
The Best Hikes in Washington State | 19 Must-Do Trails for Every Adventurer

Washington is a dream for hikers. From glacier-capped volcanoes to emerald alpine lakes and fire lookout towers perched on ridgelines, the state offers some of the most diverse and spectacular hiking in the U.S.
After road-tripping around the Pacific Northwest and hiking every day, I pulled together this list of the best hikes in Washington,. I have completed 15 of the 20, with the other being on my to-do list and coming highly recommended by locals.
There are hikes in the blog for people of all ages and abilities. Aside from the last, hike all of these are day hikes and most are moderately challenging, between 6-12km with <700m of elevation.
I have grouped by region and complete with trail details, links, and tips. All are special in their own way and are perfect for anyone planning a road trip, long weekend, or summer hiking itinerary inn Washington or the Pacific Northwest
Hikes at a Glance
Hurricane Hill, Olympic National Park
Mount Storm King, Olympic National Park
Rialto Beach and Hole in the Wall, Olympic Coast
Skyline Loop and Myrtle Falls, Mount Rainier National Park
Bench and Snow lakes, Mount Rainier National Park
Pinnacle peak, Mount Rainier National Park
Freemont lookout, Mount Rainier National Park
Colchuck lake, Alpine Lakes Wilderness
Maple Pass, North Cascades National Park
Cascade Pass and Sahale Arm, North Cascades National Park
Hidden lake, North Cascades National Park
Park Butte, Mount Baker
Ptarmigan ridge, Mount Baker
Chain Lakes, Mount Baker
Winchester Lookout, Mount Baker
Mt Pilchuck Lookout, Mt. Baker-Snoqualmie National Forest
Big Four Ice Caves, Mt. Baker-Snoqualmie National Forest
Vesper Peak, Mt. Baker-Snoqualmie National Forest
Three Fingers lookout, Mt. Baker-Snoqualmie National Forest

-
Check the weather: the weather will have a significant effect on your enjoyment, views, and safety of your hike. It will also determine what you need to wear and bring. Always check the weather forecast for the specific peaks and mountain ranges you are planning on hiking. Focus on; Feels like temperature, Chance of Rain, Visibility, and Wind speed
Plan and understand the route: Make sure you know all the key Information (Distance, Elevation Gain, Route Profile, Terrain, Technical Aspects, Where to park) and that the hike is suitable for you and any other members of your group
Check the trail and road conditions: Snow can block roads and can linger on alpine trails well into July. Some trail trailheads are only accessible via rough forest roads, so high-clearance vehicles or 4x4 might be necessary. Always check recent trip reports on WTA.org or AllTrails
Check for wildfires: From July–September, smoke and closures can affect trail access. Check InciWeb or the WA DNR Wildfire Map.
Permits and parking passes: Many trailheads require either a Northwest Forest Pass ($5 /day or $30 /year) or a Discover Pass ($10 /day or $35 /year). National Park hikes also require a park entry fee or America the Beautiful Pass.
Start early or late: Popular trailheads fill up quickly, especially on weekends. Sunrise hikes are often worth the early alarm. If you don’t like getting up early then go for sunset. Trailheads start emptying in the afternoon and you will likely have the trail to yourself. Just pack a head torch for the hike down.
Wear and carry the correct kit: Grippy and table footwear is essential as is a head torch if hiking around sunrise and sunset. As Washington’s mountain weather is unpredictable, always carry extra layers and rain gear. See below for my full kit list
Leave no trace: Pack it in, pack it out. Respect wildlife and trail rules.
Let someone know your plans: What route or mountains you are hiking, where you are parking, and roughly how long the hike will take
Give yourself more time than you need: It’s better to have too much time than too little, and have to cut your hike short or hike in the dark
Know your limits: If the hike is too difficult, technical, you aren’t feeling up for it, or if the weather changes don’t be afraid to stop or change your plans.
-
Sturdy and comfortable hiking shoes with good grip
Waterproofs: I always carry a waterproof outershell and packable over trousers
Layering system: wear or carry a minimum of 3 top half layers, with a 4th in winter
Synthetic or Merino base layer (T-shirt)
Mid layer (Fleece or hoodie)
Outer shell (Wind breaker or waterproof)
Fourth layer in winter (Insulated jacket)
A proper navigation app with the route downloaded for offline use
Satellite messaging system for emergencies
Power bank and charging cable
Headtorch
Fluids and snacks
Other Things to Consider
Gloves, hat, and face buff for cooler conditions
Hiking poles to help with both the ascents and descents
If it’s winter then micro spikes, extra clothing, and specific winter gear is essential.
-
Below is a list of all the hiking gear I currently use and recommend.
I have also included links to all of the products where possible. Some of these are affiliate links, which means I receive a small commission if you purchase an item after clicking on one of the links. This comes at no additional cost to yourself and helps to support my website and my ability to continue to create content.
Base layers
The purpose of a base layer is to wick sweat away from your skin to keep you dry alongside offering protection from the elements. The type of base layer I wear will depend on the season and temperature. I will usually wear merino wool or a synthetic material (polyester), avoiding cotton.
Icebreaker Merino Long Sleeved hoodie - My go to base layer for spring, summer, and autumn hiking. It’s lightweight, quick drying, breathable, and because it is made of merino, has odour control.
Mid layers
The purpose of a mid layer is to provide warmth and insulation. Even if I don’t wear them while I am hiking, I will always carry them in my bag as an extra layer. They often come out when I reach a summit or if the conditions get colder.
Simond Merino Wool Zip Hoodie - comfortable, lightweight, stretchy, and wont smell. It also has elasticated thumb loops, a close-fitting hood, and three zip pockets.
Decathlon Forclaz MT500 Down Jacket - It is £85, lightweight, non-bulky, easily packable, and thanks to its 700 FP down fill, is rated to -10 degrees Celsius.
Outer shell
The purpose of an outer shell is to protect you from the wind and the rain. No matter the season and weather I will always carry one just in case.
Columbia Ampli-Dry II Shell Jacket - Waterproof, lightweight, functional, and packs down well
Quechua Lightweight Waterproof Jacket MH500 - Unbelievable value at £80 and has a hydrostatic head rating of 25,000mm
Columbia Loop Trail II Windbreaker - My go to choice in the summer and for trail running
Lower half
Rab Men's Downpour Eco Pants - Lightweight (225g) over trousers which pack down super small.
Footwear
Columbia Montrail Trinity Ag II- The comfiest summer hiking and trail running shoes I have ever worn. The break in period is non-existent. I wore them for my 6 day through hike through the Dolomites, Snowdon 6 challenge, all around Madeira, and for 190km of hiking around the Canadian Rockies.
Adidas Terrex Free Hiker 2 GTX- My go to for wetter conditions
Backpacks
Deuter Ascender 13 Trail Running Backpack – My go to for trail running and hiking challenges
Deuter Speed light Pro 25 - My go to for summer hiking. It’s comfortable, extremely lightweight (630g), and big enough to fit all my gear.
Deuter Speed Lite Pro 30 - My go to for winter hiking or if I need more space.
Deuter Air contact Ultra 50+ 5 - My go to for wildcamping, backpacking. It is very lightweight (1.3kg), comfortable, functional, and supportive.
Equipment & Accessories
PETZL Swift RL Headlamp - Essential for hiking, especially around sunrise or sunset, alongside wildcamping & astrophotography. This provides 900 lumens of brightness at only 100 g and is rechargeable. The Everbeam H6 Pro is a great cheap option at £15,
Silva Walking Poles- Lightweight, collapsible, quick locking, and comfortable on the hands.
Forclaz MT500 stretch gloves - Lightweight, practical, functional, and warm. They are also stretchy, clip together when not being used, and you can use your phone with them. At £13 they are bargain.
Forclaz Foam Seat Pad– Weighs 60g, can fit in the side of your bag and doubles up as mat to stand on when getting changed after wild swimming
Mini Crampons/ Micro spikes– The best investment I’ve made for winter walking. These are a set of chains with 18 small spikes connected to a thick elastic rubber which can be pulled over any footwear. They are perfect for hiking in snowy and icy conditions when crampons would be overkill as they are much easier to walk in, and are far lighter and easier to carry.

Olympic National Park & Coast
1. Hurricane Hill
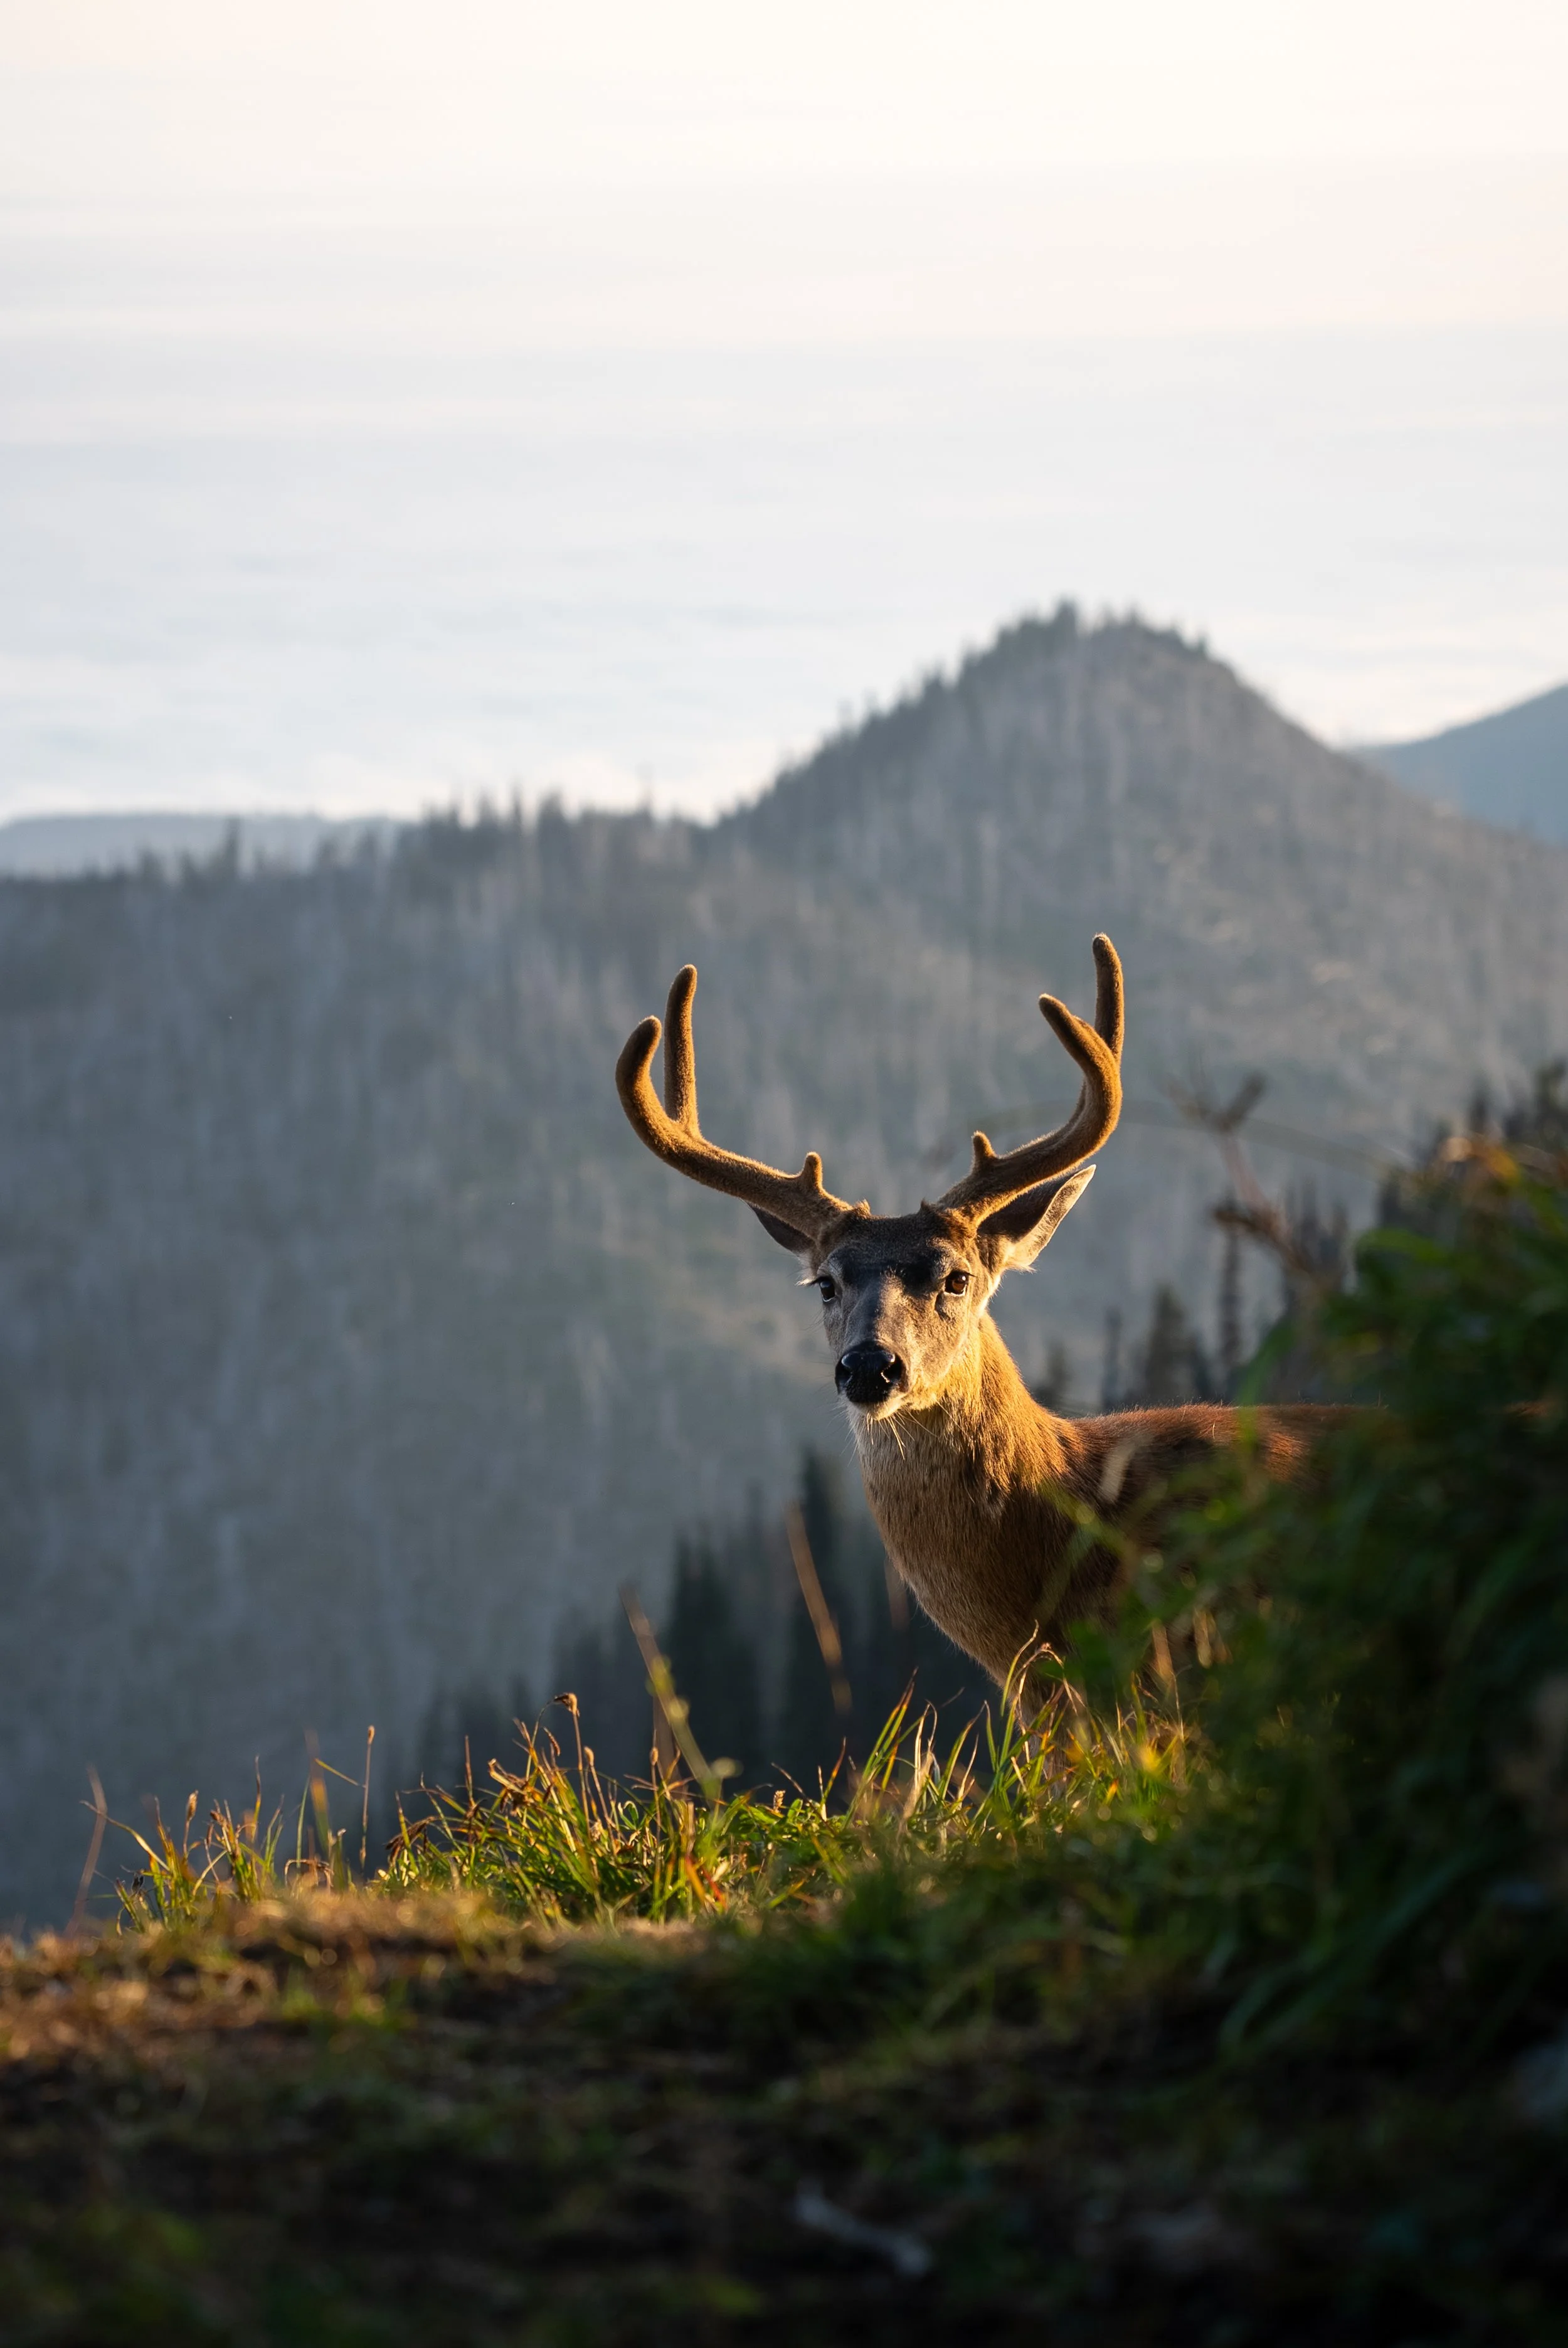
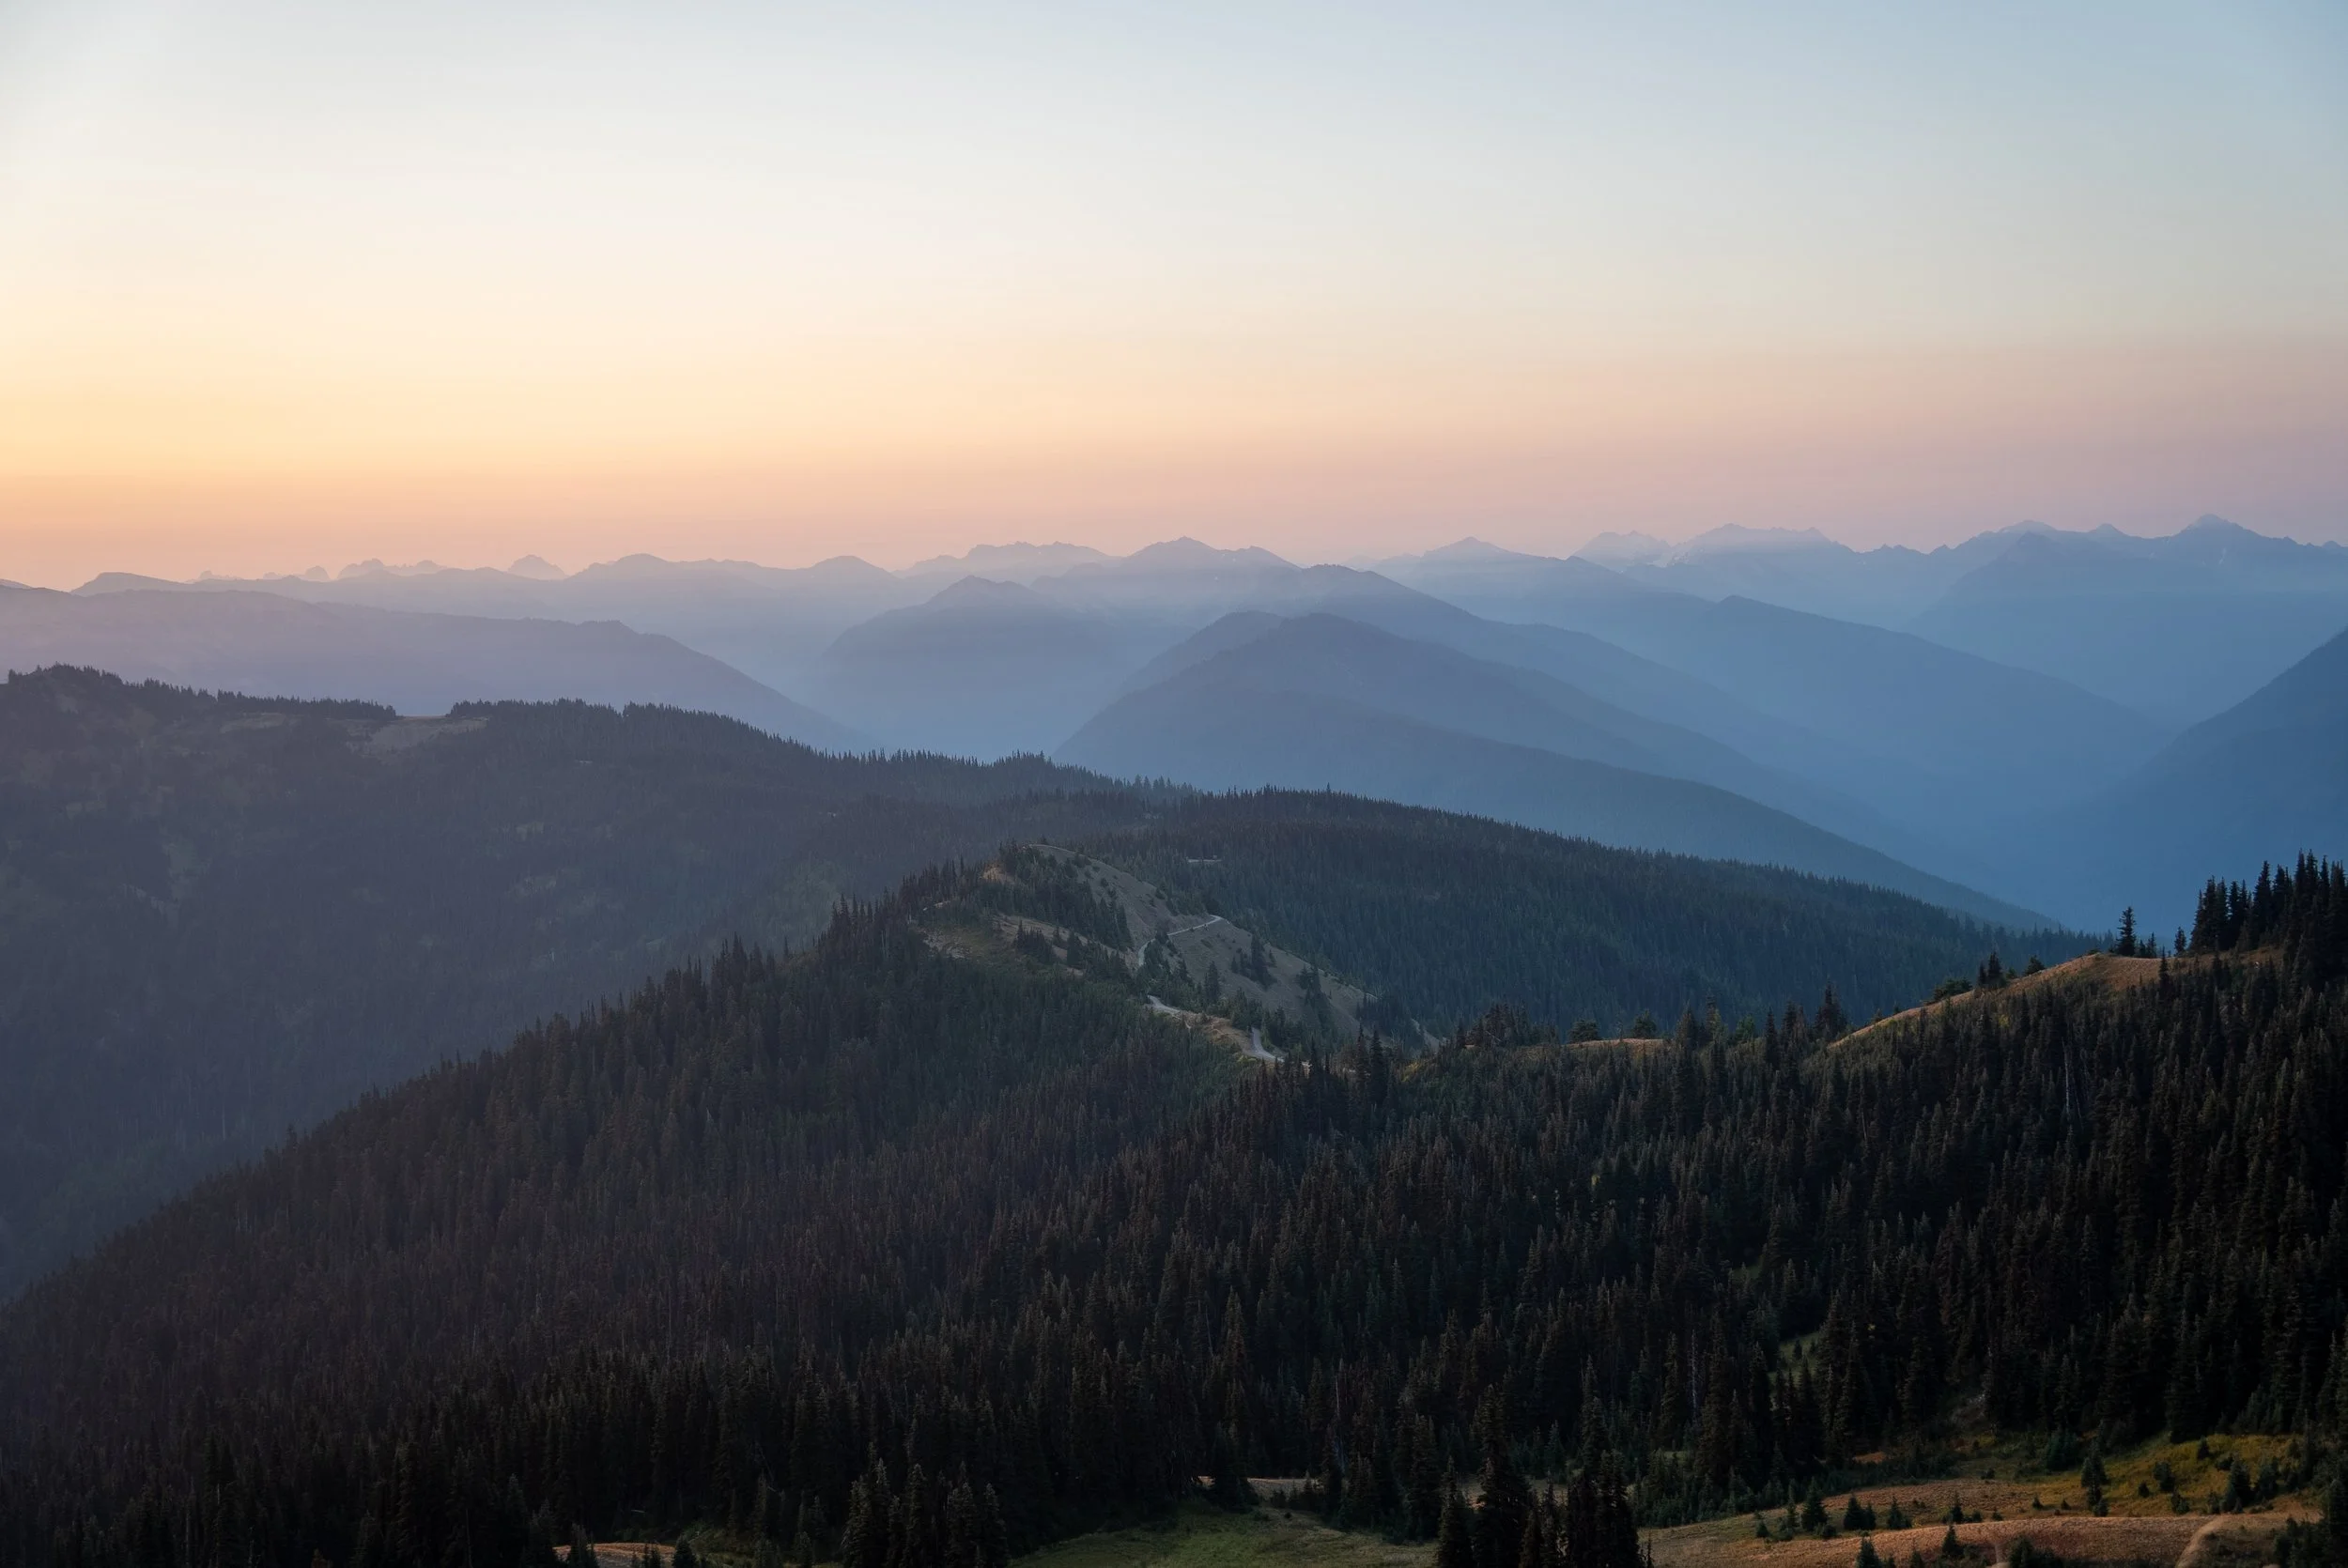
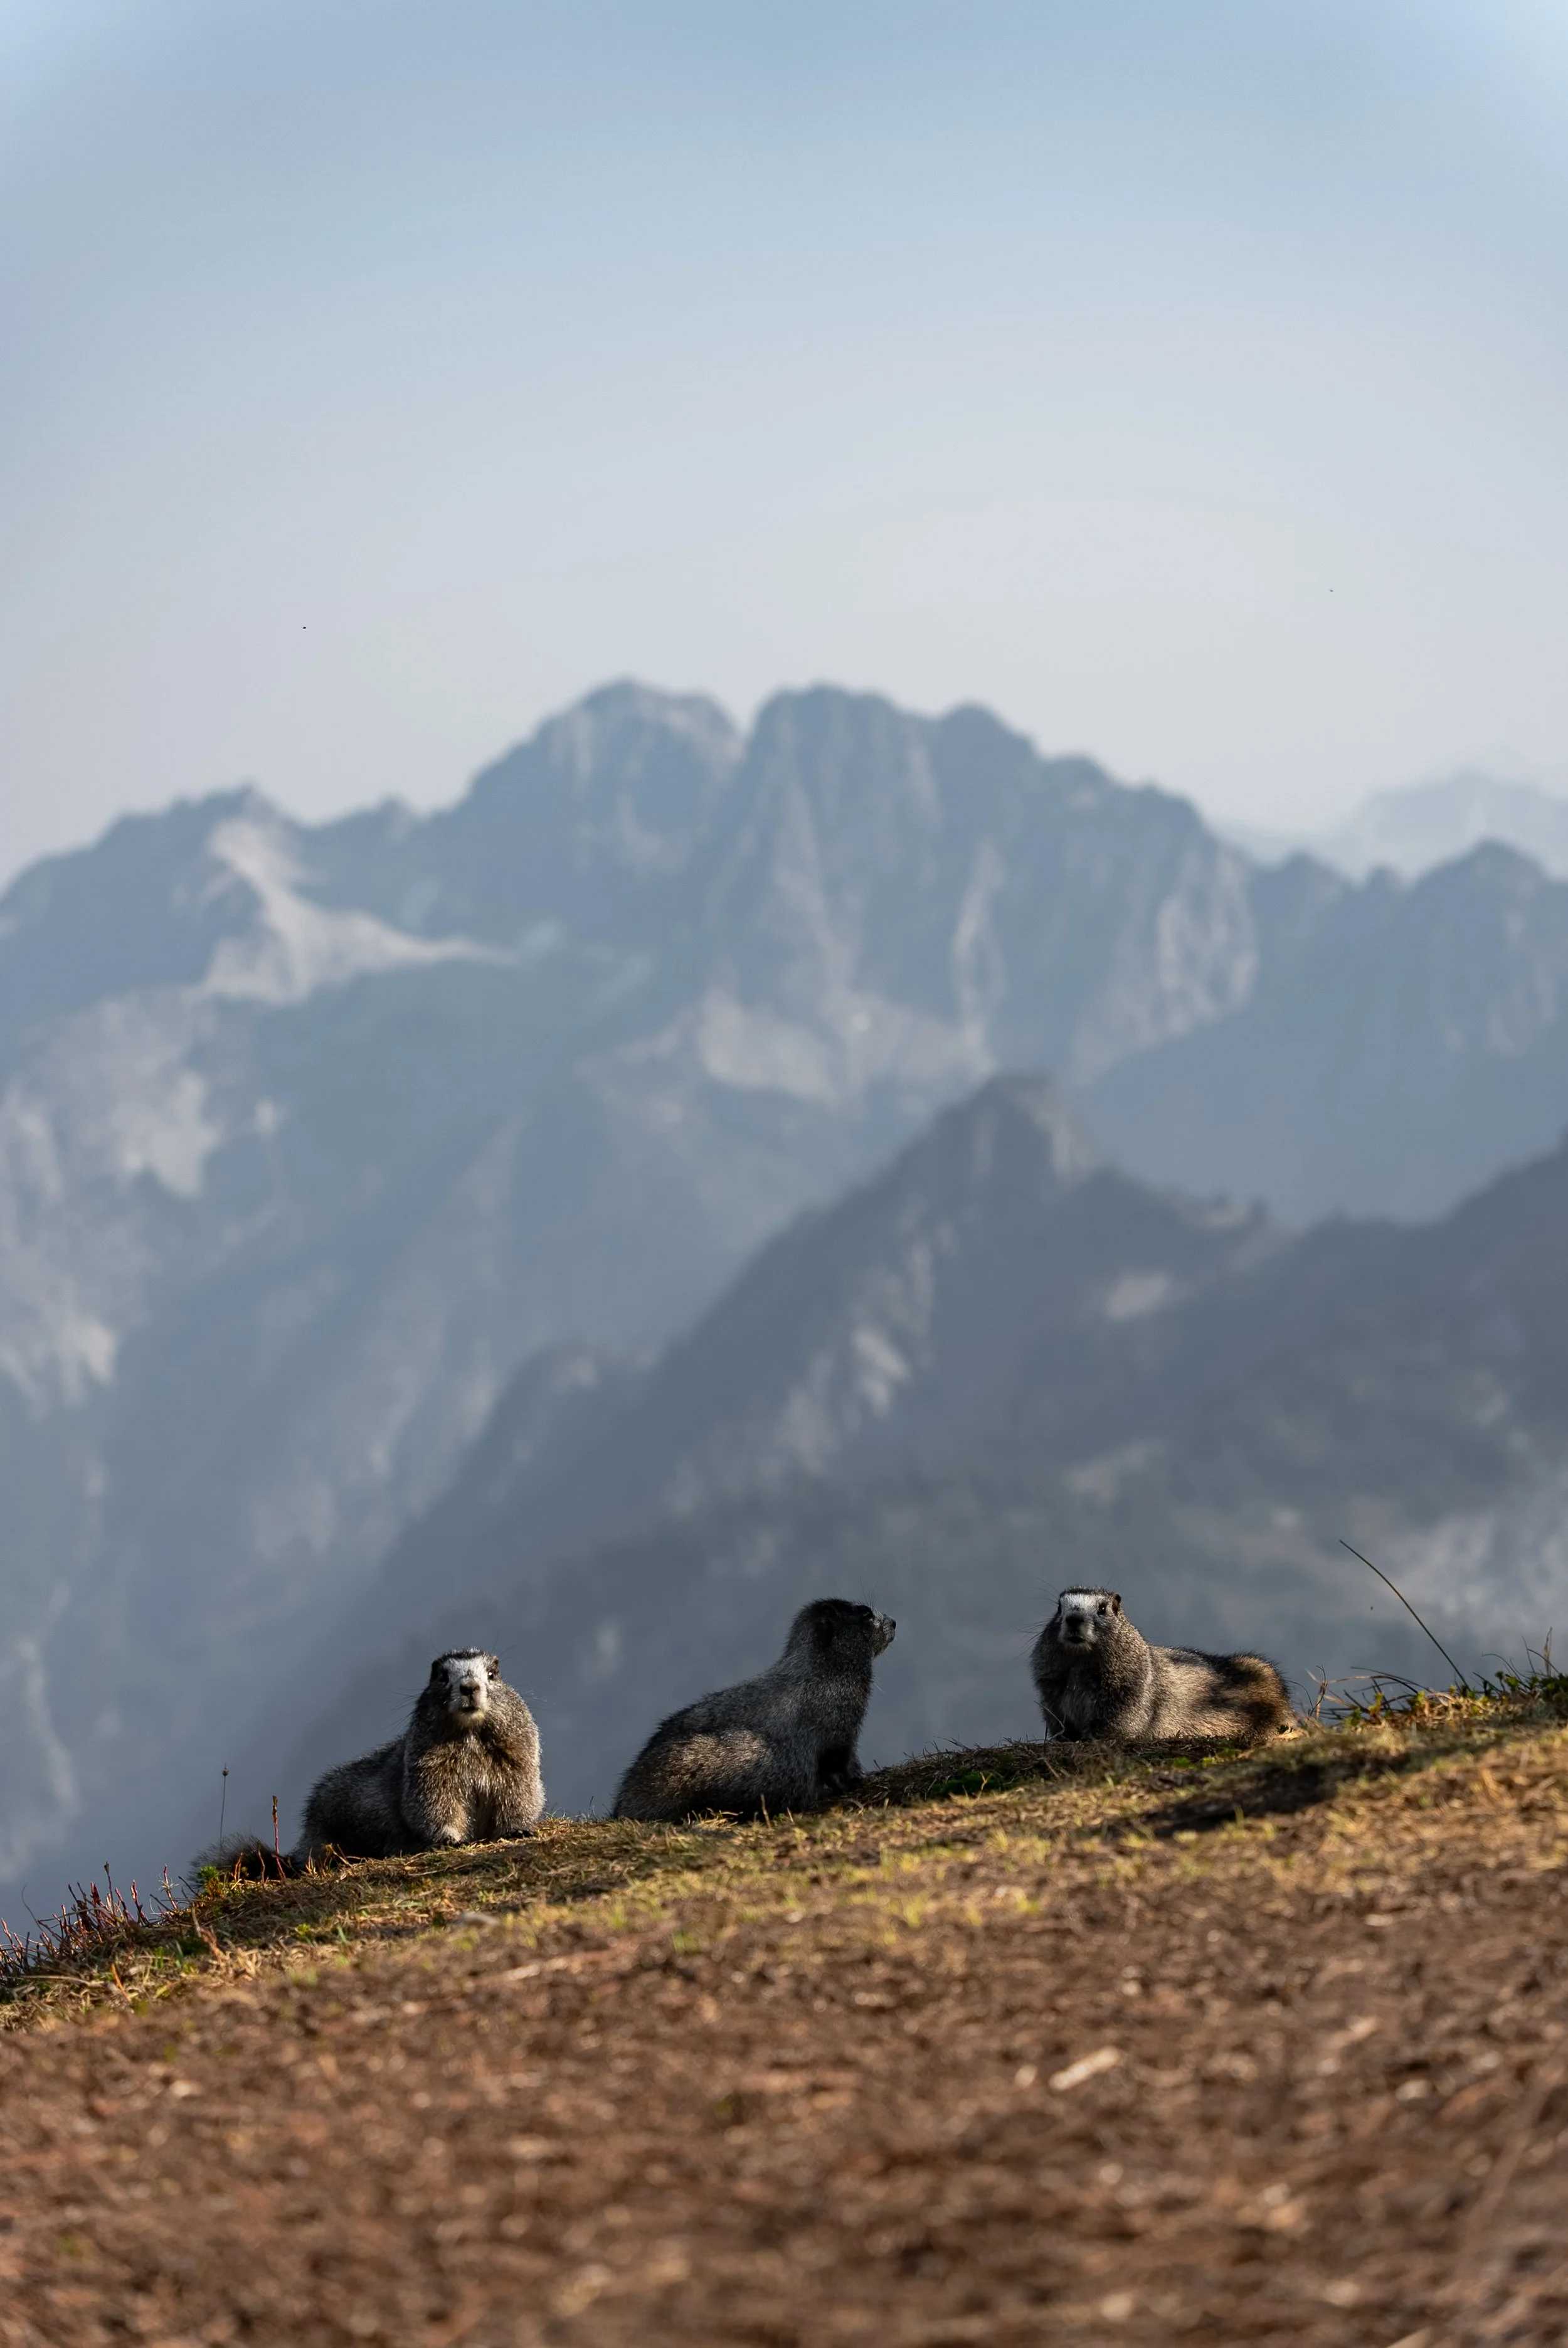
Located near Hurricane Ridge, this trail rewards minimal effort with panoramic views across the Olympic Mountains and the Strait of Juan de Fuca. Paved the entire way, it’s a great option for hikers of all ages. Alongside stunning view you might even spot Deer and marmots. It’s ease of access and low effort mean it’s a great choice for both sunrise and sunset. We did it for sunrise and head the summit and trail to ourselves for 75% of the route.
Location: Olympic NP – Hurricane Ridge
Type: Out-and-back
Difficulty: Easy
Distance: 5.5 km (3.4 mi)
Elevation gain: 250 m (820 ft)
Time: 2–3 h
Technical Aspects: Fully paved; ideal for families and casual hikers.
Trailhead: Google Maps

2. Mount Storm King
Arguably Olympic National Park’s most famous hike, Mount Storm King is a short but steep climb above Lake Crescent offering one of the most dramatic viewpoints in the state. The trail’s final section involves a rope-assisted scramble, due to the slippery nature of the dusty trail. However the reward is a jaw-dropping panorama of blue water and rugged peaks.
We did this for sunset and it did not disappoint. If you do go up for sunset, pack a head torch and layers as it can get chilly.
Location: Near Lake Crescent, Olympic NP
Type: Out-and-back
Difficulty: Hard
Distance: 6.5 km (4 mi)
Elevation gain: 650 m (2,130 ft)
Time: 3–4 h
Technical Aspects: Steep grades; rope section over exposed terrain.
Trailhead: Google Maps

3. Rialto Beach & Hole-in-the-Wall
A wild coastal walk where sea stacks rise from the surf and massive driftwood trees line the shore. At low tide, you can walk 2.5 km (1.5 mi) north past rockpools to the Hole-in-the-Wall, a natural arch carved by the ocean. .
We unfortunately didn’t walk out the the hole in the Wall, as it was high tide and there was a significant amount of fog.
Location: Near Forks, Olympic NP coast
Type: Out-and-back
Difficulty: Easy–Moderate
Distance: 5 km (3.1 mi)
Elevation gain: 30 m (100 ft)
Time: 1.5–2 h
Technical Aspects: Sandy terrain; time your visit with low tide.
Trailhead: Google Maps

Mount Rainier National Park
4. Skyline Loop & Myrtle Falls
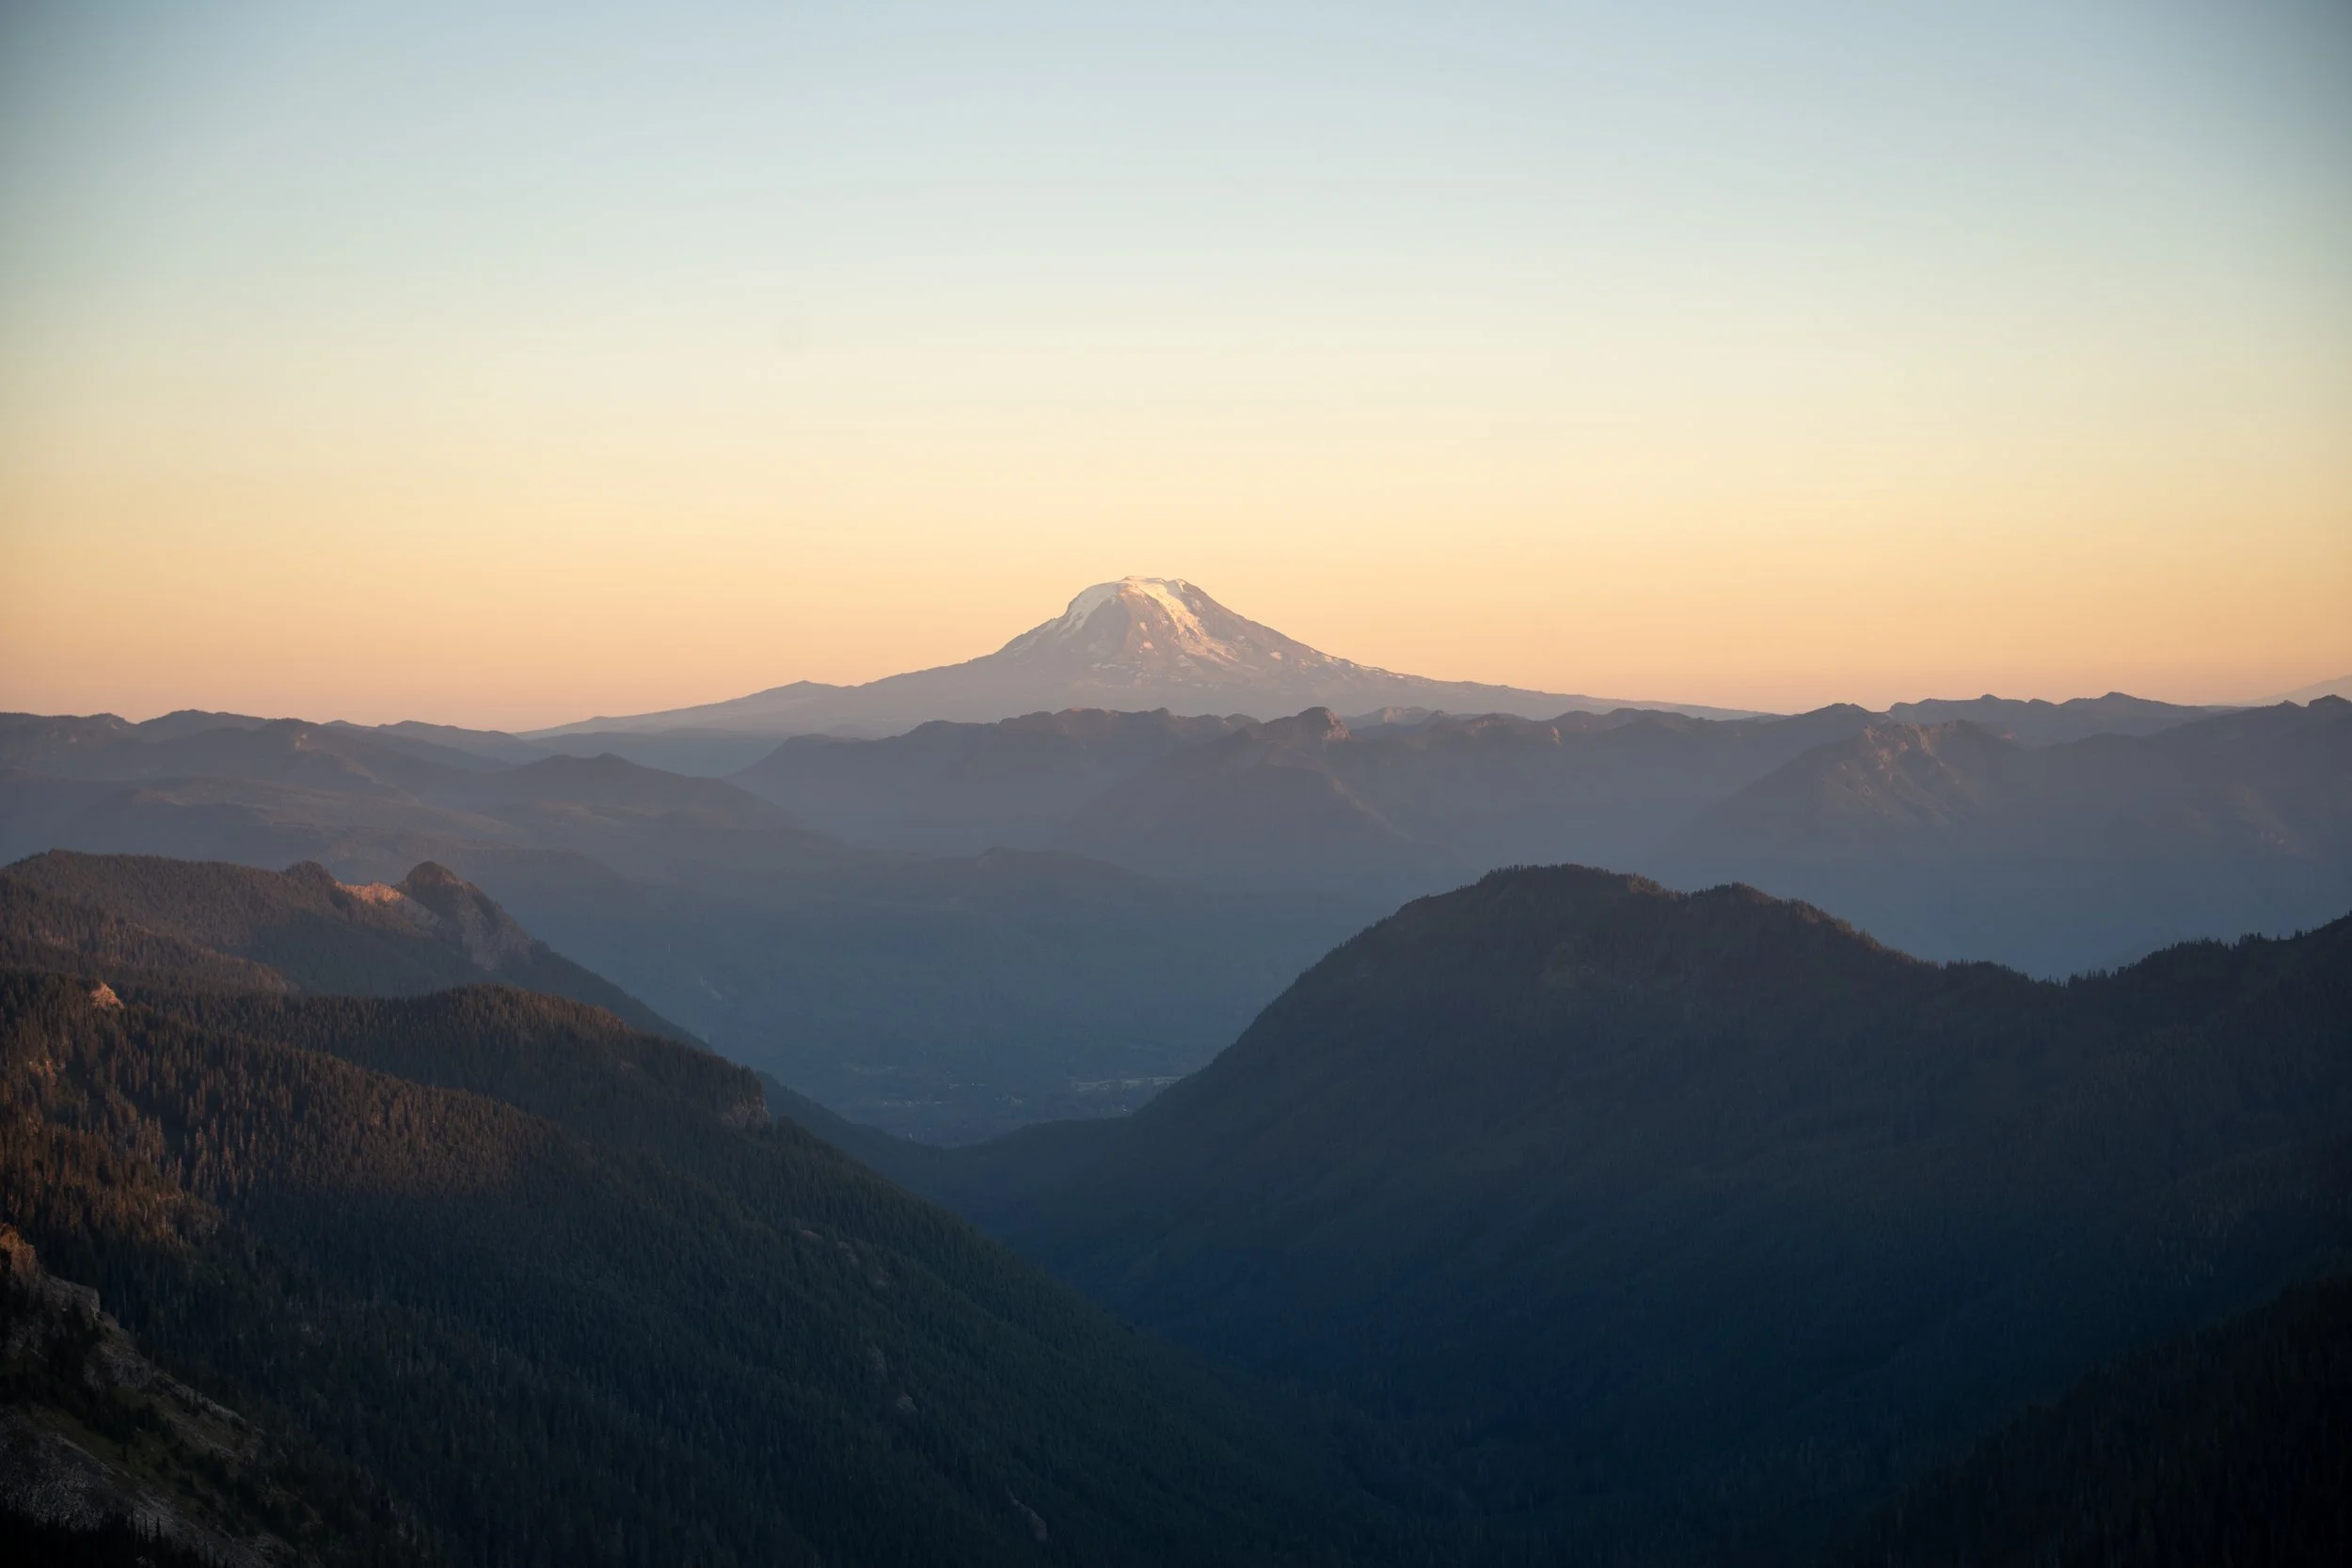
The Skyline Trail from Paradise is the quintessential Mount Rainier hike, with flower-filled meadows, roaring waterfalls, and close-up glacier views. the trail steeply climbs up towards Mount Rainier and gives you panoramic views back south towards Mount Adams.
For those not wanting to do the full hike, Myrtle Falls is just minutes from the trailhead , and will provide you with a postcard view of Rainier framed by alpine meadows.
Location: Paradise Area, Mount Rainier NP
Type: Loo
Difficulty: Moderate–Hard
Distance: 8.8 km (5.5 mi)
Elevation gain: 540 m (1,770 ft)
Time: 3–5 h
Technical Aspects: Snow patches linger into July; and it can be steep in sections
Trailhead: Google Maps

5. Bench & Snow Lakes
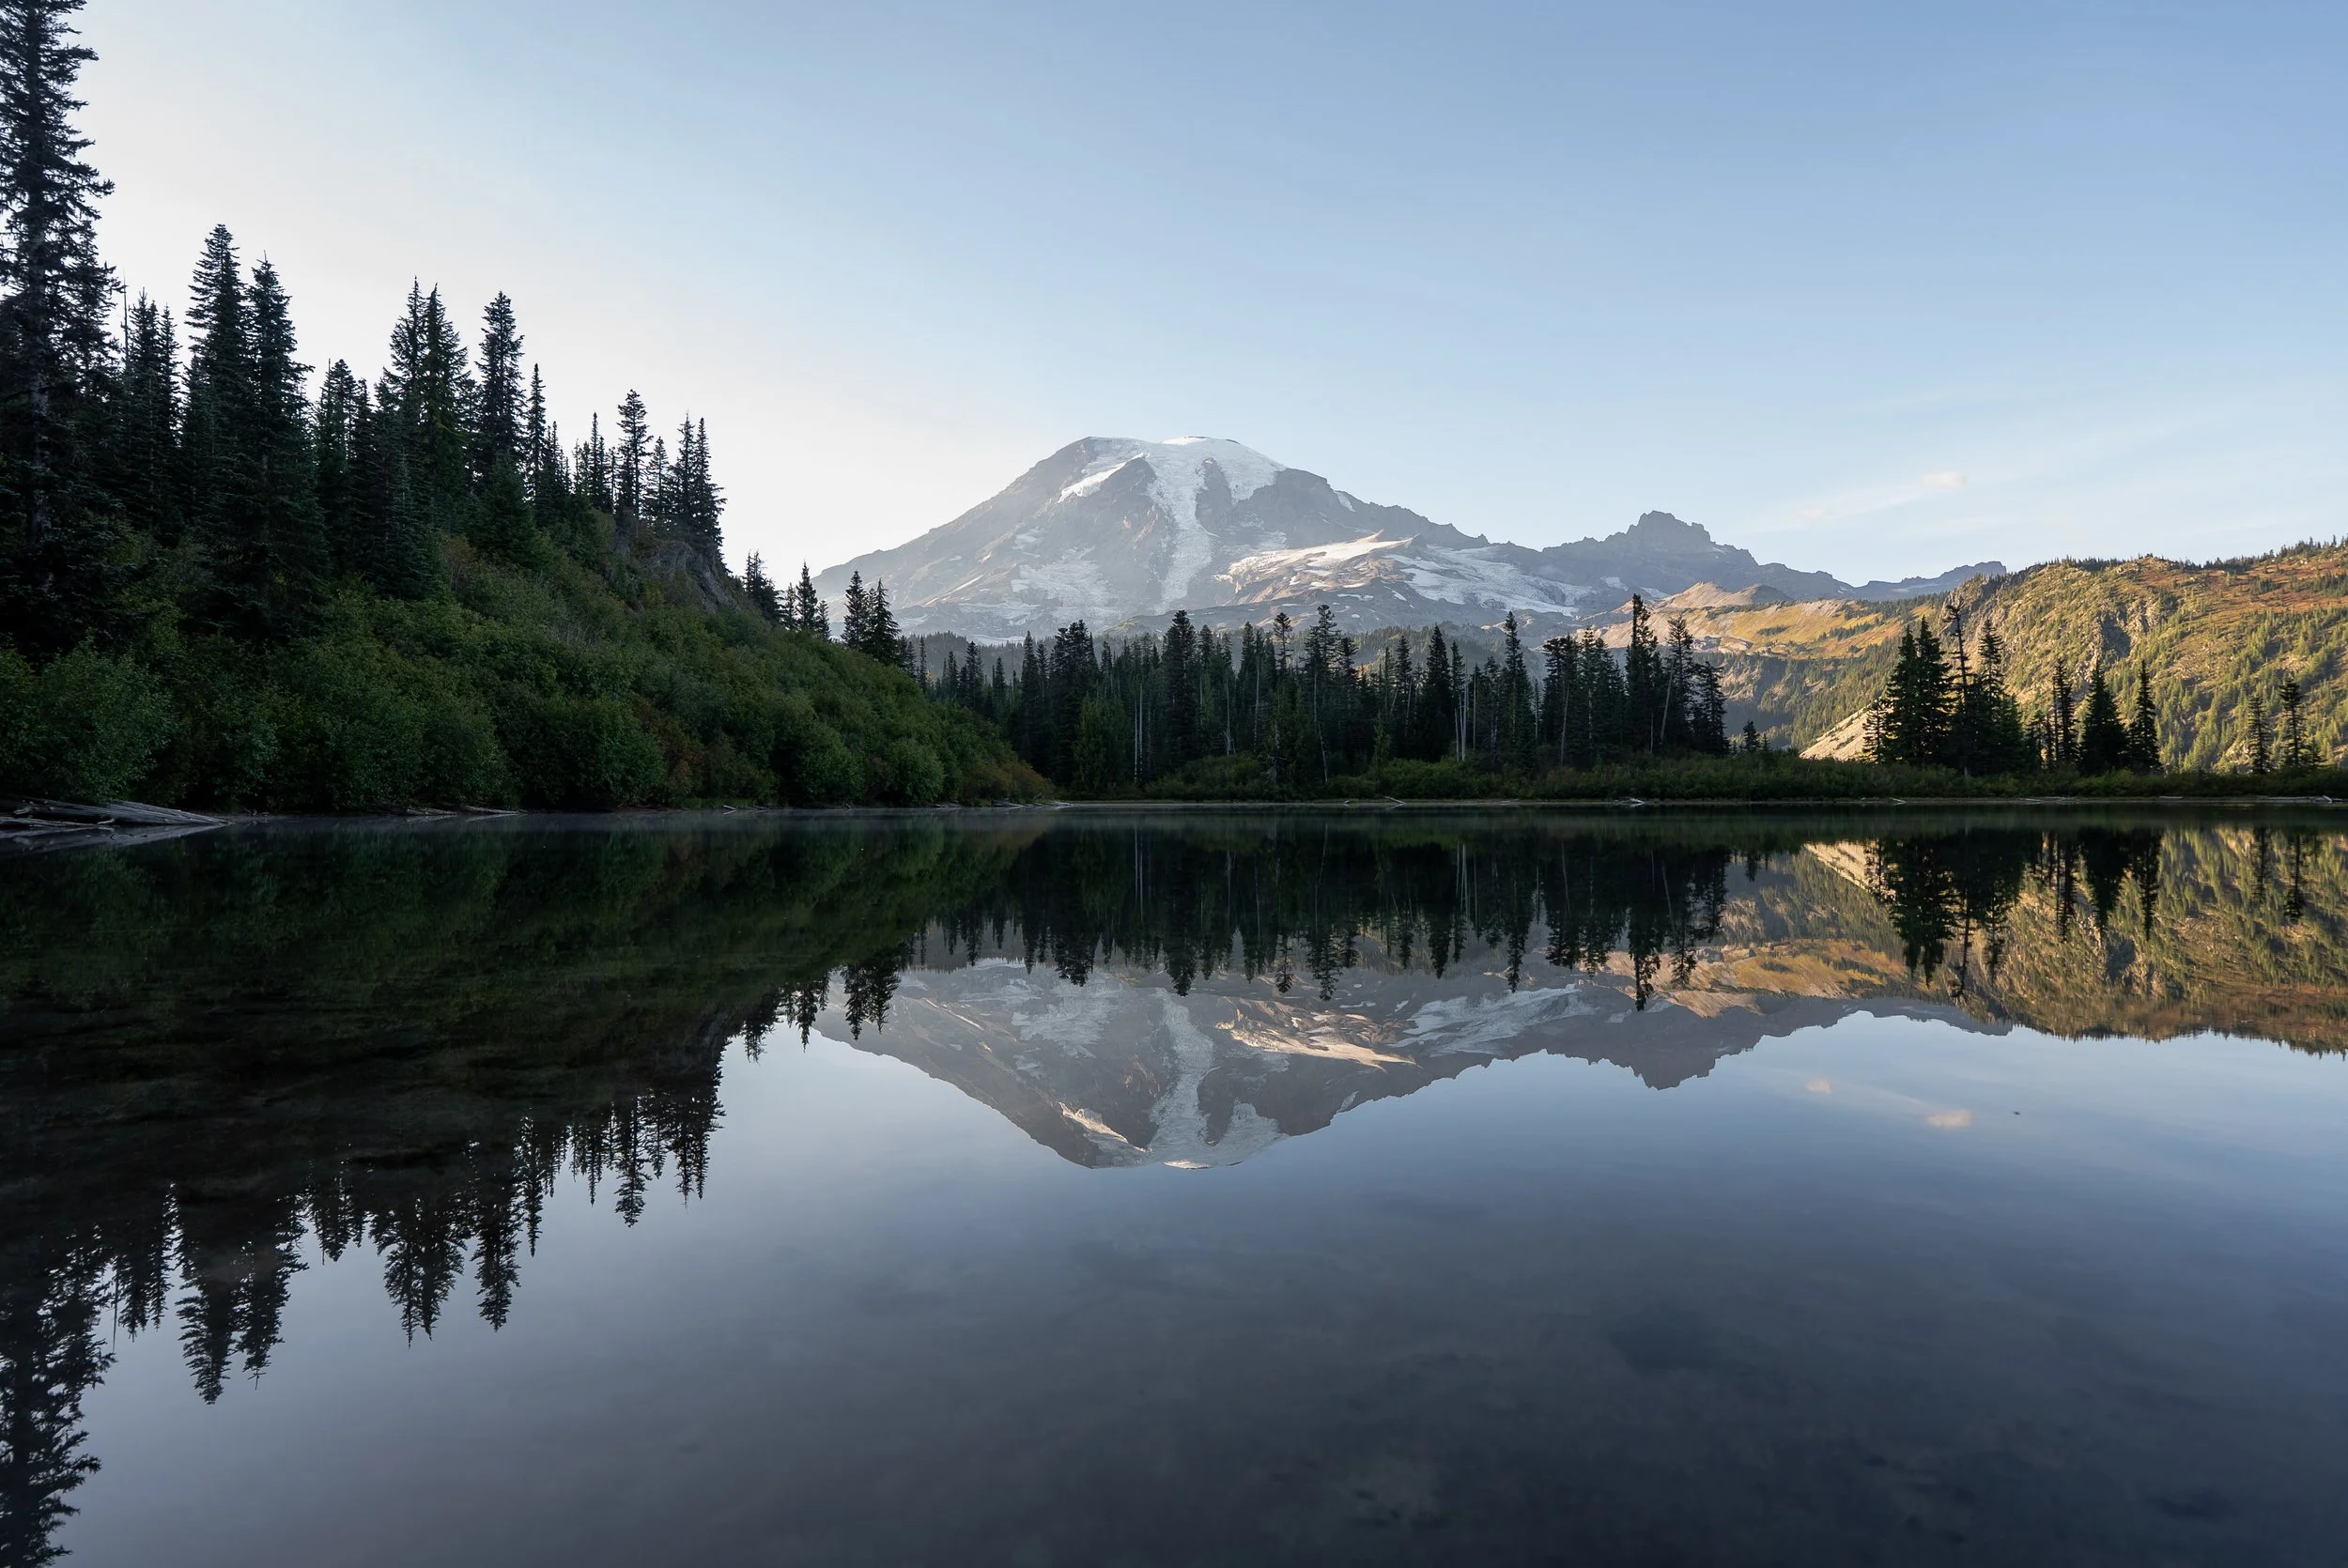
A peaceful trail linking two stunning subalpine lakes, perfect for a relaxed afternoon, or a sunrise or sunset reflection. The short hike offers wildflowers in summer and brilliant fall colours in September. Of the two, Bench lake(the first offers the best reflections of Mount Rainier.
Location: Near Paradise, Mount Rainier NP
Type: Out-and-back
Difficulty: Easy–Moderate
Distance: 4.5 km (2.8 mi)
Elevation gain: 180 m (590 ft)
Time: 1-2 hours
Trailhead: Google Maps
6. Pinnacle or Plumber Peak
I would argue these two peaks offer some of the best views in Mount Rainer, offering dramatic views towards Mount Adams, Rainier, and over the Tatoosh Range. It’s also one of the park’s best and most quiet sunset spots.
Which you choose to climb will depend on your ability, both have the same trailhead and require following a short, steep climb up to a saddle. Once at the saddle you have two options;Plumber peak is the easier of the two, but as it is lower, doesn’t have the same dramatic views. Pinnacle peak offers unobstructed panoramic views, but the final section consists of a very steep and rocky scramble, which is not suitable for everyone.
I did Pinnacle peak for sunset and it was one of, if not my favourite hike in the Pacific Northwest.
Location: Reflection Lakes area, Mount Rainier NP
Type: Out-and-back
Difficulty: Moderate–Hard
Distance: 4 km (2.5 mi)
Elevation gain: 320 m (1,050 ft)
Time: 1.5–2 h
Trailhead: Google Maps

7. Fremont Lookout
One of Washington’s most photogenic fire lookouts, perched on a broad rock ridge with panoramic views of Mount Rainier’s northern face.
The hike is very accessible and follows a steady and well marked trail the entire way. It’s a great choice for both sunrise and sunset , just don’t expect to have it to yourself. We went for sunset and it was incredible. Just pack layers and a head torch as you can not enter the lookout, and it does get cold.
Location: Sunrise Area, Mount Rainier
Type: Out-and-back
Difficulty: Moderate
Distance: 9 km (5.6 mi)
Elevation gain: 300 m (985 ft)
Time: 3-4 hours
Trailhead: Google Maps


Leavenworth and North Cascades
8. Colchuck Lake and the Enchantments
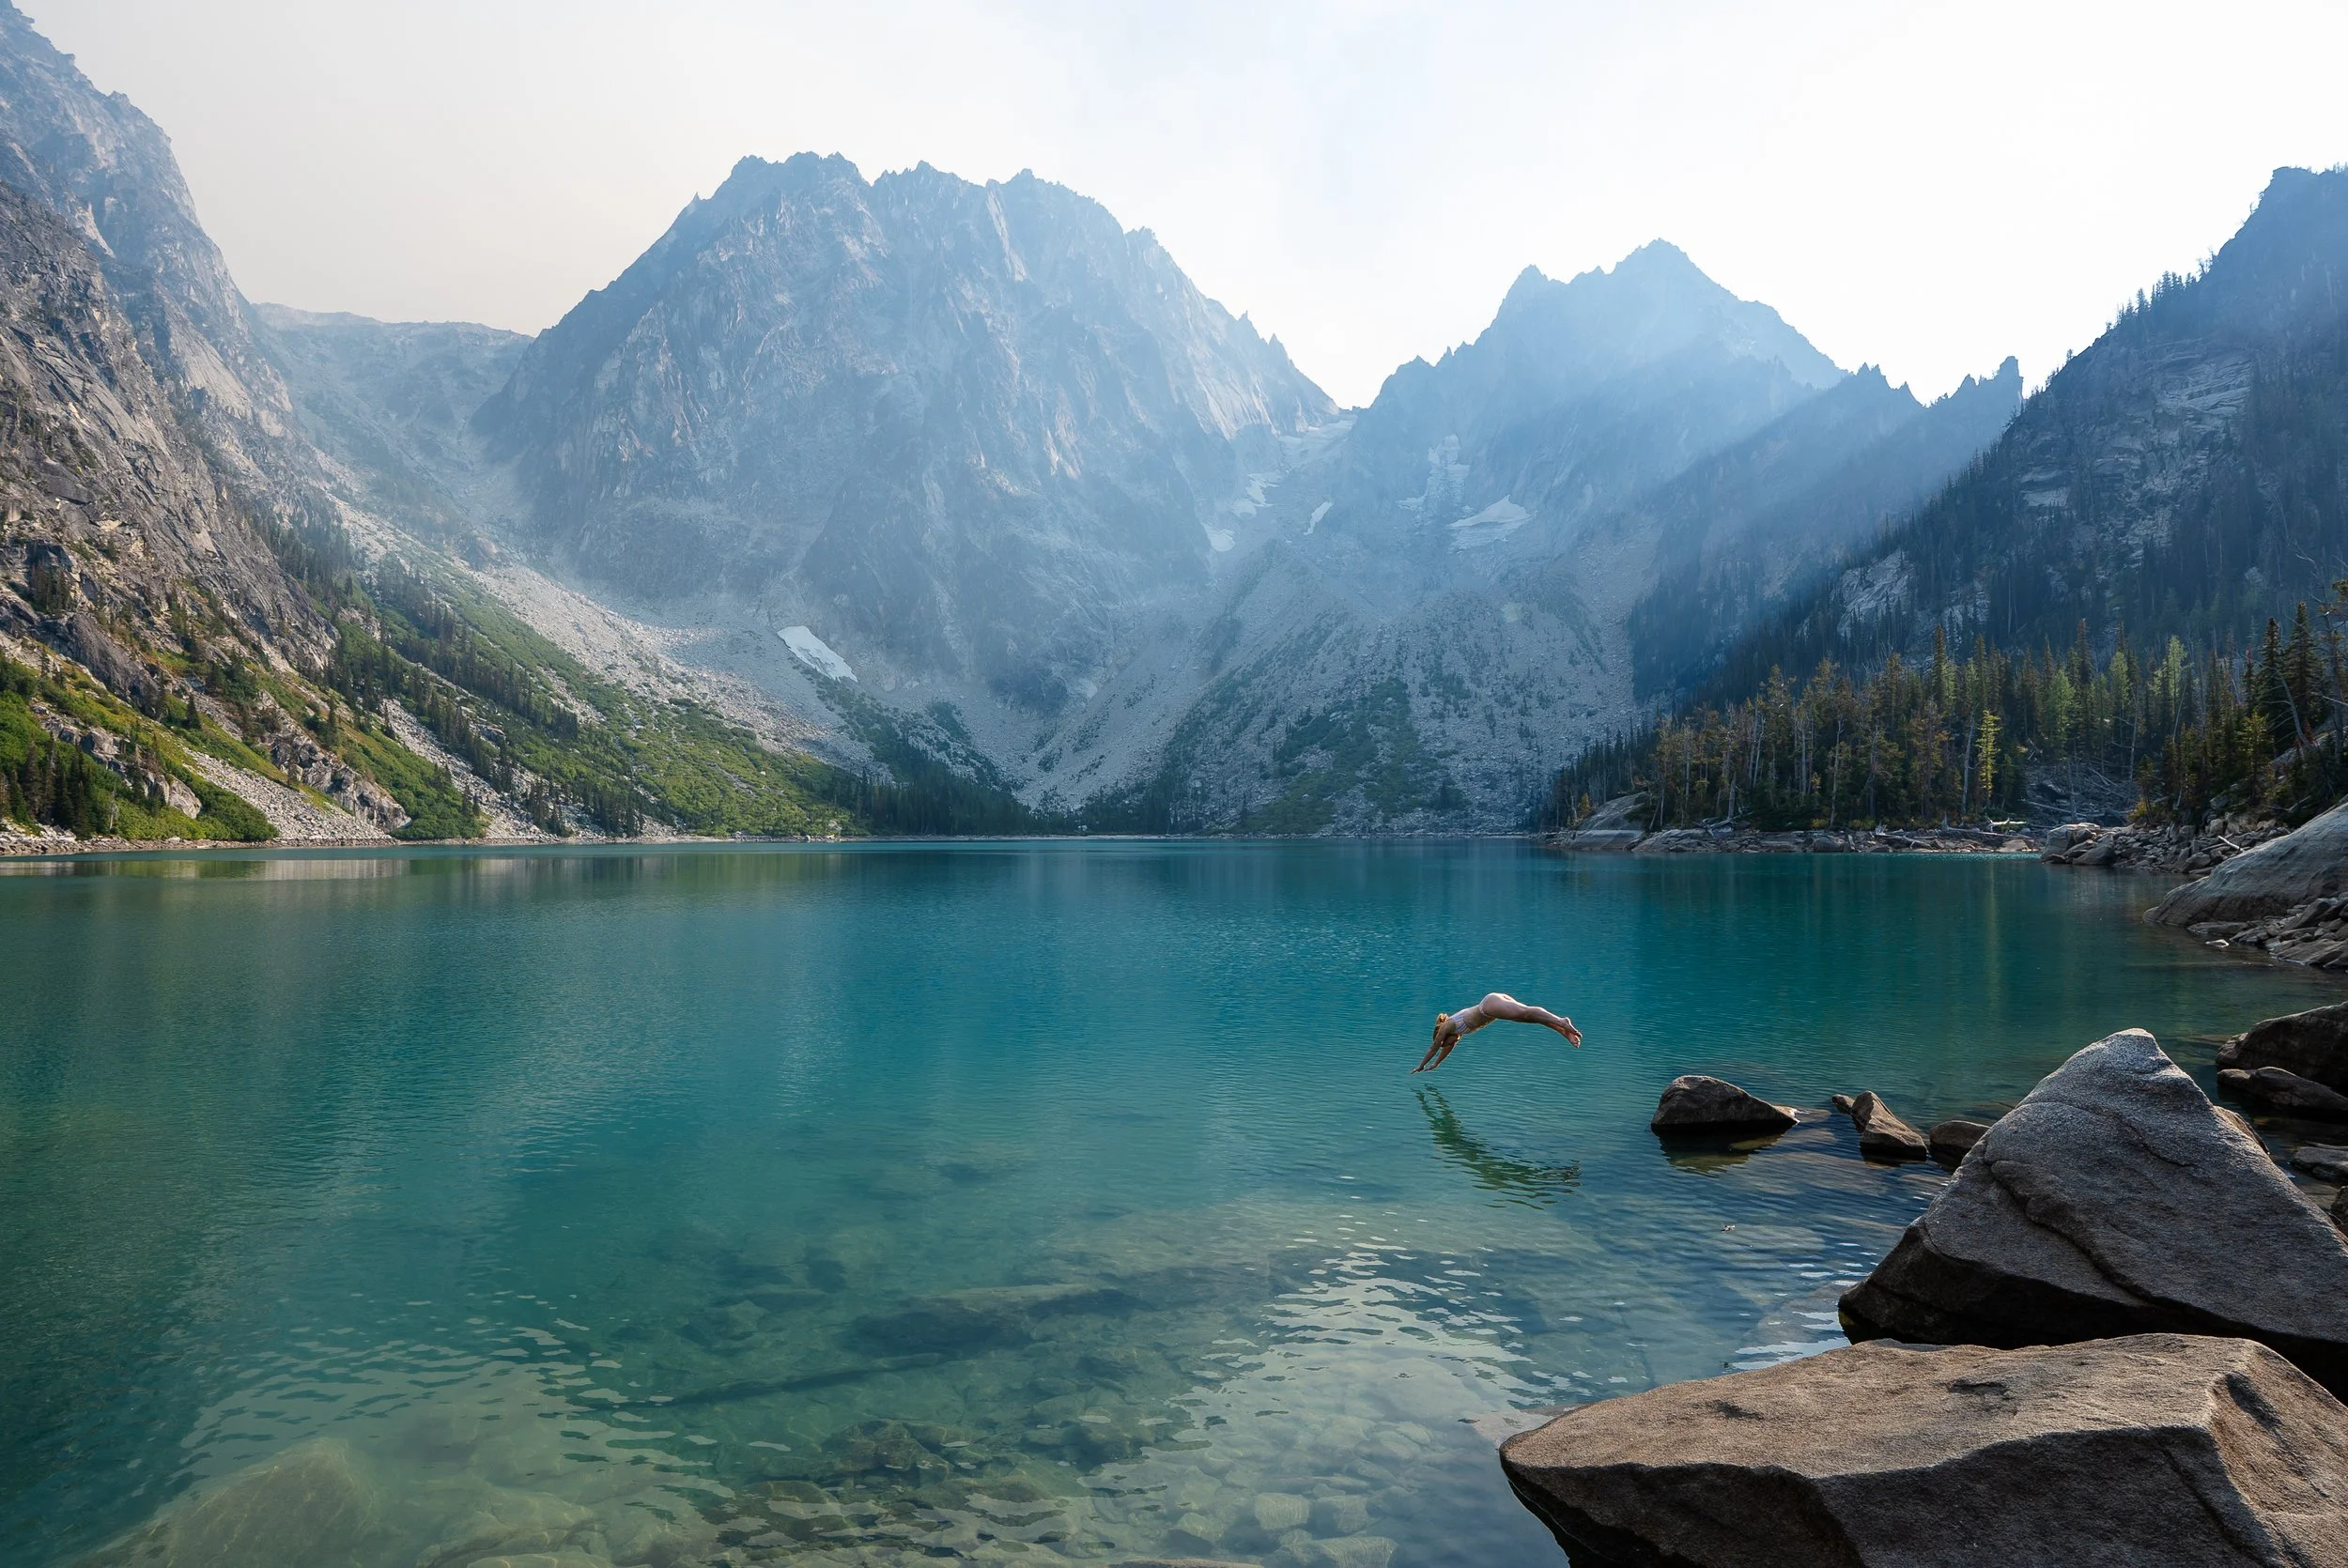
A turquoise alpine lake framed by Dragontail Peak and Colchuck Peak, This lake is one of Washington’s most iconic day hikes and arguably the best alpine lake in the state.
The car park is at the end of a beat up forest road and fills up very quickly. A high clearance vehicle is not essential but you will have to take it slow. The trail is a gradual climb up through a forest. It does involve some steeper sections but it isn’t technical.
From Colchuck you can continue up into the Enchantments and even complete the 28km through hike. However this is a significant hike with over 1,200m of elevation gain, 500m of which is undertaken in the 1km long Asgard pass. You can camp up at the lake an in the enchantments however you need to get a permit which is only obtained through a lottery system.
Location: Near Leavenworth, Okanogan–Wenatchee NF
Type: Out-and-back
Difficulty: Hard
Distance: 14 km (8.7 mi)
Elevation gain: 720 m (2,360 ft)
Time: 5–7 hours
Technical Aspects: Rocky trail; limited parking. Arrive before 7 a.m. and carry a Northwest Forest Pass.
Trailhead: Google Maps

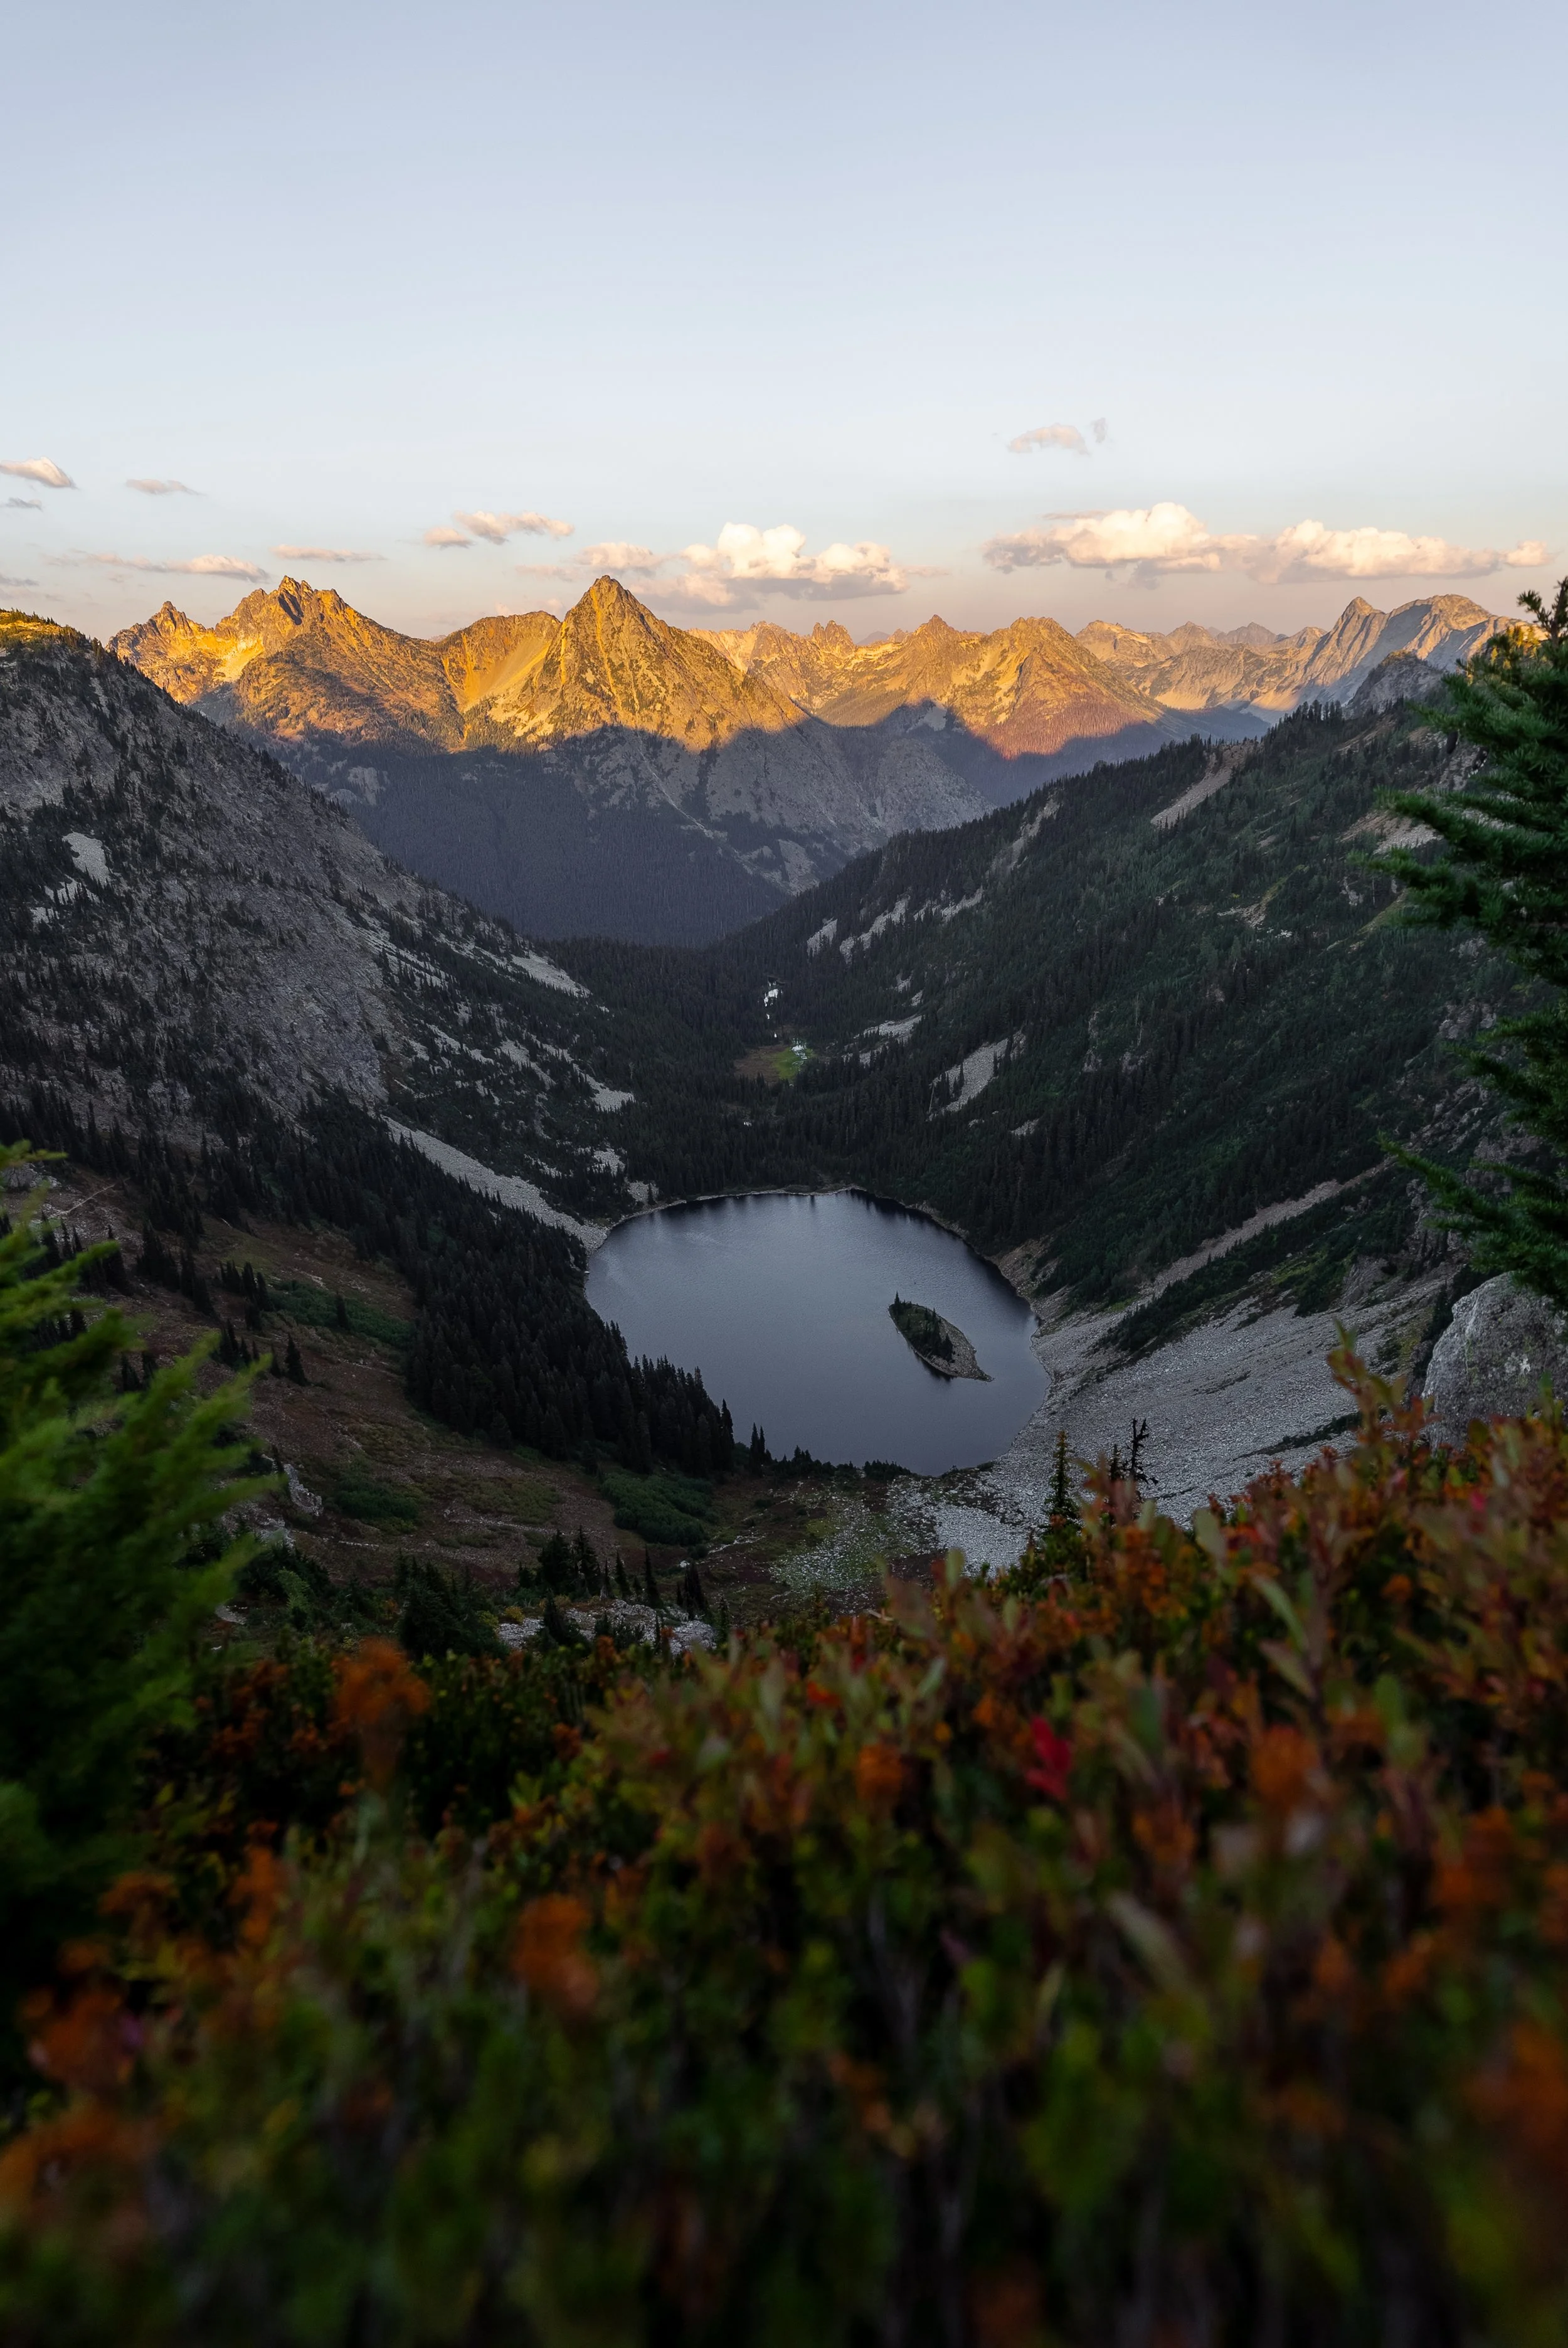
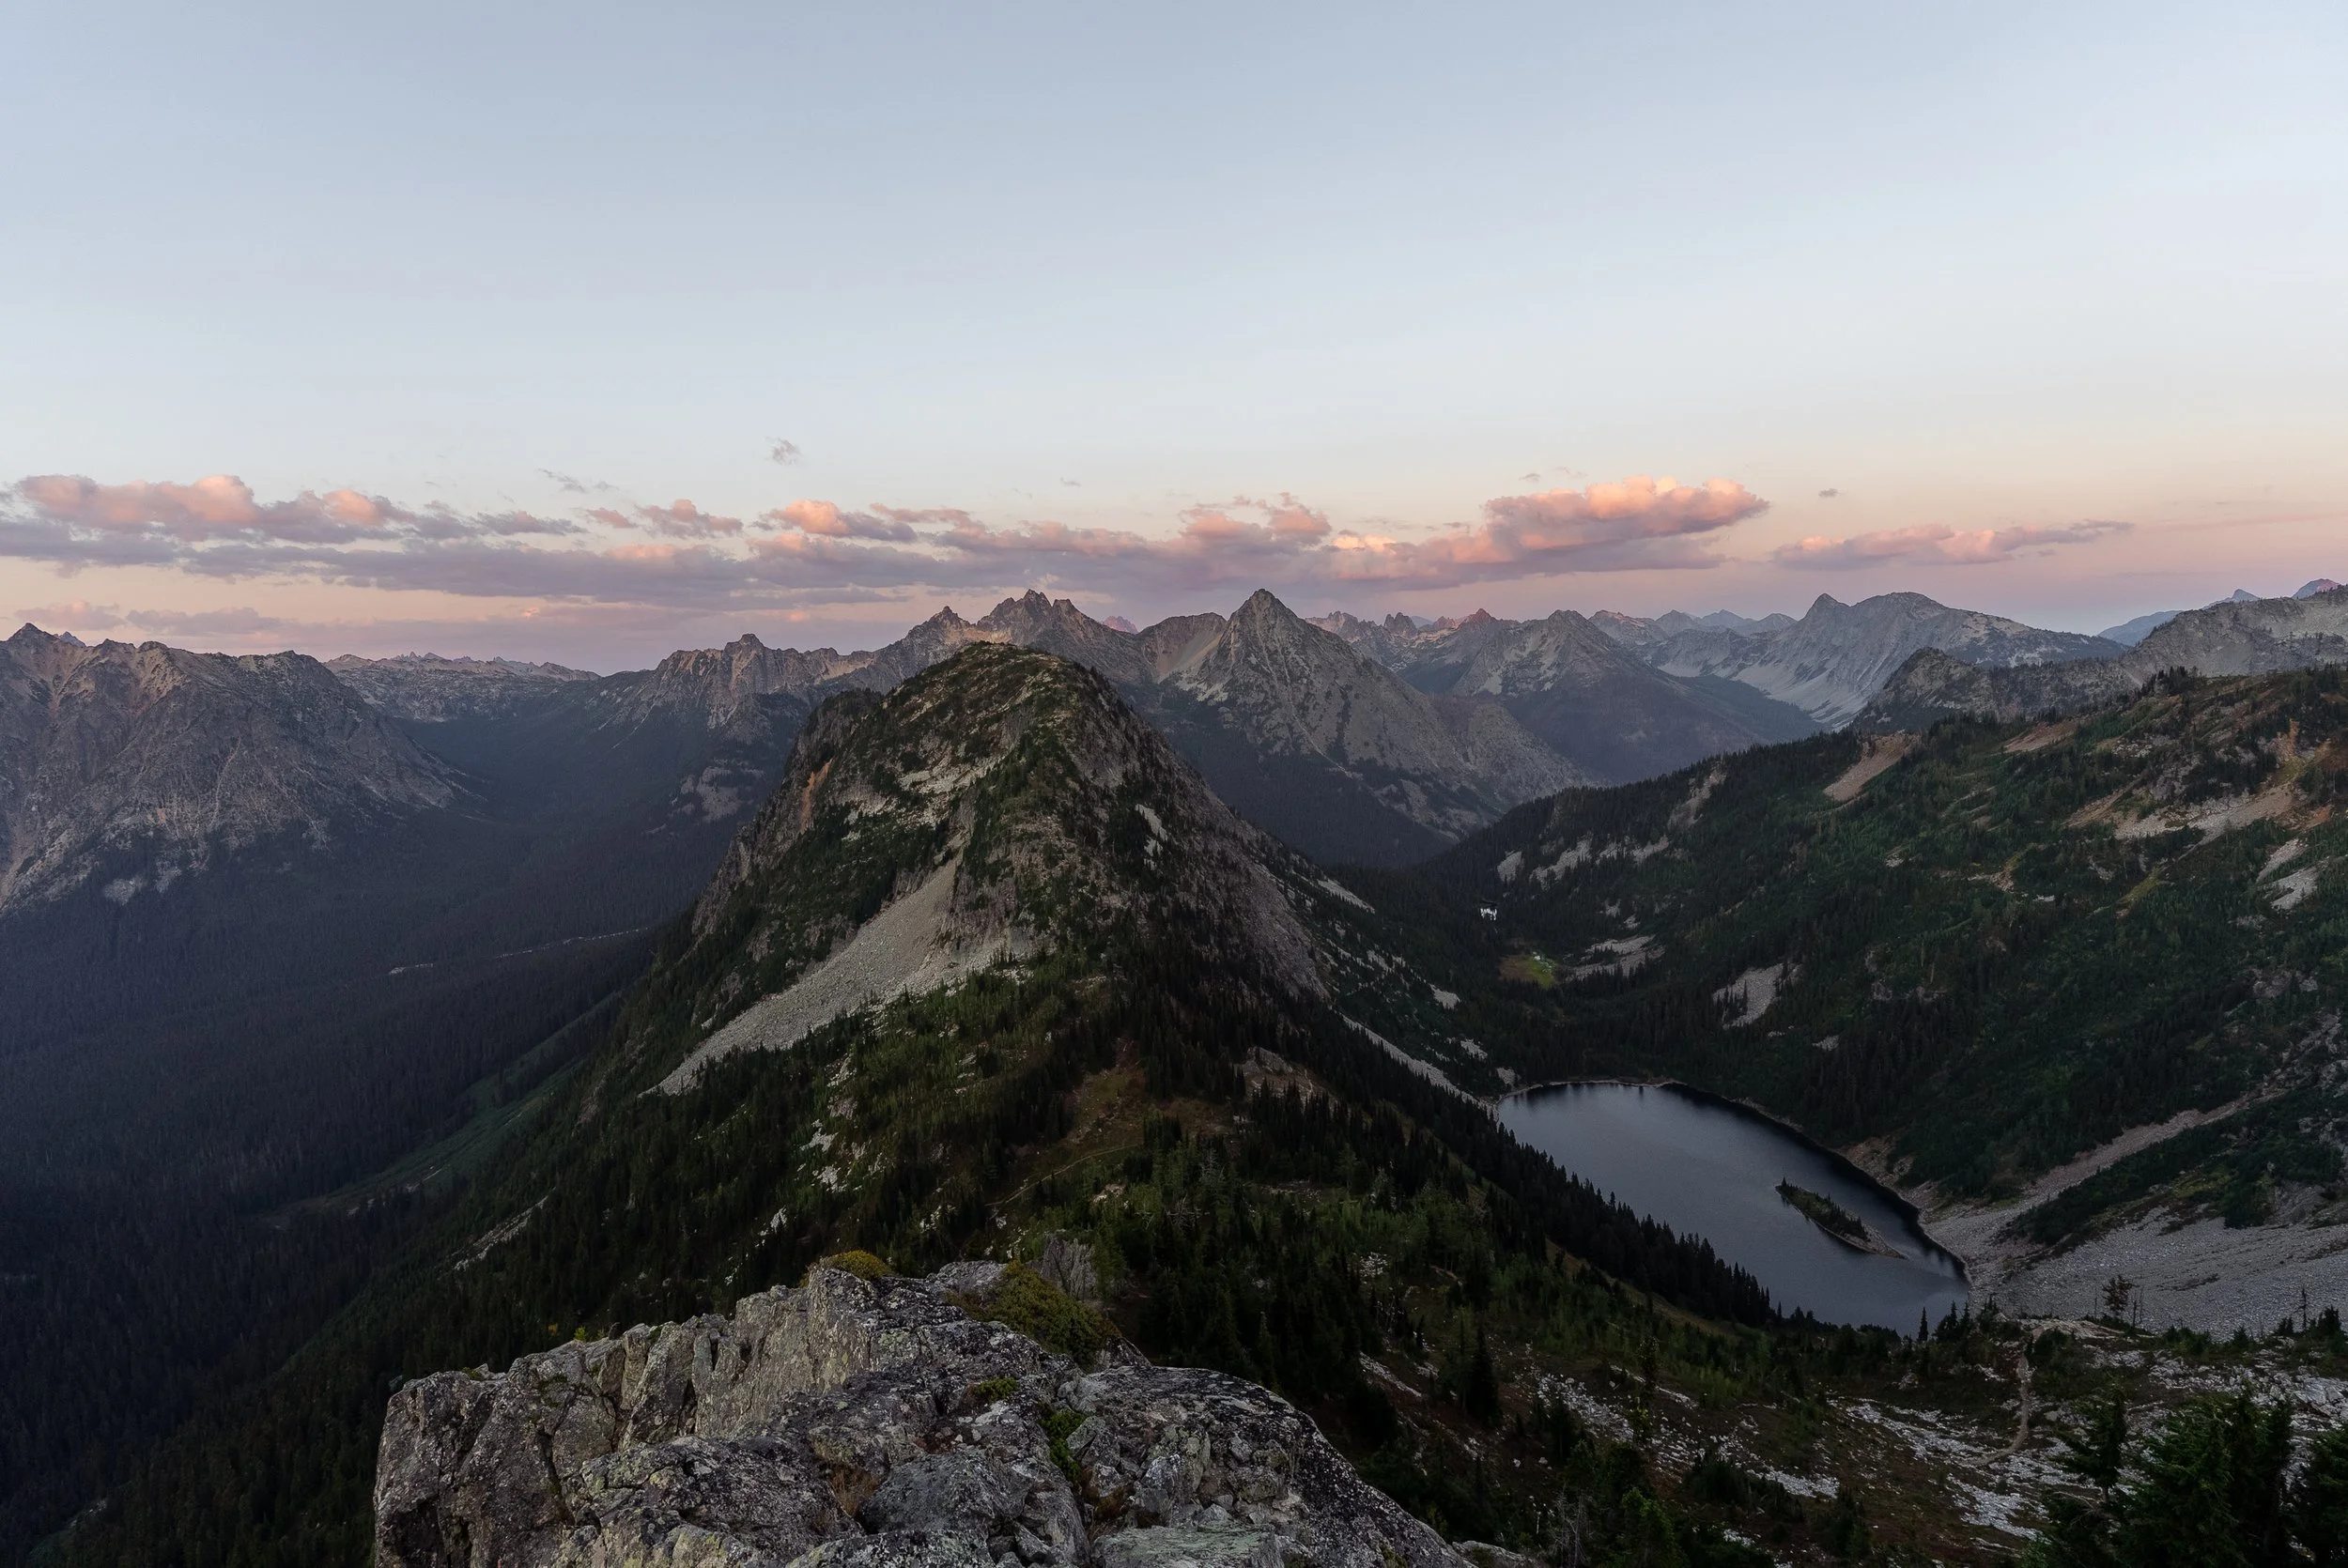
9. Maple Pass Loop
A high-alpine circuit which delivering nonstop views of glaciers, lakes, and jagged peaks. Larches turn gold in late September, making this one of the state’s most photographed autumn hikes. I did this at sunset and it was not only spectacular but i had most of the trail to myself. Although best done counterclockwise for a gentler climb, I’d recommend doing it clockwise if hiking it for sunset as the descent in the dark is much easier.
Location: Near Rainy Pass, North Cascades Highway
Type: Loop
Difficulty: Moderate–Hard
Distance: 11.5 km (7.1 mi)
Elevation gain: 610 m (2,000 ft)
Time: 4–6 h
Technical Aspects: Best done counter-clockwise for gentler climbs.
Trailhead: Google Maps
10. Cascade Pass & Sahale Arm
Perhaps the ultimate hike in the North Cascades and the most difficult on this blog. It climbs to Cascade Pass before continuing along Sahale Arm, a wide ridge which offers jaw-dropping views of glaciers, jagged peaks, and alpine meadows. Despite being the toughest hike of the trip, it ended up being one of the most rewarding, my wife loved it, and we were even lucky enough to spot a bear along the way.
The Cascade Pass Trailhead is only accessible via the 14 mile Cascade River forest road. It’s technically suitable for low-clearance vehicles, but the first 7 miles is very beat up, washboard road and requires slow, careful driving. The 14 mile road took us an hour to drive.
Location: North Cascades NP, via Cascade River Road
Type: Out-and-back
Difficulty: Hard
Distance: 18 km (11.2 mi)
Elevation gain: 1,000 m (3,280 ft)
Time: 6–9 h
Technical Aspects: Long gravel approach road; drive slowly.
Trailhead: Google Maps

11. Hidden Lake Lookout
Hidden Lake is one of Washington’s most rewarding day hikes, offering everything from wildflower meadows to dramatic granite ridgelines. The steep climb culminates at a fire lookout perched high above an alpine basin with sweeping views over North Cascades peaks.
We chose to do Sahale Arm instead as the trailhead is located at the end of a steep and narrow forest road which will require a high clearance vehicle to access. Parking is very limited so arrive early to secure a space.
Location: North Cascades National Park
Type: Out-and-back
Difficulty: Hard
Distance: 13 km (8 mi)
Elevation gain: 1,000 m (3,280 ft)
Time: 5–7 hours
Technical Aspects: Final scramble to lookout; snow can linger into July.
Trailhead: Google Maps - A high clearance vehicle is needed
Mount Baker–Snoqualmie National Forest
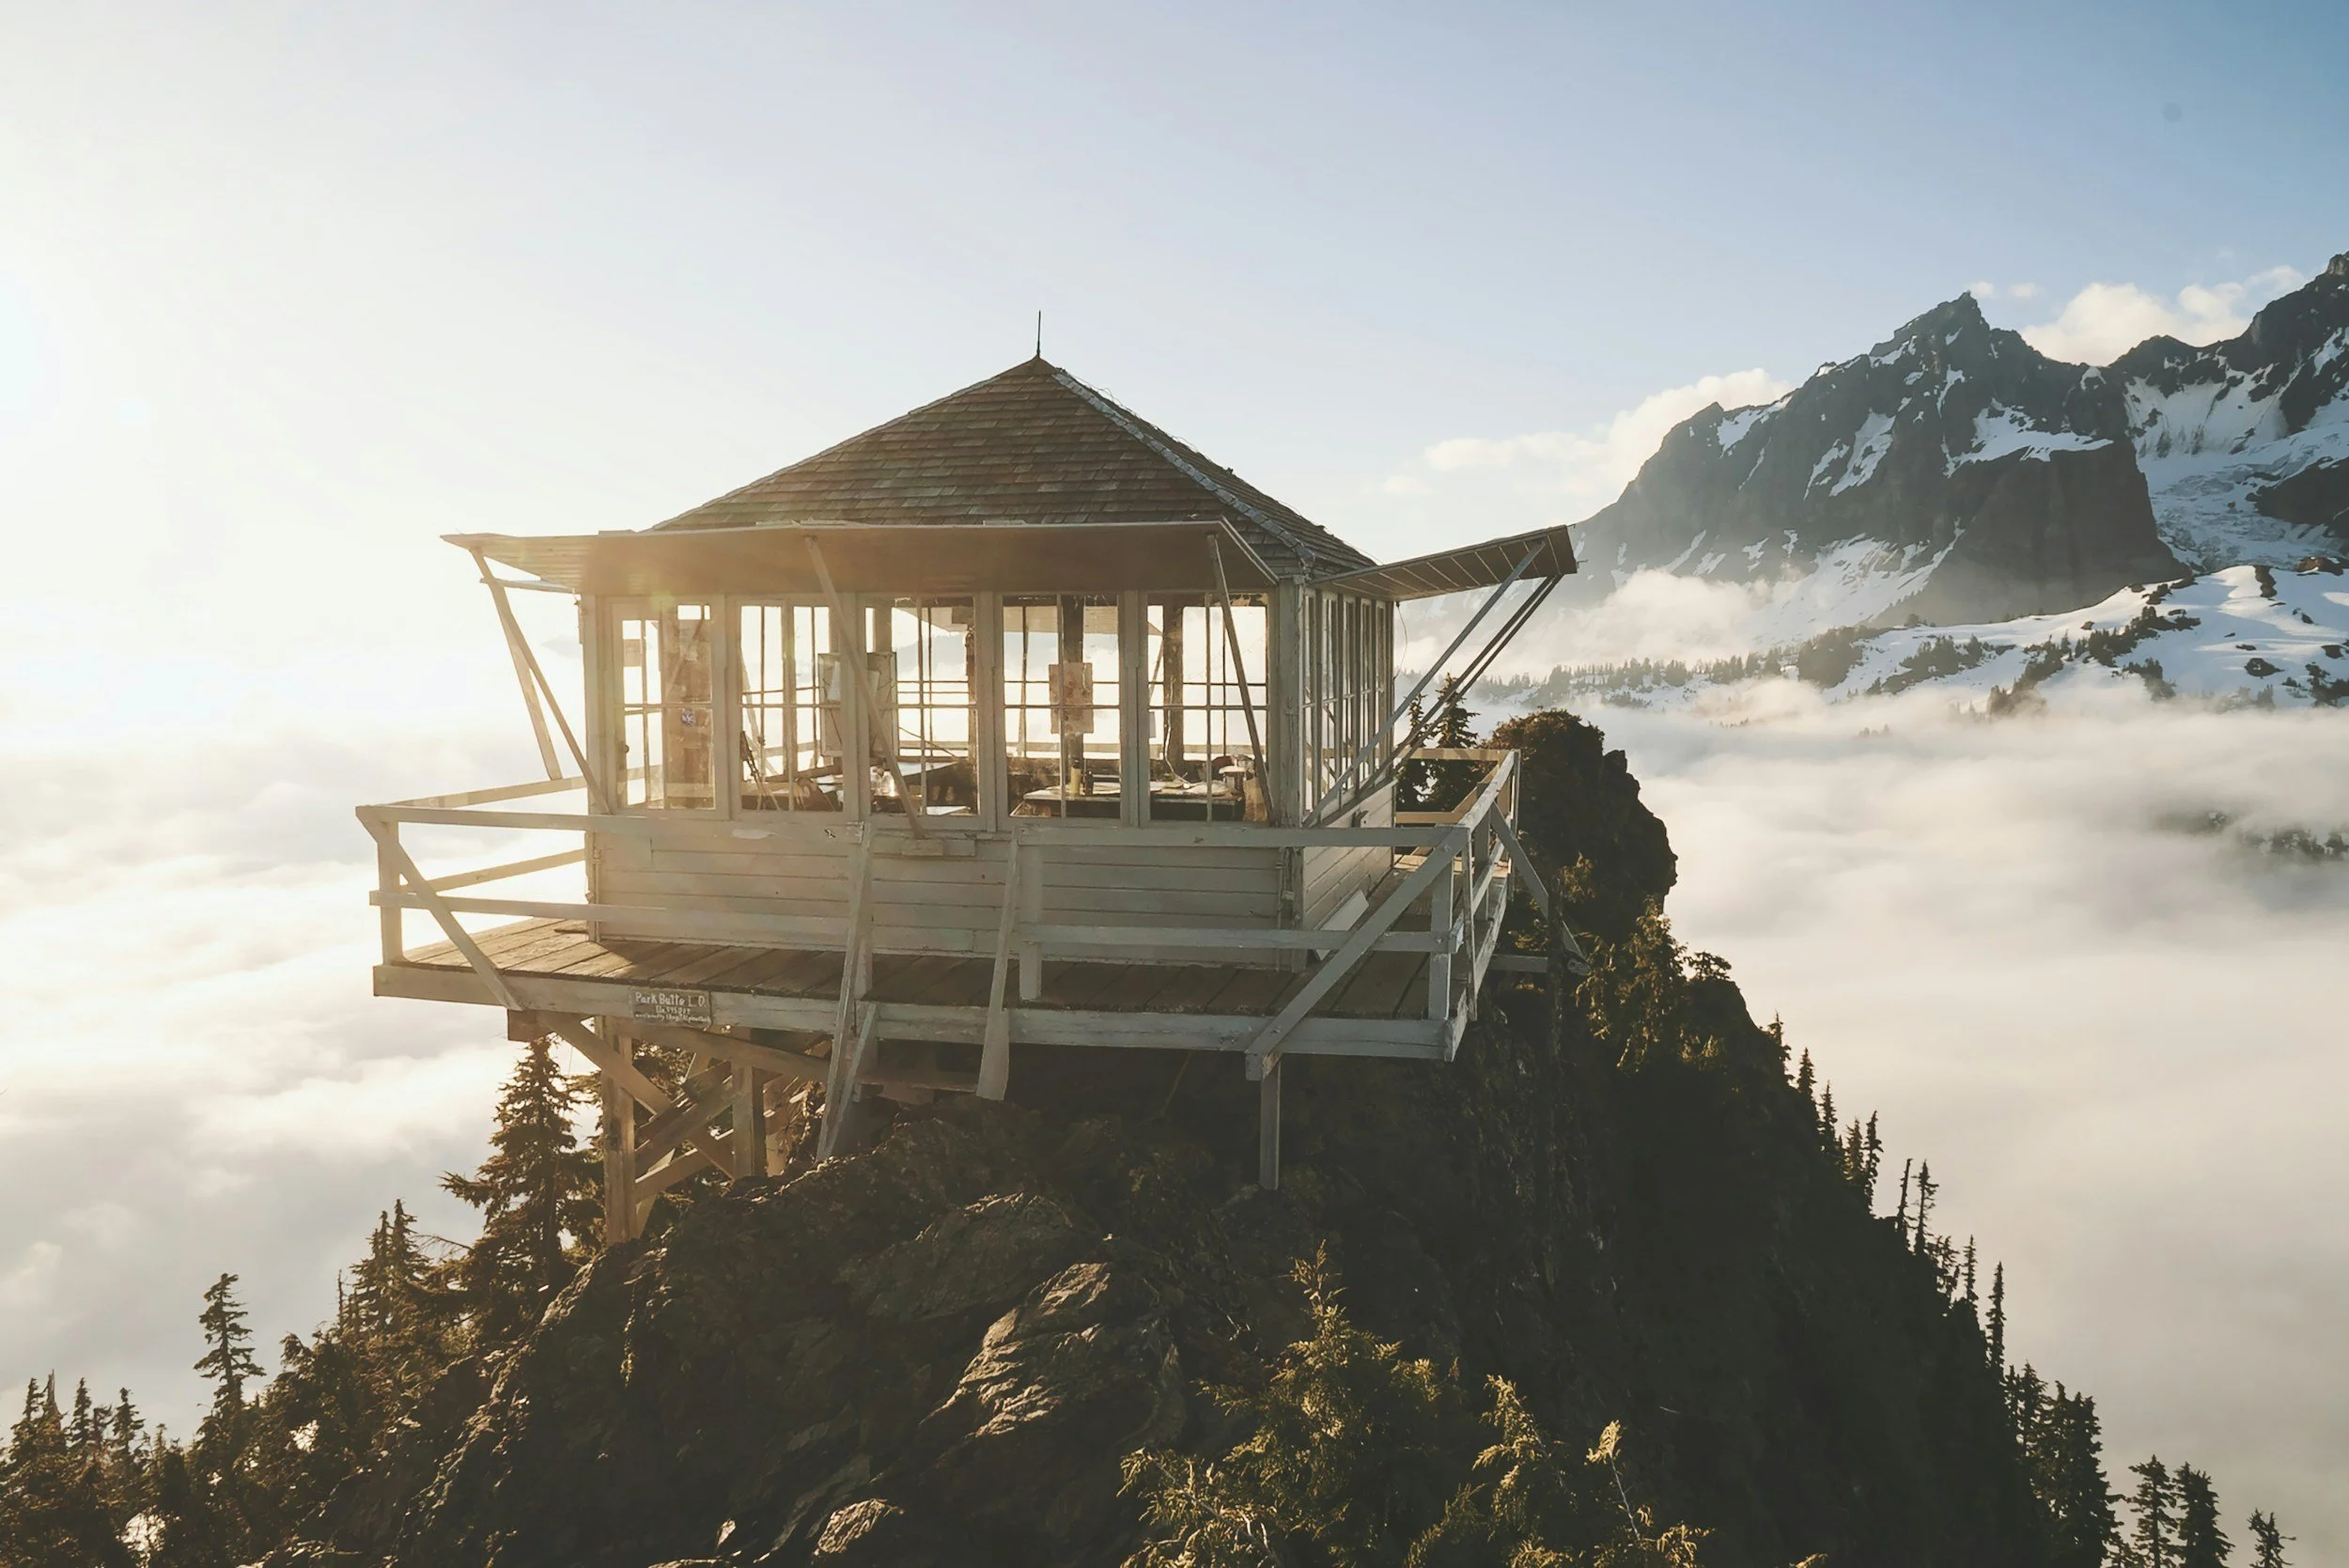
12. Park Butte Lookout
This Iconic fire lookout hike leads through forests, wildflower meadows, and moraine ridges to a restored cabin with one of the best views of Mount Baker in Washington State. the hikes requires you to cross two rivers, so pack some hiking poles and a towel to assist with crossing and potential wet feet. Also factor in that the river will swell in the afternoon due to snowmelt.
Type: Out-and-back
Difficulty: Moderate–Hard
Distance: 12 km (7.5 mi)
Elevation gain: 650 m (2,130 ft)
Time: 4–6 h
Technical Aspects: Several small river crossings; check conditions after rain.
Trailhead: Google Maps
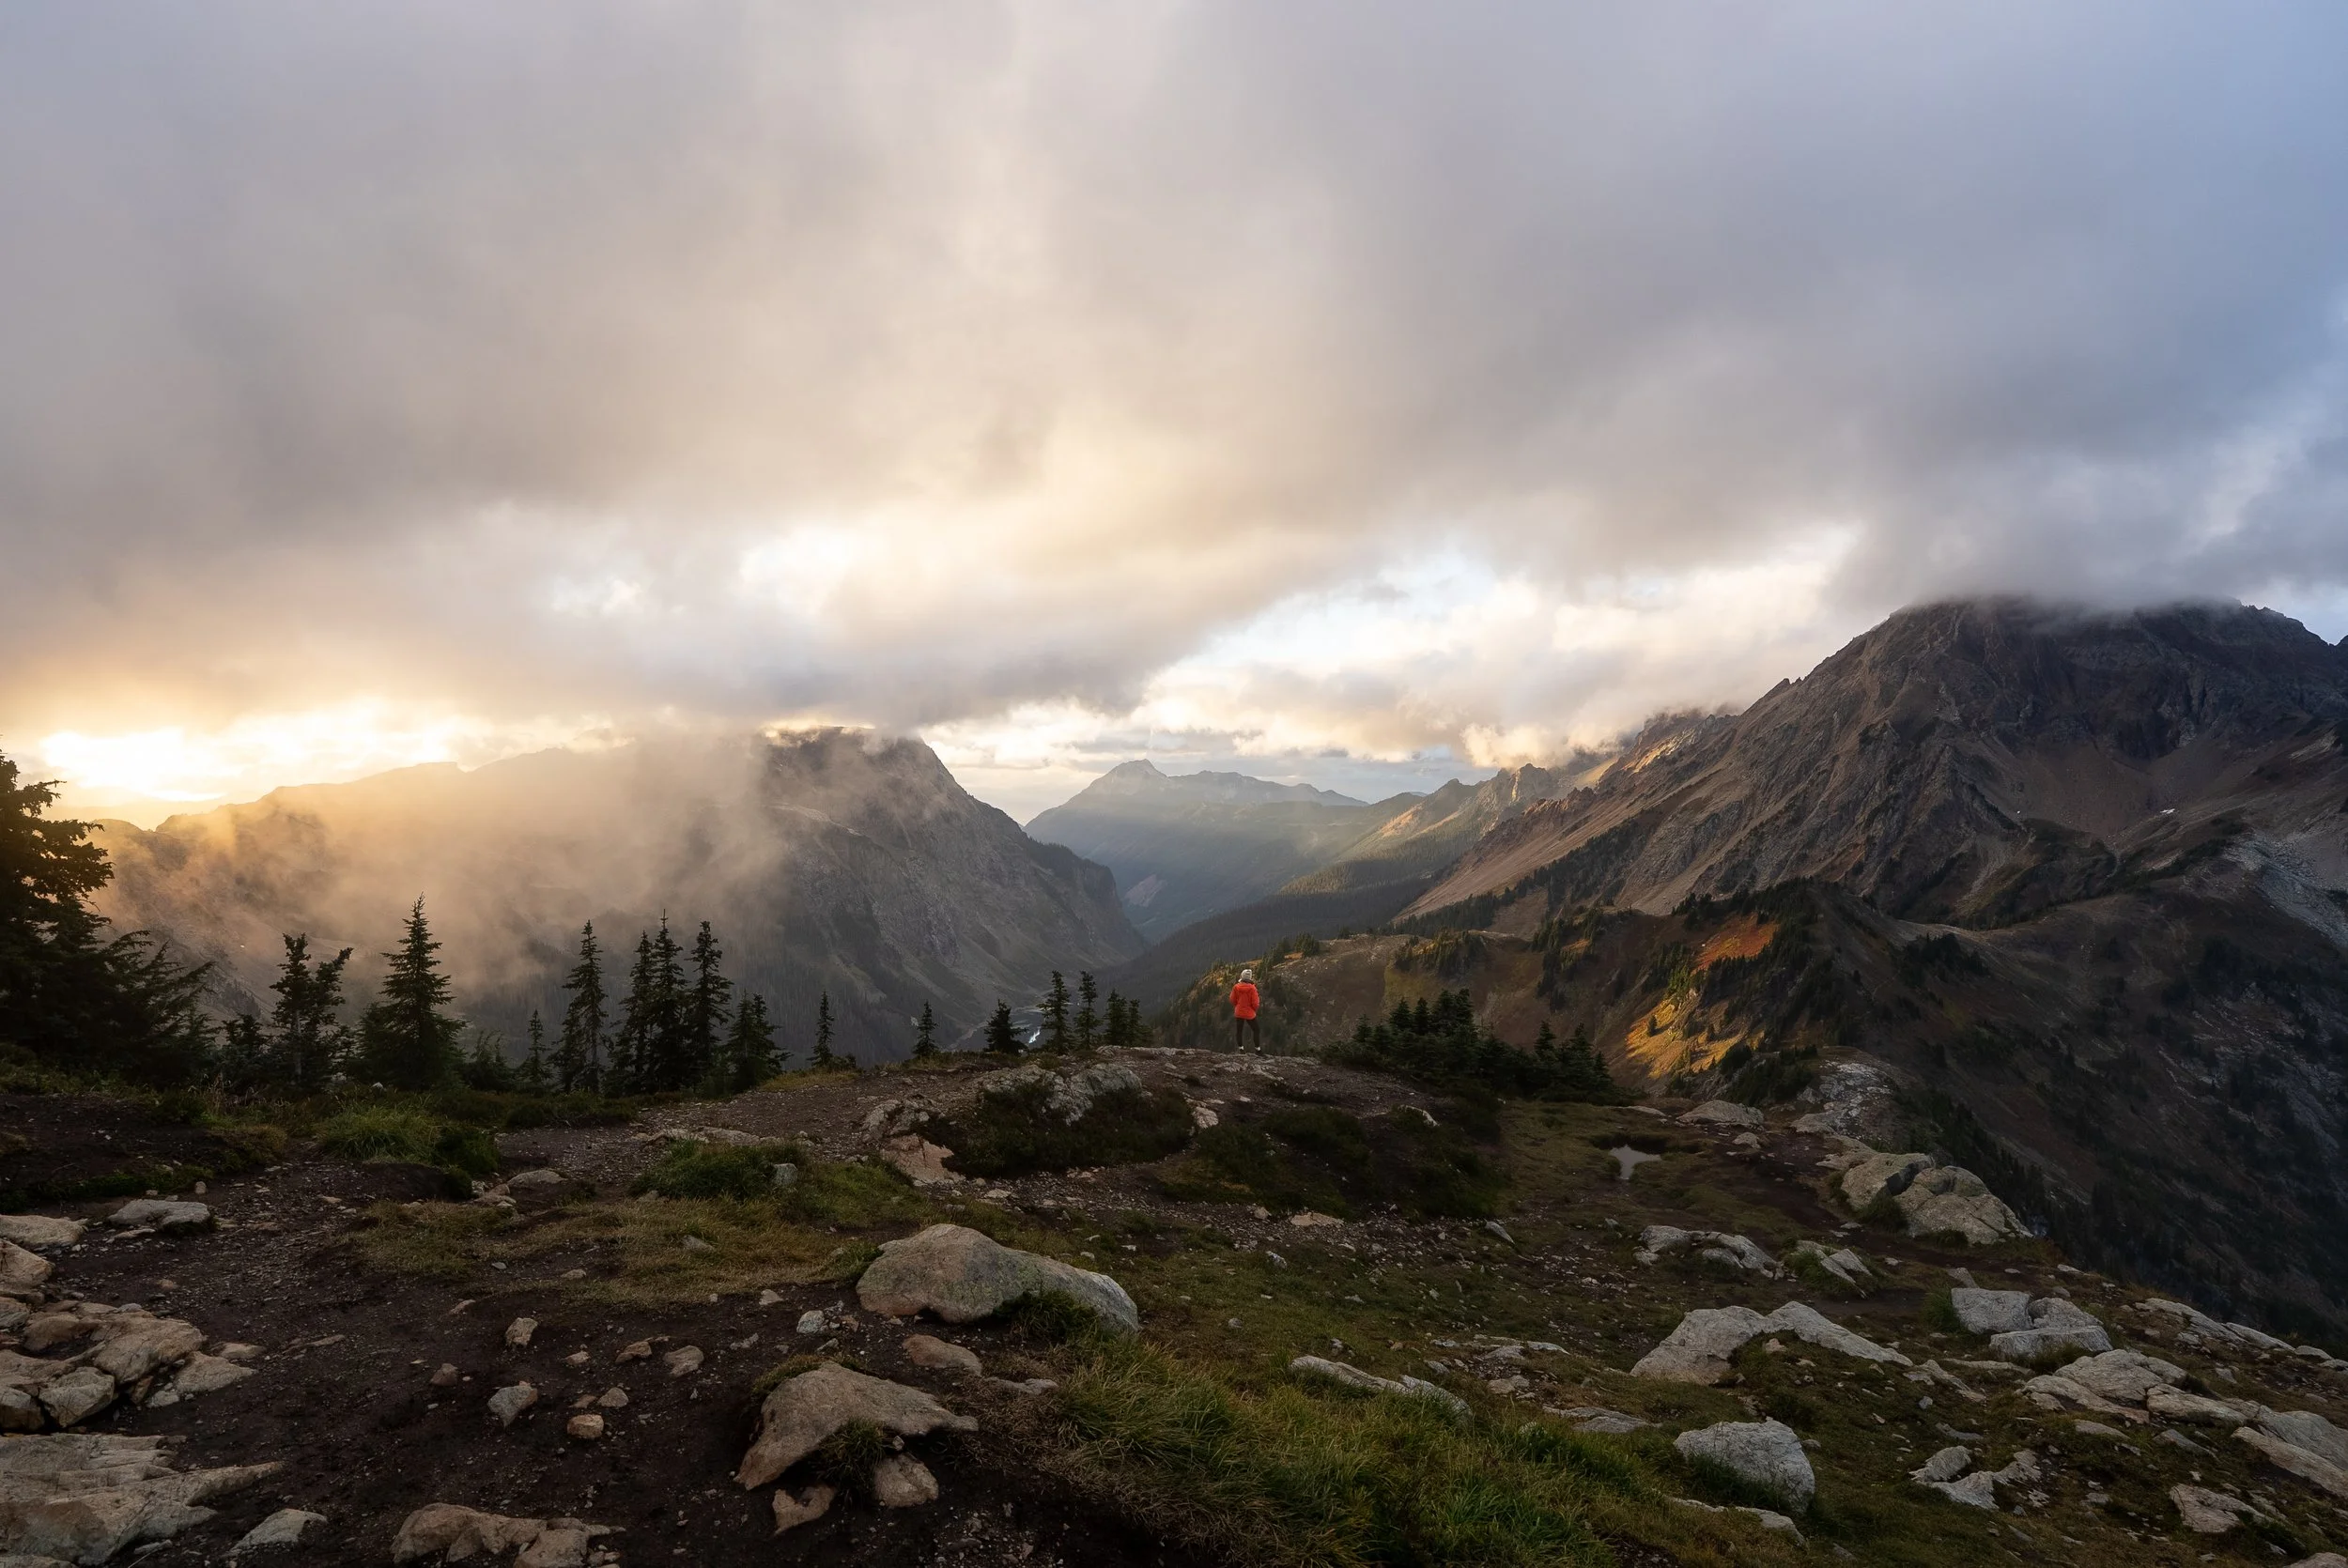
13. Ptarmigan Ridge
A high-alpine trail starting from Artist Point, Ptarmigan Ridge is one of Mount Baker’s most scenic routes. The path traverses across meadows and volcanic ridges with constant views of Mount Baker’s glaciers and the jagged peaks of the North Cascades. It’s a longish out and back hike but doesn’t have any challenging sections, just rather a gradual incline.
There are several spots to stop for snack, soak in the views, and even turn around. In fact, we only hiked around 5.5km out towards Mount baker to the viewpoint below, before turning around. We also combined this hike with Chain Lakes (see below) as they both share the same trailhead and the first 2km of the hike follows the same trail.
Location: Artist Point
Type: Out-and-back
Difficulty: Moderate
Distance: 14.5 km (9 mi)
Elevation gain: 600 m (1,970 ft)
Time: 4–6 h
Technical Aspects: Exposed sections; pack layers for wind.
Trailhead: Google Maps

14. Chain Lakes Loop
A quintessential Mount Baker hike combining alpine lakes, flower meadows, and ridge views. The loop links Picture Lake, Bagley Lakes, and Iceberg Lake, with stunning panoramas of Mount Shuksan reflected in still waters. It’s an excellent introduction to the Baker area and a photographer’s dream. We only did a section of this route as we combined it with Ptarmigan ridge to create a best of both hikes out and back hike.
Location: Artist Point
Type: Loop
Difficulty: Moderate
Distance: 10 km (6.2 mi)
Elevation gain: 550 m (1,800 ft)
Time: 3–4 h
Technical Aspects: Some rocky sections
Trailhead: Google Maps

15. Winchester Mountain Lookout
A short, steep climb that leads to one of Washington’s most iconic fire lookouts. The 360° views from the top take in Mount Baker, Twin Lakes, and the surrounding peaks. It’s a favourite overnight destination for photographers and stargazers , but only if you can secure one of the coveted sleeping spots inside the lookout.
It is great spot for sunset as you can reach the lookout in under an hour. We parked at Yellow Aster Butte trailhead (accessible via forest road which is fine for low clearance vehicles) and hitched a lift up and down the extremely rough road.
Location: Twin Lakes area
Type: Out-and-back
Difficulty: Moderate–Hard
Distance: 6.5 km (4 mi)
Elevation gain: 400 m (1,310 ft)
Time: 2–3 h
Technical Aspects: Access road to trailhead is very rough and a 4x4 required.
Trailhead: Google Maps
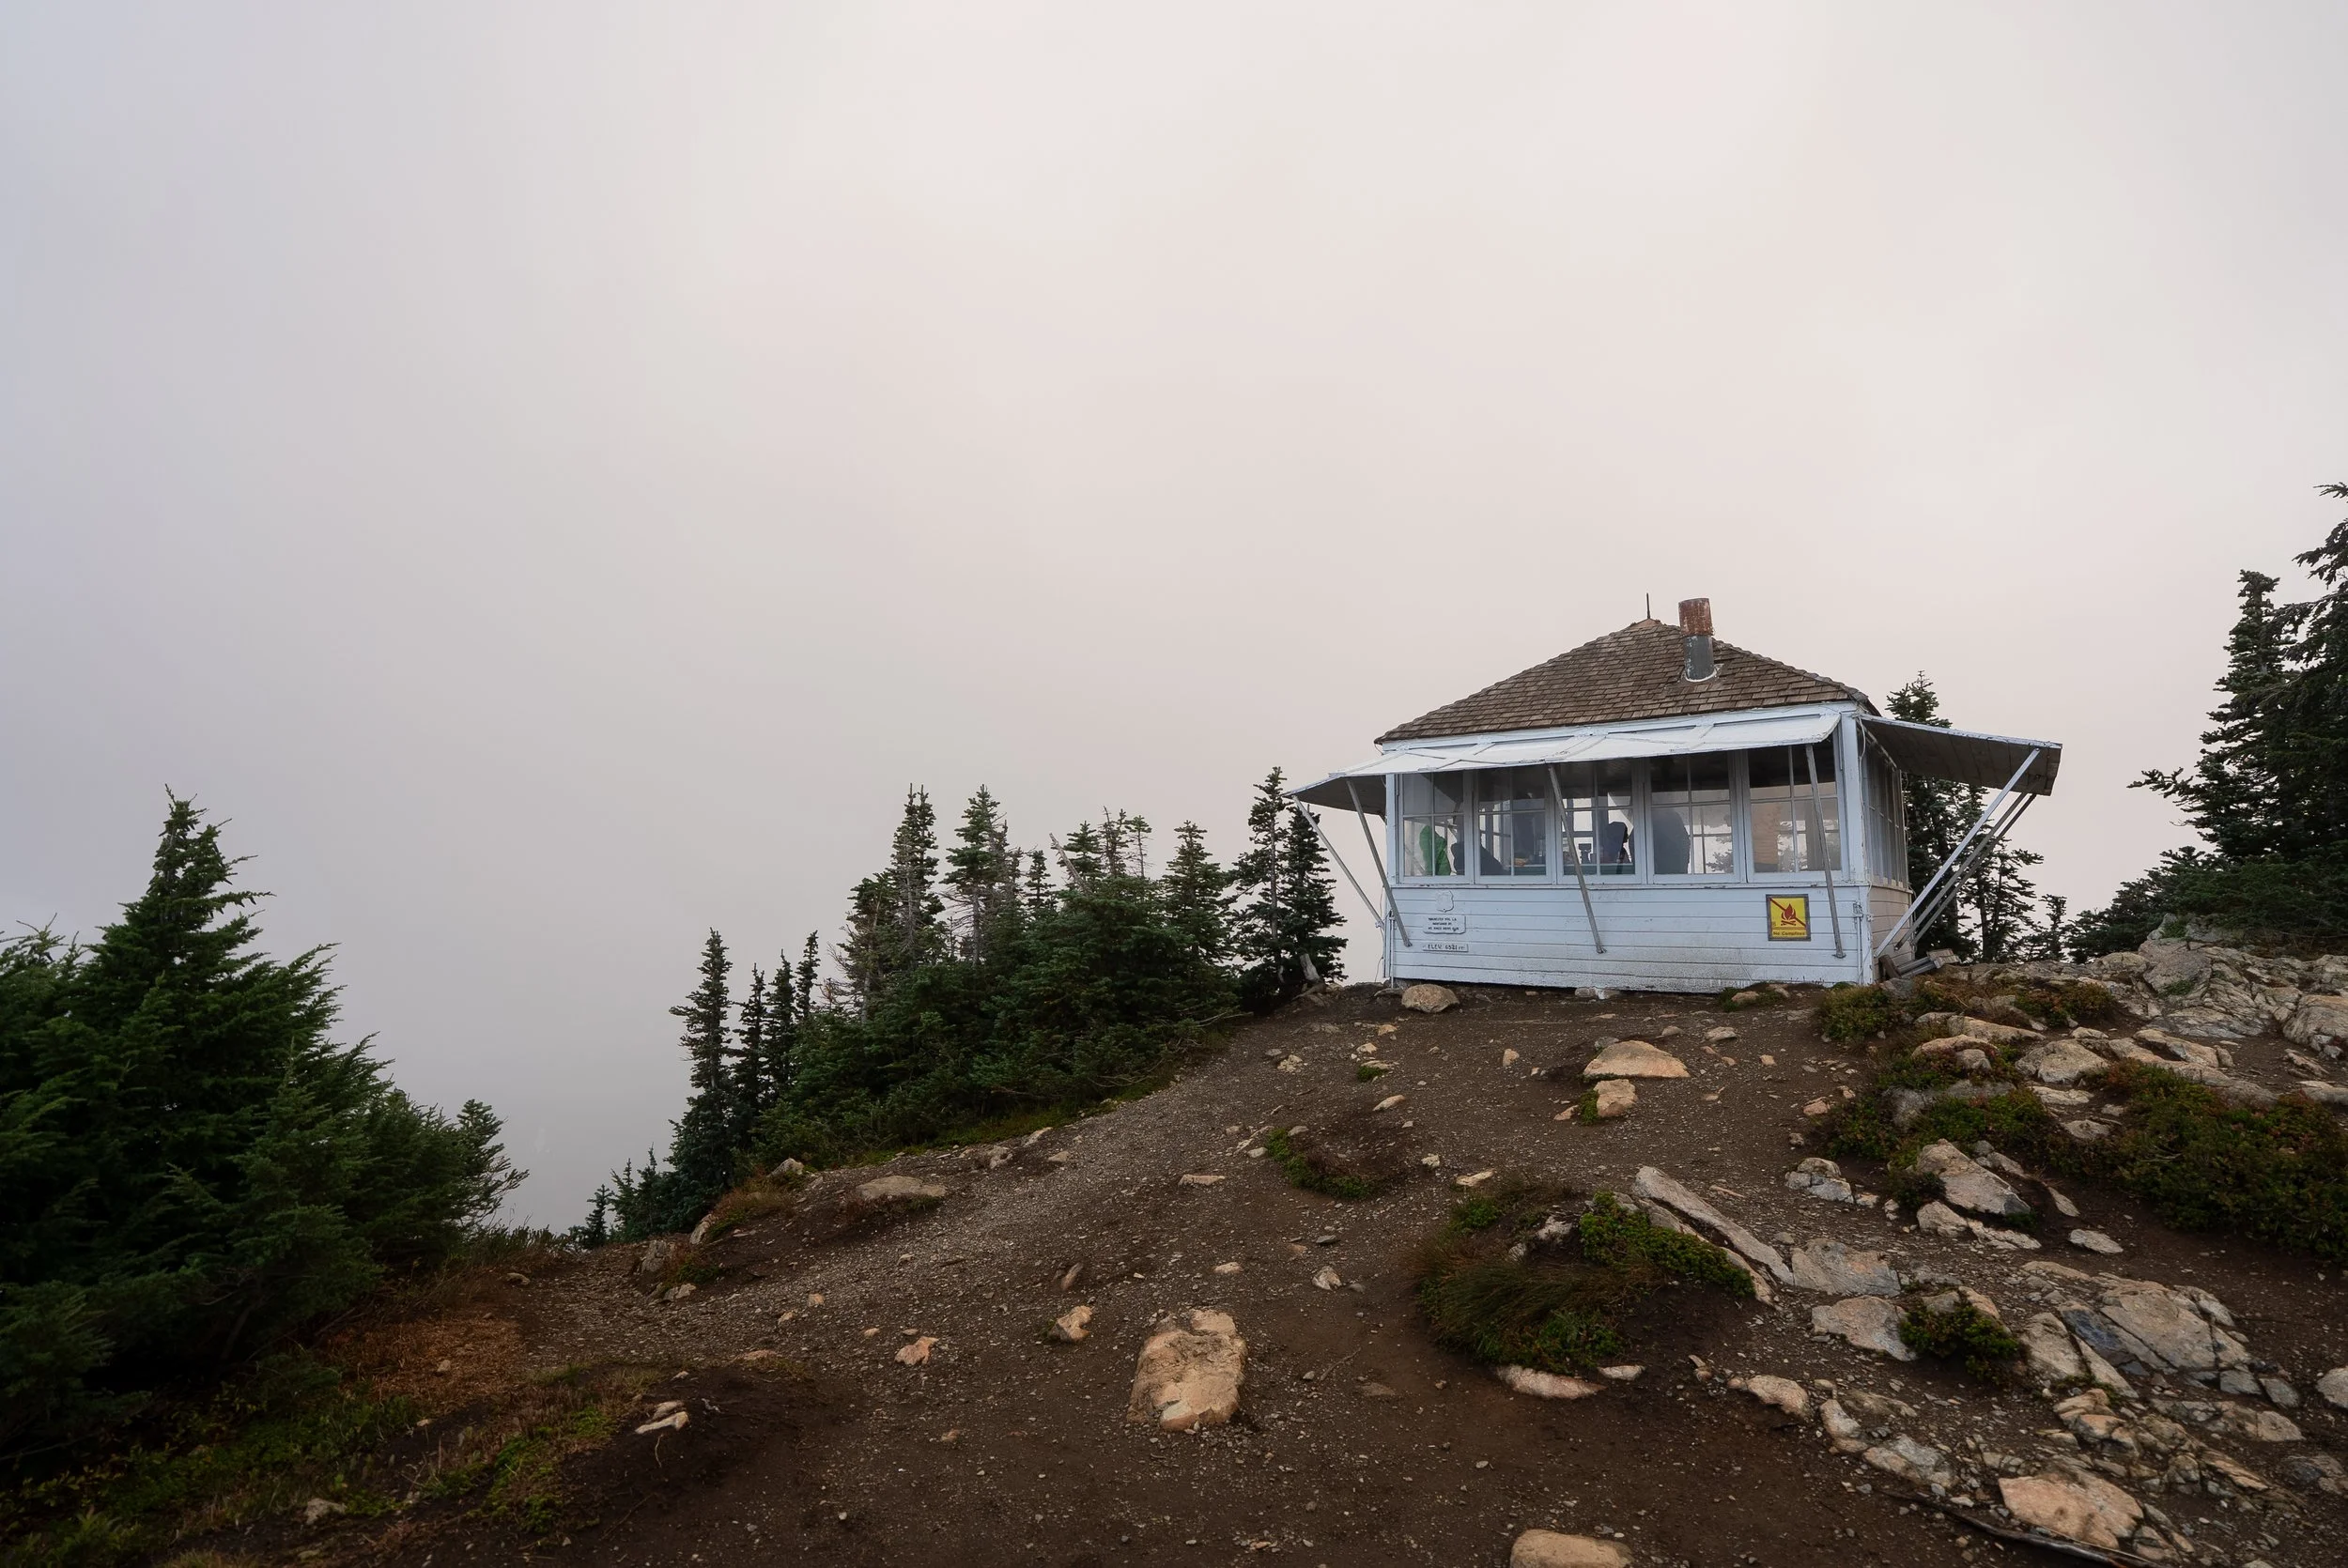
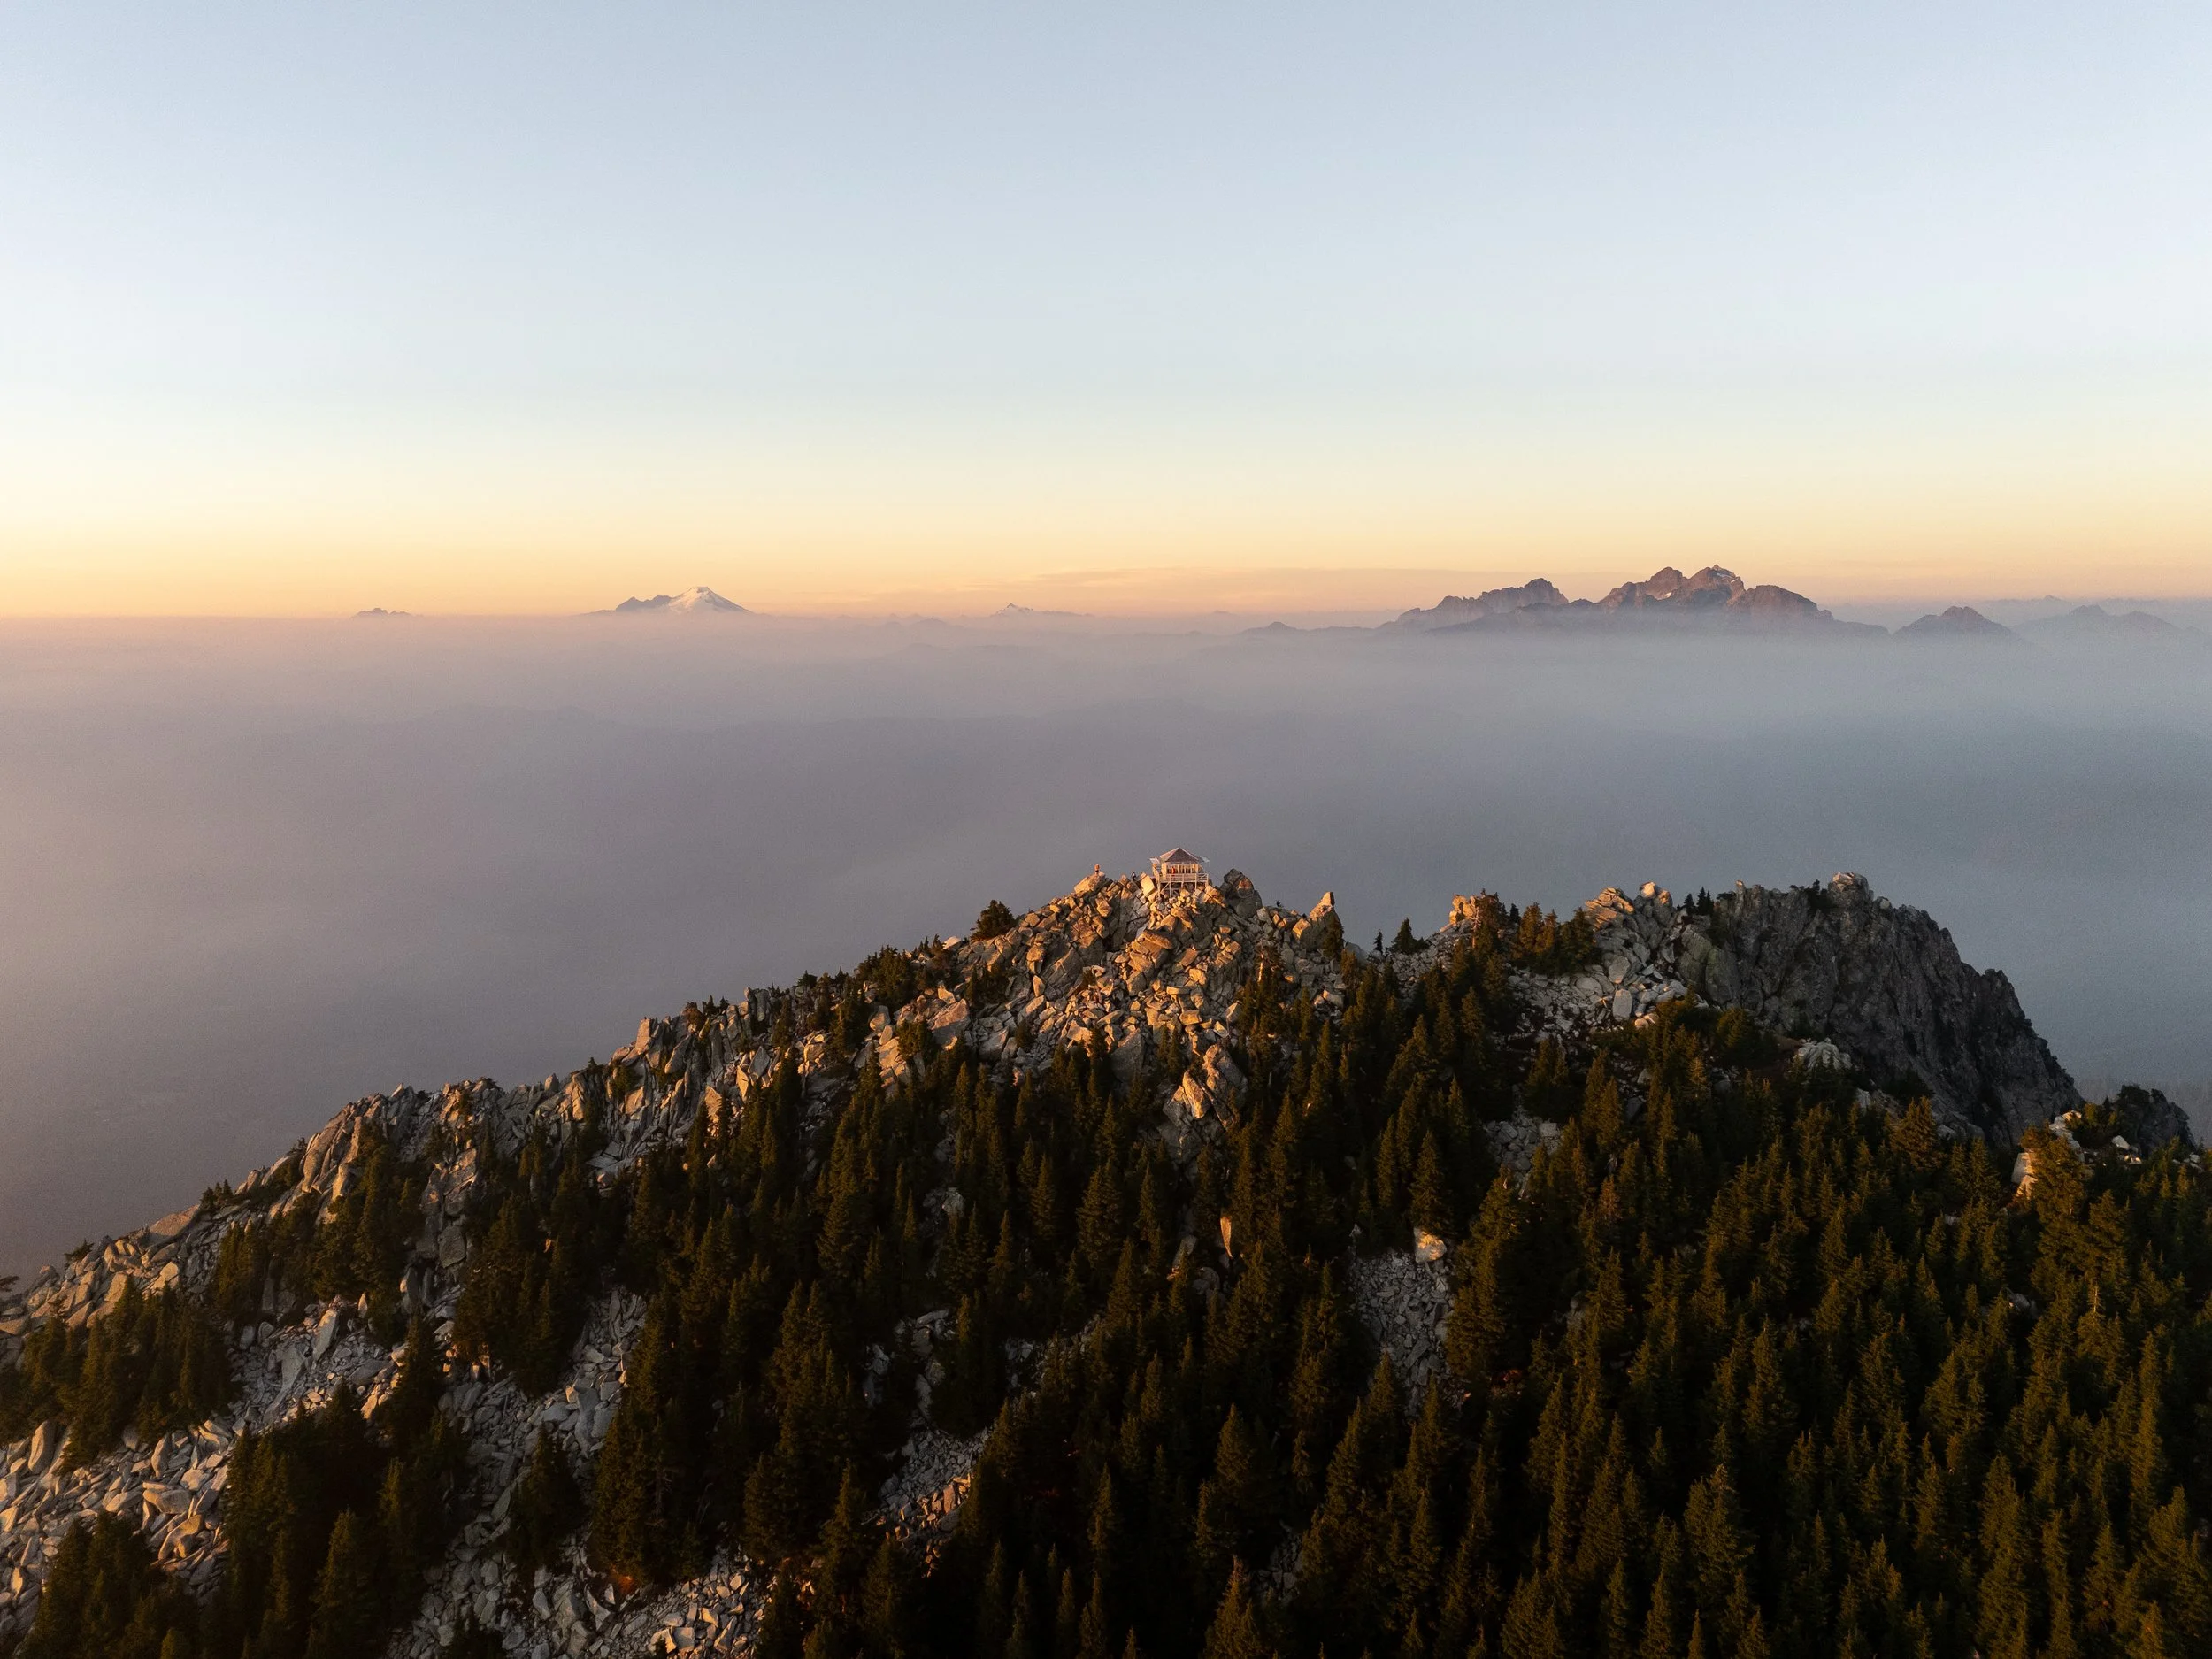
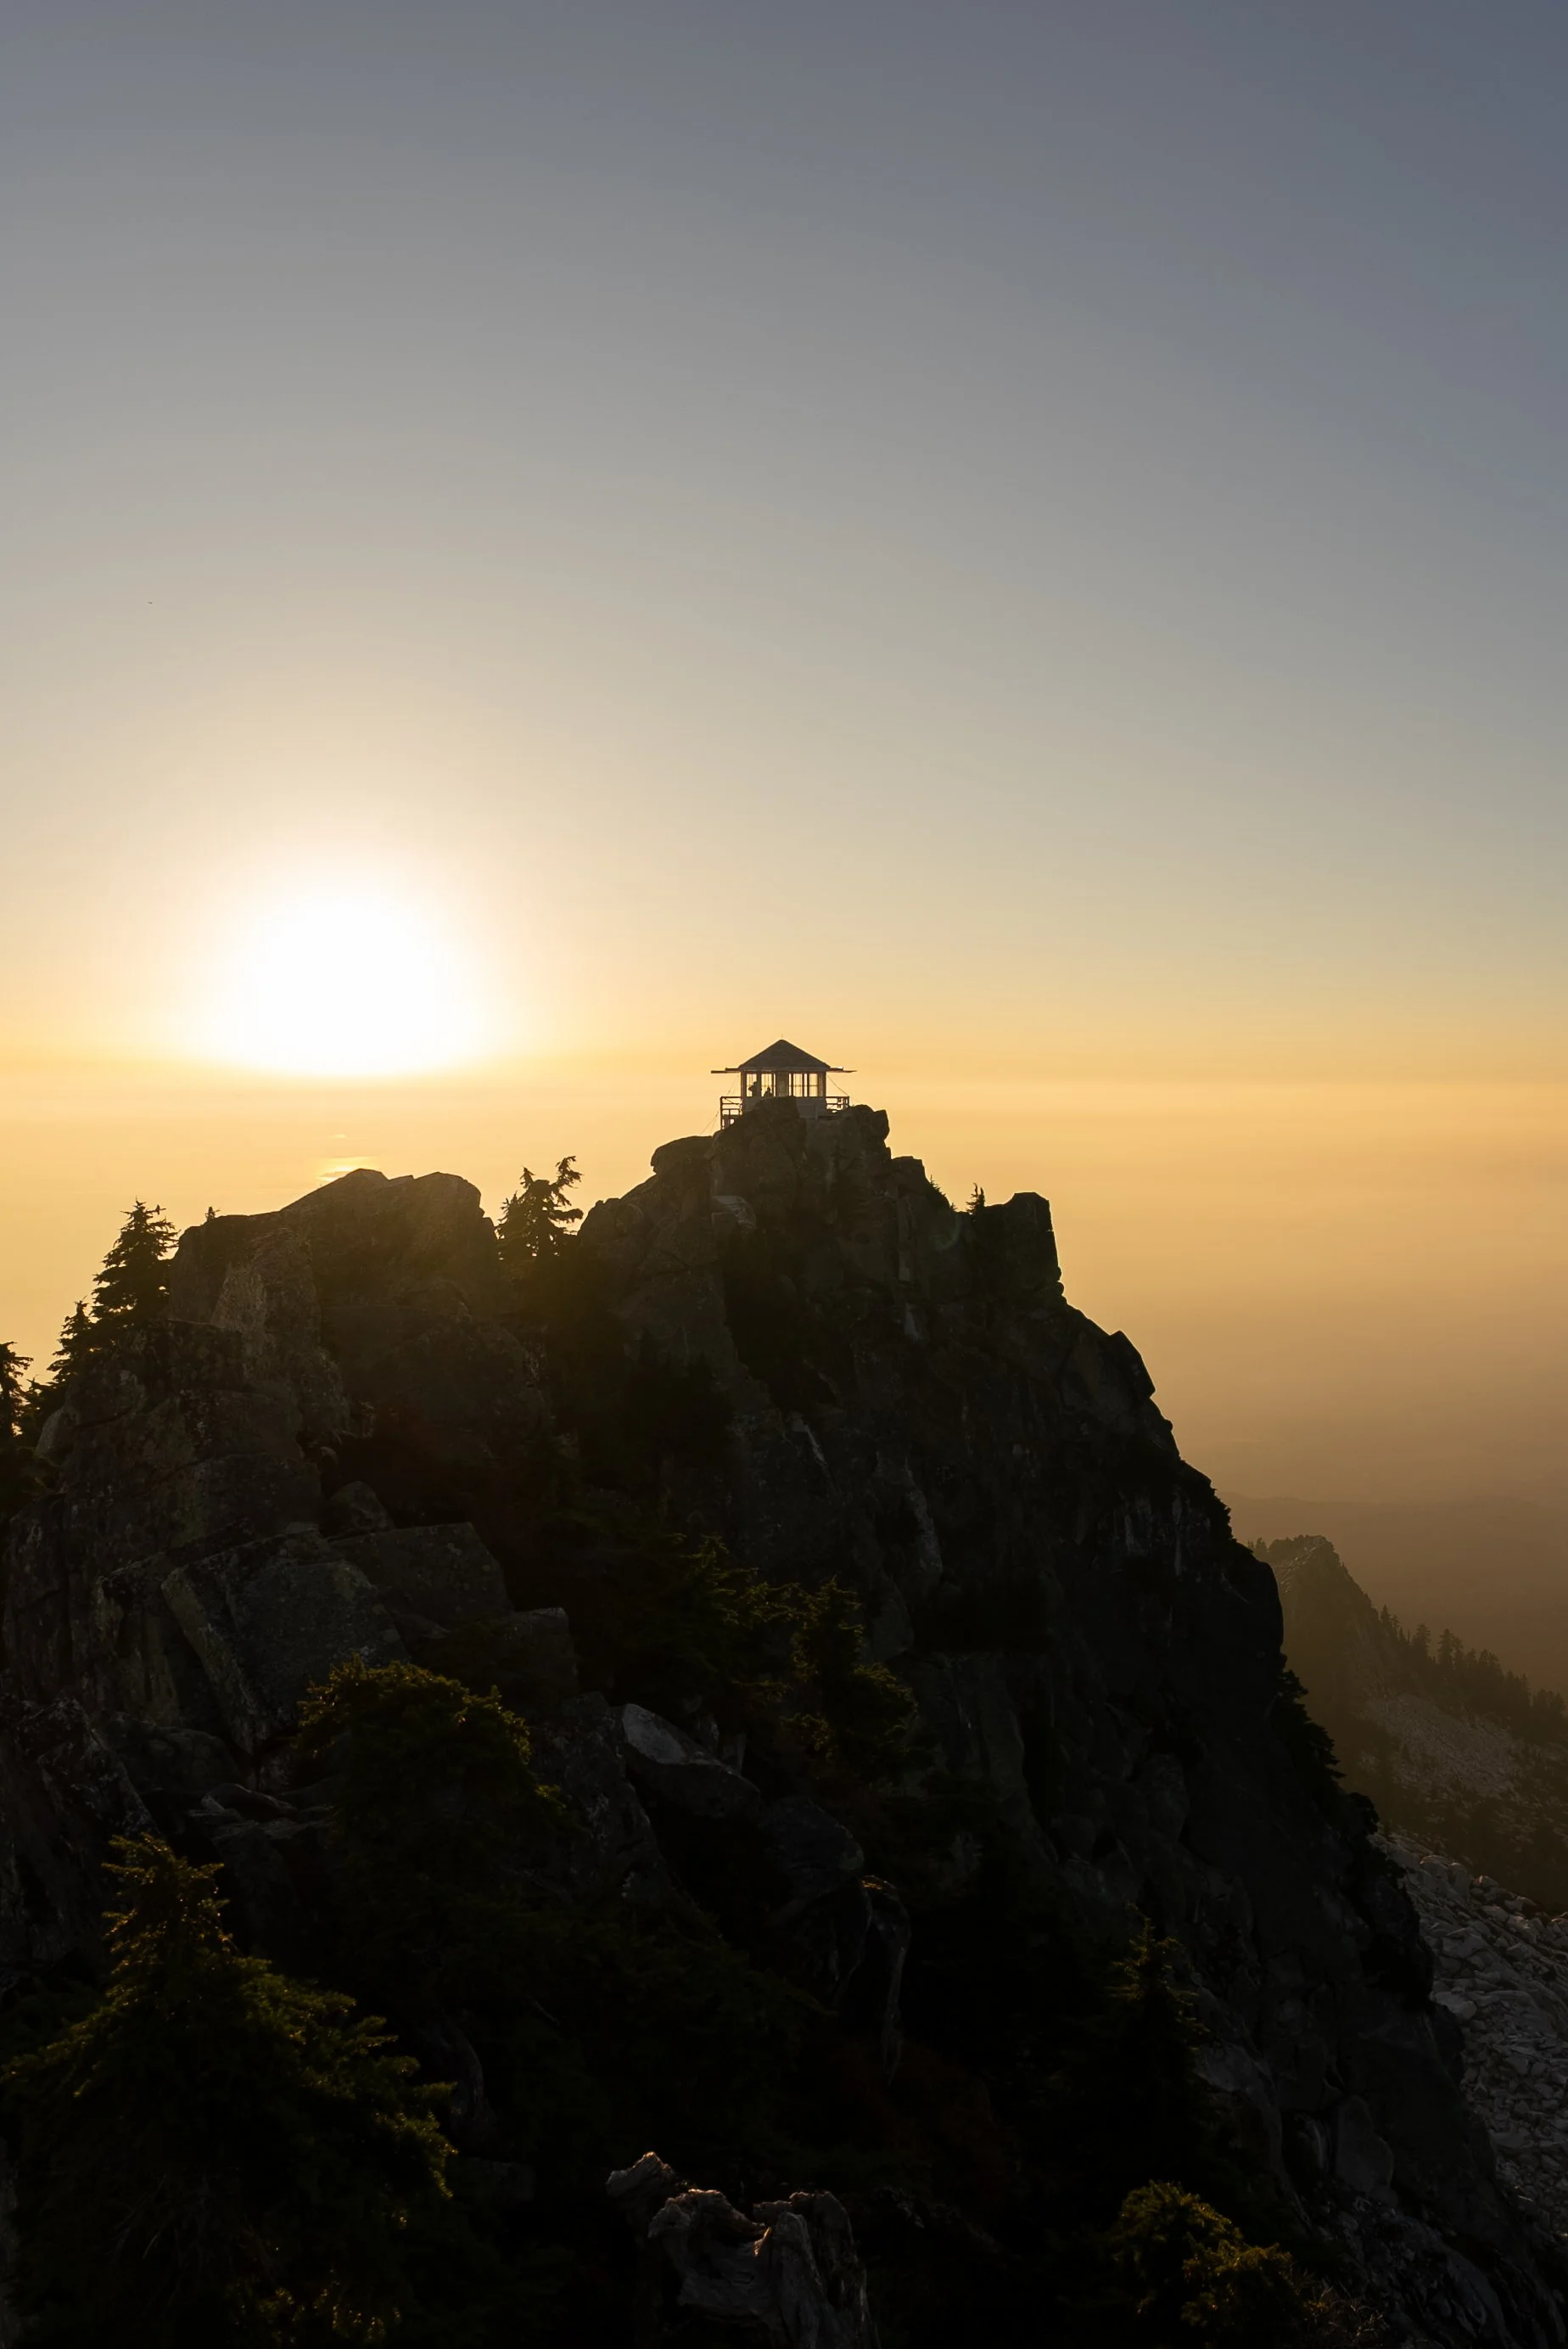
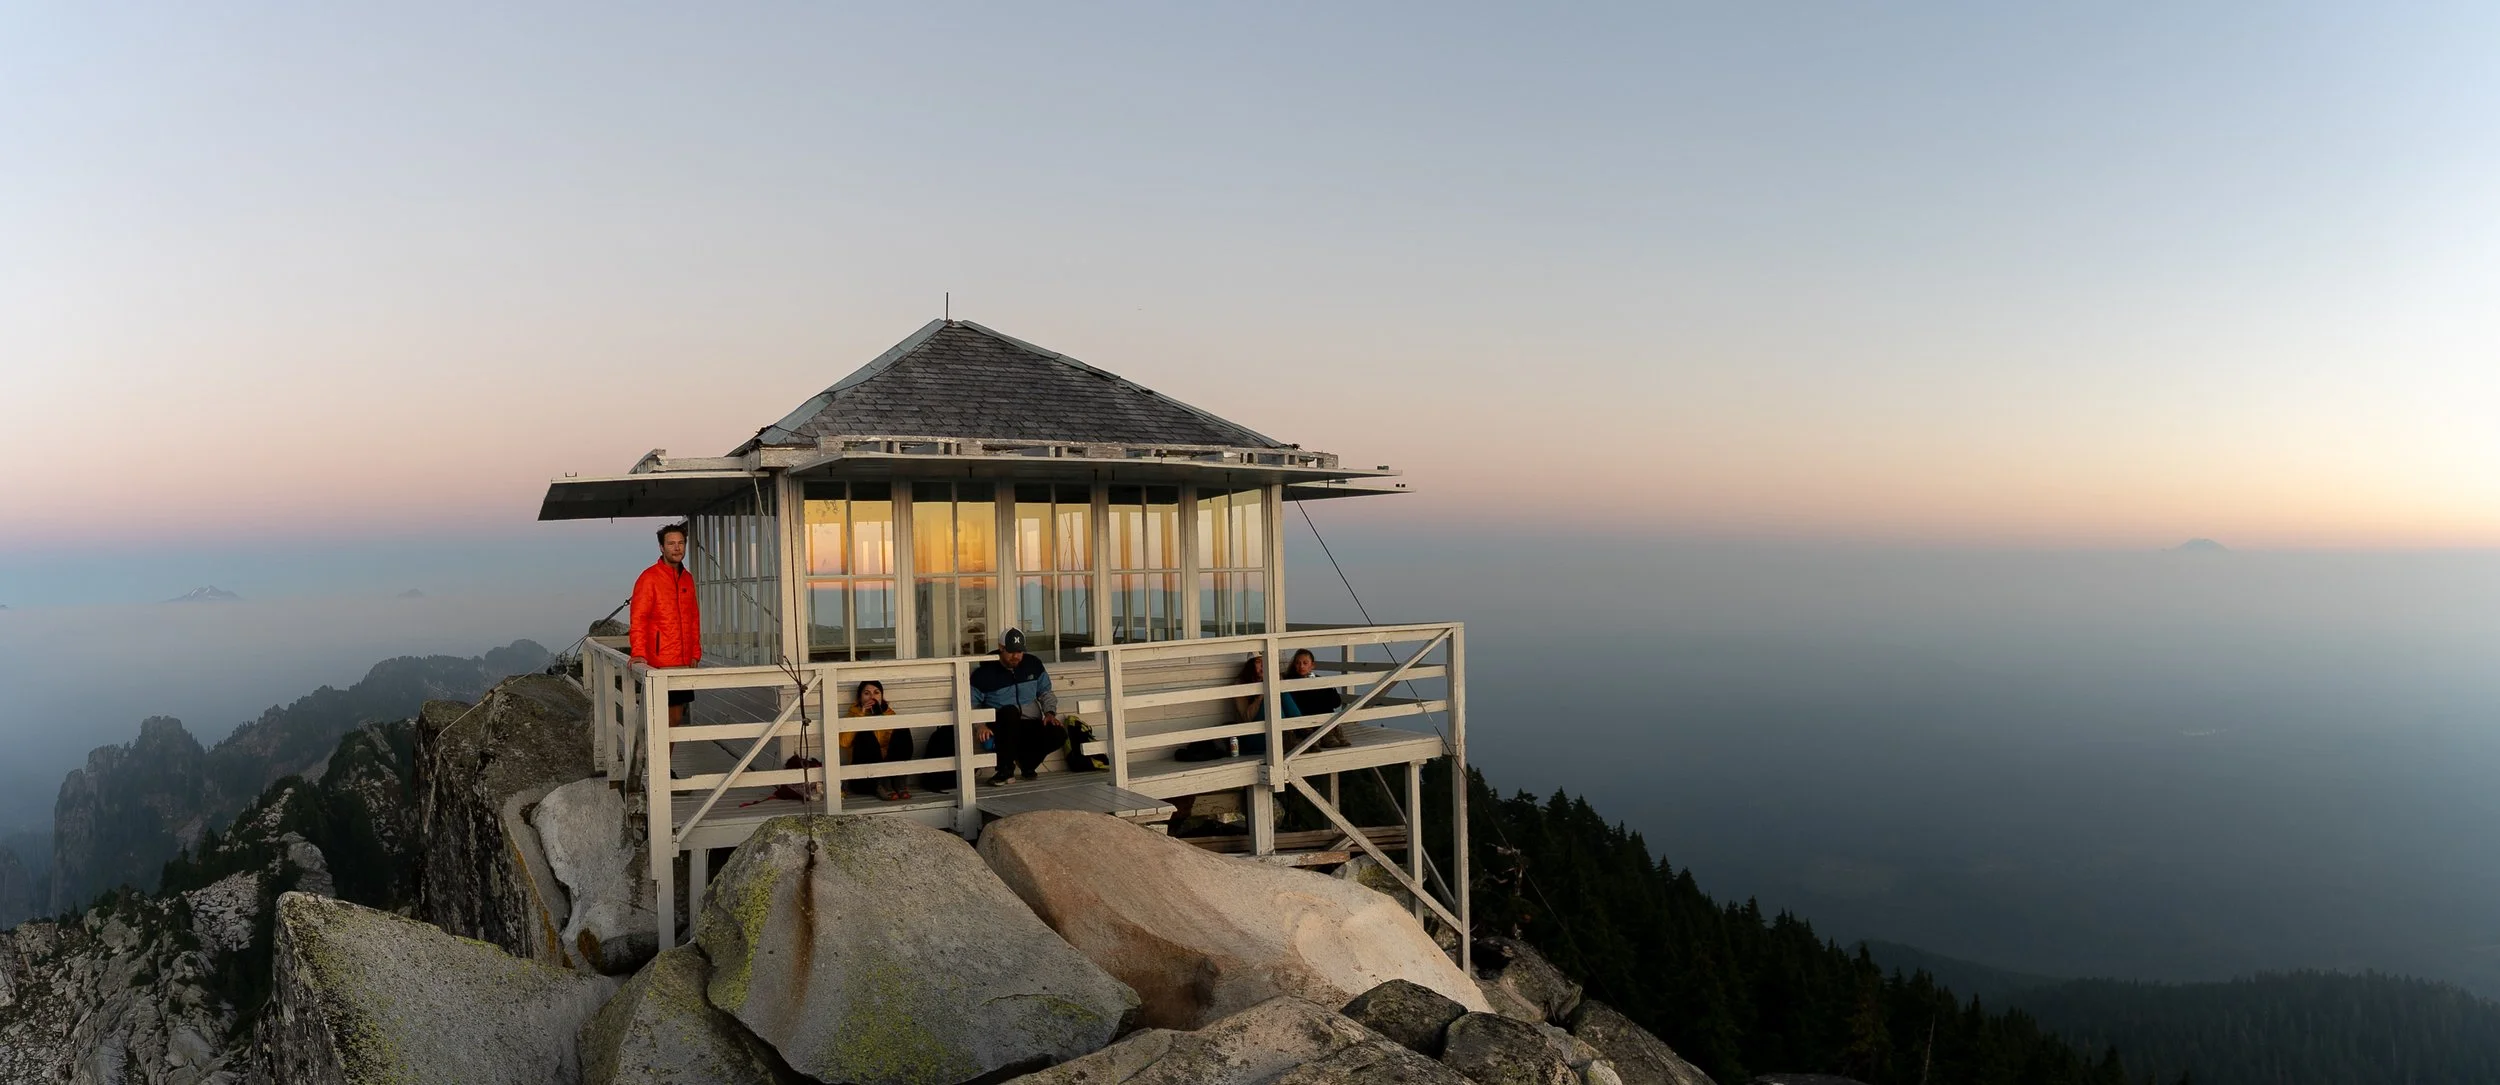
16. Mount Pilchuck Lookout
One of the state’s most rewarding moderate hikes, Mount Pilchuck combines a short but steep forest climb with expansive summit views and a historic fire lookout at the top. On a clear day, you can see from Mount Rainier all the way to the Olympics. I did this for sunset and it did not disappoint. The trail starts of muddy and does get very rocky in sections , so suitable footwear is essential.
Location: Mount Pilchuck State Park
Type: Out-and-back
Difficulty: Moderate–Hard
Distance: 8.5 km (5.3 mi)
Elevation gain: 700 m (2,300 ft)
Time: 3–4 h
Technical Aspects: Final rock scramble to the lookout; road to trailhead is unpaved but manageable for most cars.
Trailhead: Google Maps
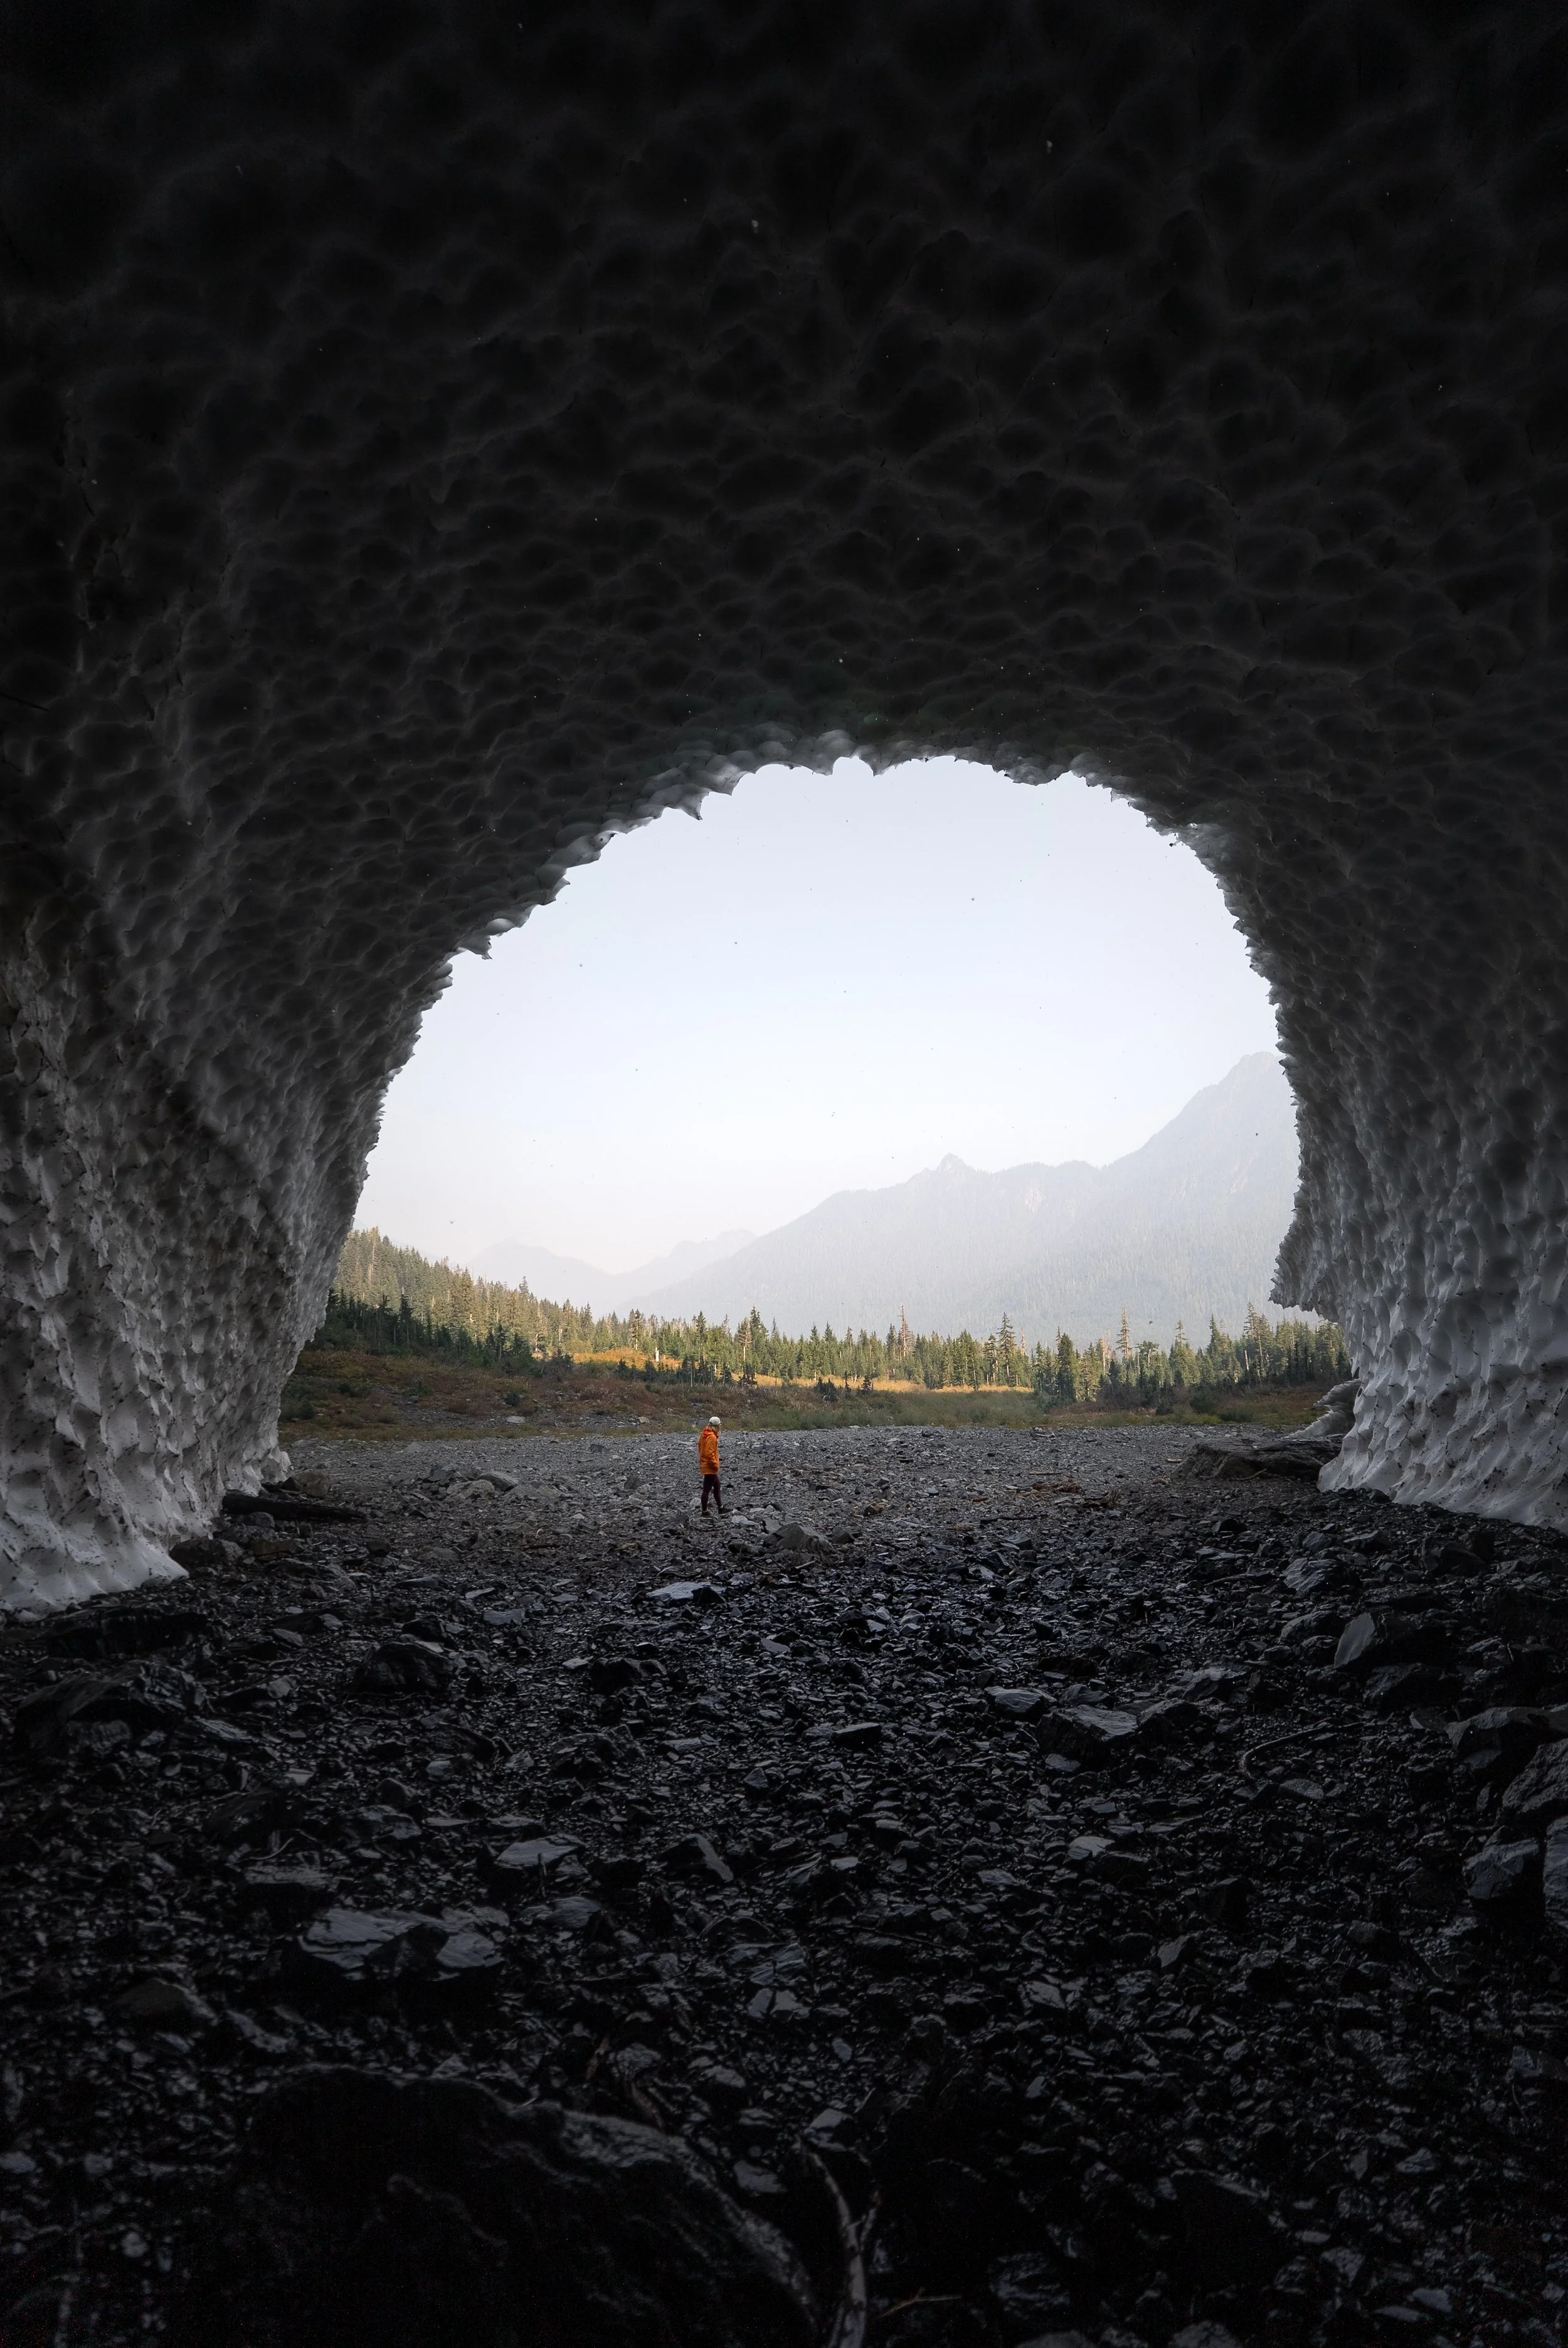
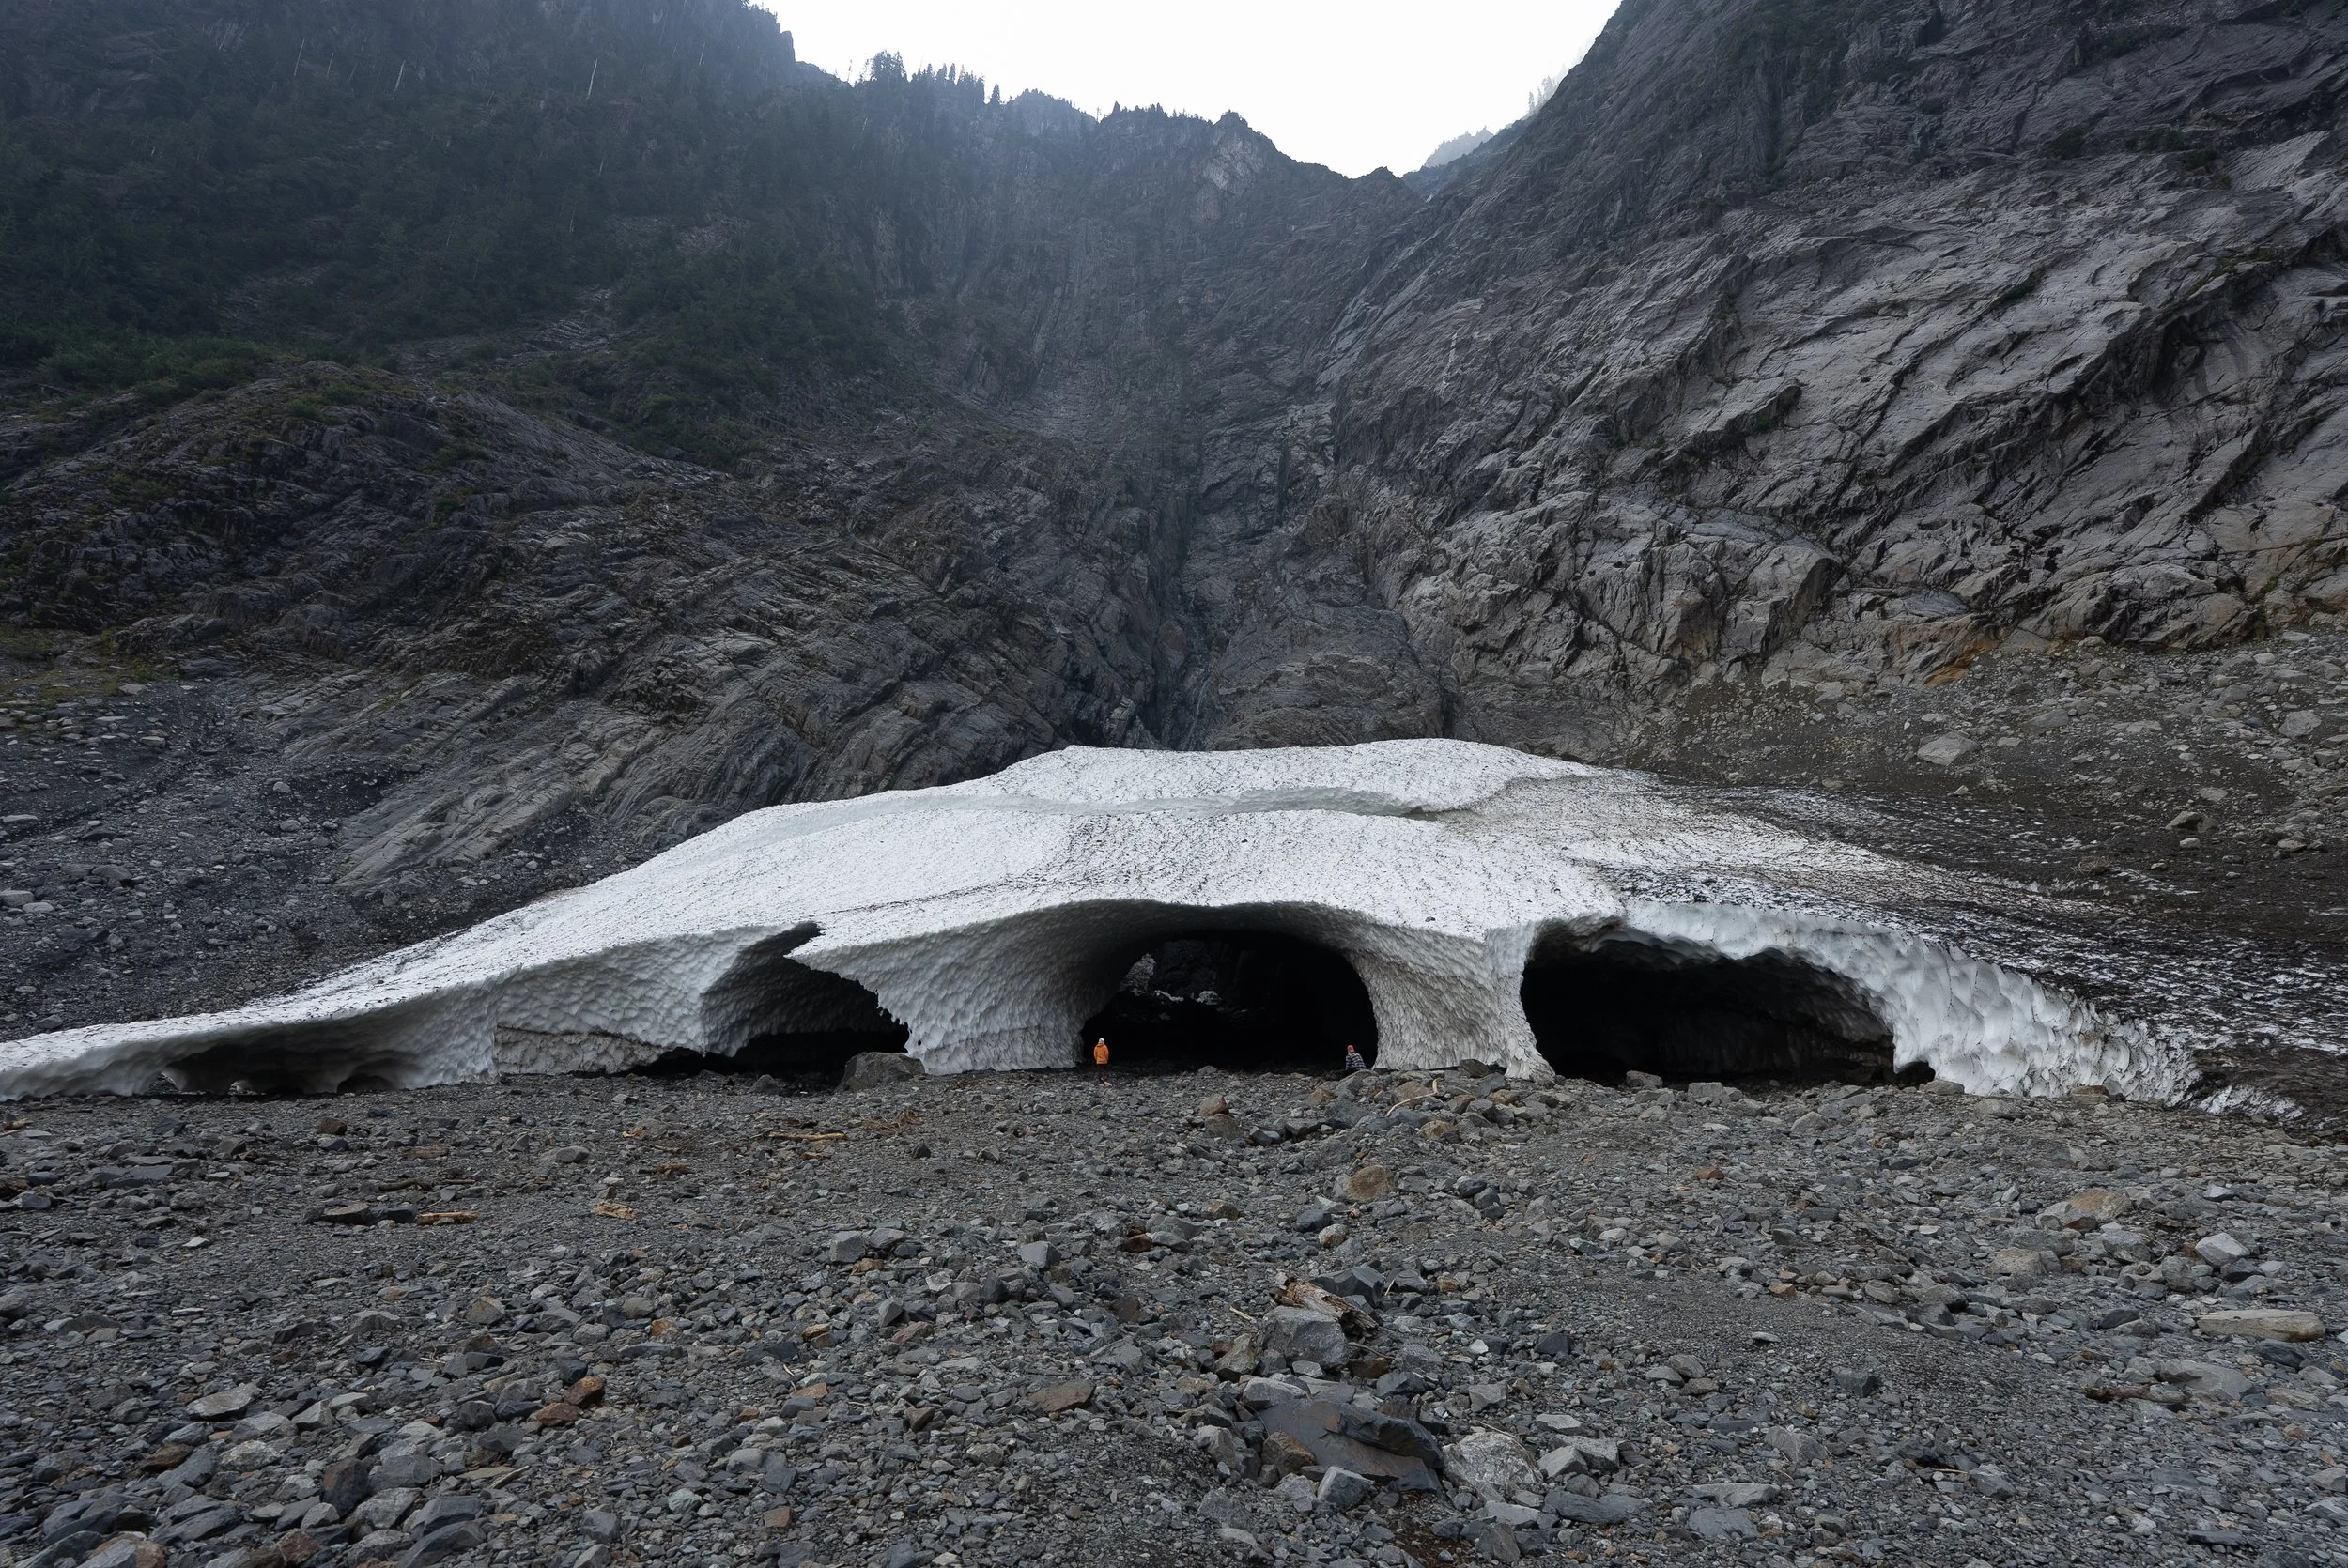
17. Big Four Ice Caves
A short, unique and very accessible trail that takes you to the base of Big Four Mountain. Here you will find one large ice cave with several entrances. It’s an easy, family-friendly walk with incredible photo opportunities. You shouldn't really enter the caves due to danger of collapse, but you probably will…
Location: Mountain Loop Highway
Type: Out-and-back
Difficulty: Easy
Distance: 5 km (3.1 mi)
Elevation gain: 70 m (230 ft)
Time: 1–2 hours
Technical Aspects: Flat, paved sections; always observe cave safety warnings.
Trailhead: Google Maps
18. Vesper Peak
A serious mountain hike for experienced trekkers, Vesper Peak offers steep ascents, boulder fields, and unbelievable panoramic views. The prominent summit overlooks Glacier Peak, Mount Rainier, and the surrounding North Cascades. It’s demanding but one of the most rewarding climbs in the region.
Unfortunately the smoke from wildfires meant I had to skip this hike, but I have been told by three separate residents of the PNW it’s an amazing hike
Location: Mountain Loop Highway
Type: Out-and-back
Difficulty: Hard
Distance: 13 km (8 mi)
Elevation gain: 1,200 m (3,940 ft)
Time: 6–8 h
Technical Aspects: Steep rock sections; not recommended in poor weather.
Trailhead: Google Maps
20. Three Fingers Lookout
The granddaddy of all fire lookouts in Washington.Perched atop a granite spire, this iconic lookout is one of the hardest to reach, but also the most awe-inspiring, set in one of the state’s most dramatic locations.
An epic and technical adventure reserved for experienced hikers, the route features rugged trails, exposed scrambles, and a narrow catwalk leading to a historic fire lookout. The panoramic views from the summit are simply unmatched.
Most people split the journey into two days, either spending the night in the lookout or at Tin Can Gap before the final push to the top.
Location: Mountain Loop Highway
Type: Out-and-back
Difficulty: Very Hard / Technical
Distance: 25 km (15.5 mi
Elevation gain: 1,700 m (5,580 ft)
Time: 8–12 h (or overnight)
Technical Aspects: Rope and ladder sections; exposure; 4x4 required to reach trailhead.
Trailhead: Google Maps
Pacific Northwest FAQ’s
-
The Pacific Northwest is best explored by campervan or car, depending on your travel style and budget.
In my opinion the best way to undertake this road trip would be in a Campervan.
It offers the most flexibility, alongside being significantly cheaper and easier than booking accommodation. In addition it is also the more adventurous and liberating option as you can wake up surrounded by nature. You can also cook your own meals to save costs and it’s easy to move between destinations without constant packing and unpacking
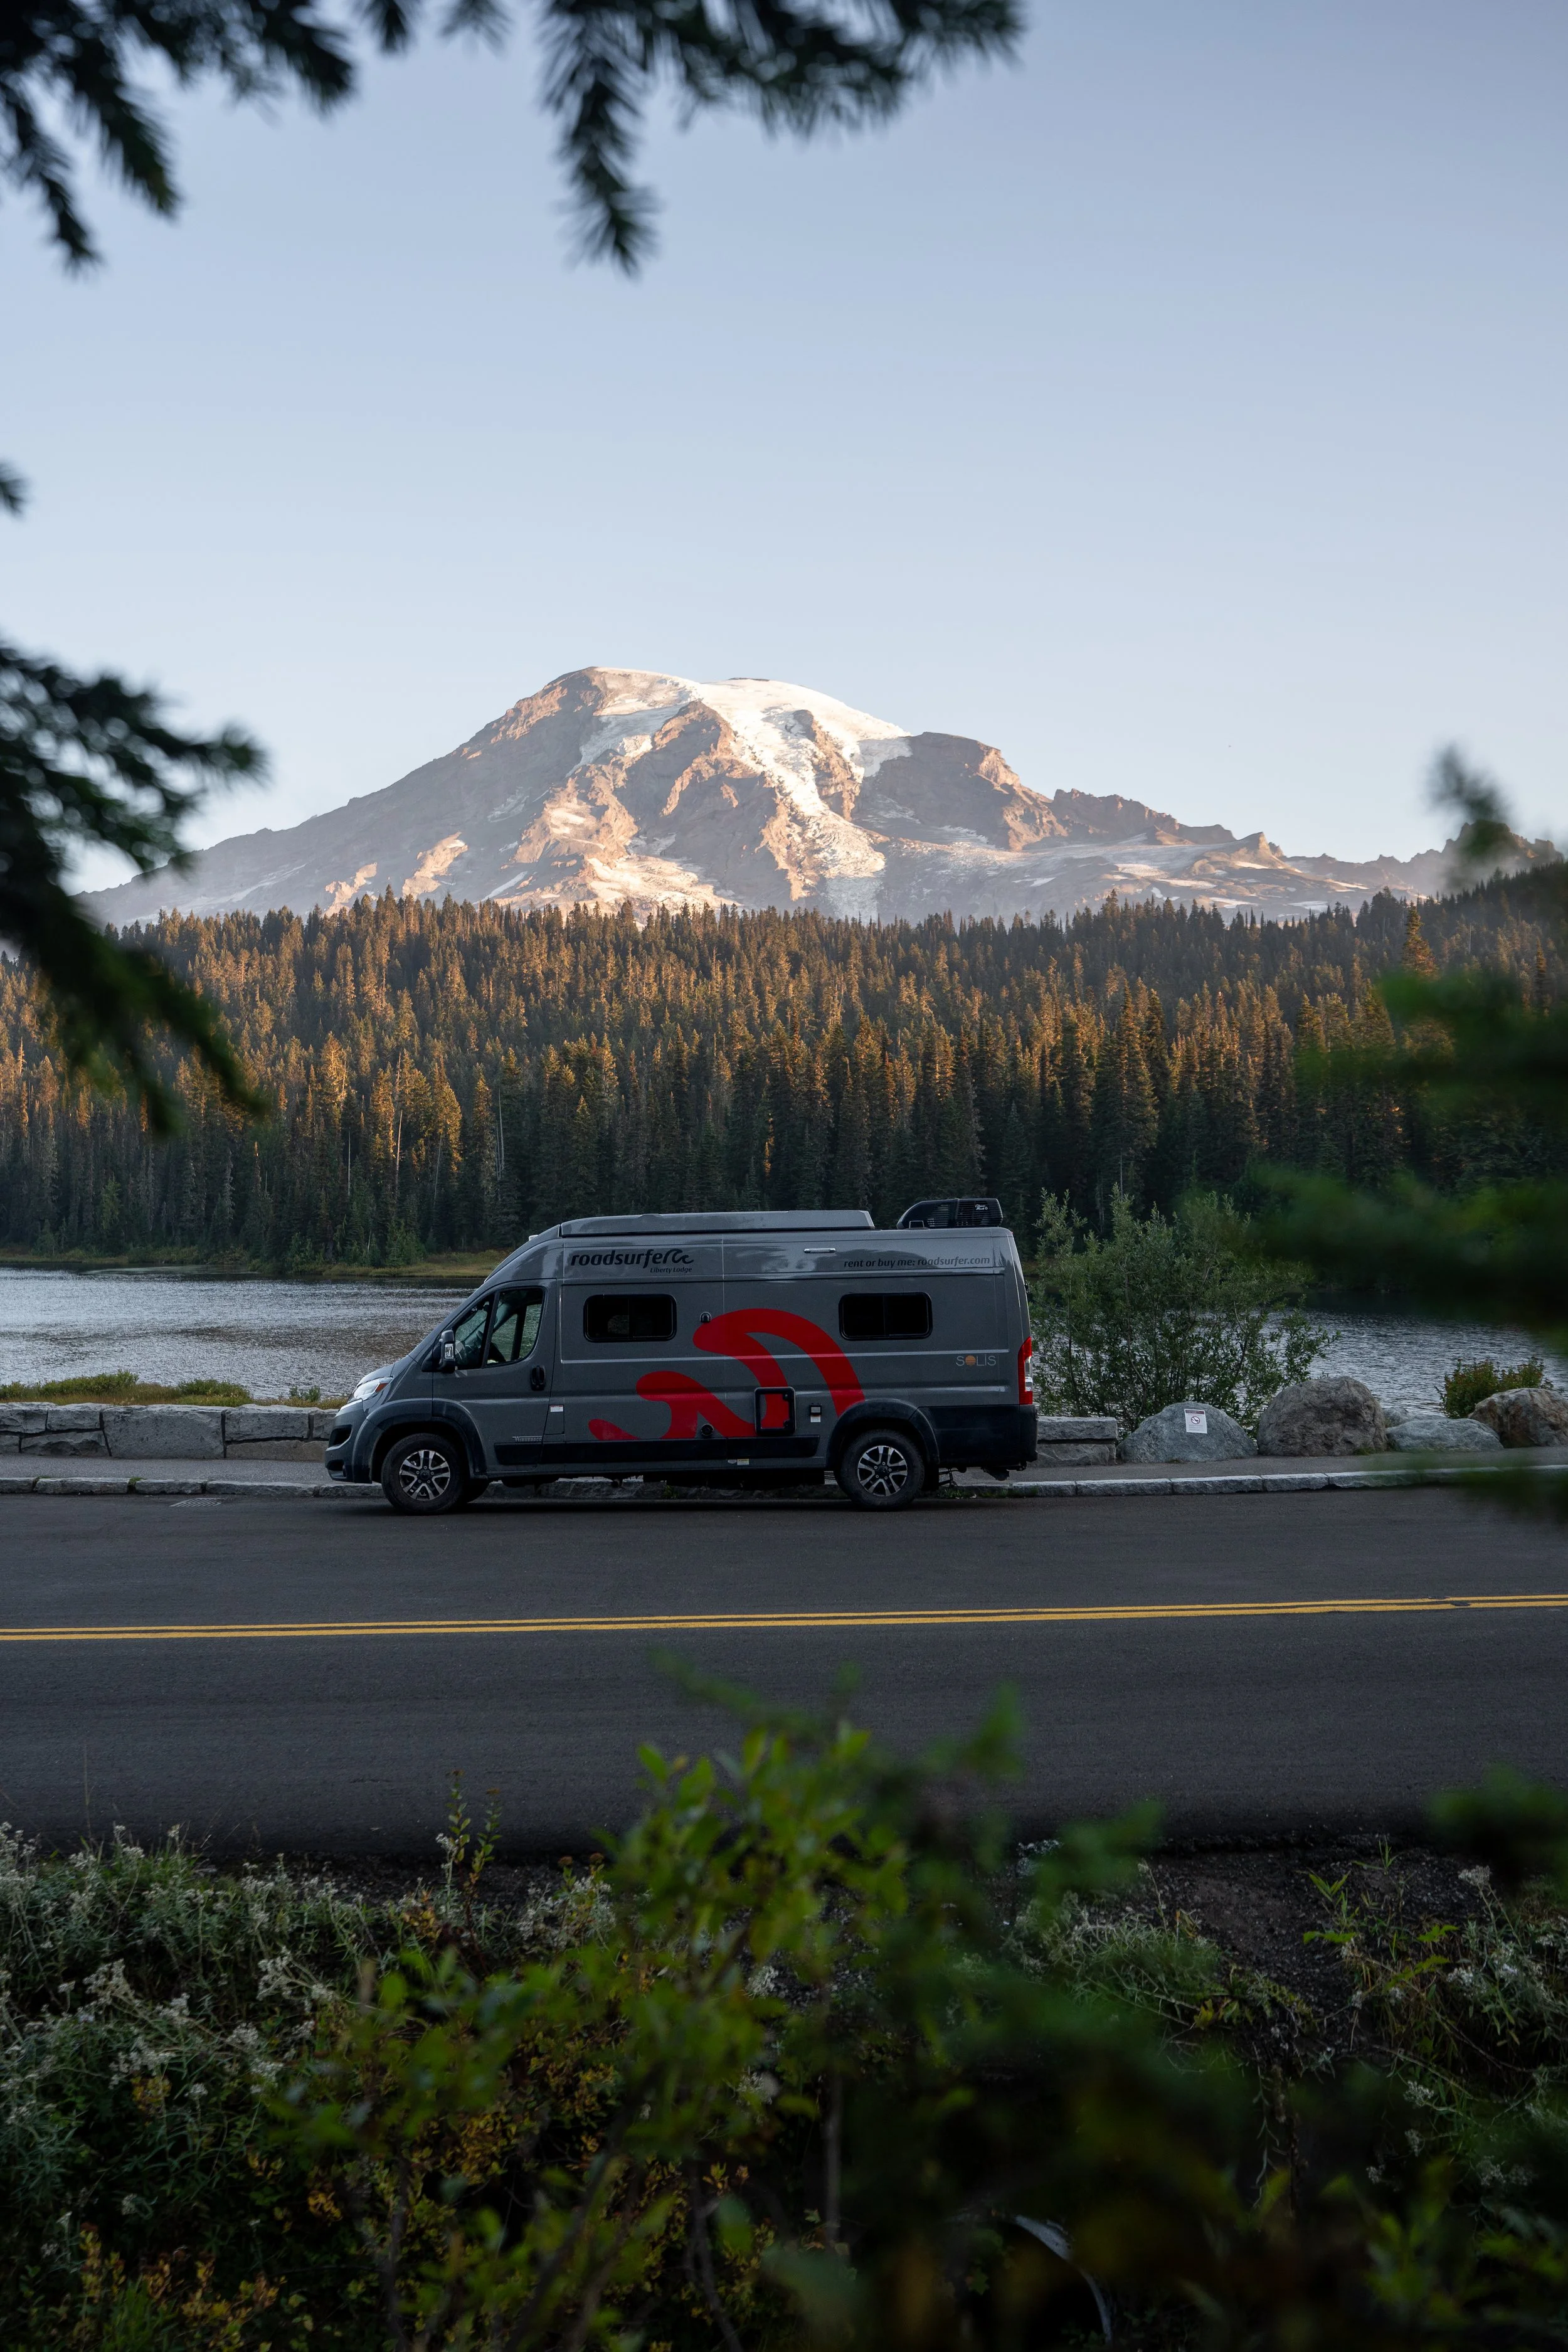
I used Roadsurfer for my trip and would definitely recommend that you do the same.
I have also used them for my road trip from Vancouver to Calgary, in Europe and also in the UK and have been almost faultless on every occasion.
They have recently opened in Seattle and have a fleet of different sized vehicles to choose from. They offer unlimited mileage (The road trip is over 2000 miles), a free second driver, and are pet friendly!
I had a liberty lodge RV ( what I also used in Canada) which is Ram Winnebago Solis.
It was incredibly spacious and it was the perfect companion on our road trip. Not only did it have everything we needed, but it was a please to drive alongside being reasonable size. This meant meaning it wasn’t a hassle to drive and we could park it in normal width space.
I also love that the van was a dark grey and the branding was dark and quite subtle, so much so that I got asked if it was my own van in serval occasions.
The automatic van can seat and sleep up to four people , and had everything we needed for the road trip including;
Two swivel seats alongside two fixed seats and a swivel table.
2 large sleeping areas (In the van and in the pop up roof)
Electricity connection and supply battery
Cruise control, reversing camera, Bluetooth, and Apple and android CarPlay
Spacious kitchenette area with a sink, two stove gas hob, fridge and lots of storage
Wet room a hot water shower and toilet
Parking Air conditioning unit which runs off a generator
Mosquito nets and black out blinds for all windows
Camping chairs, table and kitchen utility box.
Outdoor shower
Pick up in Seattle was incredibly easy, the depot is located a short journey from the airport and can be reached using the tram line. The staff were incredibly friendly and very helpful giving me suggestions for Seattle and the trip in general. The depot also has a help yourself section (including food and kitchen equipment) which other users have left and you can take with you.
The only thing which the van was lacking a proper frying pan, which we ended up buying from a Walmart for $15
You can get a discount on your next booking if you use the code ‘Knight10’
-
While you could tick off the highlights in 7-10 days, visiting the highlights of these two states (or just Washington) will require a significant amount of driving. We nearly covered 2,000 miles across 15 days.
The sweet spot for this itinerary is 2–3 weeks, which gives you time to balance driving days with hiking, sightseeing, and downtime.
With two weeks, you can comfortably visit all the main national parks and coastal regions at a relaxed pace. If you have three, you’ll have more flexibility to add rest days, wait out bad weather, or extend the road trip to explore more places in Oregon.
This blog focuses on a two week trip, but I do give suggestions on how to make it both shorter or longer.
-
The best time to visit the Pacific Northwest is between May to October, with each season offering a different experience:
May–June: Quieter and greener, with waterfalls at their fullest from spring melt. Lower-elevation trails are open, but snow can linger at higher passes. A good choice if you prefer lush forests to alpine hikes.
July–September: Peak hiking season. Expect long daylight hours, warm days, and the most reliable weather. Wildflowers bloom in the mountains, and almost every alpine trail is snow-free. This is also peak season for crowds so don’t expect solitude. Wildfires are also incredibly common, so your trip may have to be altered or you might not have the ideal air quality/visibillity.
Late September–October: This offers cooler temperatures and fewer crowds. However the weather can be quite varied, with wildfires still common and a higher chance of rain. Campsites do start to close as well so it can make finding accommodation more difficult. If you are looking for golden larches and autumn colours then early to mid October is the best time to visit.
Winter brings snow and closed passes, so I wouldn’t recommend visiting then.
We visited between the 10th and 25th September and lucked out with the weather.
We had almost two weeks of sunshine, with two mornings of rain across the entire trip. Aside from a foggy morning at Cannon beach and an afternoon and Mount Hood, the weather was almost perfect and we were able to see and do everything we planned.
There were however lots of wildfires, especially in the mountainous areas of Washington.
Because of these I decided to reverse the route, giving them time to calm ( which they thankfully did). The only days where smoke really affected our view was at Colchuck lake (Even then it wasn’t bad) and at on the last day in Mount Pilchuck.
-
You can just as easily rent a car then either choose to camp ( the cheapest option), stay in accommodation on route, or do a mixture of both.
This will be initially cheaper than renting a motorhome but could end up being more expensive depending on what your sleeping arrangements will be.
If you plan on camping you can bring or buy a tent and stay in the numerous campsites. This tends to range between $15 and $40 per night.
Accommodation in national parks and remote areas can be very limited , very expensive and gets booked up quickly in summer. So although a car may be cheaper than a van initially, the overall cost will most likely be higher.
If you are considering renting a car then I recommend discovercars.
Things to know before Visiting the Pacific NorthWEst
-
Because you’ll visit multiple National Parks, national forests, and state parks on your road trip, it’s helpful to know which passes cover what.
America the Beautiful Pass ($80 Annual / $30 daily): Covers entry to all U.S. national parks and most federal recreation areas, including trailheads in national forests. It effectively replaces the Northwest Forest Pass for this route.
Northwest Forest Pass ($30 / annual): Required at some trailheads managed by the U.S. Forest Service if you don’t have the America the Beautiful Pass.
Discover Pass ($45 annual / $10 daily): Needed for parking at Washington State Parks and Department of Natural Resources (DNR) lands. You’ll only use it if you plan to visit state park sites such as Snoqualmie Falls.
Oregon State Parks Day-Use Fee: Some Oregon parks, including Silver Falls, charge a $10–12 daily parking fee (campers staying overnight are exempt).
I recommended just buying the annual America the Beautiful Pass.
It will not only cover almost everything in this itinerary but will save you money as you will most likely spend more than 3 days in national parks. There’s no need to pre-order it, as you can buy it on entry to any national park or at the visitor centre. For a full guide on park fees, see the Washington Trails Association article on passes.
Skip the Northwest Forest pass and Discover Pass as and just pay Oregon’s day-use fees when needed.
Mount Rainier National Park
Between July and September, both Paradise and Sunrise require timed-entry reservations (7 a.m.–5 p.m.). Book early via recreation.gov.
-
As of 2025, a timed-entry reservation is required to access both the Sunrise and Paradise Corridors between 7 a.m. and 5 p.m. This system helps manage peak season crowds and applies during the following windows:
Daily: July 11 – September 1
Weekends and holidays only: September 2 – October 5
Reservations are required for each vehicle and can be booked through Recreation.gov. If your trip includes a visit to Sunrise or Paradise during these dates, it’s worth reserving your pass as early as possible to avoid disappointment.
You can access Sunrise or Paradise without a reservation if you:
Enter on foot or by bicycle
Enter by vehicle or motorcycle before 7 a.m. or after 5 p.m.
Have a camping reservation at White River Campground*
* White River Campground is first-come, first-served. You can enter the campground before 7 a.m. or after 5 p.m. without a timed-entry reservation. However, if you arrive between 7 a.m. and 5 p.m., a reservation is required.
Timed-entry reservations do not guarantee a campsite, but once you've secured a site, your camping permit allows re-entry to the Sunrise Corridor throughout your stay
-
Driving in the Pacific Northwest is straightforward. Vehicles drive on the right-hand side of the road, and the majority of routes are clearly marked and well maintained. You’ll encounter a mix of scenic coastal highways, winding forest roads, and mountain passes.
A 4x4 or SUV is useful (but not essential) for reaching some trailheads that are located deep on gravel forest service roads, especially in places like Mount Baker, the North Cascades, and certain access points in the Olympic Peninsula.
We completed the entire route in a standard campervan and managed just fine, although we did have to take it slow on a few rough sections.
Always check for road closures or delays if you're heading into forested or alpine areas. Snow, landslides, or fire conditions can temporarily block access. Road works are also common in the shoulder seasons and affected us on numerous occasions.
The most frustrating was the (now completed) roadworks in Mount Rainier. We couldn’t make the 70 minute drive between Paradise and sunrise, instead we had to do a 4 hour detour up and round the entire national park
-
If you're traveling between June and October, it’s essential to monitor wildfire activity. Wildfires are common in the Pacific Northwest and can significantly affect your trip. (They caused us to change the direction of our road trip at the last moment). They can often lead to;
Poor air quality and low visibility
Road or trail closures
Full region evacuations or detours
Useful resources for up-to-date wildfire information include:
Map of Fire (great for visualising active burn areas)
Stay flexible and prepared to change your route or skip a destination altogether if conditions worsen.
-
Mobile signal is unreliable in many areas of this trip, particularly in the mountains of Washington. While you can download offline maps in Google Maps, I also highly recommend Maps.me. This free navigation app allows you to download entire regions for offline use.
This is a free mapping service which allows you download entire regions for offline use. The app will show and allow you to search for toilets, fuel, places to eat, supermarkets, points of interest, mountains, alongside hiking trails. It also will allow you to navigate from place to place using vehicles and by foot. I have used it all over the world. It is particularly useful for hiking as it shows contour lines, hiking trails, viewpoints, and mountain peaks.
-
If you're traveling during summer or holiday weekends, book your campsites as far in advance as possible. National Parks like Olympic, Mount Rainier, and Crater Lake are extremely popular and can book out weeks ahead, especially on Fridays and Saturdays.
Reservations can be made at Recreation.gov, which covers most U.S. National Park campgrounds.
If you prefer flexibility, try to at least secure bookings for weekends, as It will take a huge amount of pressure off your route planning.
If you dont want to pre-book, seek out first come first served campsites and try to get there as early as possible.
If you are struggling for accommodation, go and speak to the Rangers on duty. They will do their best to help find you a campsite or a place to stay. Some campsites offer up no shows after a certain time ( we got lucky with this at Silver state on a Saturday).
-
Before setting off on your Pacific Northwest road trip, I highly recommend downloading the following two camping apps. Both were absolutely invaluable during our journey, especially in offline mode when we didn’t have signal in the mountains or deep forest roads.
🏕️ The Dyrt
An all-in-one campground finder with over 500,000 listings across the U.S., The Dyrt is one of the best tools for planning and adjusting your camping itinerary. The free version gives you access to campground reviews, photos, site descriptions, and user tips. Dyrt PRO (about $36/year) offers
Offline maps
Public land overlays to show where BLM and USFS land begins (ideal for free camping)
Trip planning tools to map out your route
Camping discounts at hundreds of sites
Offline access alone saved us more than once in Washington’s backcountry. Even better, they offer a 30-day free trial of PRO, so you can use the full version just for your trip if you like.
🗺️ iOverlander 2.0
While The Dyrt focuses on campgrounds (paid and free), iOverlander is all about the real nitty-gritty road trip life. It’s a community-driven map of dispersed campsites, informal overnight spots, water fill stations, dump stations, and all sorts of other helpful resources for vanlifers and overlanders.
The info honest, and super practical, often updated by fellow travelers and even park officials. We found some amazing free pull-outs and dispersed spots through this app that weren’t listed anywhere else.
The free version lets you:
See user-submitted campsites (including photos, comments, and GPS coords)
Download one region at a time for offline access
The Pro version (around $6/month or $60/year) lets you download multiple offline regions and removes ads.
🧠 Tip: If there are two of you on this road trip and you want to save some money, split the regions, one person downloads Washington, the other Oregon. We did this and it worked perfectly.

Final Thoughts
Washington’s trails are some of the most diverse and rewarding in North America, from rugged coastlines to volcanic peaks, tranquil lakes, and alpine meadows glowing gold with larches. Whether you’re chasing summits, fire lookouts, or quiet forest walks, there’s a hike here that will leave you speechless.
If you’re new to hiking in Washington, start with moderate routes like Hurricane Hill, Bench and Snow Lakes, or Chain Lakes, then work your way up to bigger hikes like Colchuck Lake, Vesper Peak and Sahale Arm.
Remember to check recent trail reports, weather and fire forecasts, wear and carry the appropriate kit and leave no trace.
If i had to pick some of my favourite hikes in washington from this list they would be
Hurricane Hill - The bes beginner hike on this list
Maple Pass Loop – The best overall hike for variety, views, and a rewarding loop.
Pinnacle Peak – A short but technical trail with epic sunset views over Mount Rainier.
Fremont Lookout – The best fire lookout hike, especially at golden hour.
Colchuck Lake – The best Lake hike, close second was Bench Lake
Help support my website
I created and run this free website in order to help inform, amaze, inspire people to get outside and explore the adventurous side of the UK.
I have limited ads in order to make your experience on this website far more enjoyable.
If you’d like to support this website, you can use the affiliate links below to book your accommodation or transport. These come at no extra cost to you, but help keep this site running.
Book your vehicle using Discover Cars
Book your accommodation using Booking.com
If you are feeling generous you can also Buy me a Coffee to say thank you, and give me a follow on social media.
Thank you, and if you have any questions, leave them in the comments below or drop me an email!
