
How to Prepare for a Hike | 6 Essential Things I Always Do
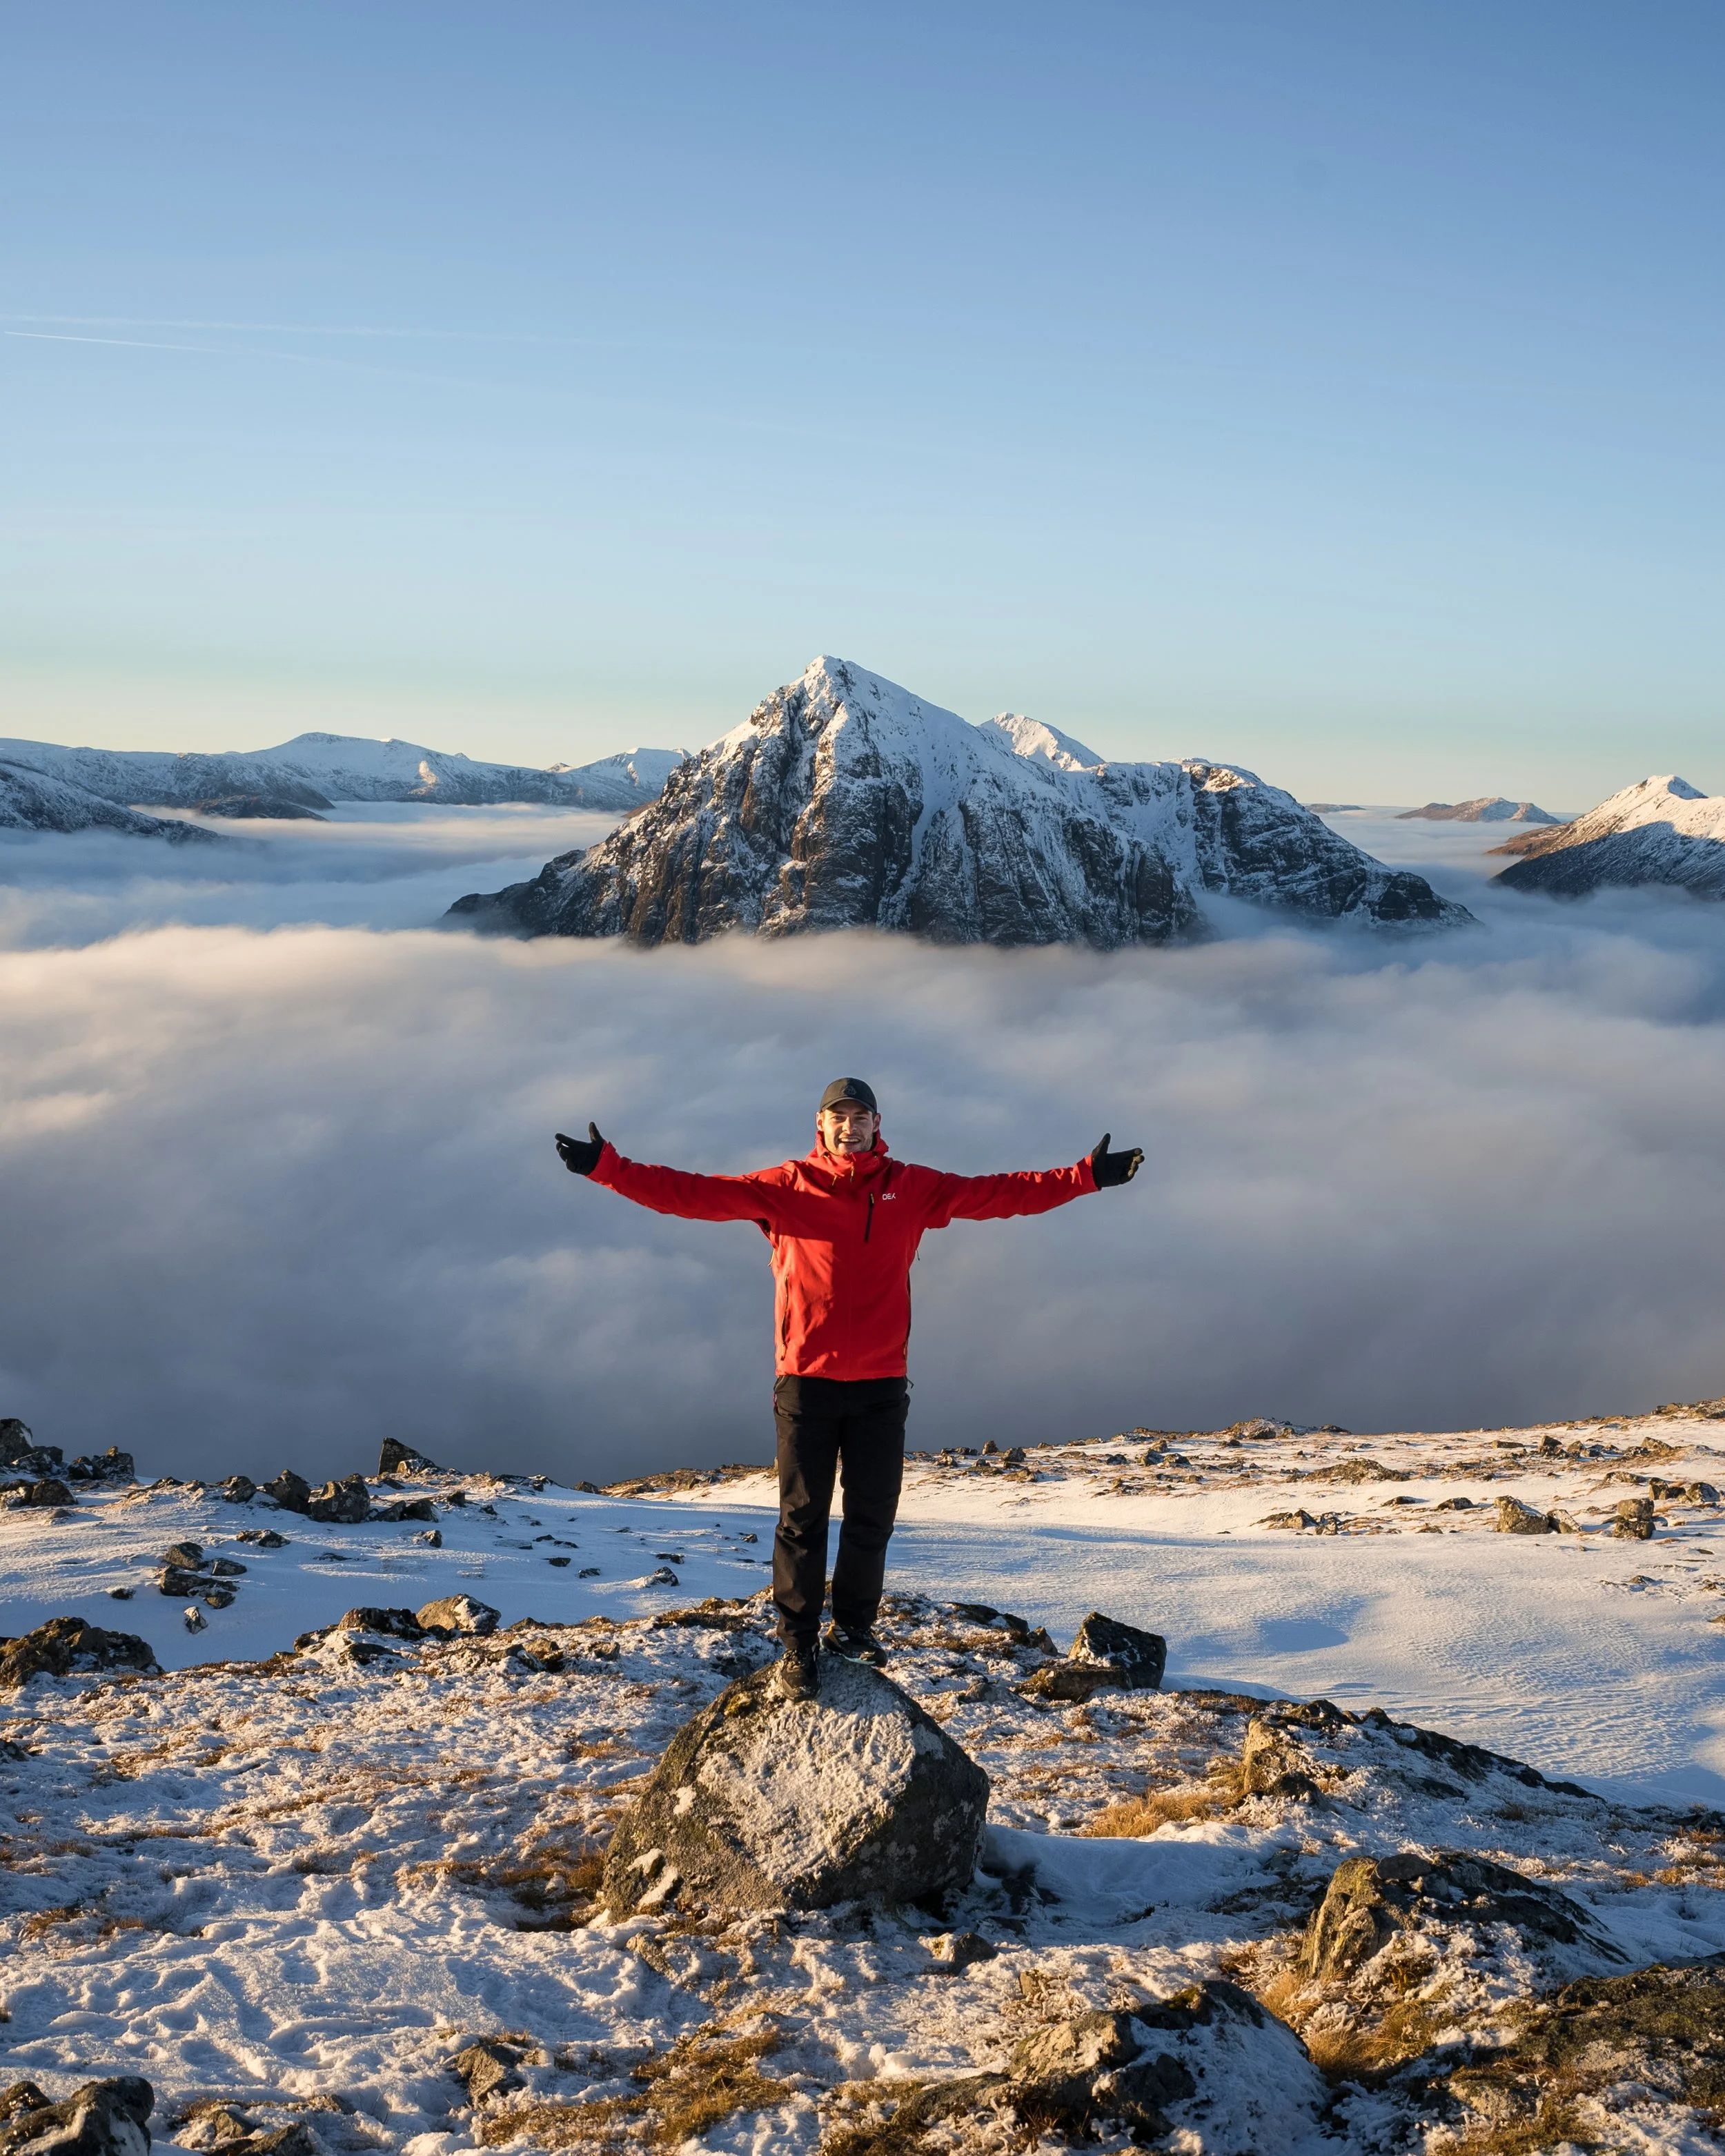
Heading off for a hike in the mountains of the UK is one of the most rewarding and incredible things you can do. Not only does it provide a proper physical workout, it is great for your mental health, gives you a huge sense of achievement, epic views, and memories that will last a lifetime.
Although they are not the highest in the world, our mountains in the UK are unpredictable, exposed and, if you get complacent, unforgiving, especially if you head out unprepared.
Over the years I have developed a simple routine that I follow before every single hike. It is nothing fancy, just common sense and experience. It keeps me safer, makes the day more enjoyable, and massively reduces the chances of something going wrong.
Whether I am heading into Snowdonia, the Lake District, the Brecon Beacons or further north into Scotland, these six things never change. So if you are heading into the mountains, you should probably be doing them too.
1. Check and Monitor the Weather
First thing I do is check the weather for the specific mountain or mountain range I want to hike.
Why? Well, if the weather is rubbish, I will not bother heading into the mountains.
I hike first and foremost for enjoyment, and the views are a big part of that. I’m not a sadist, so I would rather not spend the day hiking in bad weather to see sod all.
If I just want to spend time in nature or get outside, there are plenty of lower level alternatives if the mountains are going to be miserable or dangerous. And if I just want a workout, I will head to the gym or go for a run.
You also have to remember, you are not just putting yourself at risk if you head out in bad weather. If something does go wrong, it is Mountain Rescue, who are unpaid volunteers, that have to come out and rescue you. That means they are putting their lives at risk.
Below are four things I look for in a forecast. These have the biggest impact on both safety and enjoyment and will also dictate what clothing and equipment I need to bring.
Visibility
Chance of precipitation
Wind speed and direction
Feels like temperature
I usually check and monitor the weather several days before a hike, right up until I set off. Checking early also gives you an idea of the ground conditions, whether it will be wet, icy or snow covered.
I check multiple sites and there are three in particular I use.
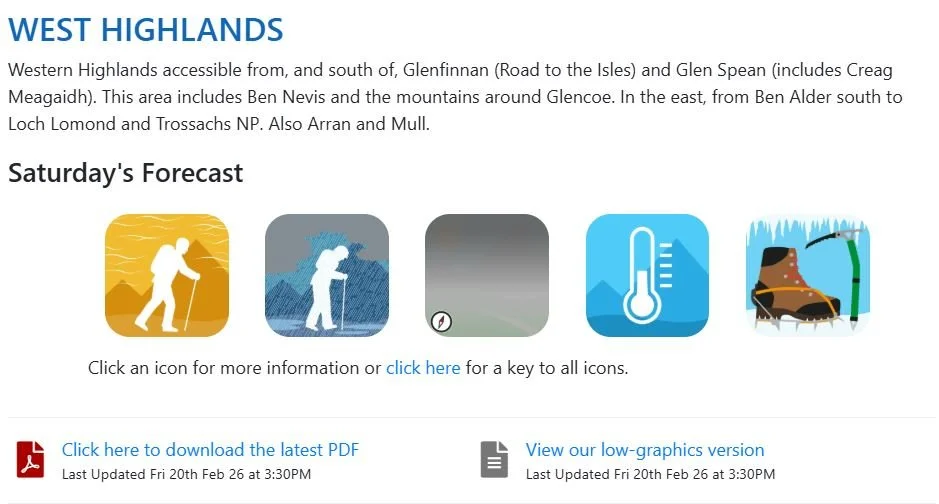
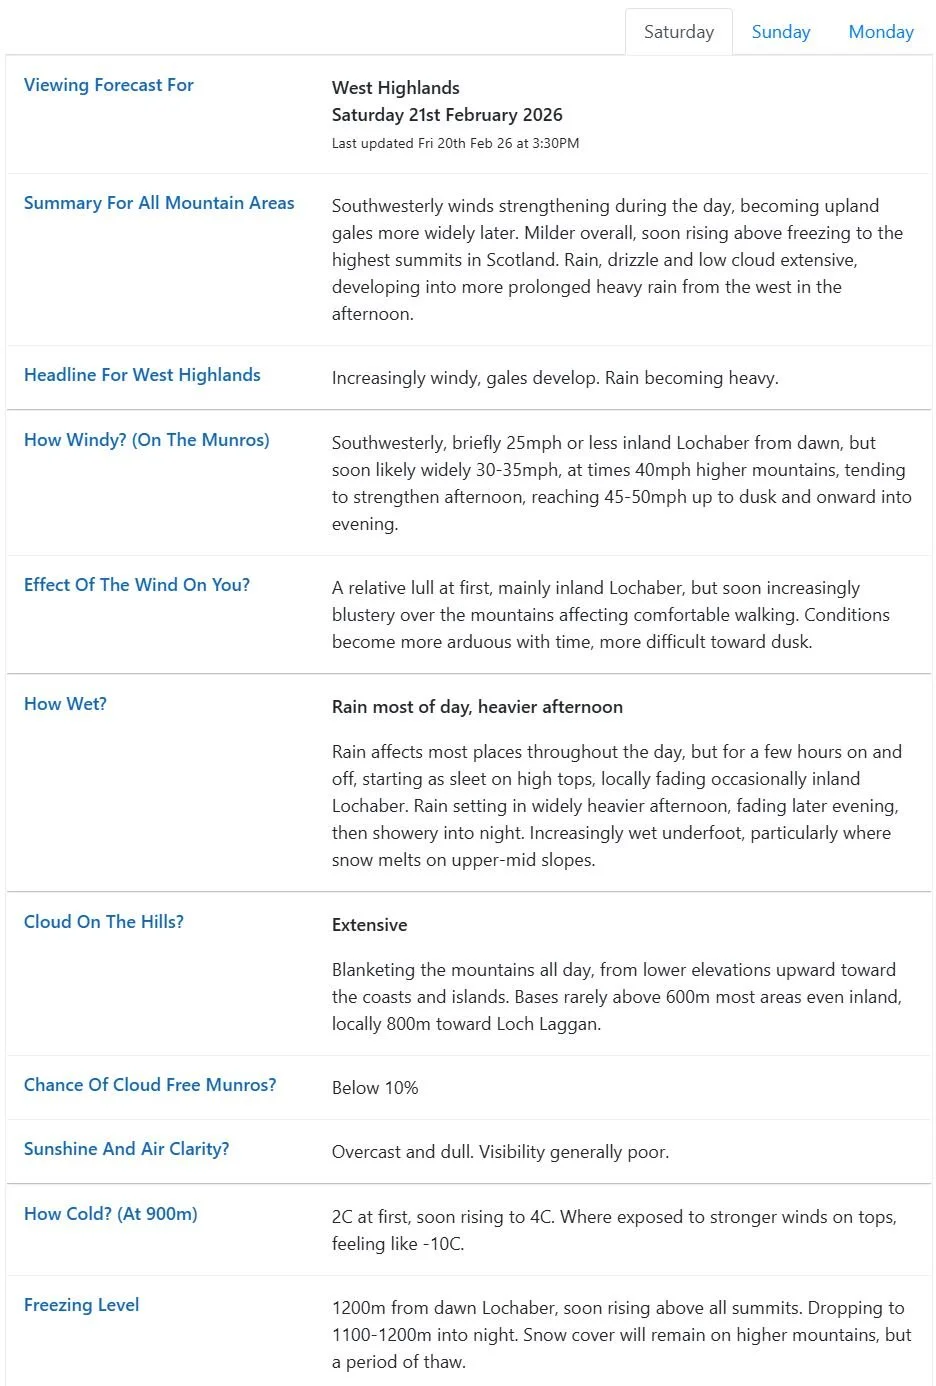
MWIS - Mountain Weather Information Service
This is usually my first stop as it gives the forecasts for 10 mountainous regions of the UK. So I can get an overview for the weather in an certain area. It is just a website, but you can save it to your home screen. The MWIS offers
Three-day forecasts updated daily
Written specifically with mountain users in mind
Explains the impact of the weather the hiker
Simple and easy to read
Includes helpful graphics

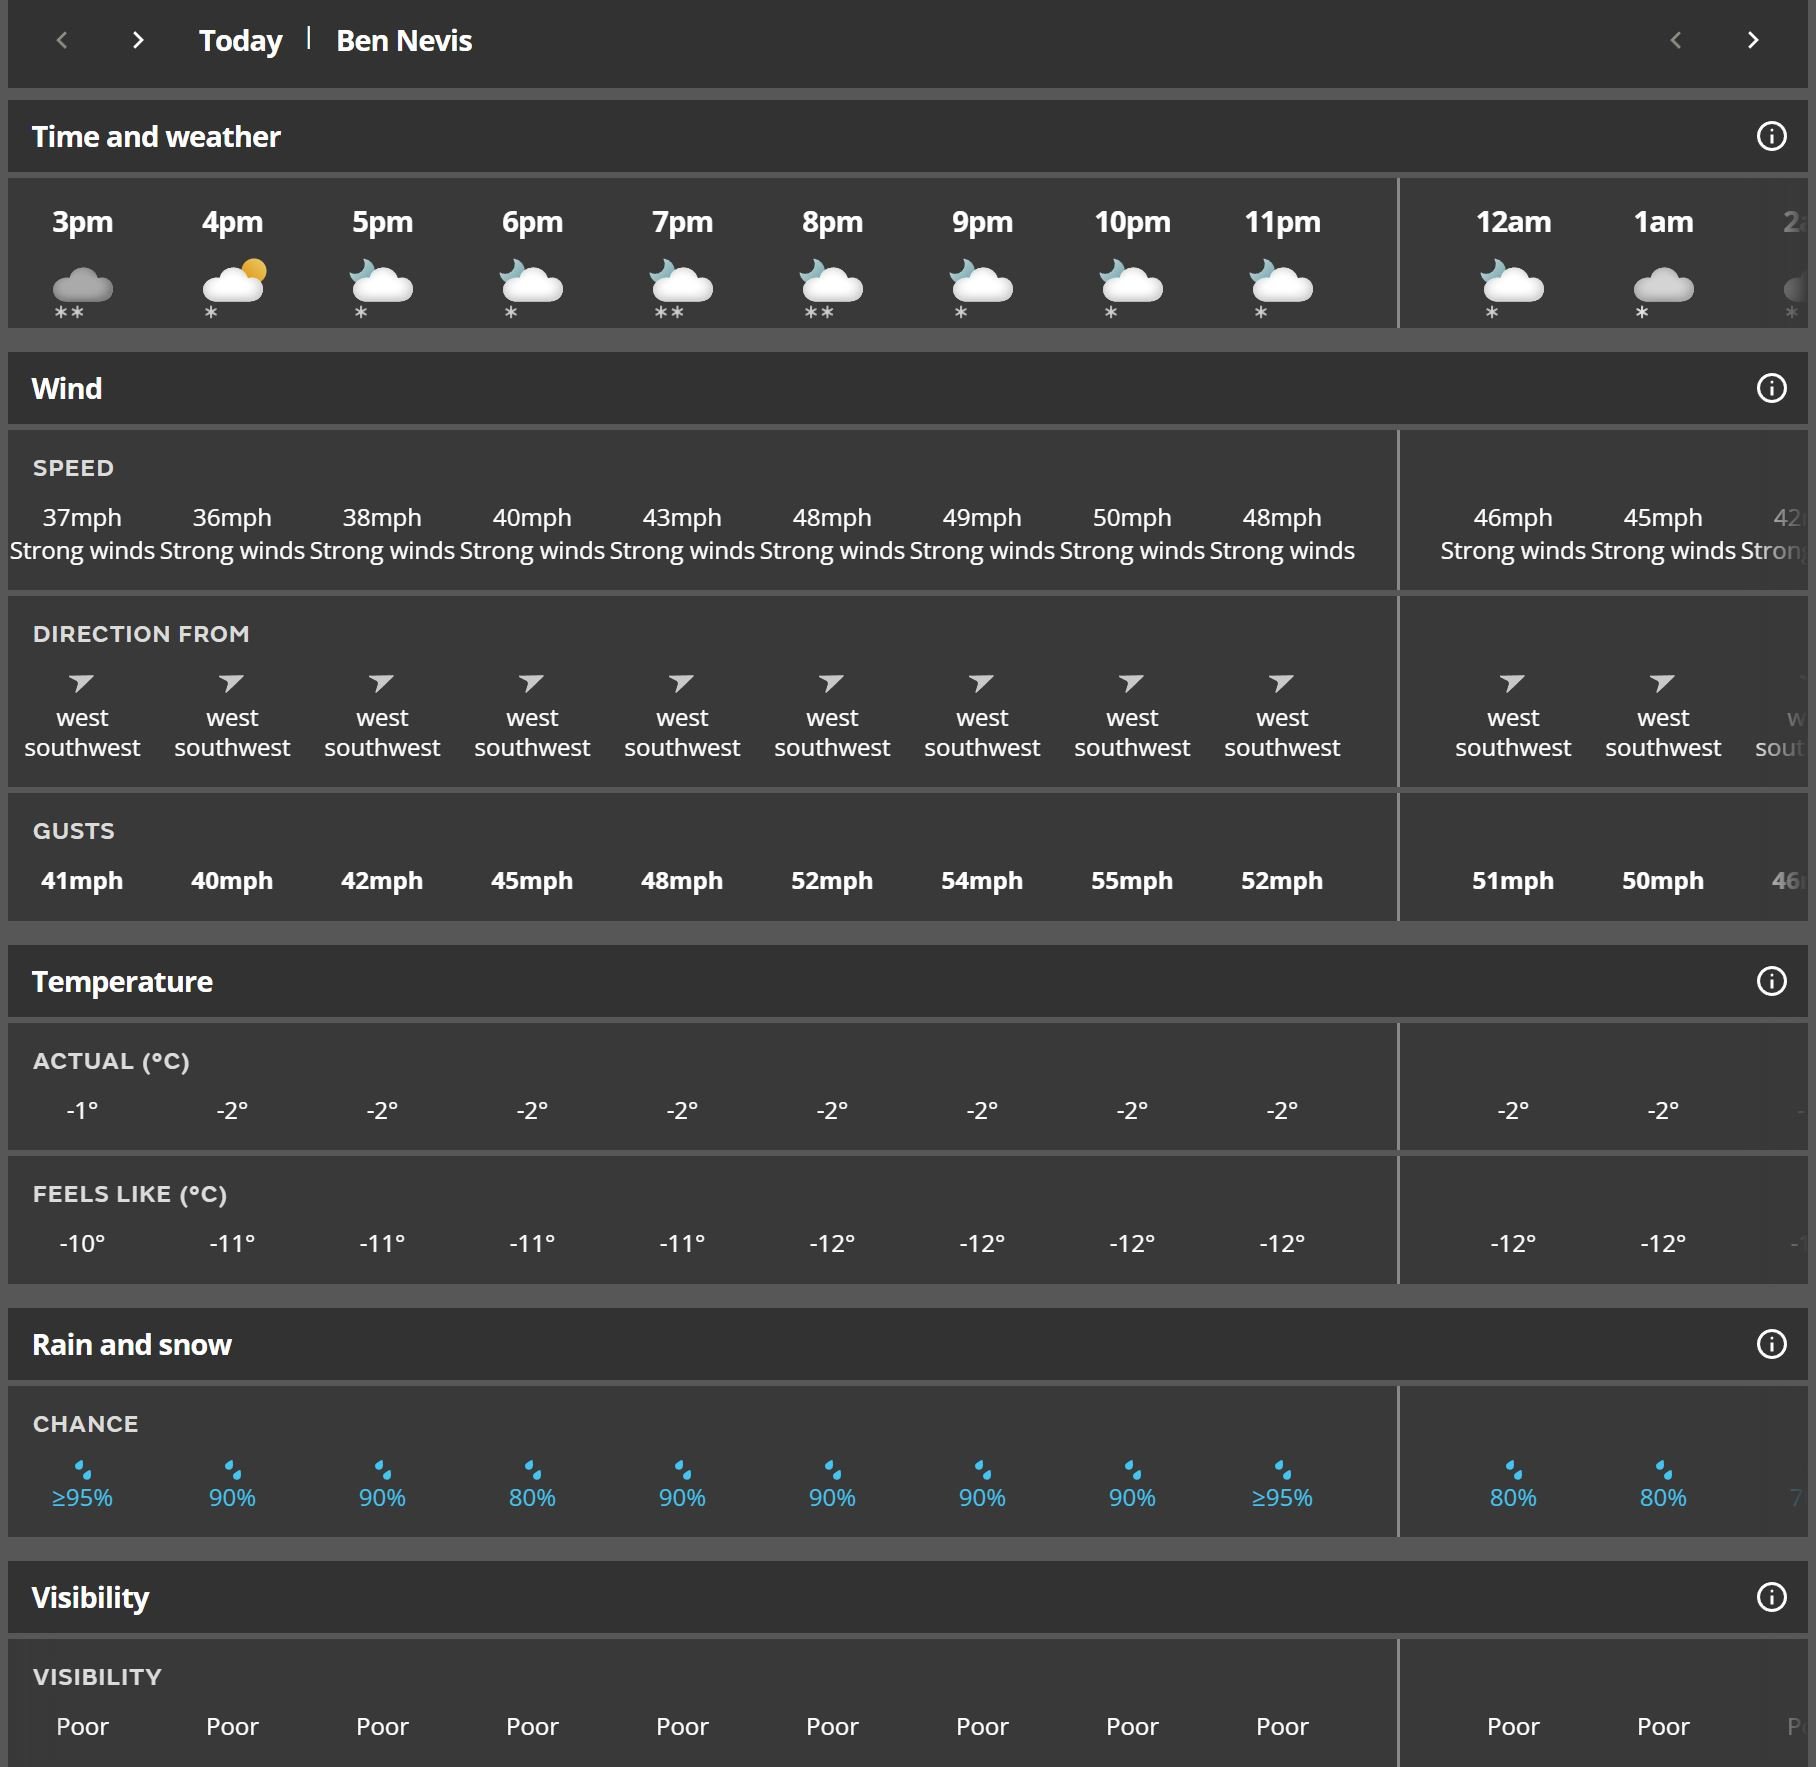
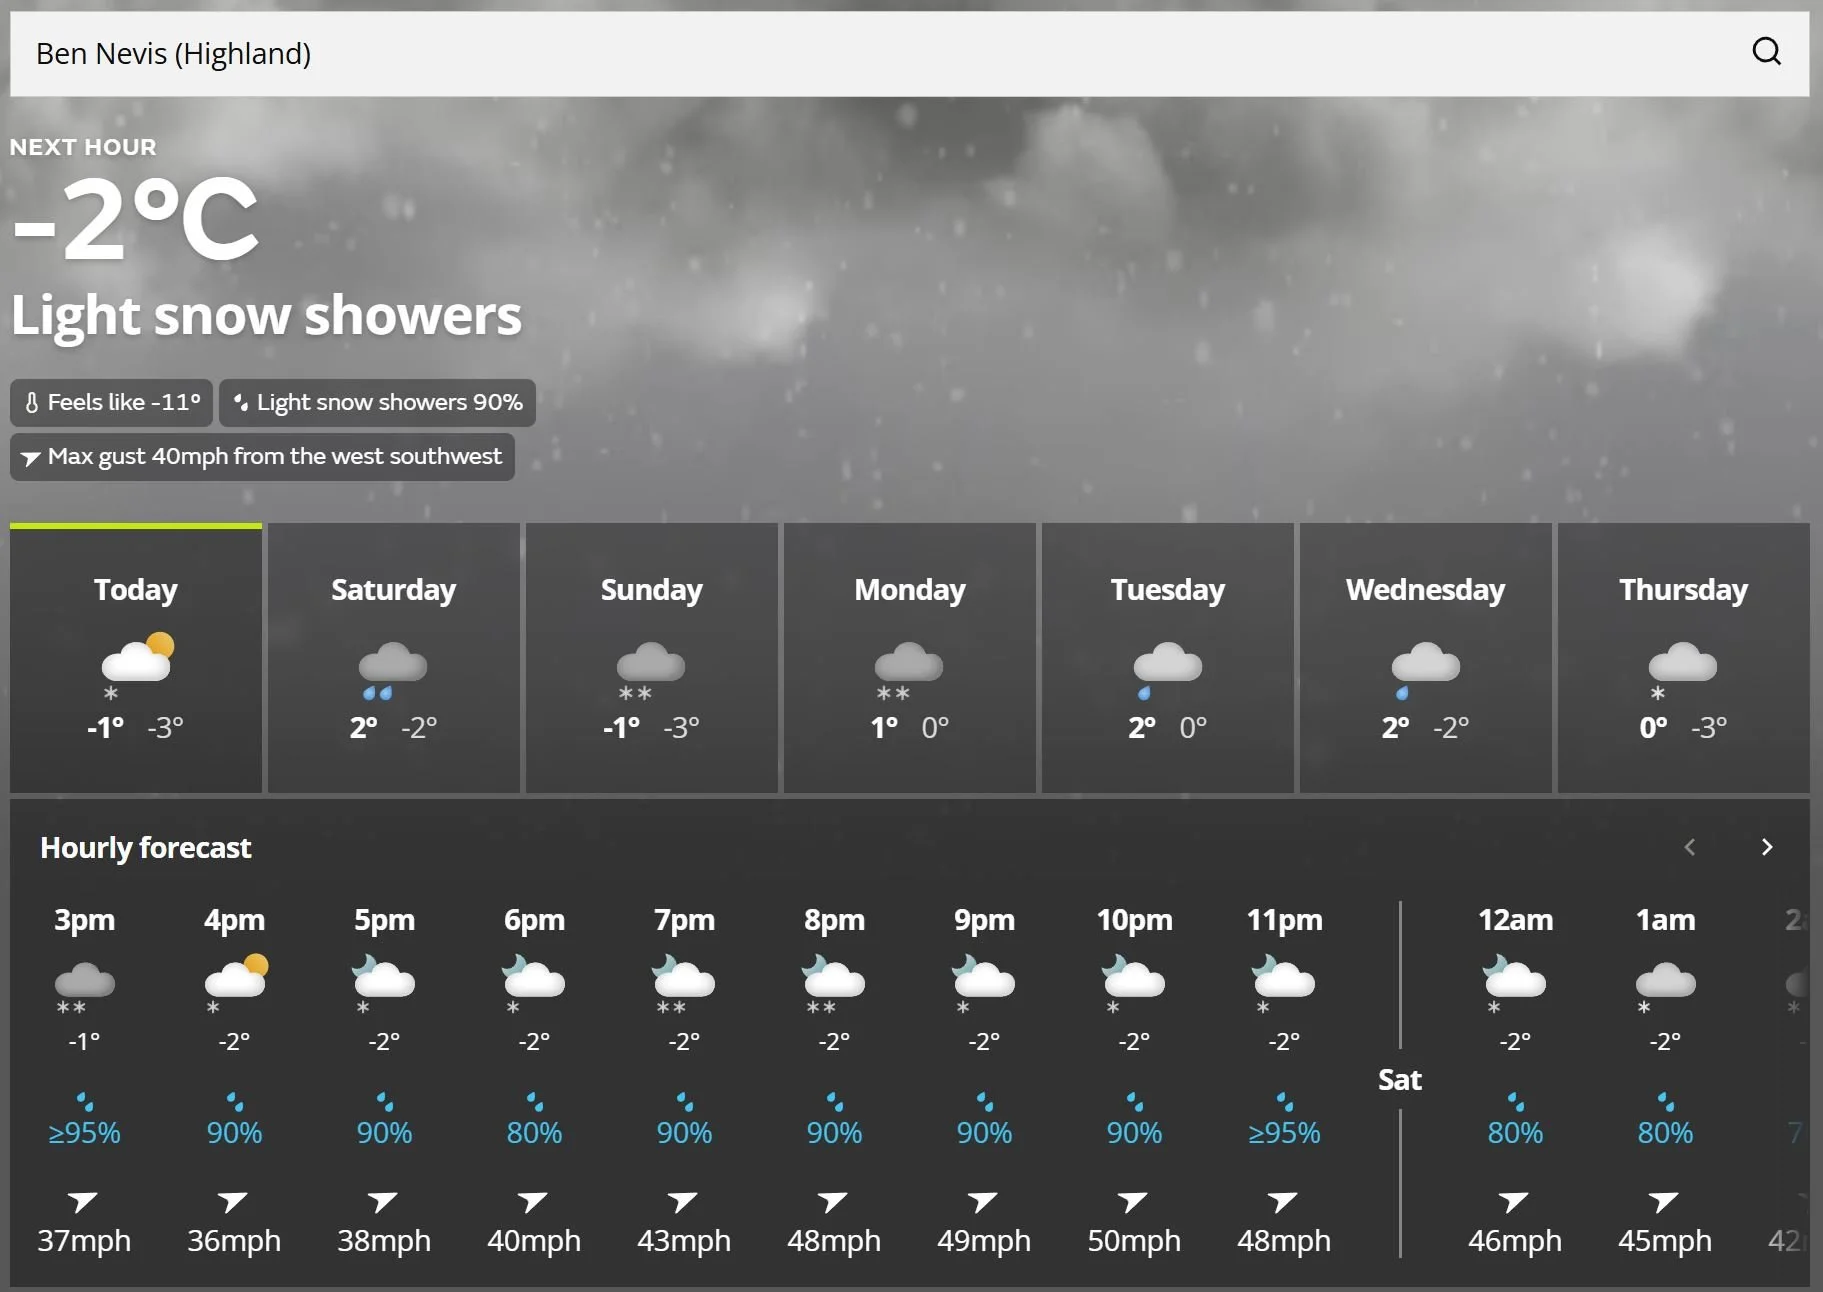
Met Office
I then head to the Met Office to cross check the forecast. They are the official weather provider of the UK, so tend to be the ‘most’ accurate’.
Allows you to search specific peaks and locations
Clear graphics and breakdowns
Five-to-seven-day outlook
App and website available
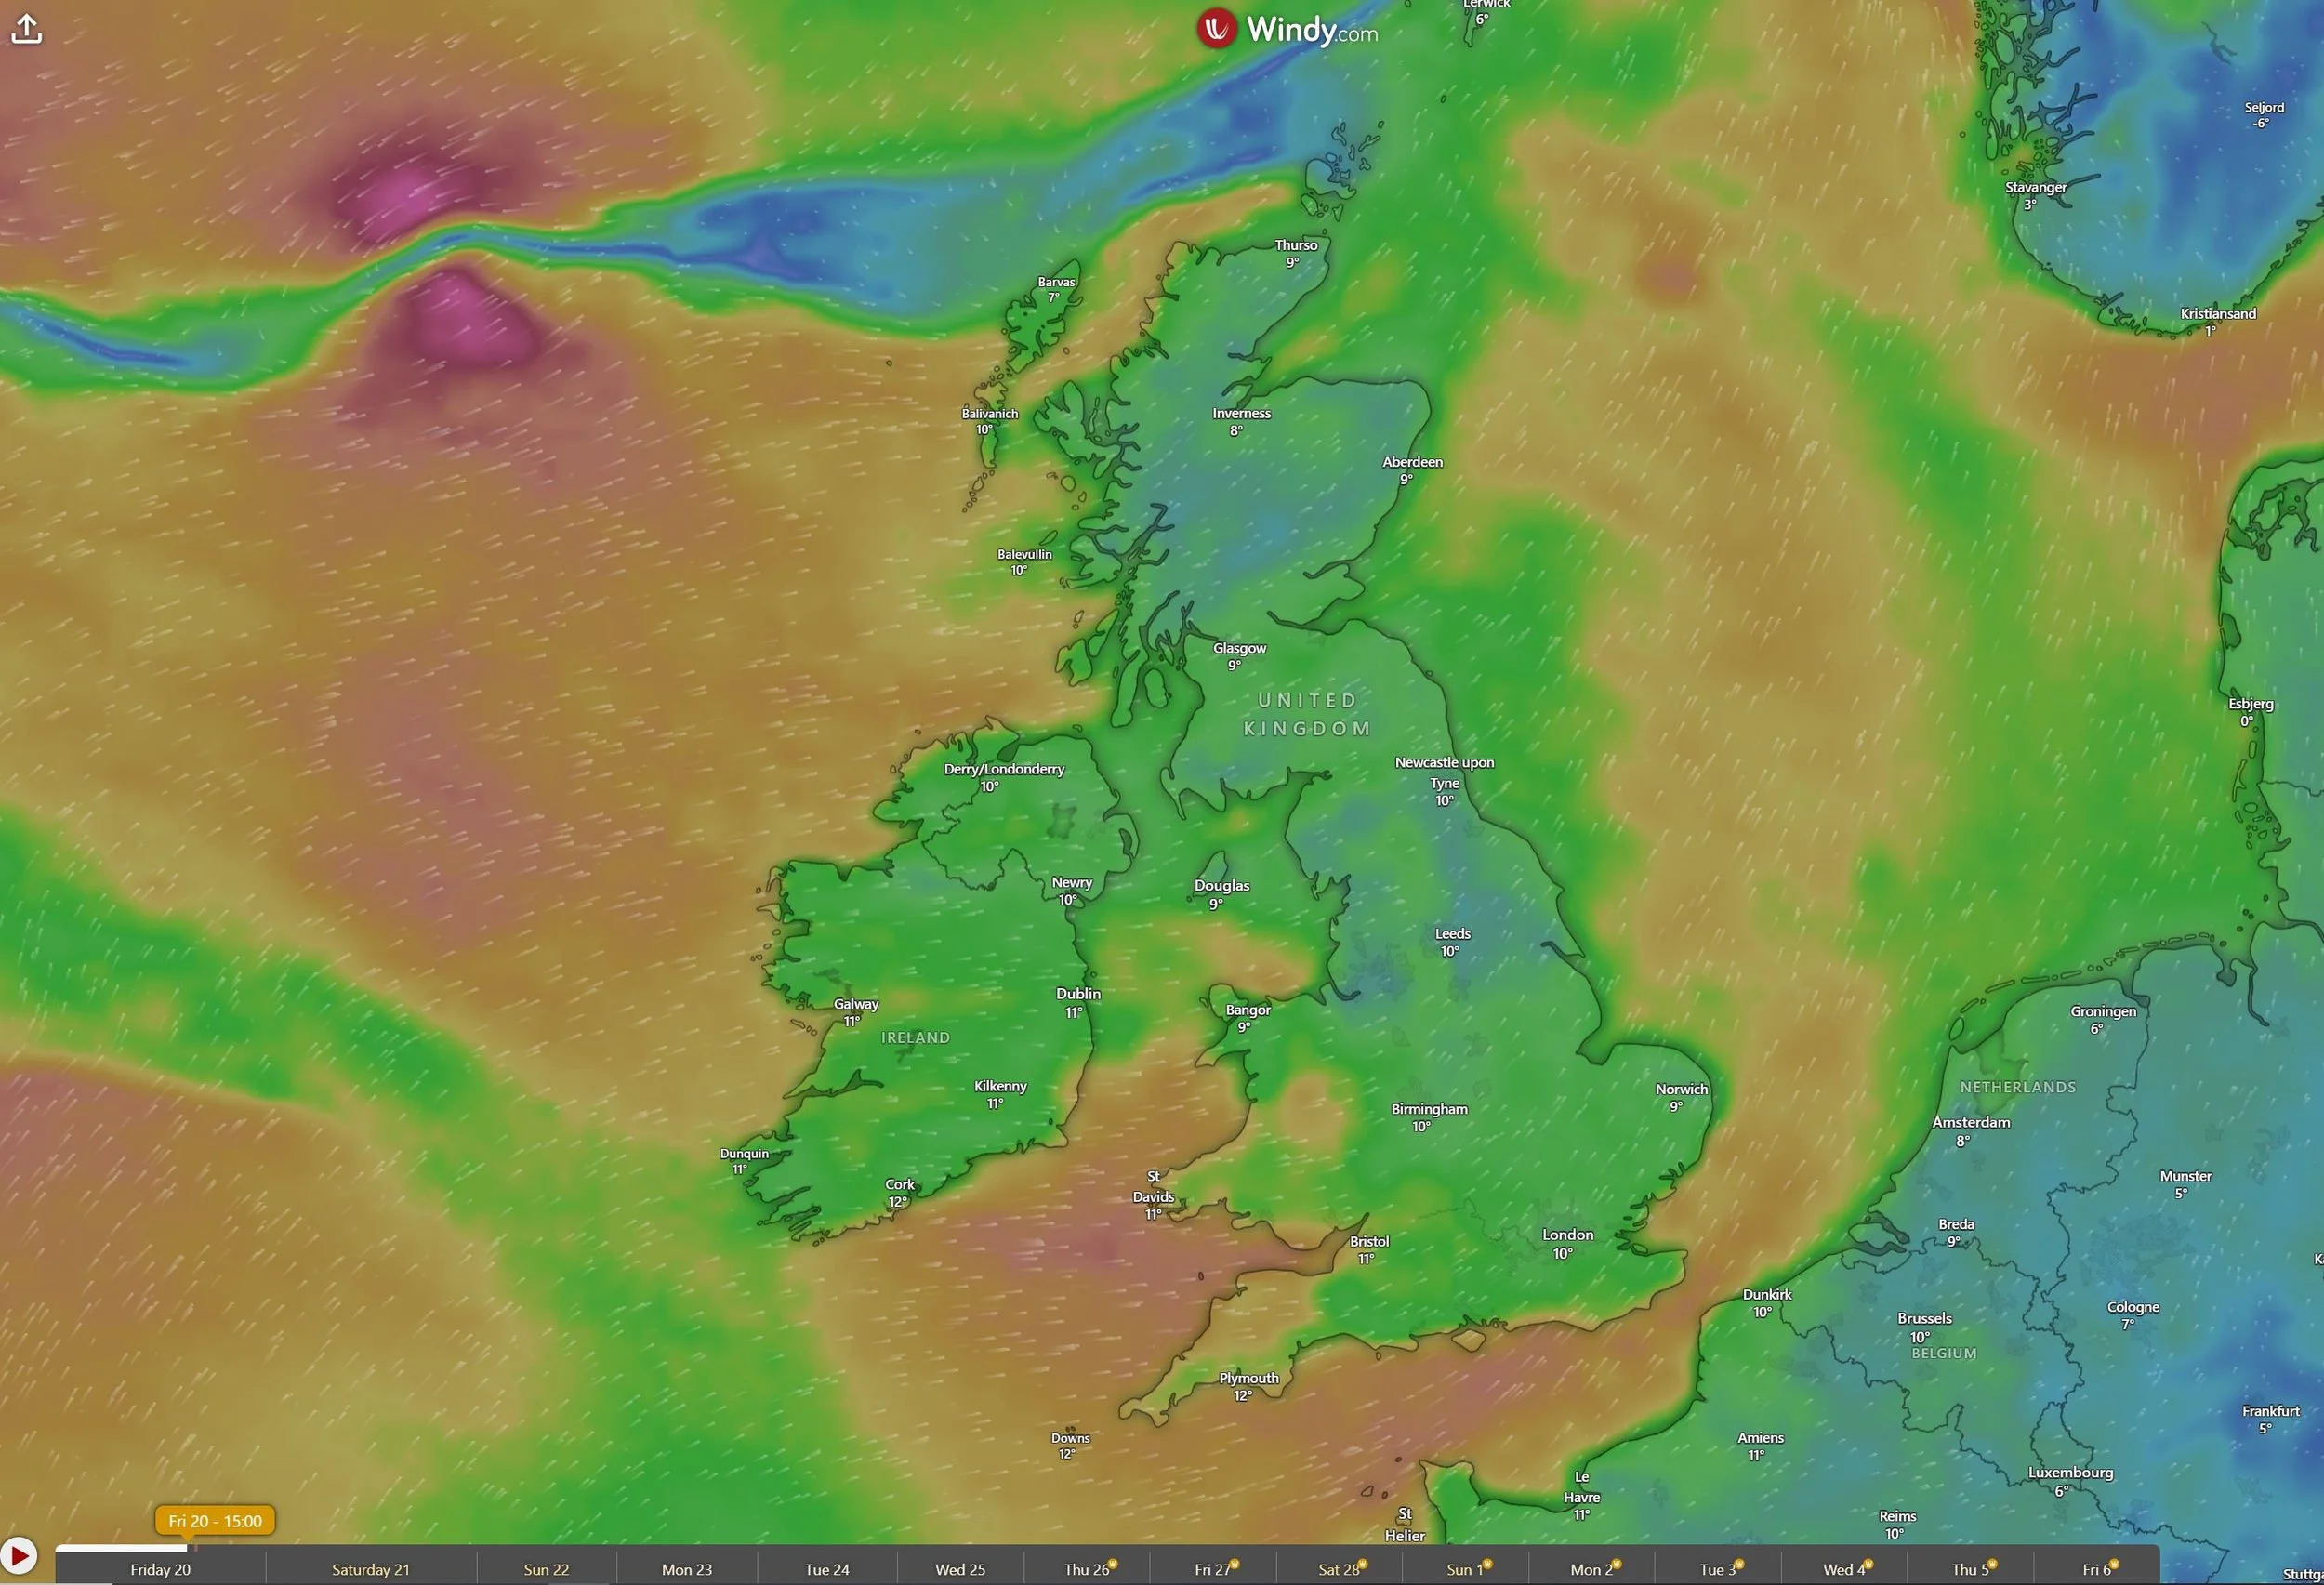
Windy
Finally, I will use windy, which is a worldwide animated weather map, to check wind speed and Direction
Free to use: with both app and website
I mainly use it for wind, but it shows lots of other options (Weather, waves)
Easy to understand as it displays wind speed with colour and direction with arrows
Forecasts up to six days in advance
It is great for exposed terrain and judging ridge days. It also helps me decide whether I can realistically fly my drone.
I sometimes use Mountain Forecast as well. It shows forecasts for specific peaks and different elevations, and it is useful outside the UK. However, I have found it can occasionally differ quite a lot from MWIS and the Met Office.
Remember the weather can change quickly, especially in the mountains. Keep checking up until you set off on your hike
Do not be afraid to change plans or cancel. The mountains aren’t going anywhere
Do not treat forecasts as gospel. They can be wrong.
Always pack essentials as conditions in the mountains can change rapidly. Its always better to have it and not need it than need it and not have it.
2. Plot and Research My Route
I never just turn up and start hiking
First, I Google the route. There is usually a blog, a vlog or at least some kind of trip report out there. This gives me a better idea of what to expect and will often provide all the key information I am looking for; If it is a technical hike, I also look for photos and videos so I can understand how exposed or difficult certain sections are, and judge whether it is suitable for me and whoever I am hiking with.
Key things to know
Distance
Elevation gain / ascent
Route profile
Terrain and technical sections
Start and finish point
Parking situation
Once I know this, alongside the weather forecast, I can realistically gauge how long it will take.
Apps and websites give predicted durations, but that depends heavily on your fitness level, your group’s fitness, experience and how confident you are on certain terrain.
A technical scramble up steep ground will take much longer than a steady walk over rolling hills.
Years in the hills mean I usually have a good idea how long hikes will take me. If you are newer to hiking, always give yourself more time than you think you need.
Also factor in the drive and parking. Hiking has become far more popular in the UK, especially in summer. Parking around hotspots can be difficult. You might spend longer than expected finding a space or have to park further away. Both add time and distance which will eat into your hiking time.
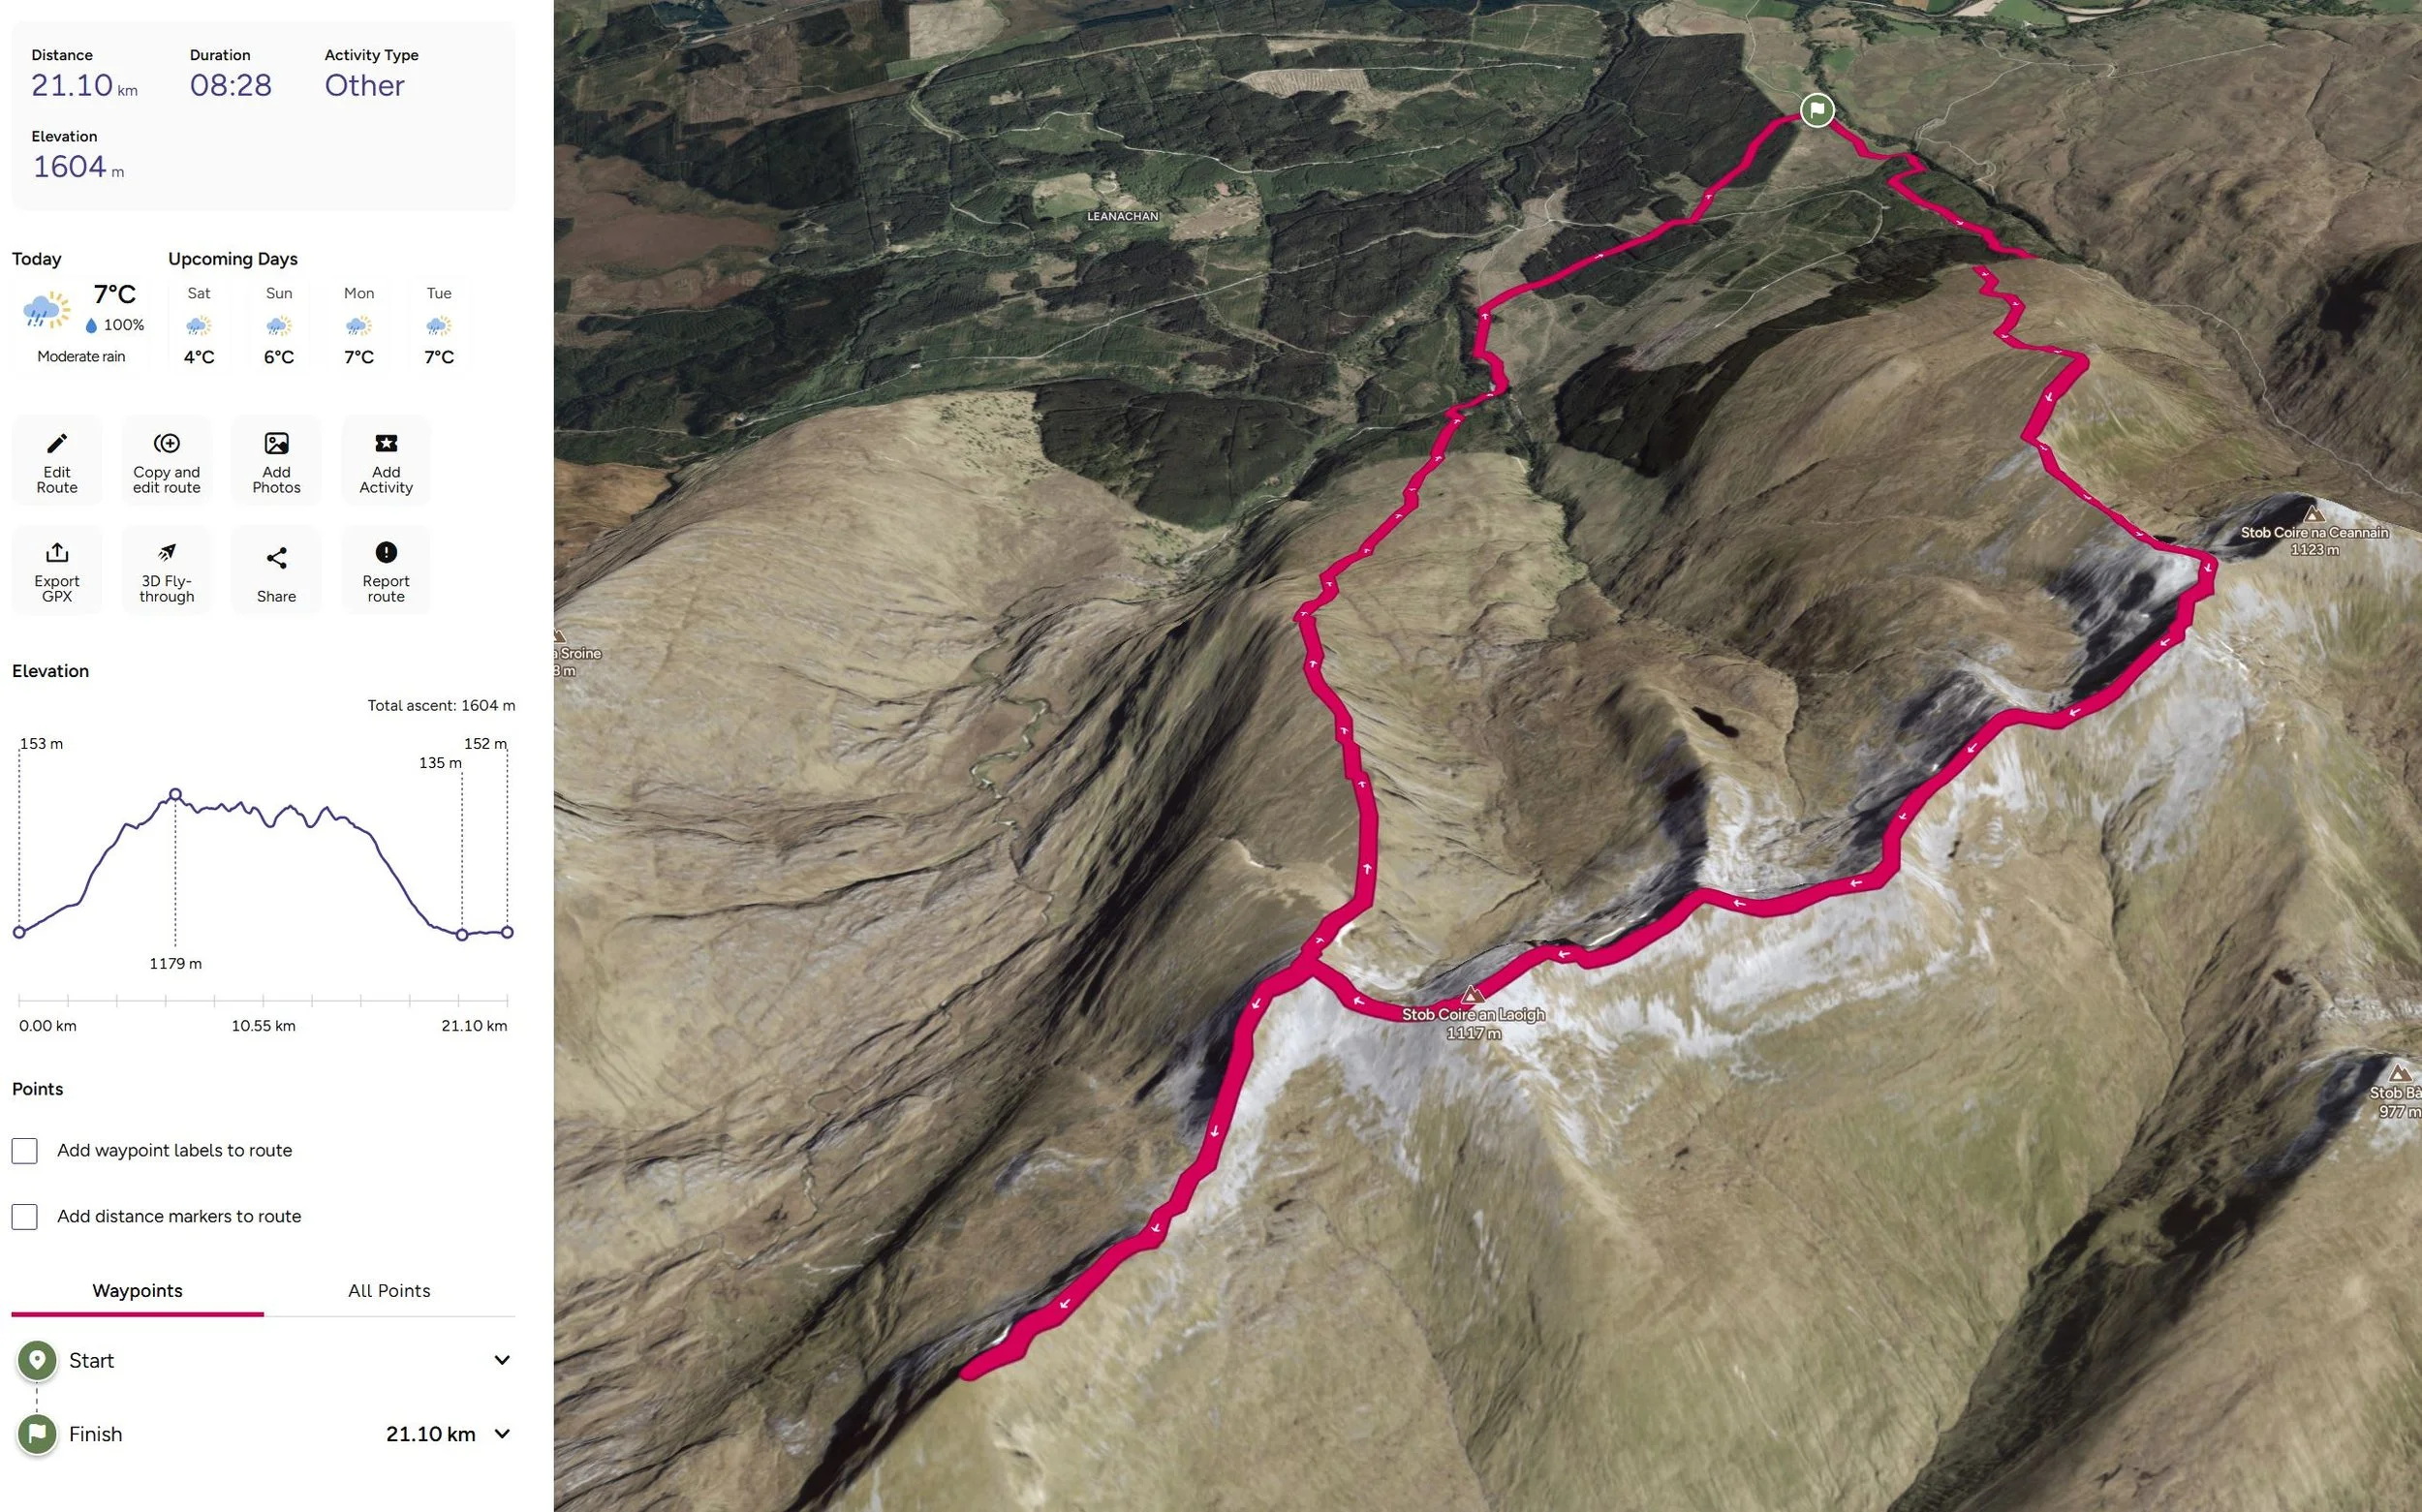
What I use to plot my routes
I use OS Maps Premium Subscription which costs £34.99 per year as of early 2026, or £6.99 per month. I use OS as they are the official map provider of the UK, and I have found them to be the most accurate and detailed of the options in the UK
Have both a Website and app, which are easy to use
Three base map options to plot my routes using
Snap to path feature allows for easy route plotting
I can plot the route on my computer and it instantly available on my phone
3D fly through feature allows me to preview the route
Ability to print maps to scale as a physical backup
I can also download routes and map areas for offline use
I have used other apps like AllTrails and Komoot. They are not bad, but they do not give me the same level of confidence and detail as OS Maps.
3. Download the Route for Offline Use
Once my route is plotted, I download it for offline use. Remember to do this the night before because signal in the mountains is patchy at best
It’s one of the main reasons I use OS Maps as it allows you to download both the route and the surrounding area.
I also like to use my Garmin alongside my phone for navigation. I prefer doing this as it means I can hike hands free, and save my phone battery. However, I will always keep the route on my phone as a backup.
To do this, I export the route from OS Maps, upload and save it to Garmin Connect as a course, and then send it to my device.

4. Put Safety Measures in Place
Before I go on any hike, I always let someone know the following things so I do not ending up like the bloke from 127 Hours.';
Where I am going
What hike I am doing and which mountains I am climbing
Roughly how long I expect to be
That way, if something drastic does go wrong and they do not hear from me, they can pass that information on to the relevant authorities.
In addition, there are several key items I always carry year round when I head into the mountains. Remember, forecasts can be wrong and conditions can change quickly. Always better to have it and not need it.
Portable Power bank and charging cable
Extra layers, gloves,and hat
Waterproof and windproof outer layer
Emergency bivvy bag - I use the LifeSystems thermal bag. It is windproof, waterproof, radar reflective, weighs around 100 grams and costs roughly £10 to £15.
If something does go wrong and you contact Mountain Rescue, they cannot teleport to you. Helicopters are only used in the most serious situations. It will usually take several hours for a team to reach you. While you wait, staying warm and dry is critical.
Satellite Messaging
Having a way to contact both the authorities and loved ones when you do not have signal is a big step up in safety. I have the Garmin inReach Messenger Plus
SOS alerts to a 24 hour emergency response centre
Uses the global Iridium satellite network
Allows two way messaging, including images and voice notes
Location sharing and tracking
Around 28 days battery life depending on use
Costs roughly £350 plus a monthly subscription
You cannot really put a price on safety, but not everyone will be able to afford it, especially if you are new to hiking.
You can also now send satellite emergency messages via newer iPhones in supported regions, provided you have a clear view of the sky and horizon. This is available on models from the iPhone 14 range onwards, running recent iOS versions

5. Layout and pack the correct clothing and kit
I always get my kit ready and pack my bag the night before. That way I know I have everything I need and it avoids a rushed morning. I also make sure all my electronics are fully charged. What I pack depends on the weather, length of the hike, season and terrain.
However no matter the weather or season, I always carry the following. Even if the forecast looks perfect, conditions can change quickly in the mountains.
Backpack
Waterproof outer shell
Extra layers, insulated jacket and mid layer
Gloves and hat or buff, thickness depending on conditions
Power bank and charging cable
Headtorch
Water and snacks
Emergency bivvy bag
My phone
I will also carry additional items depending on the season. For example, in winter or colder conditions I might also take:
Additional warm layers
Walking poles
Spikes or crampons
Goggles
Ice axe,
Winter kit is not something to guess with. If conditions require it, you need the right equipment and the knowledge to use it safely. Packing properly the night before removes stress and reduces the chances of forgetting something important.

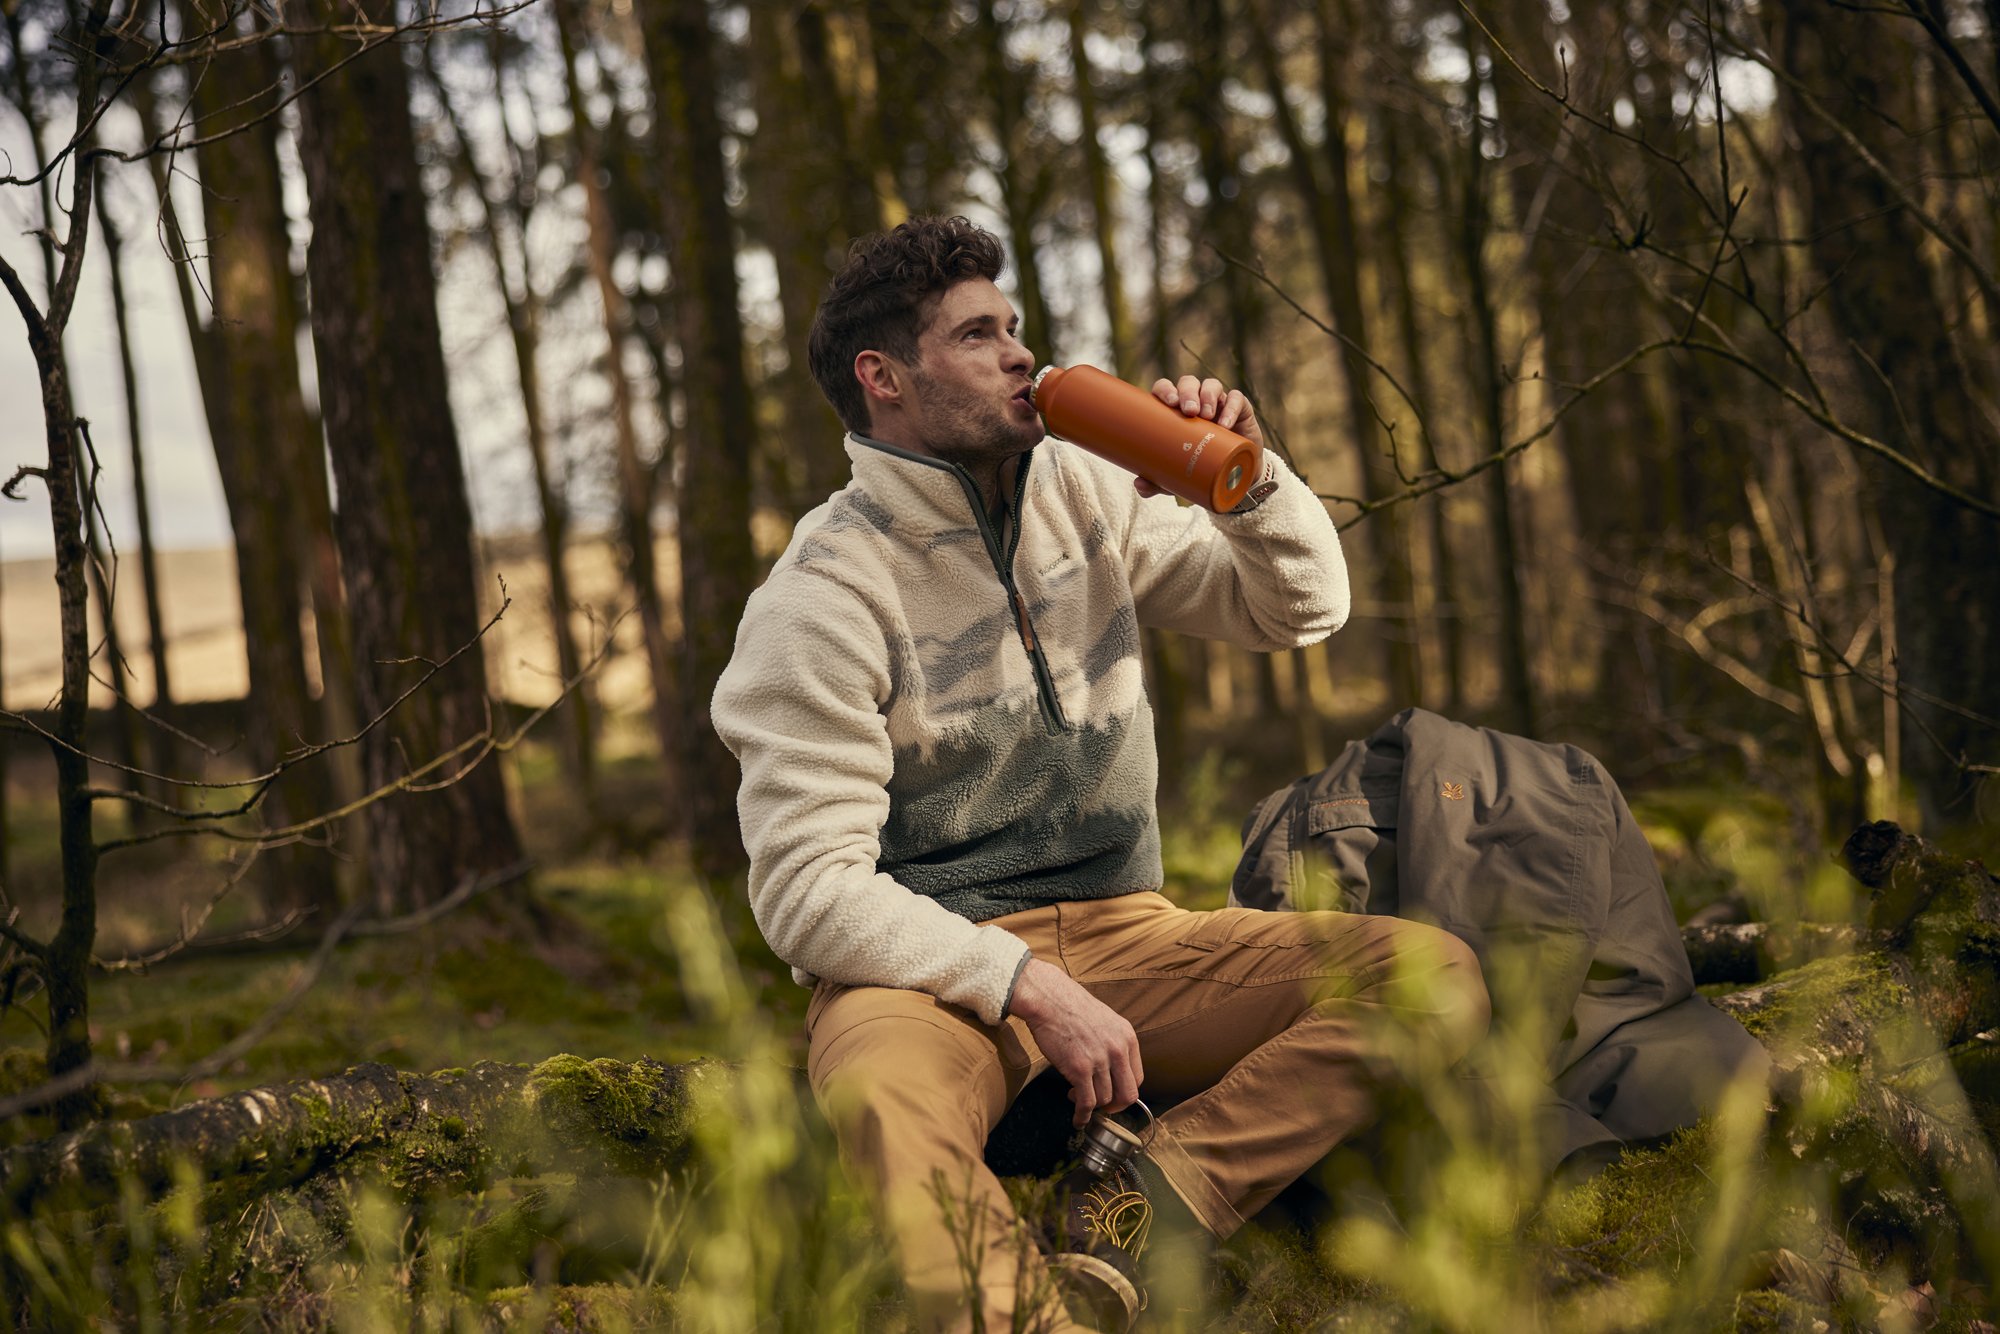
6. Prepare Food, Snacks and Hydration
The chance to eat calories guilt free with epic views is one of the best things about hiking and I never miss that opportunity.
Fuel and hydration are key to keeping energy levels up in the hills. It is also a morale boost knowing you have good snacks waiting in your bag when you reach the summit, or if you need m a little pick me up.
For shorter hikes under three hours, I usually take snacks and eat something more substantial before and after. I love a pastry, sweets and chocolate. Sausage rolls, pain au chocolat, Clif bars and Snickers are personal favourites.
For anything longer, I will take a more substantial meal. Wraps and sandwiches are my go to. They are easy to carry and easy to eat on the move.
Making them the night before means you are not rushing in the morning and you will not forget them, leaving you hangry halfway up a mountain.
Starting hydrated is also key. I usually drink 500 to 750 ml before setting off, then carry between 500 ml and 2 litres depending on the hike. As I set off well hydrated, I often find myself not drinking hardly anything, Again, better to have it and not need it than need it and not have it.
Sometimes I will carry a fizzy drink, or if I am heading out for a sunset, even a cider.
In winter, I like to take a thermos flask with a hot drink. It gives you something to look forward to and boosts morale while helping keep you warm.
-
Know and plan the Route: Use proper hiking app (I use and recommend OS Maps) and have the route downloaded for offline use
Check the Weather: Always check the weather forecast for the specific peaks and mountain ranges you are planning on hiking. I use MWIS and Met Office
Start Early: Give yourself plenty of daylight to complete the hike.
Know Your Limits: This hike requires a good level of fitness and a head for heights.
Group Up: If possible, hike with others or consider hiring a local guide for extra safety
Wear and carry the correct kit: see below
-
The correct kit and equipment are essential when hiking in Scotland.
Sturdy hiking boots with good grip
Waterproof jacket and overtrousers
A layering system (wear/carry a minimum of 3 top half layers, with a 4th in winter)
GPS device with the route downloaded (or Map and compass)
Power bank and charging cable
Headtorch + First aid kit
Plenty of fluids and high-energy snacks
Gloves and a hat for cooler conditions
If it’s winter then crampons, micro spikes, and an ice axe(s) are essential alongside extra clothing. I’d also recommend walking poles and ski goggles.
You can find my hiking kit List here: https://ohwhataknight.co.uk/my-hiking-gear
Final Thoughts
So there we go, the six things I do before every hike. None of this is complicated, It is just common sense and a bit of experience.
Half the problems people run into in the hills could have been avoided with 30 minutes of planning the night before. Check the weather properly. Know and download your route. Tell someone where you are going. And carry the correct clothing and kit.
It’s not only going to make hiking in the mountains much safer, but also a lot more enjoyable and stress free. So you can keep on doing it and reaping the benefits of being in the outdoors for years to come.
Always remember, it is better to have it and not need it than need it and not have it.
If in doubt, turn around or give it a miss. The mountains will always be there, and no hike is worth risking your life, or someone else’s, for.
Did you find this useful? Let me know your thoughts in the comments below.
Help support what I do
I created and I run this website in order to help inform, amaze, inspire people (for free) to get outside and explore the adventurous side of the UK and beyond.
If you’d like to support this website, you can use the affiliate links below to book your accommodation or transport. These come at no extra cost to you, but help keep this site running.
If you are felling generous you can also buy me a coffee to say thank you, and give me a follow on social media.
Book your car using Discover Cars
Book your accommodation using Booking.com
Thank you, and if you have any questions, leave them in the comments below or drop me an email!
