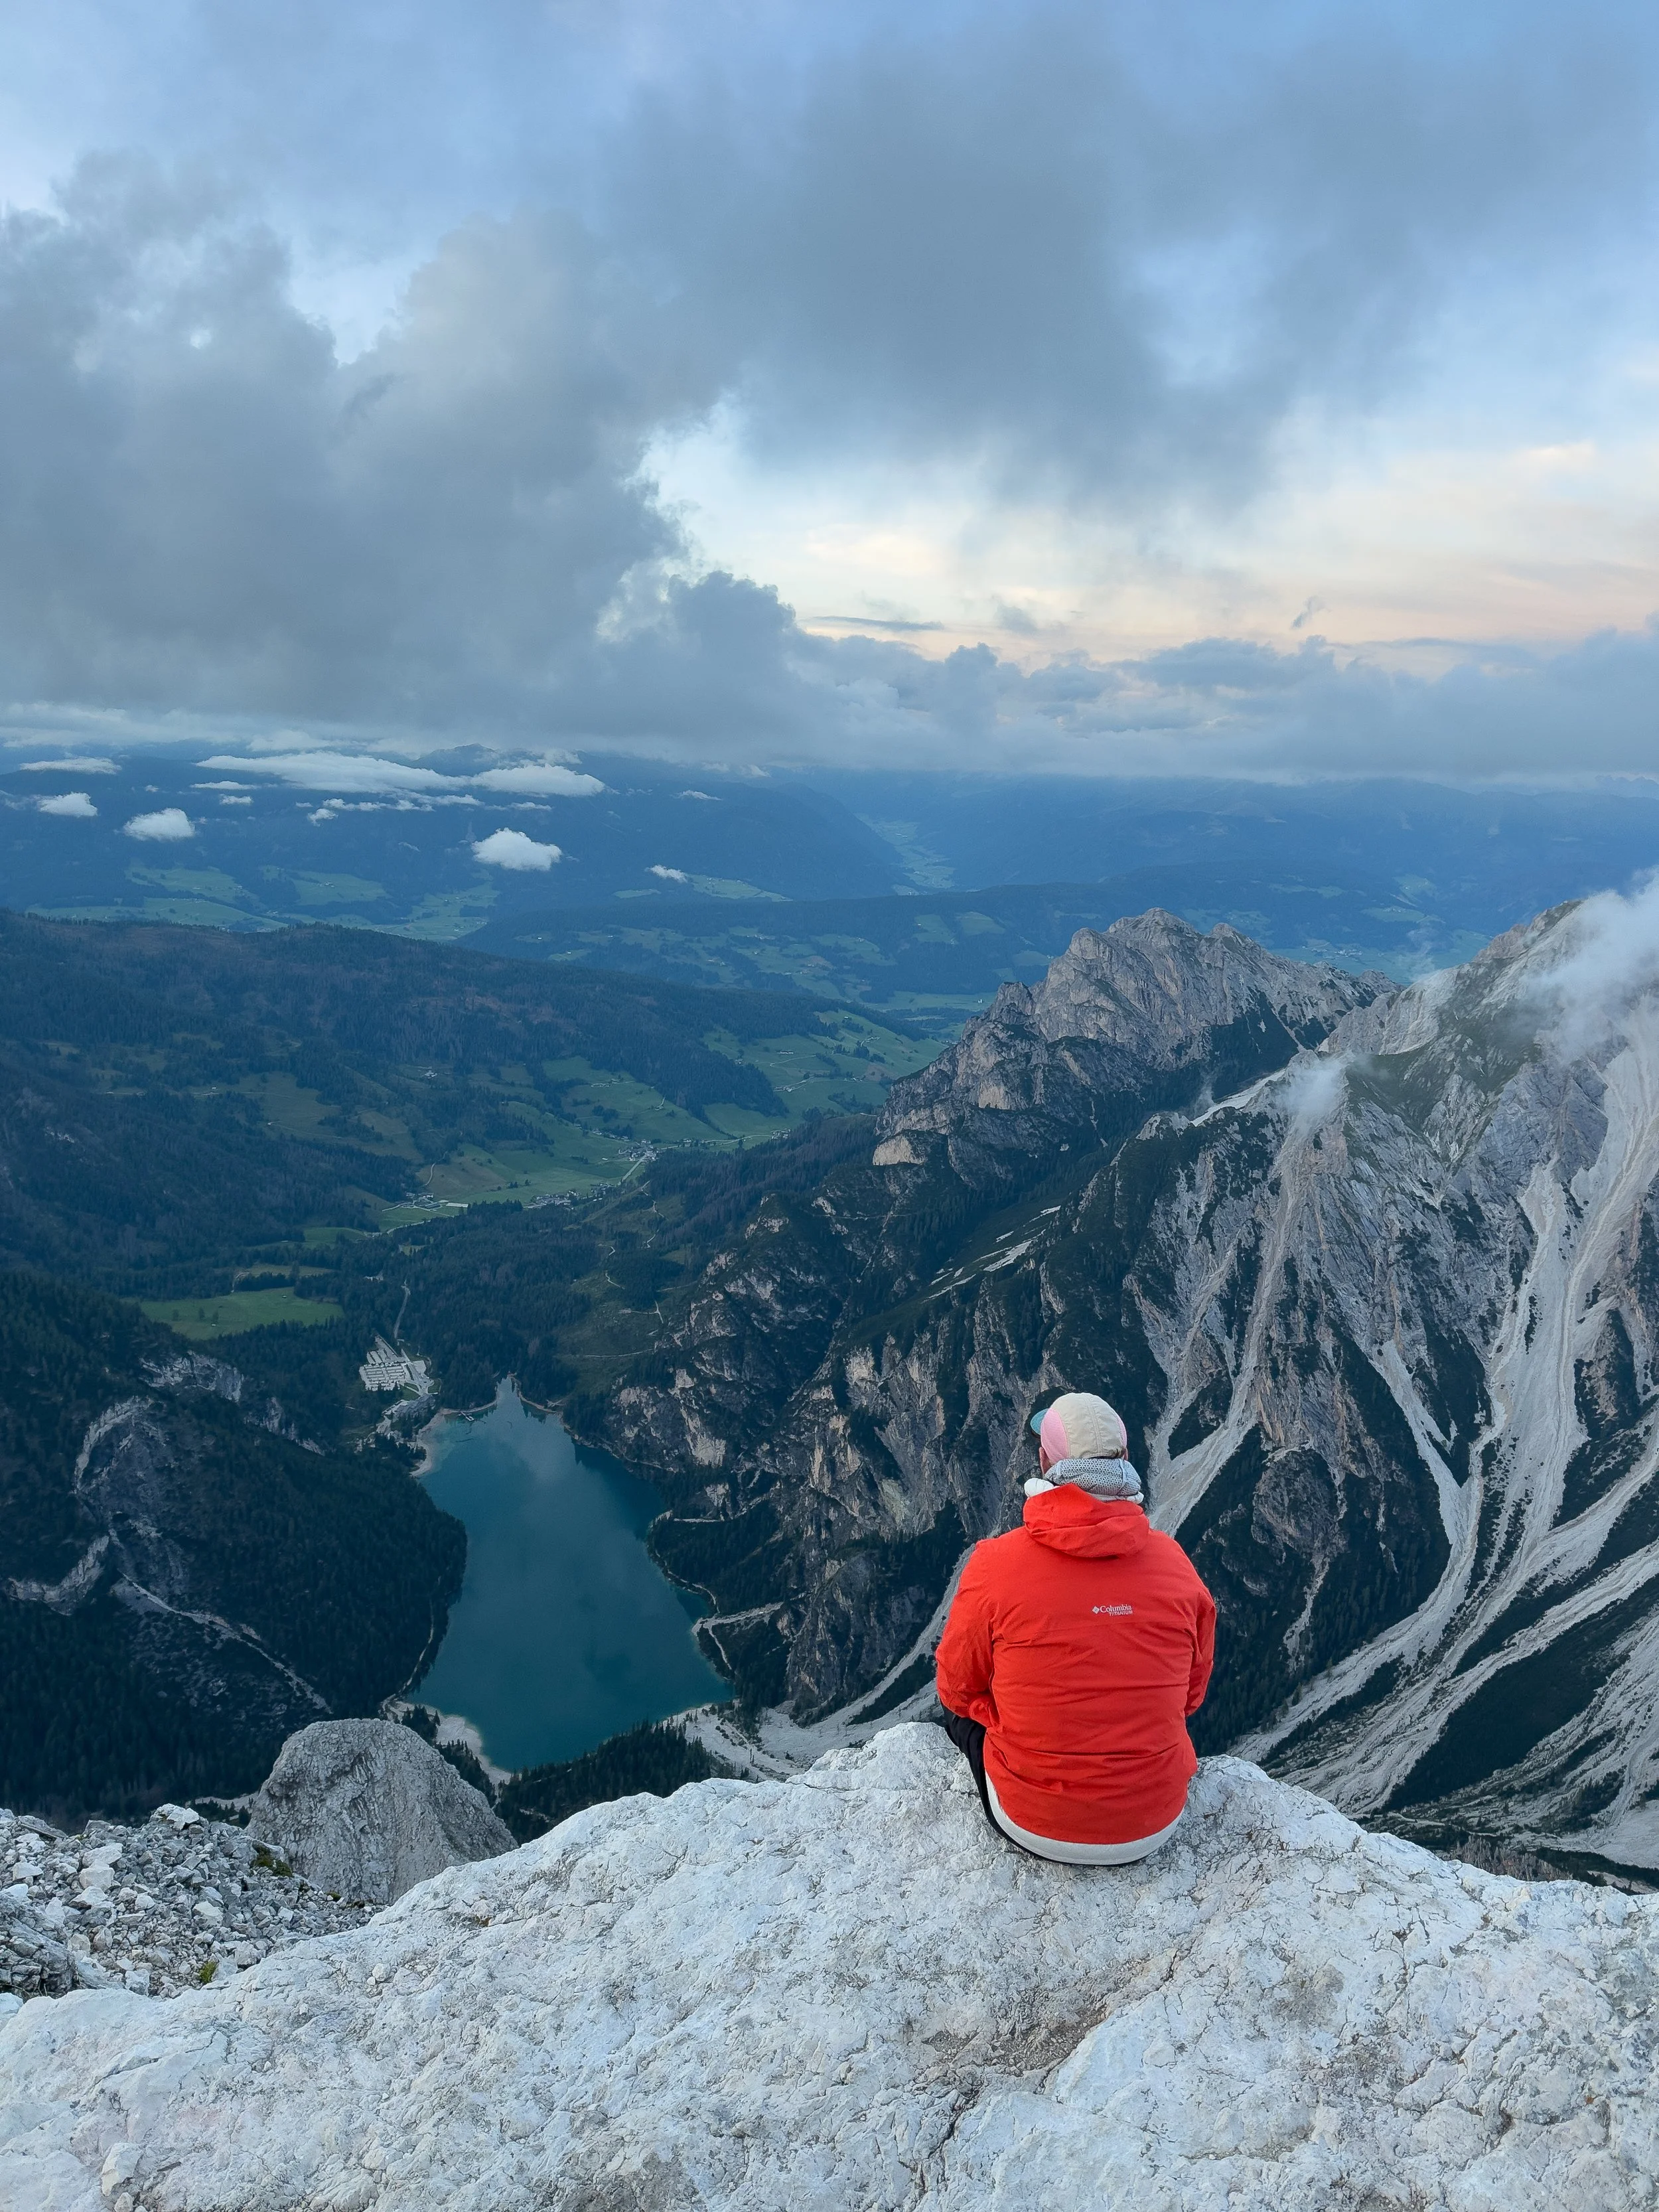
Hiking the Dolomiti Trail - an incredible six-day trek through the Dolomites
Ever dreamt of trekking through the Italian Dolomites without any of the planning stress? Well let me introduce you to the Dolomiti Trail
Organised by Travel Base, it is a self-guided, 100km trek which passes through some of the most jaw-dropping alpine scenery in Europe.
The best part? All the logistics are taken care of, meaning I got to enjoy the adventure at my own pace, with a ready-made route and support team ensuring I didn’t accidentally wander off into Austria.
In fact, the only thing needed to worry about was my own kit and how much food I got to reward myself with after each day’s hike.
In this blog post, I’ll recount my experiences on the Dolomiti Trail alongside giving you my opinions on what makes it so special, from the route and landscape, to the new friends I met along the way.
So, If you’re curious about arguably one of the best multi day hikes in the Dolomites, then read on.

-
The Dolomiti Trail is essentially self guided, multi-day trek that takes you through some of the most iconic and picturesque locations in the Dolomites.
It’s a unique five or six-day route which combines scenic day hikes with four days of through-hiking. Along the way, you’ll stay in a mix of accommodations: from charming rifugios to a campsite and a cozy hotel.
Although the trek is self-guided one (there’s no official guide to hold your hand), it’s not just a random DIY adventure.
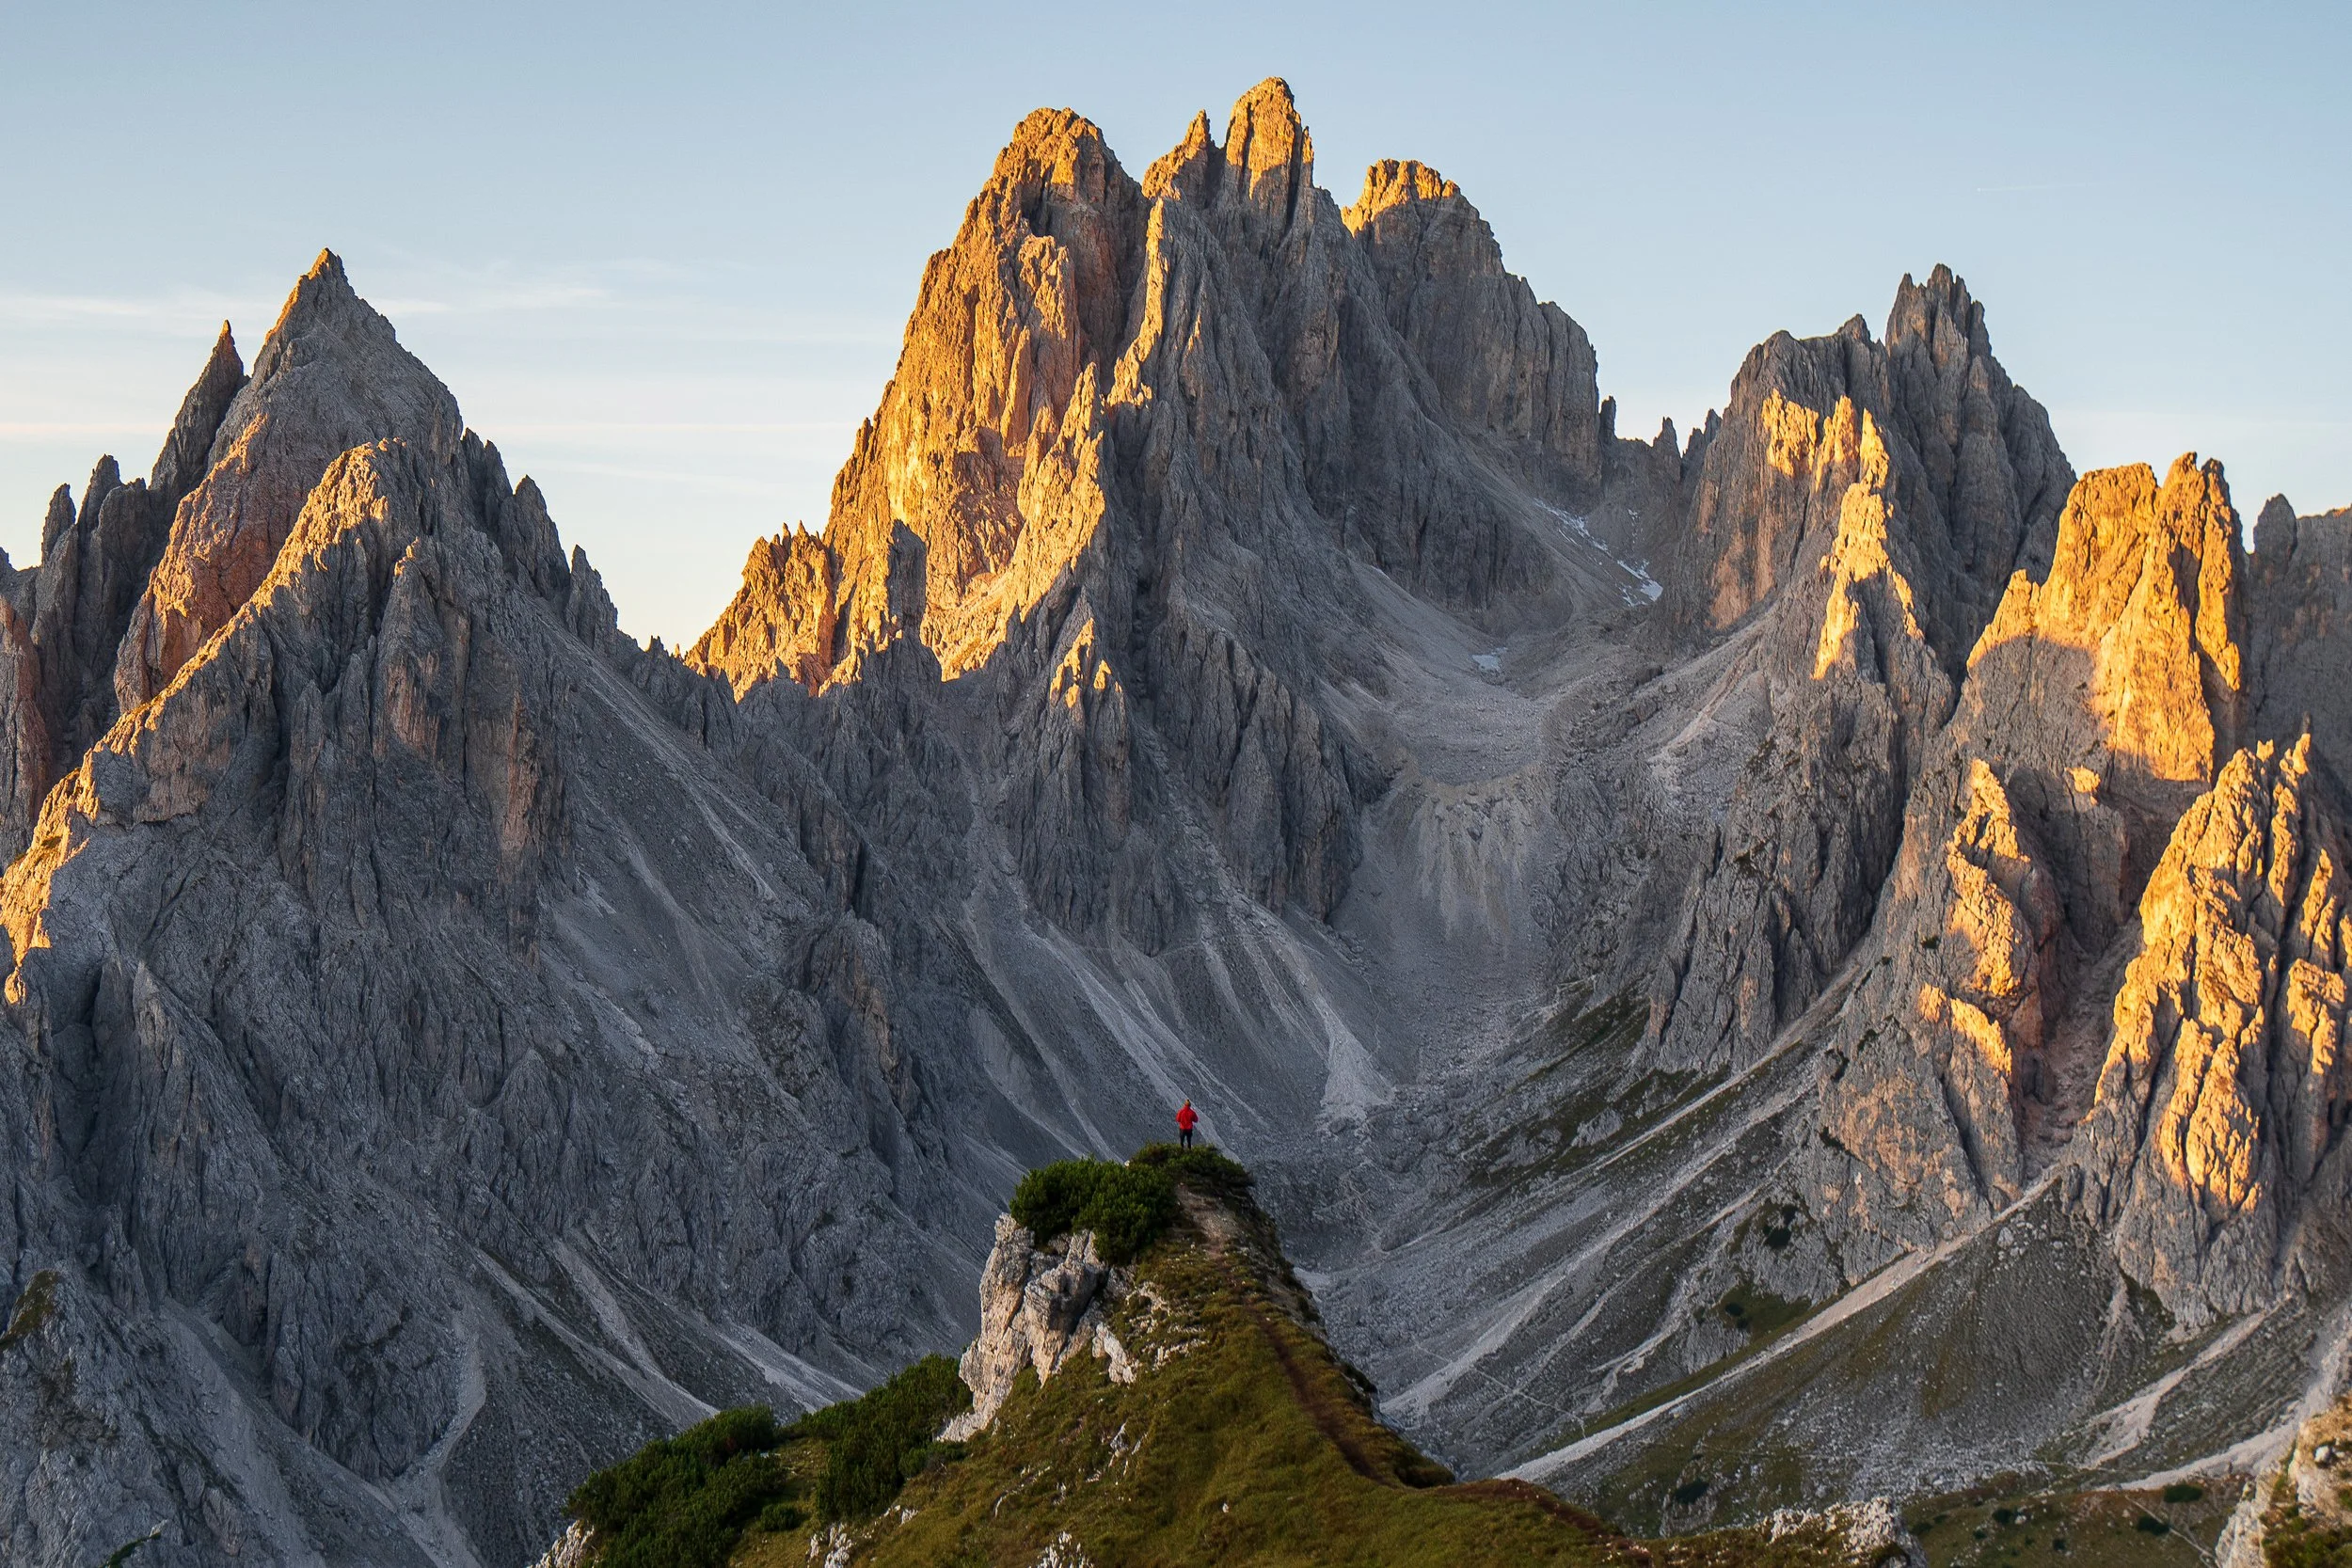
A local company has done all the heavy lifting for you: mapping out a week-long route hitting the region’s greatest hits (Including Lago di Braies, Lago di Sorapis, Cadini di Misurina, Cinque Torri, and Tre Cime di Lavaredo) reserved your beds, and arranged key transports.
Think of it as an “independent hike with support team on call”
You get the freedom of hiking on your own pace, with the peace of mind that comes from a pre-planned route and emergency support.
-
You pick a start date (trips run on select summer weeks each year), and organise your own flights and transport to the start point In show up at the base camp by Lago Misurina,
Once you arrive at the base almost everything is organised for you, including your route, accommodation, alongside your breakfast and evening meal.
The only thing you have to worry about is having the right kit, water, lunch, and getting from point A to Point B.
The itinerary packs in four full days of point-to-point hiking (carrying your gear hut-to-hut) plus a couple of spectacular extra hikes at the beginning and end if you’re up for them.
The trek is self-guided and will be completed within a group of up to 10 people (There were only 6 people including myself on my trip)
As it is self-guided, it means you can choose to hike alone at your own pace, or join up with one of the other people on the trek.
Each day you’ll trek through mountains and meadows, following the well-crafted route on the detailed and interactive app which is provided.
Each evening, you’ll regroup at the accommodation where you can hang out, swap stories from the day, or just relax on your own.
It’s the best of both worlds: your adventure, but with a safety net in place.
-
I’m a big fan of adventures that remove the stressful bits, and the Dolomiti Trail excels at this.
Logistically, everything was dialled in, leaving me free to focus on the views and not, say, how to catch the next bus or where to sleep that night. Here are some key logistics and support perks that made a huge difference:
Trail App & Navigation: Before we set off, we all downloaded a comprehensive mobile app loaded with our daily routes, maps, GPS tracks, and tons of info about the trail. The app works offline and highlighted points of interest, water sources, and emergency info.
Local Ranger Support: You will have a team of experienced English-speaking “rangers” is behind the scenes. They’re not trekking with you, but will welcome you on day 1, provide you with an in depth briefing each day, and are essentially on-call throughout the week. They provide a safety net you hope you don’t need, but are really glad to have.
Transport Arrangements: The Dolomites region is vast, and connecting all the “must-see” spots in one itinerary would be a nightmare on public transport. The Dolomiti Trail includes all internal transfers needed during the trek
Luggage and Gear: This is a self-supported hike in terms of carrying your stuff – you’ll need to backpack your clothing, toiletries, and water throughout. The good news is that with meals and accommodation taken care of, ypur pack should stay fairly light. If you don’t have all the gear, the company offers gear rentals (trekking poles, sleeping bag liner, etc.)
Group or Solo – Your Choice: I did the Dolomiti Trail solo, but I never actually felt alone. The way the departures are set up, you start the hike alongside a group of up to 9 other like-minded hikers who chose the same date. If you value alone time, it’s totally fine to hike at your own pace (I hiked 5/6 days alone) But it’s nice knowing at dinner you’ll see some friendly faces. Also, for those who do come with friends or a partner, the trip is equally fantastic – you get quality time together in an unforgettable setting.
-
I would consider the Dolomiti trail to be a moderately challenging trek.
There are either one- or two-day hikes, alongside four days of through hiking. The total distance of the Dolomiti trail is between 80 100 km.
Each day will vary in distance (10-25km) and depending on your fitness and pace will involve hiking for between 4 -12 hours each day.
However, the distances of most days each day can be shortened or lengthened depending on how you are feeling.
In total I hiked just over 100km with 5,574m of elevation over 6 days
Here is the breakdown of the distances I hiked across the six days:
Day 1: 13.5km / 710m elevation
Day 2: 11.5 km / 1,094m elevation
Day 2 Extension: 4km / 480m Elevation
Day 3: 24km / 950m elevation
Day 4: 15km / 1,409m elevation
Day 5: 15.6km / 290m elevation
Day 6: 14km / 450m elevation
During the through-hiking days you will have to carry all of your gear for four days.
Because of this you will need a moderate level of fitness and some experience hiking for several hours carrying a loaded backpack.
If you're worried about your fitness levels the Dolomiti trail provides access to a free training programme alongside tips and tricks within their app.
Because there is no rush to complete the hikes you can take as little or as long as you like, hiking at a super leisurely pace.
-
As of 2025, the early bird price for the Dolomiti Trail is €830. Here’s what you get:
Planned route and full trip organization
1 night in a hotel (with breakfast and dinner)
2 nights in rifugio (with breakfast and dinner)
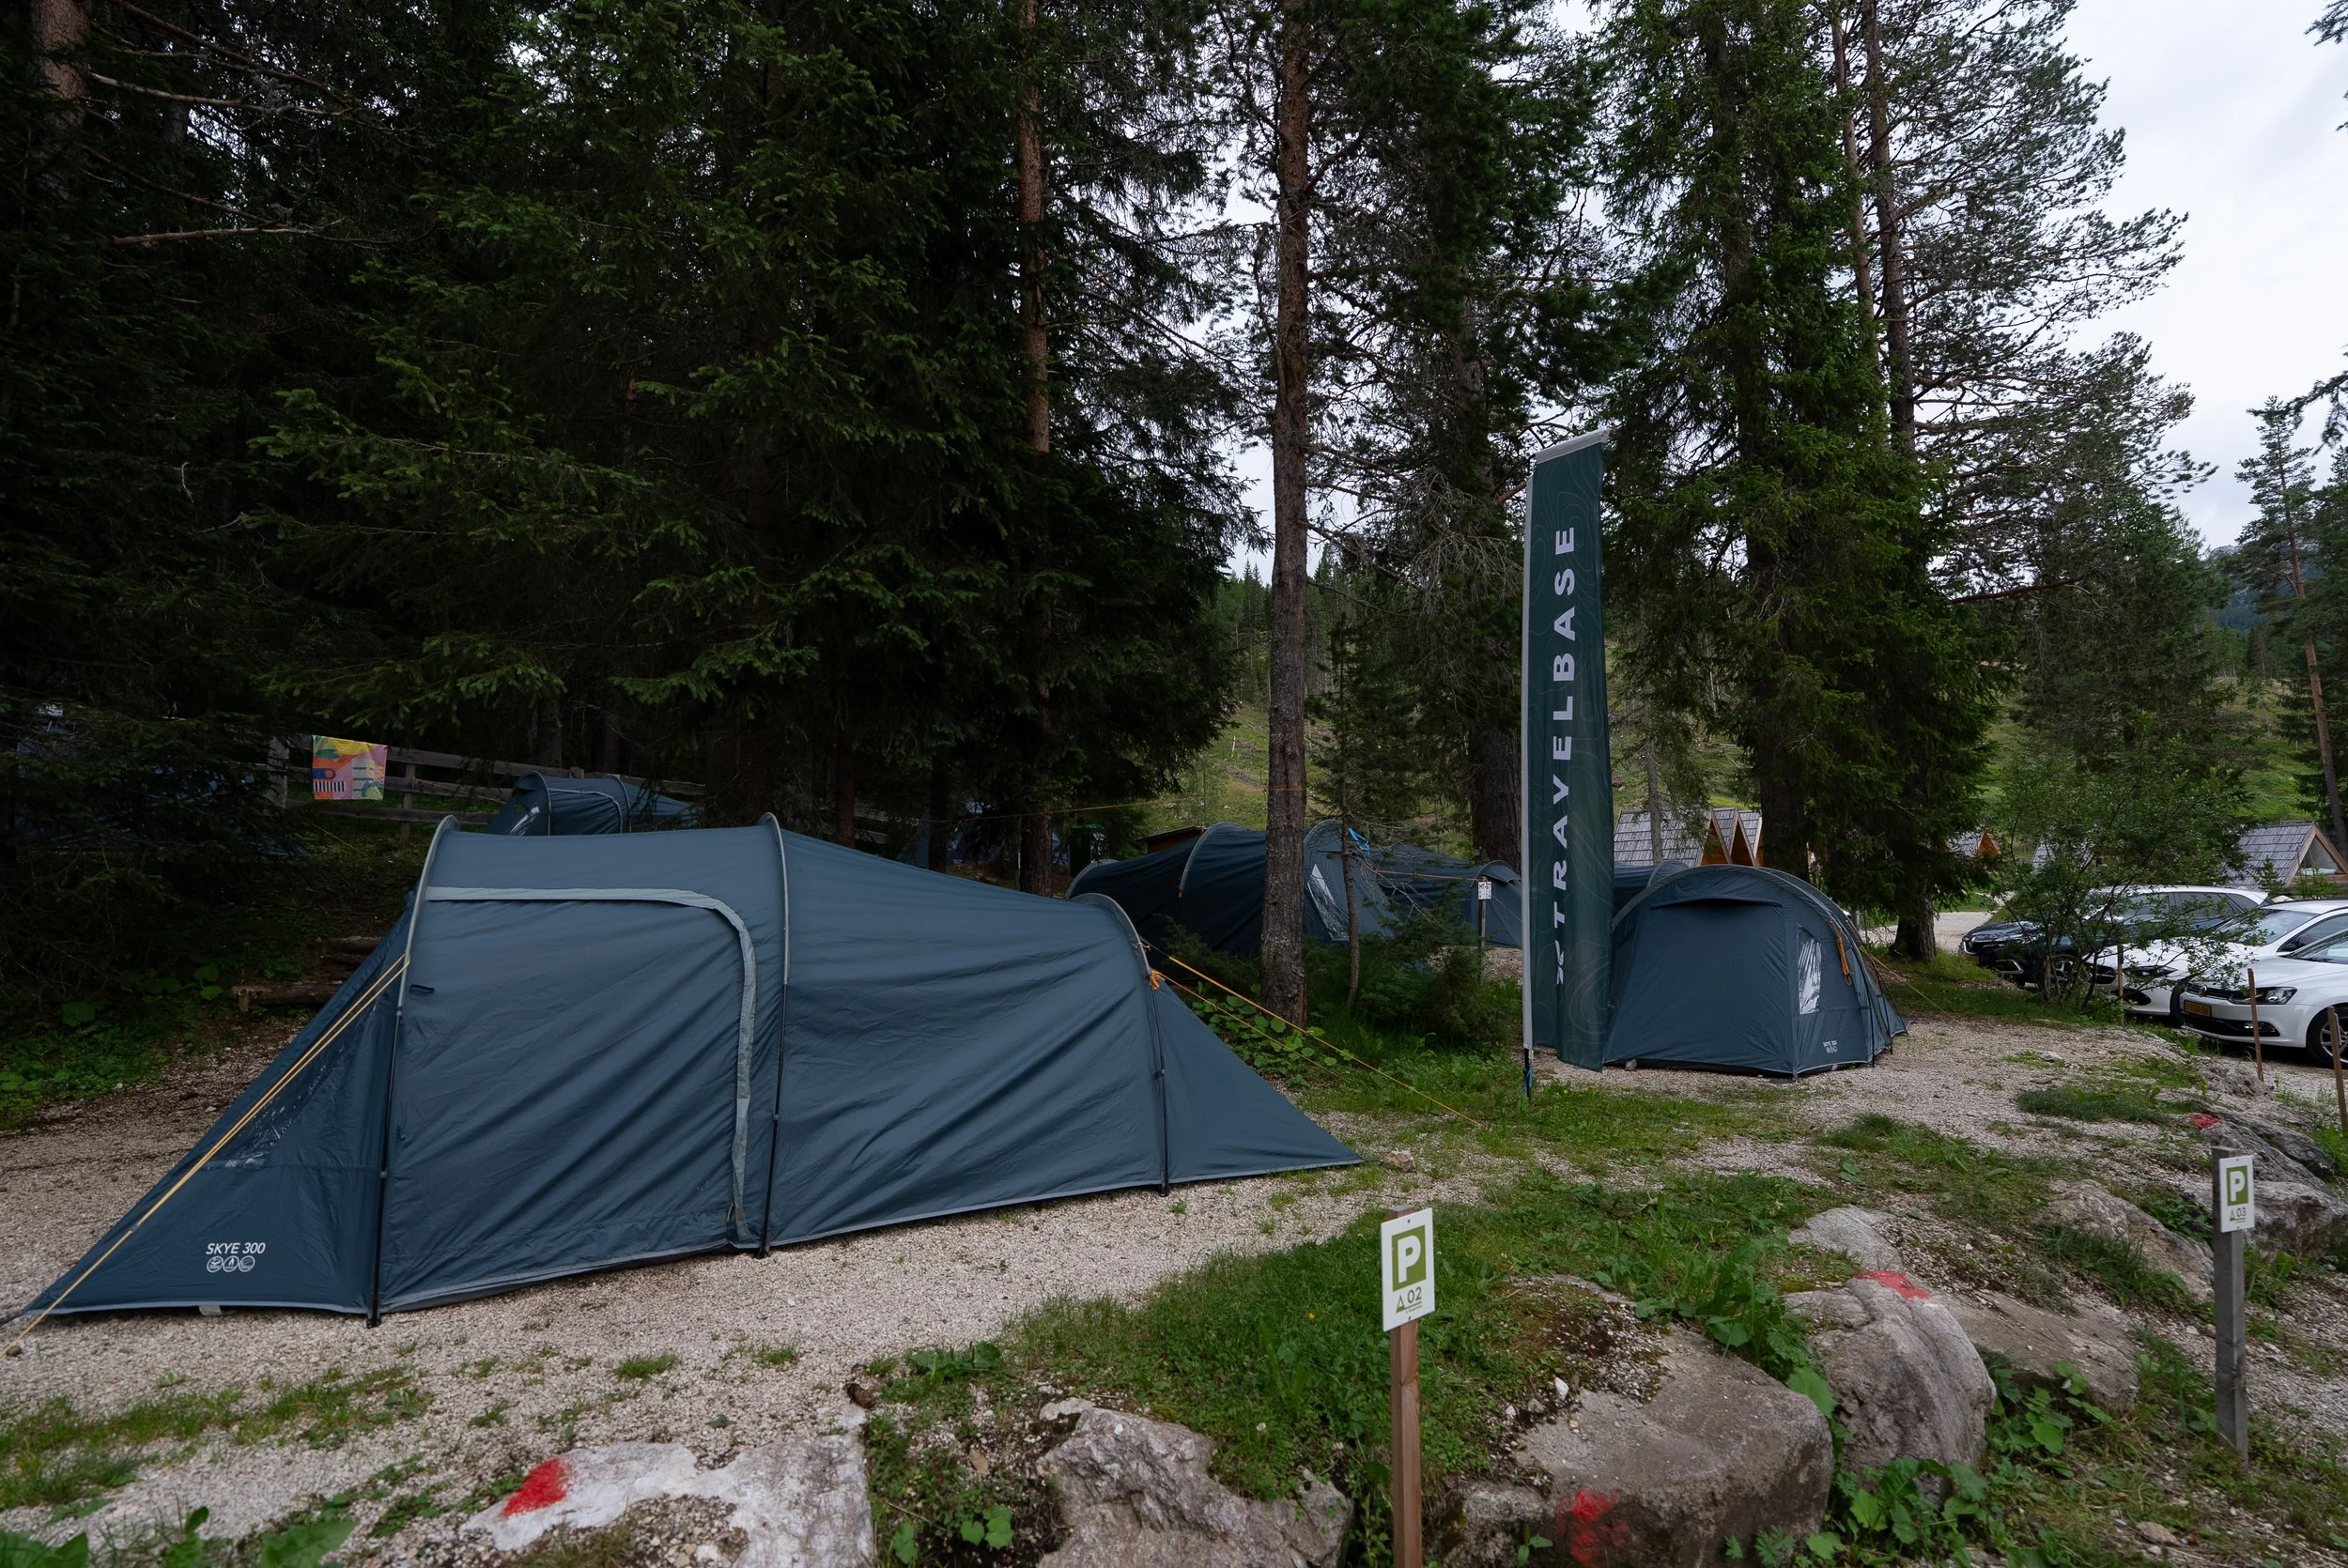
1 night in a tented campsite (gear and meals included)
Support from experienced, English-speaking local rangers
All internal transport to and from the trail
Local tourist tax
You also get access to very detailed and interactive app which provides all of of the information you need including
Pre-departure info and packing list
Daily itinerary
Interactive offline map with all the routes routes and hike highlights
Hiking tips and training program
GPX files and transport info
-
Across the trek you will sleep in a mixture of hotels, mountain huts, and a campsite
Night 1: A shared room (3-4 people) at Hotel Misurina, located next to a beautiful lake.
Nights 2 & 4: Dorm style rooms in Rifugio’s located along the trail
Night 3 : Tented campsite (tent, sleeping mat, and sleeping bag provided)
It is worth nothing that what hut you stay in will be based on availability and you may not stay in the same huts that i did.
In the mountain huts, you'll sleep in dorms or mattress rooms. These are shared rooms with multiple (bunk) beds or mattresses. So, you'll be sleeping alongside other hikers. This is unique and typical of life in the mountain hut.
It's mandatory to bring your own sleeping bag liner. Be sure to also bring earplugs and/or an eye mask to ensure a better night’s sleep in the hut.
-
Breakfast and dinner are included throughout the trek.
Lunch is down to you to organise, You can pick up sandwiches or snacks at huts en route, or opt for an optional “survival food pack” if you want a ready supply of trail lunches.
I personally just gorged on hut lunches as nothing beats a pasta and pint combo at 2,000 meters.
I also carried a snack selection which would rival that of Willie Wonka (energy bars, sweets, and chocolate) for the afternoon pick me up.
For hydration you carry your own water and have the ability I refilled my bottle from the numerous mountain hut taps and streams (bring a filter if you like) on route.
-
Because of their popularity and limited capacity, securing a spot in the Rifugio’s (mountain huts) of the Dolomites is a challenge in itself (and is often harder than the actual hikes).
Huts are often booked out months in advance making planning a thorough hike a logistical nightmare.
With the Dolomiti Trail you are guaranteed two nights’ accommodation in two beautiful mountain huts which are situated on the Alta Via one, an iconic 120km point to point hike which passes through the Dolomites.
In addition, there are endless trails and iconic sites scattered throughout the Dolomites. This makes choosing and planning a hiking trip very stressful, time consuming, and overwhelming.
The Dolomiti Trail takes away all of the planning and makes your trip a breeze. Everything in the itinerary is organised for you so you can just focus on hiking and enjoying the beautiful scenery.

Day one
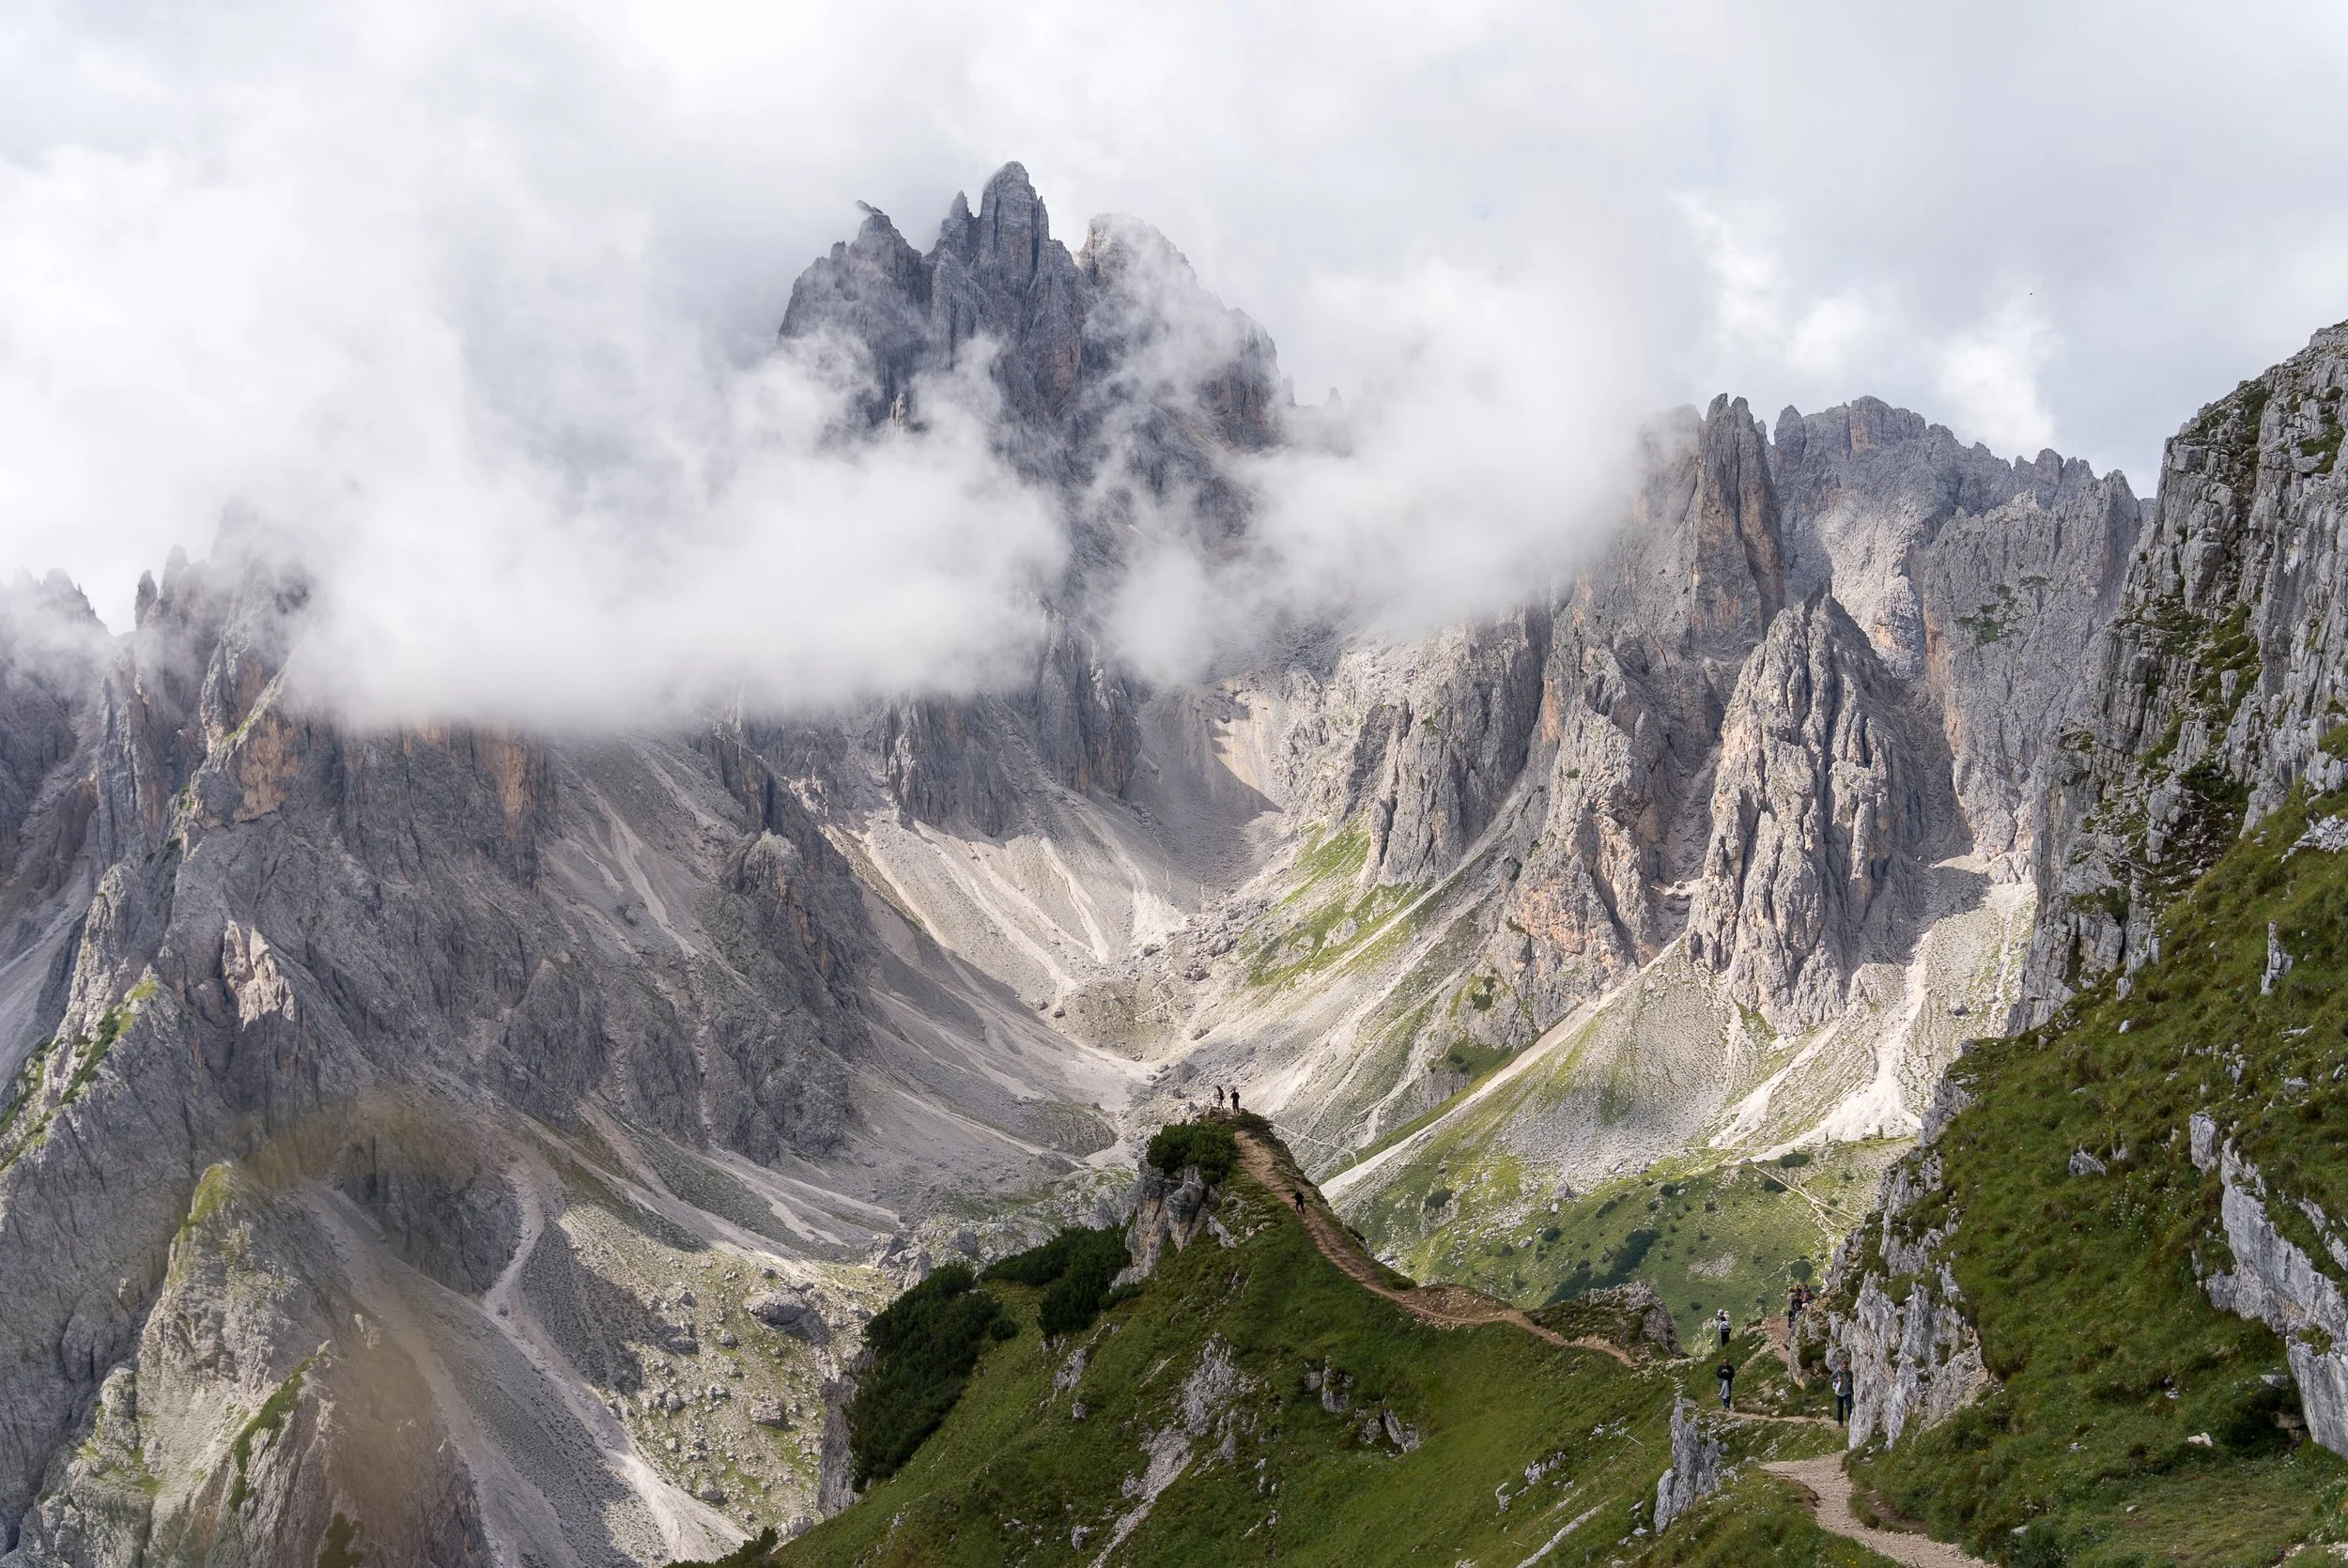
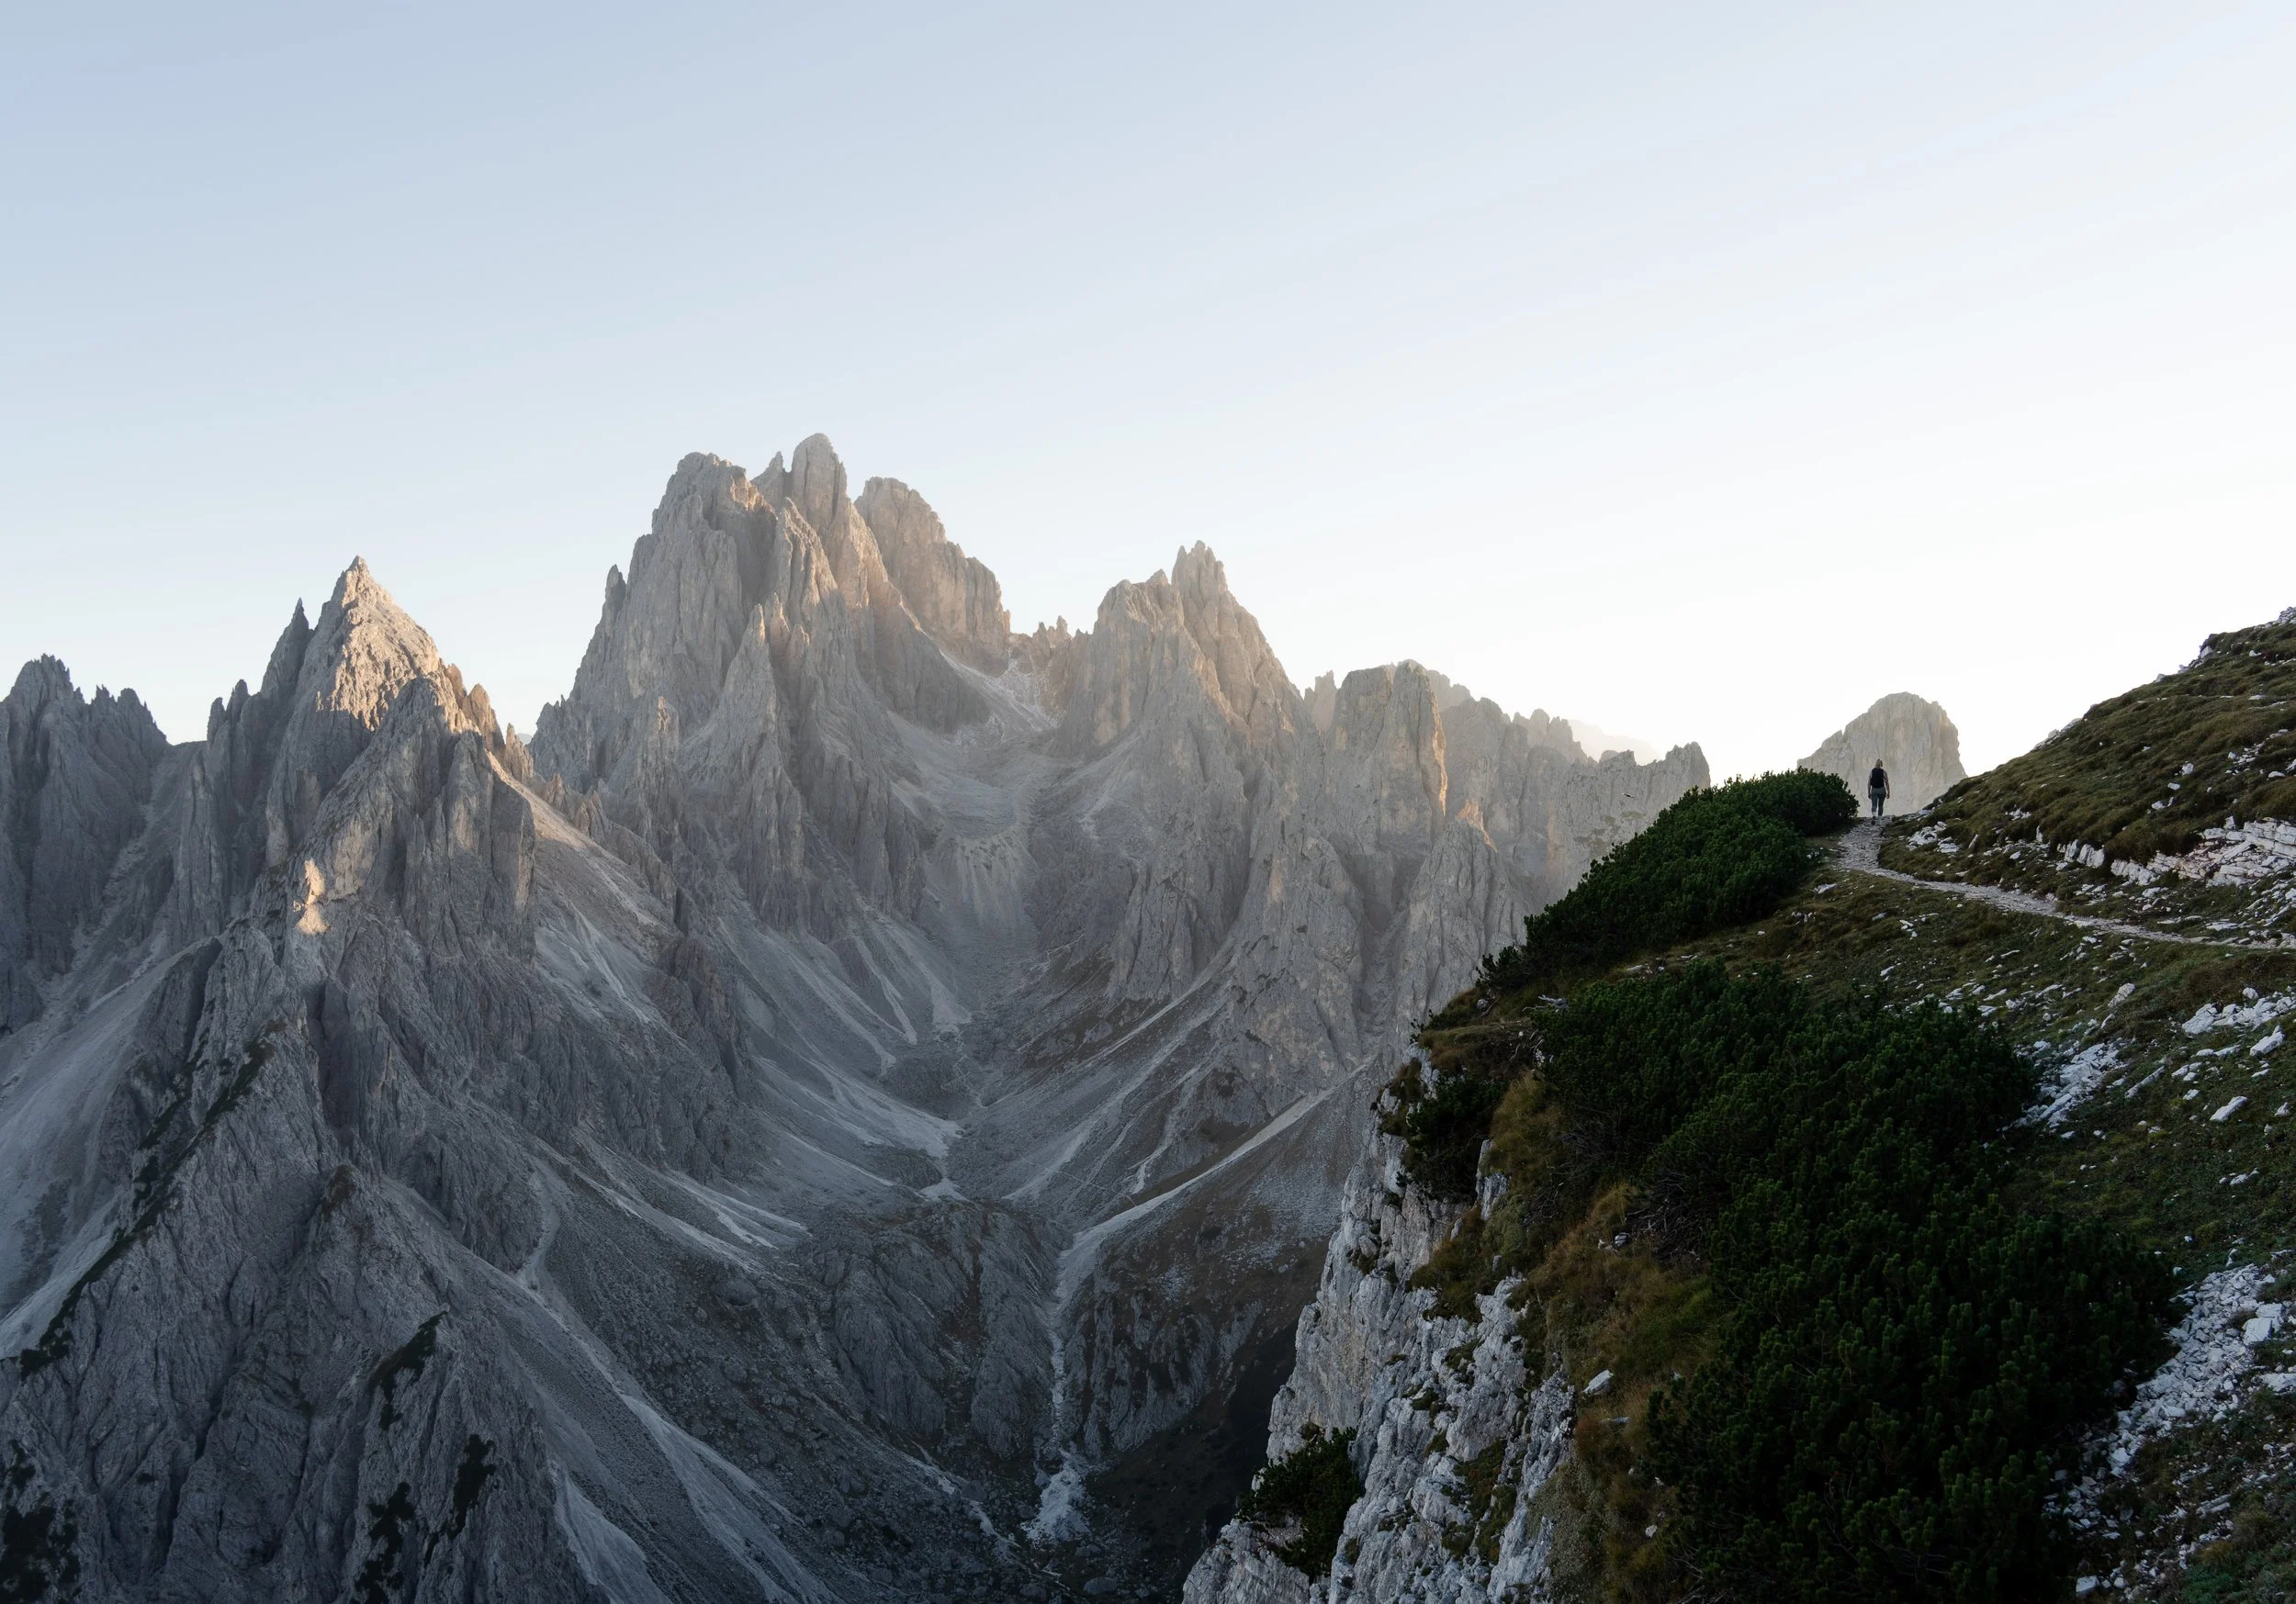
Day one offers the option to complete two separate day hikes: Lago di Sorapis and Cadini di Misurina. This day acts as a warm-up for the upcoming four-day through-hike and is a fantastic way to get your legs moving while experiencing two of the Dolomites' most beautiful spots.
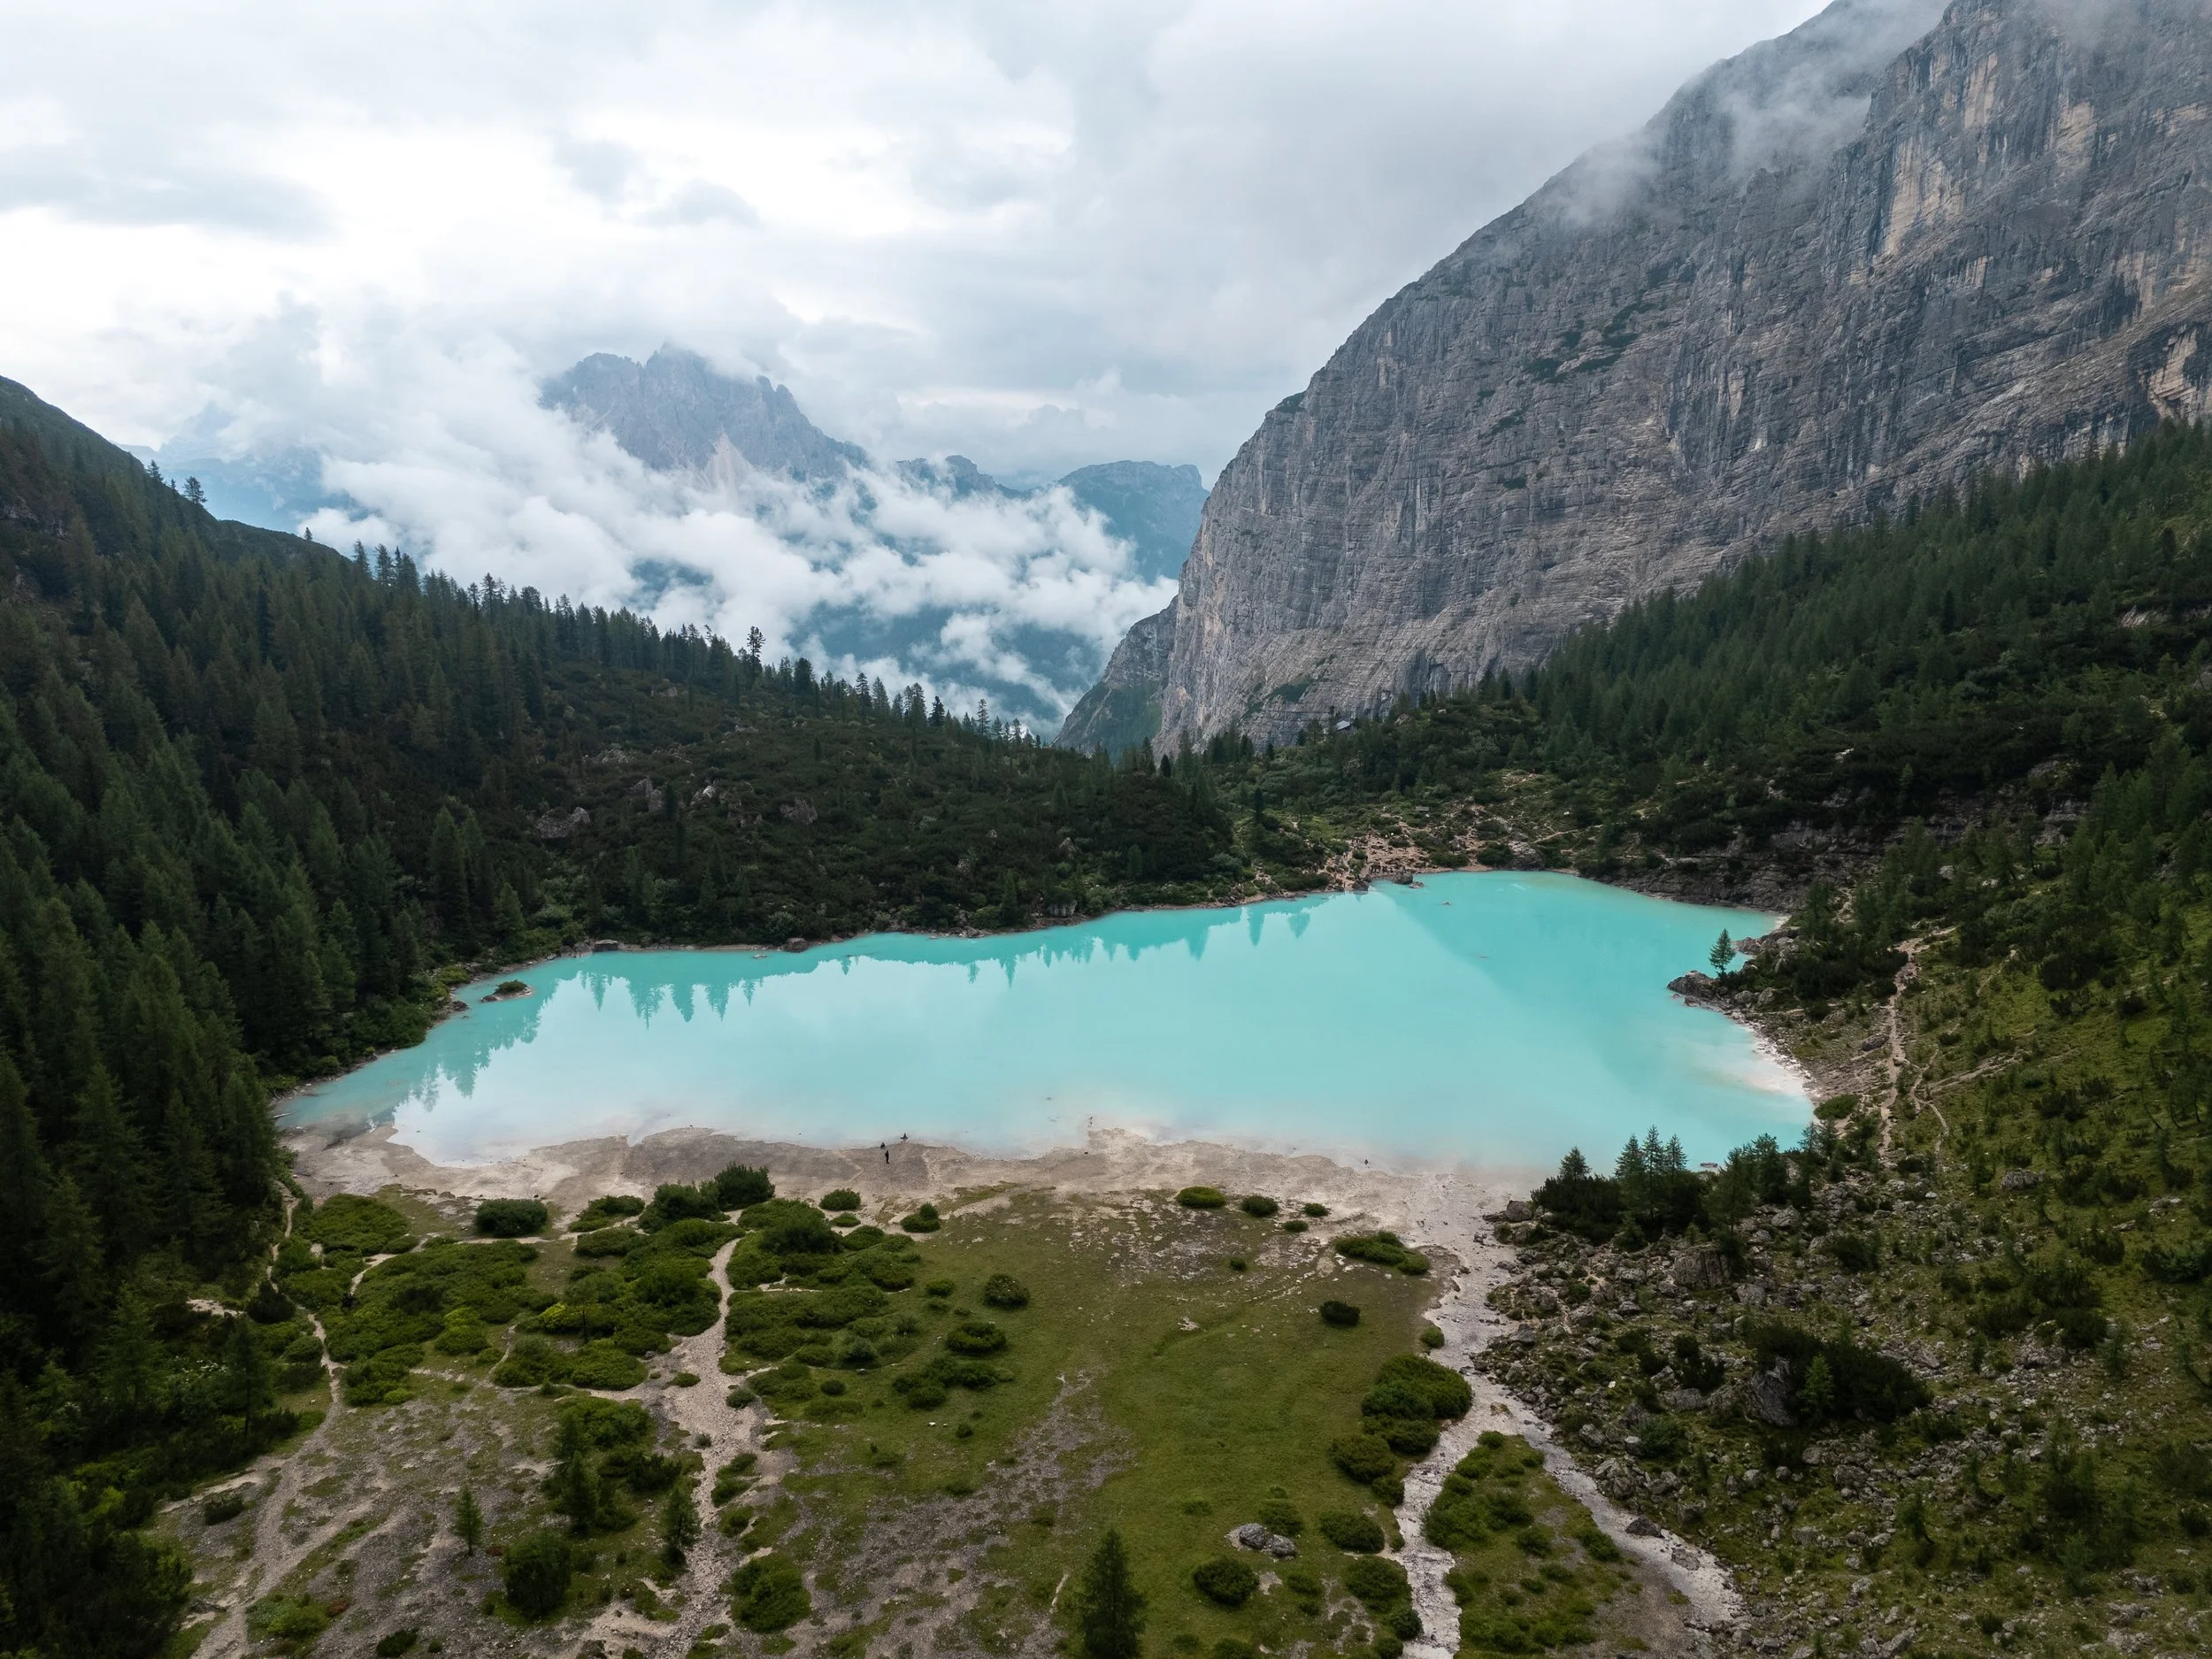
Lago Di Sorapis
I began the hike from Passo Tre Croci, where there's plenty of roadside parking and a convenient bus stop.
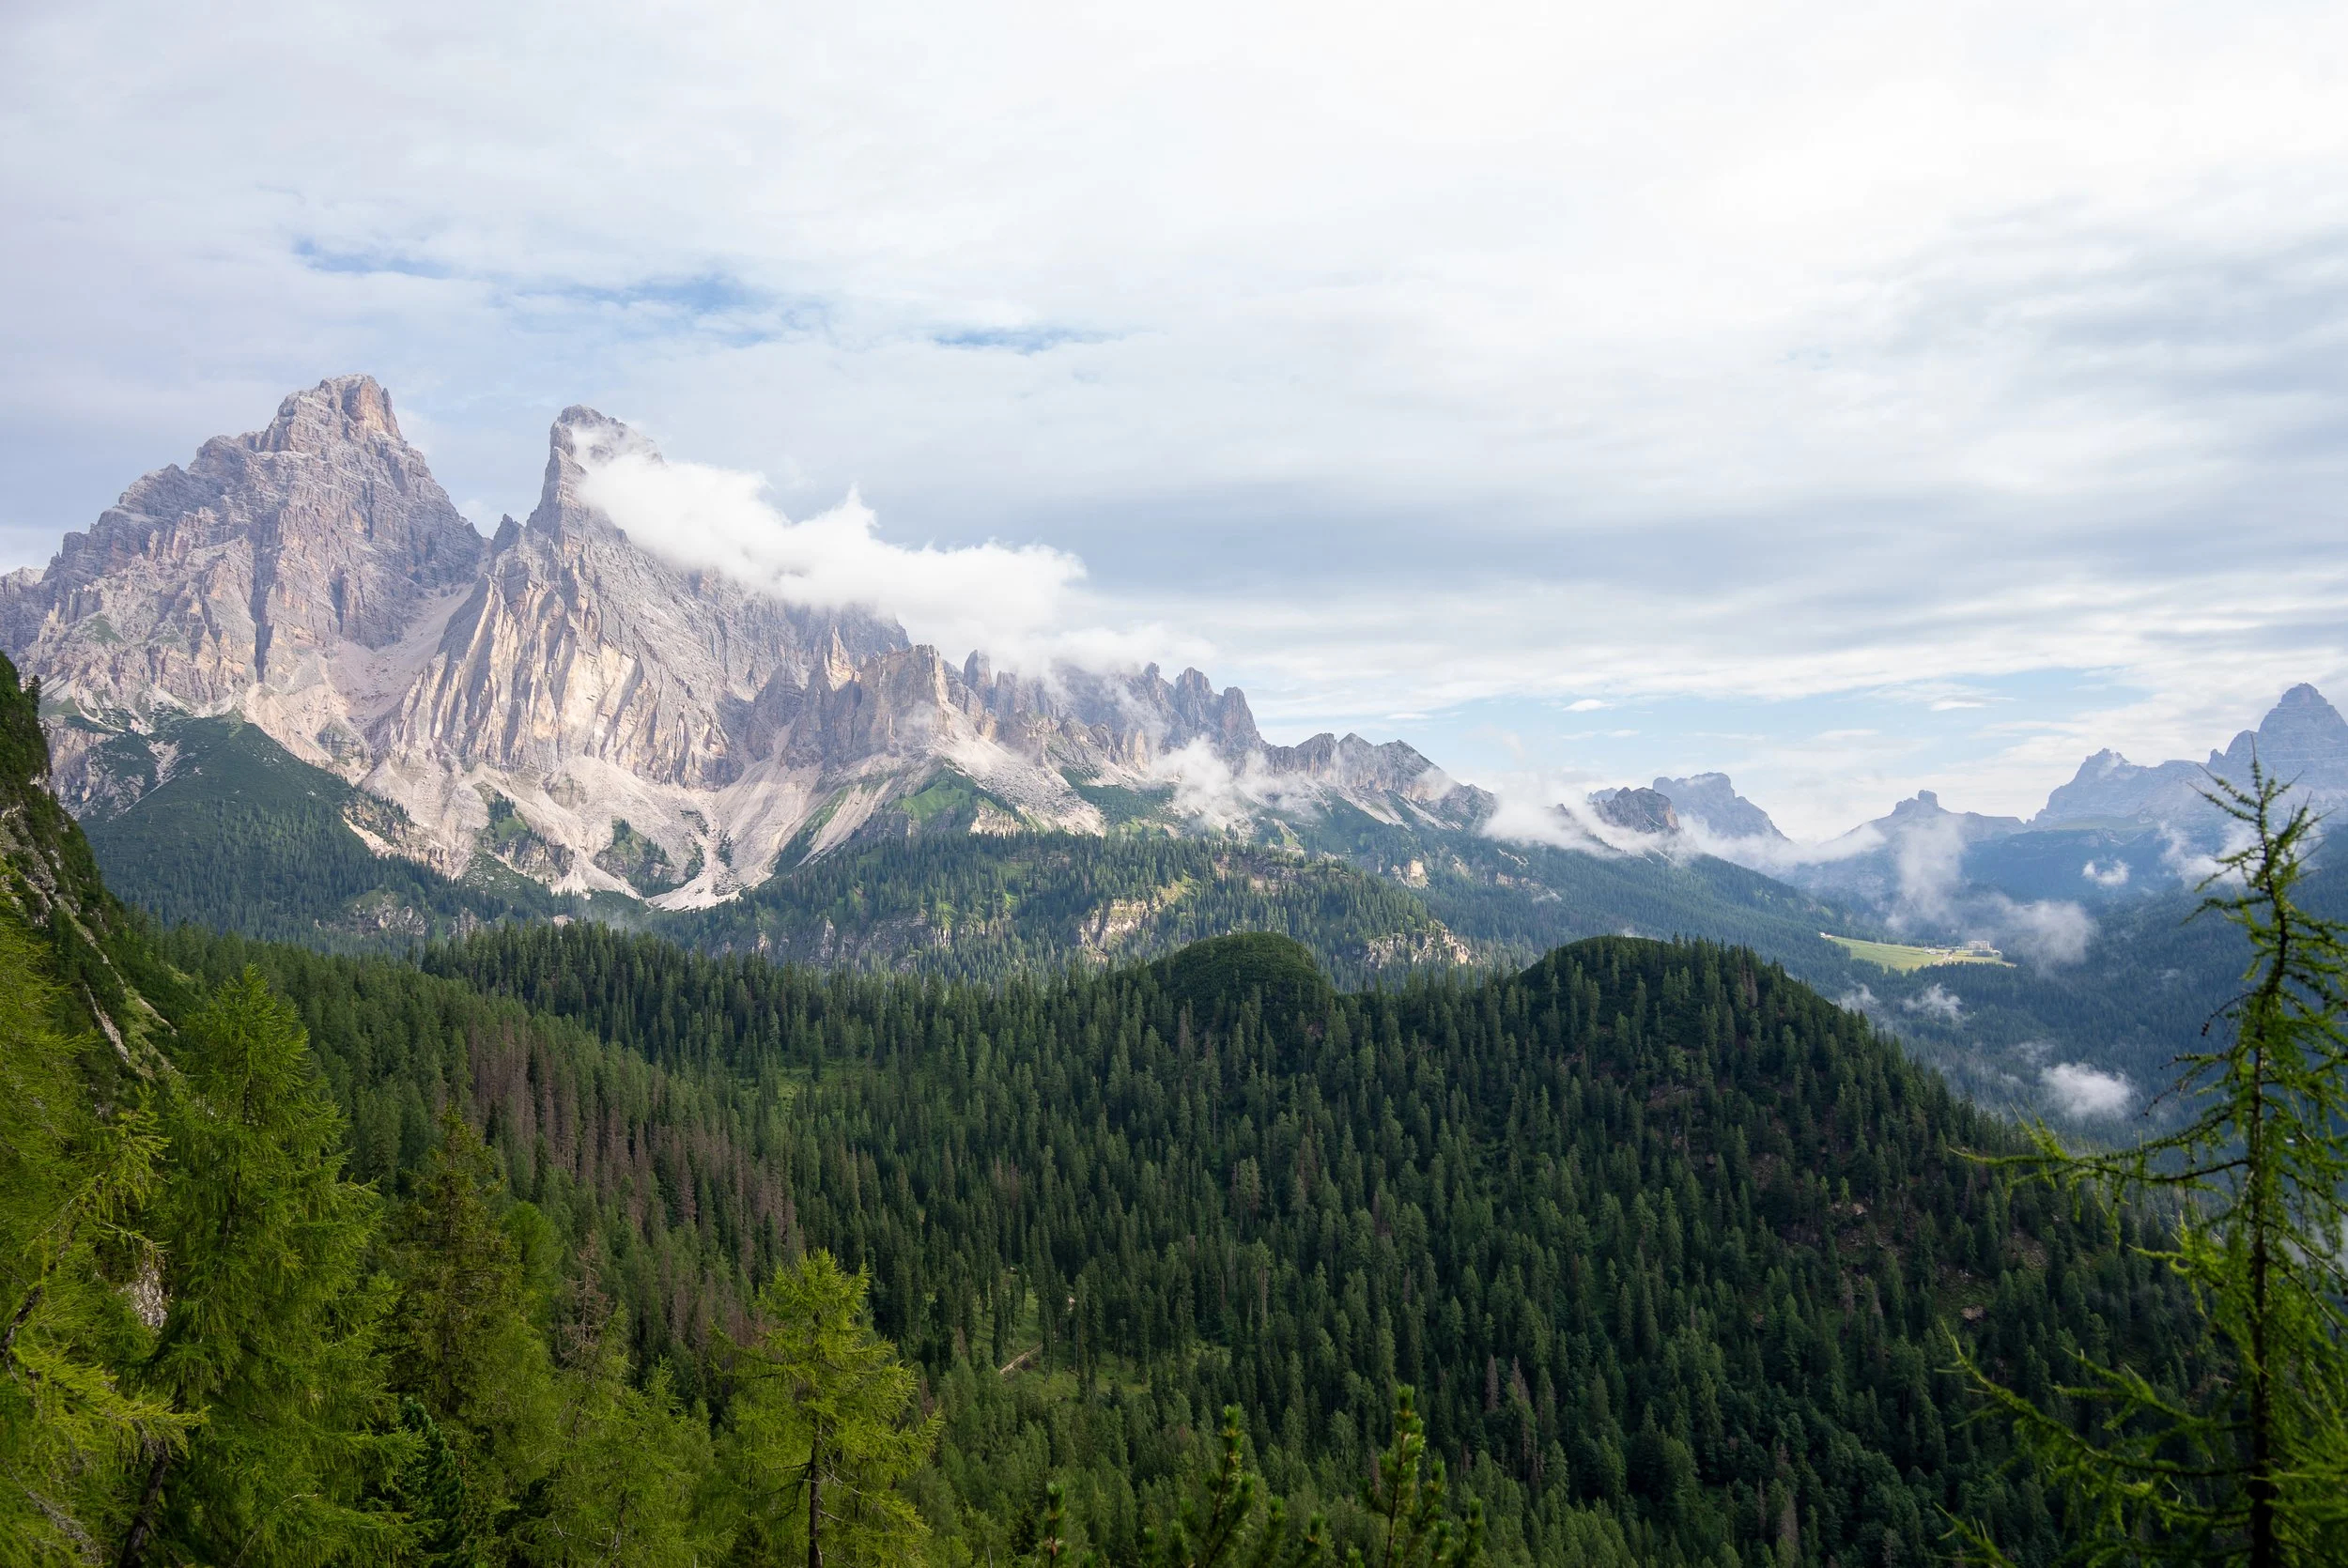
The route winds through a forested slope through breaks in the treeline you should hopefully have beautiful views towards Monte Cristallo and down into the valley.

The first few kilometres are undulating and relatively easy underfoot. Around the 3.3 km mark, the trail steepens and the terrain becomes more rugged, with muddy patches, exposed tree roots, and loose rocks.
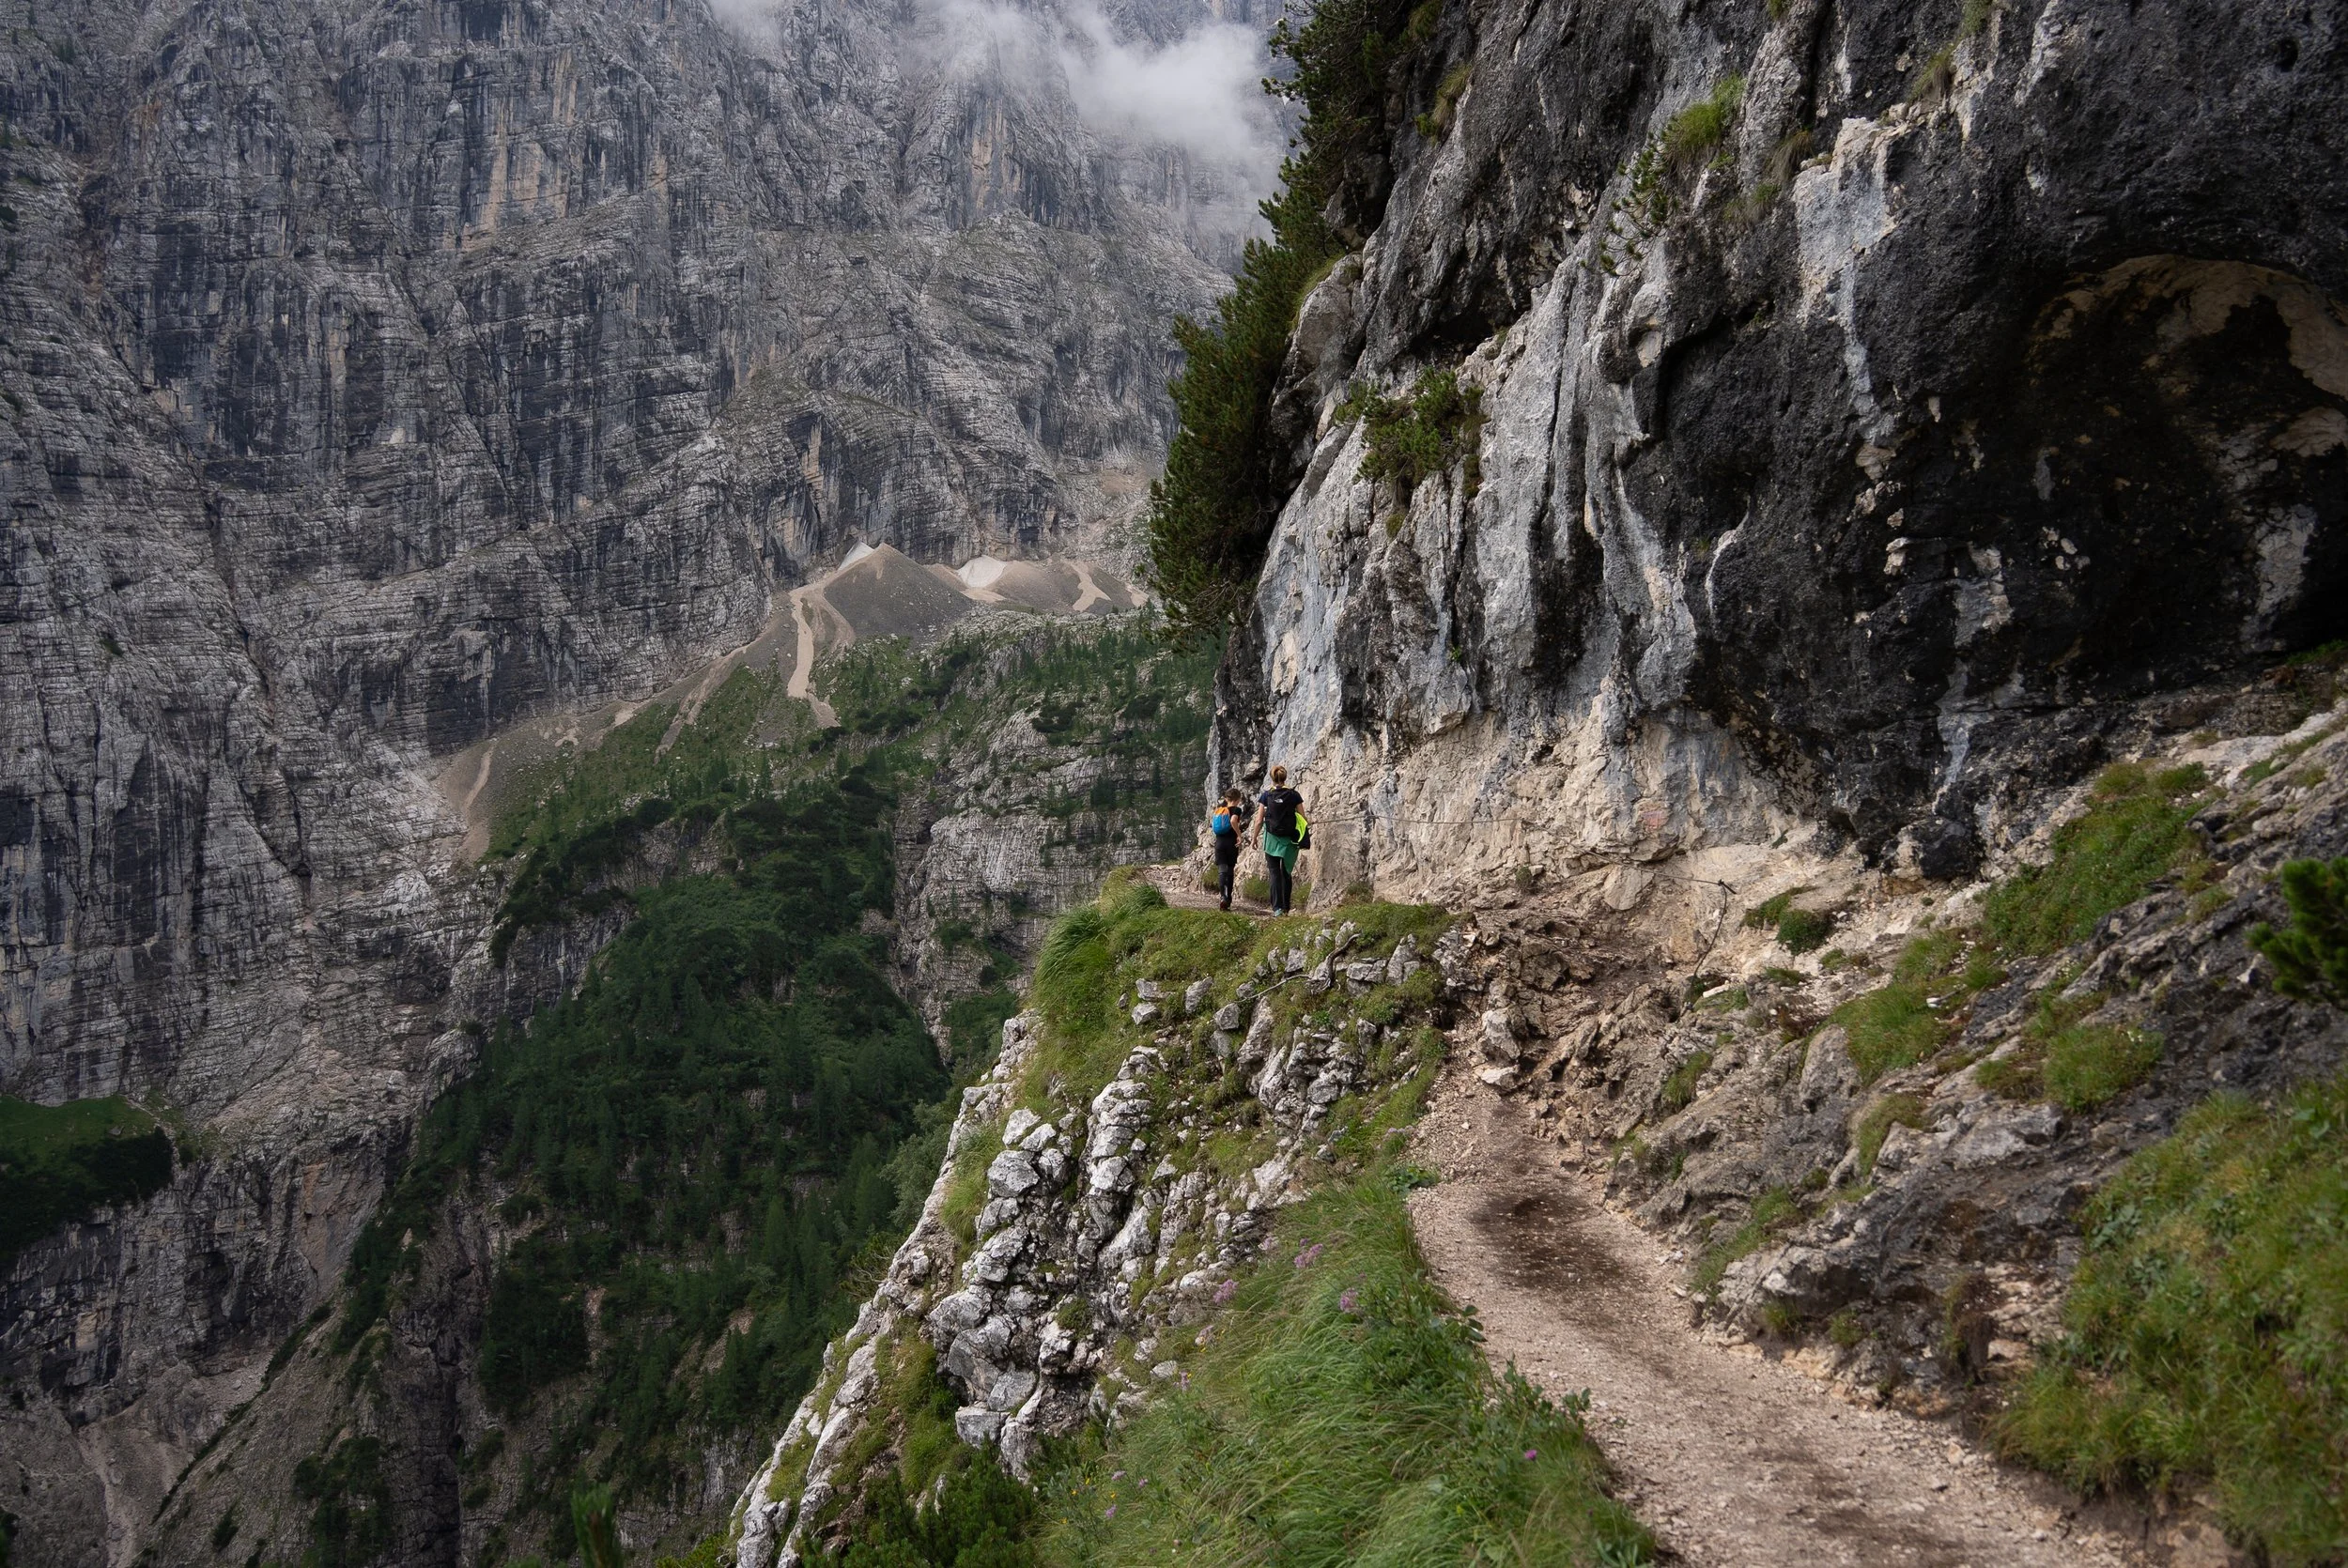
As the path climbs above the treeline, panoramic views re-emerge. This section includes several short but steep rocky segments, some cabled handrails, and even metal stairs. While not overly technical, this part might be a little difficult and daunting for some.

Eventually, you’ll reach the northern shoreline of Lago di Sorapis, a vibrant, turquoise-blue lake surrounded by dramatic peaks. It’s one of the most striking and photogenic lakes in the Dolomites.
I arrived just as the weather turned, rain was coming down and thick mist rolled through shrouding the surrounding peaks. Despite the gloomy weather, the lake's colour was still jaw-dropping and the mist added an atmospheric touch.
Most hikers stop at the northern shore, but I recommend walking around the lake. The far side is quieter and offers amazing reflections, especially on calm days. With a bit of luck, you may even catch views of Tre Cime di Lavaredo like I did on my first visit to the Dolomites.

Before descending, stop by Rifugio Vandelli just above the lake. It's a lovely mountain hut and is great for a hot drink, a meal, or, in my case, shelter from the downpour.
The trail back to Passo Tre Croci is the same in reverse. Expect a lot more foot traffic on the return, especially in the narrower sections. Be patient, courteous, and don’t hesitate to politely ask to pass slower walkers.
Afternoon & Hotel Check-In
Unfortunately, the rain didn’t let up for the rest of the afternoon and visibility in the mountains was poor. After drying off and grabbing a pizza and pasta combo at Pizzeria Edelweiss in Misurina (highly recommended), I checked into the accommodation for the night, Hotel Misurina.
The hotel is located right on the lakeshore. It’s peaceful, recently renovated, and has a modern alpine feel.
Accommodation is shared on the first night. The 10-person group is split across three rooms (typically 3-3-4). As there only six people were booked on my trek, and I was the only solo male, I had a room to myself.
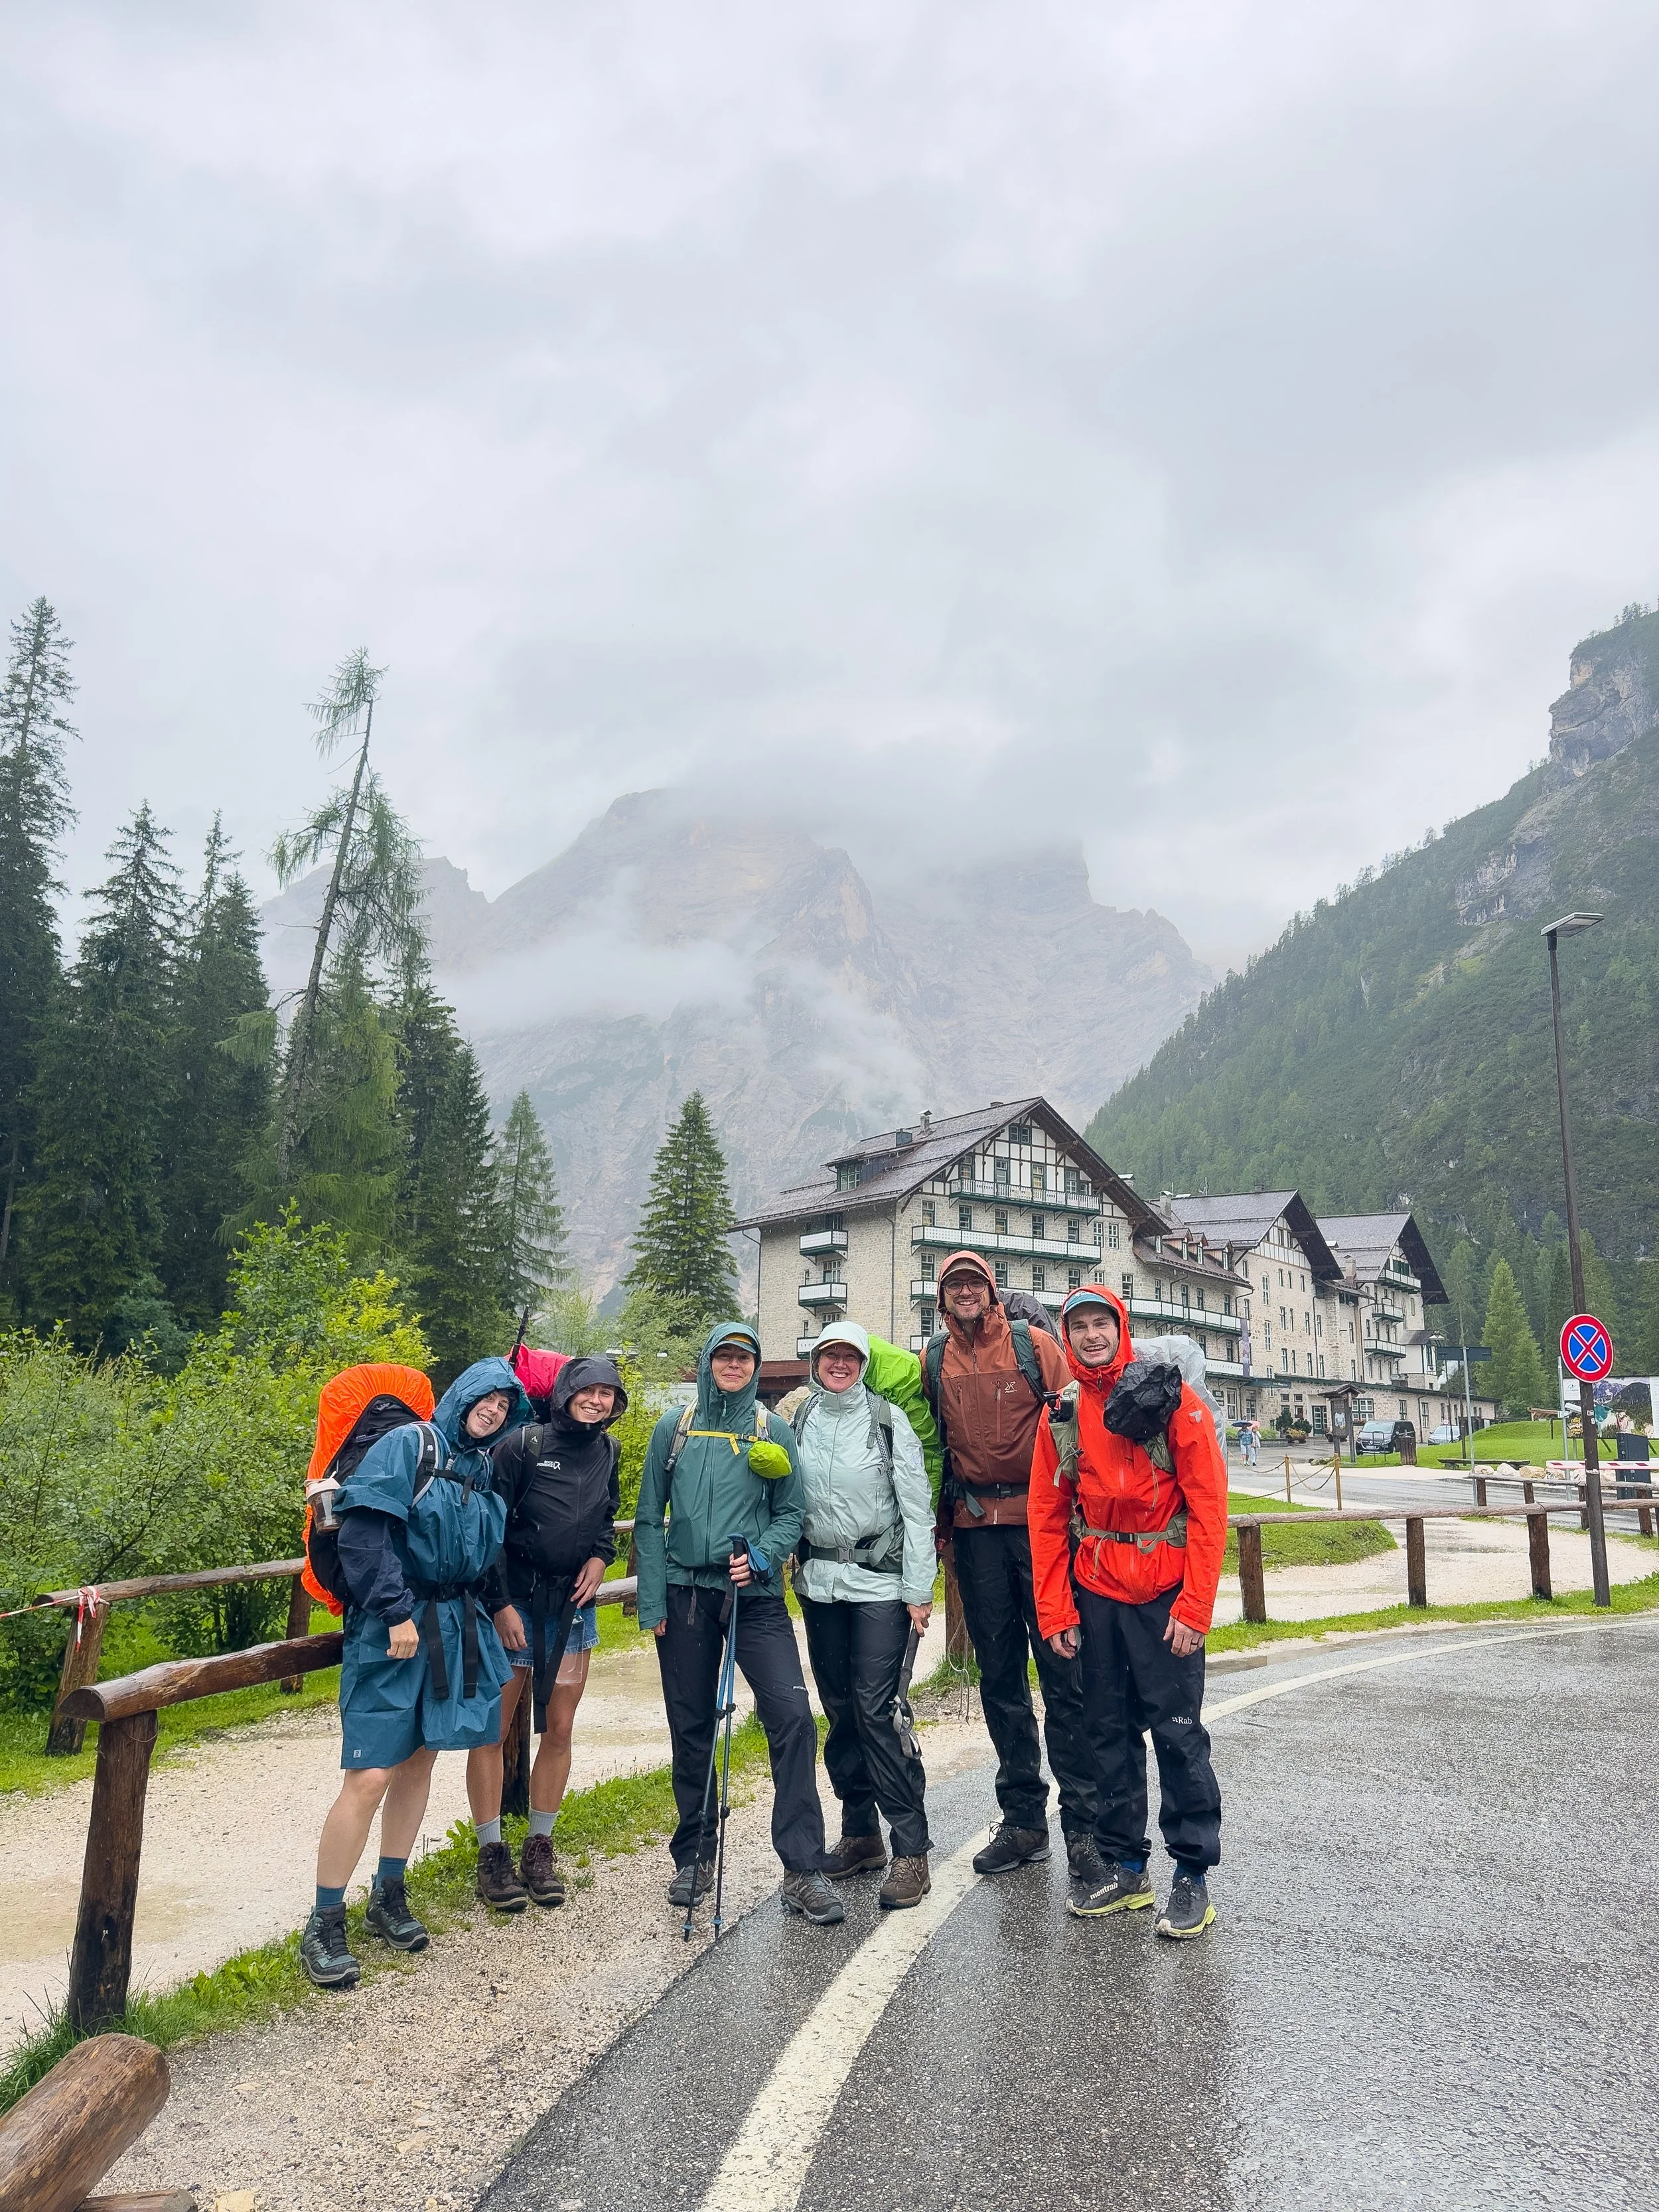
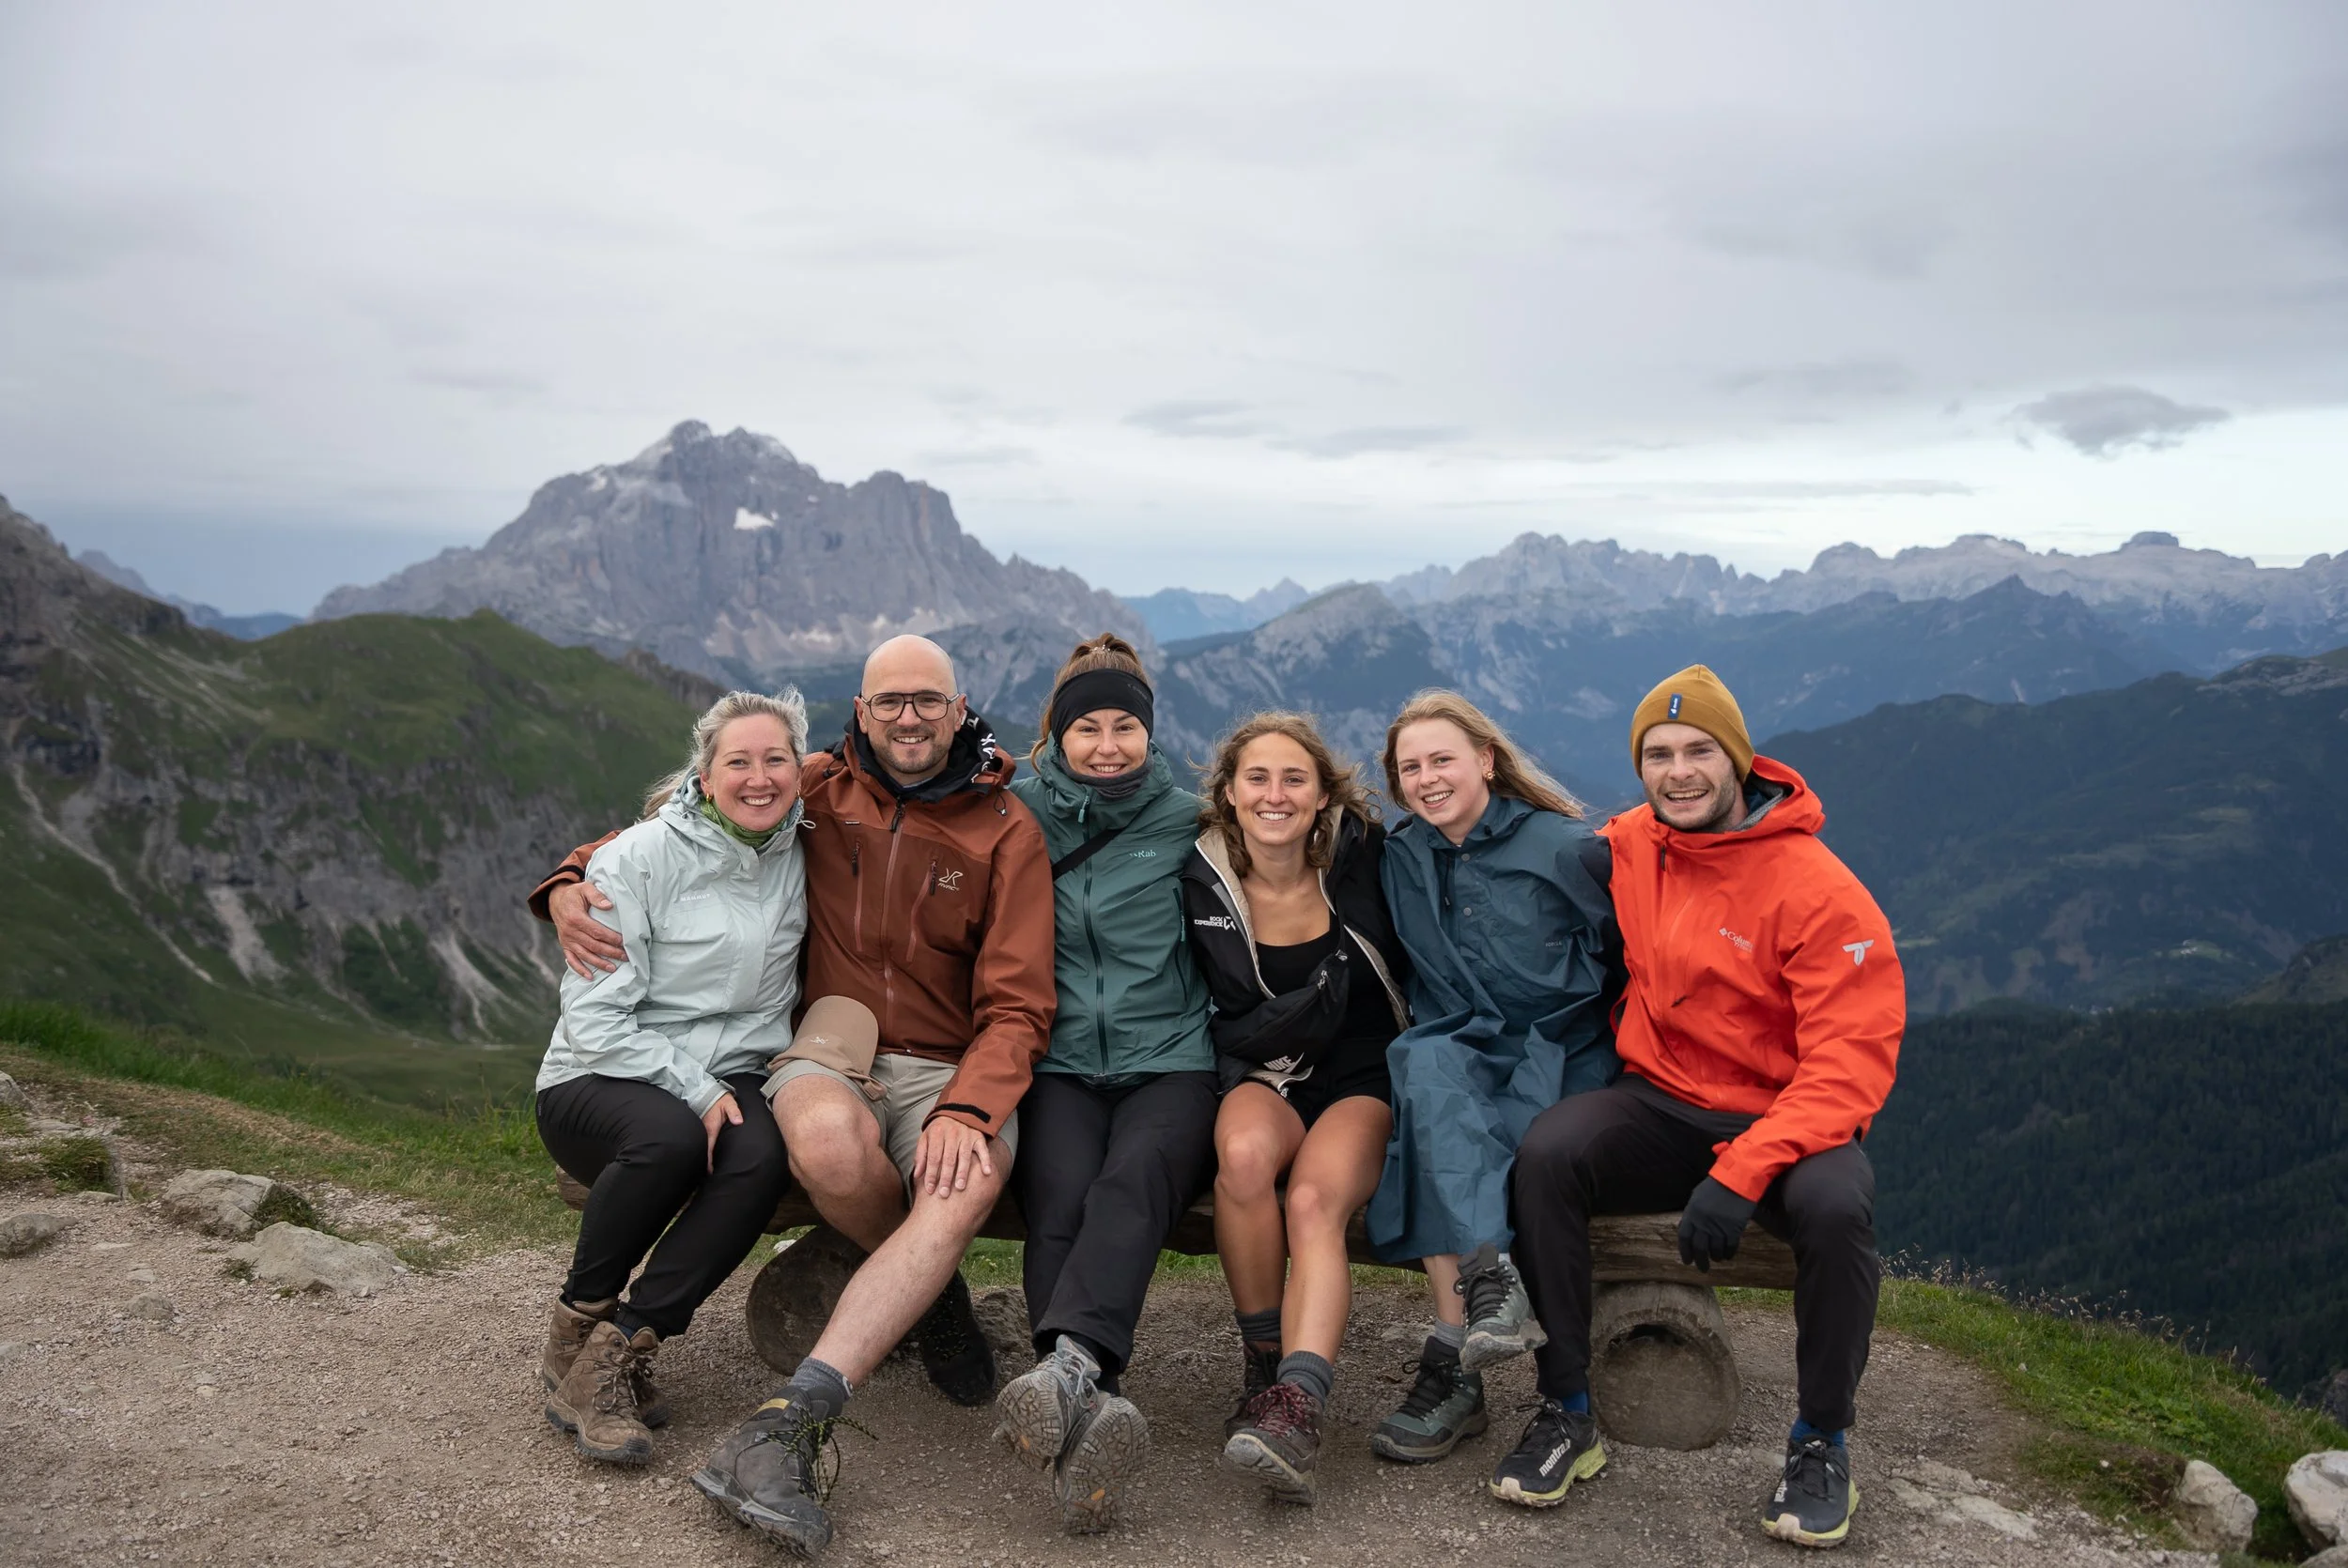
The group consisted of five fellow hikers from Belgium:
Vincent & Marcia – A couple
Sienna & Janne – Two young female friends
Sophie – A solo female traveller
Due to the bad weather and limited visibility, I decided to skip the second hike to Cadini di Misurina as it wouldn’t have been worth it.
If you’re planning to do the optional Day 6 hike to Tre Cime and Cadini, you’ll have another chance to visit the Cadini viewpoint then. Unless the forecast looks awful for Day 6, I recommend saving your energy and waiting until then.
That evening, we all met for dinner, swapped stories from the day, and talked about the adventure ahead. It was a great way to break the ice and get to know everyone before hitting the trail together the next morning.
Day two
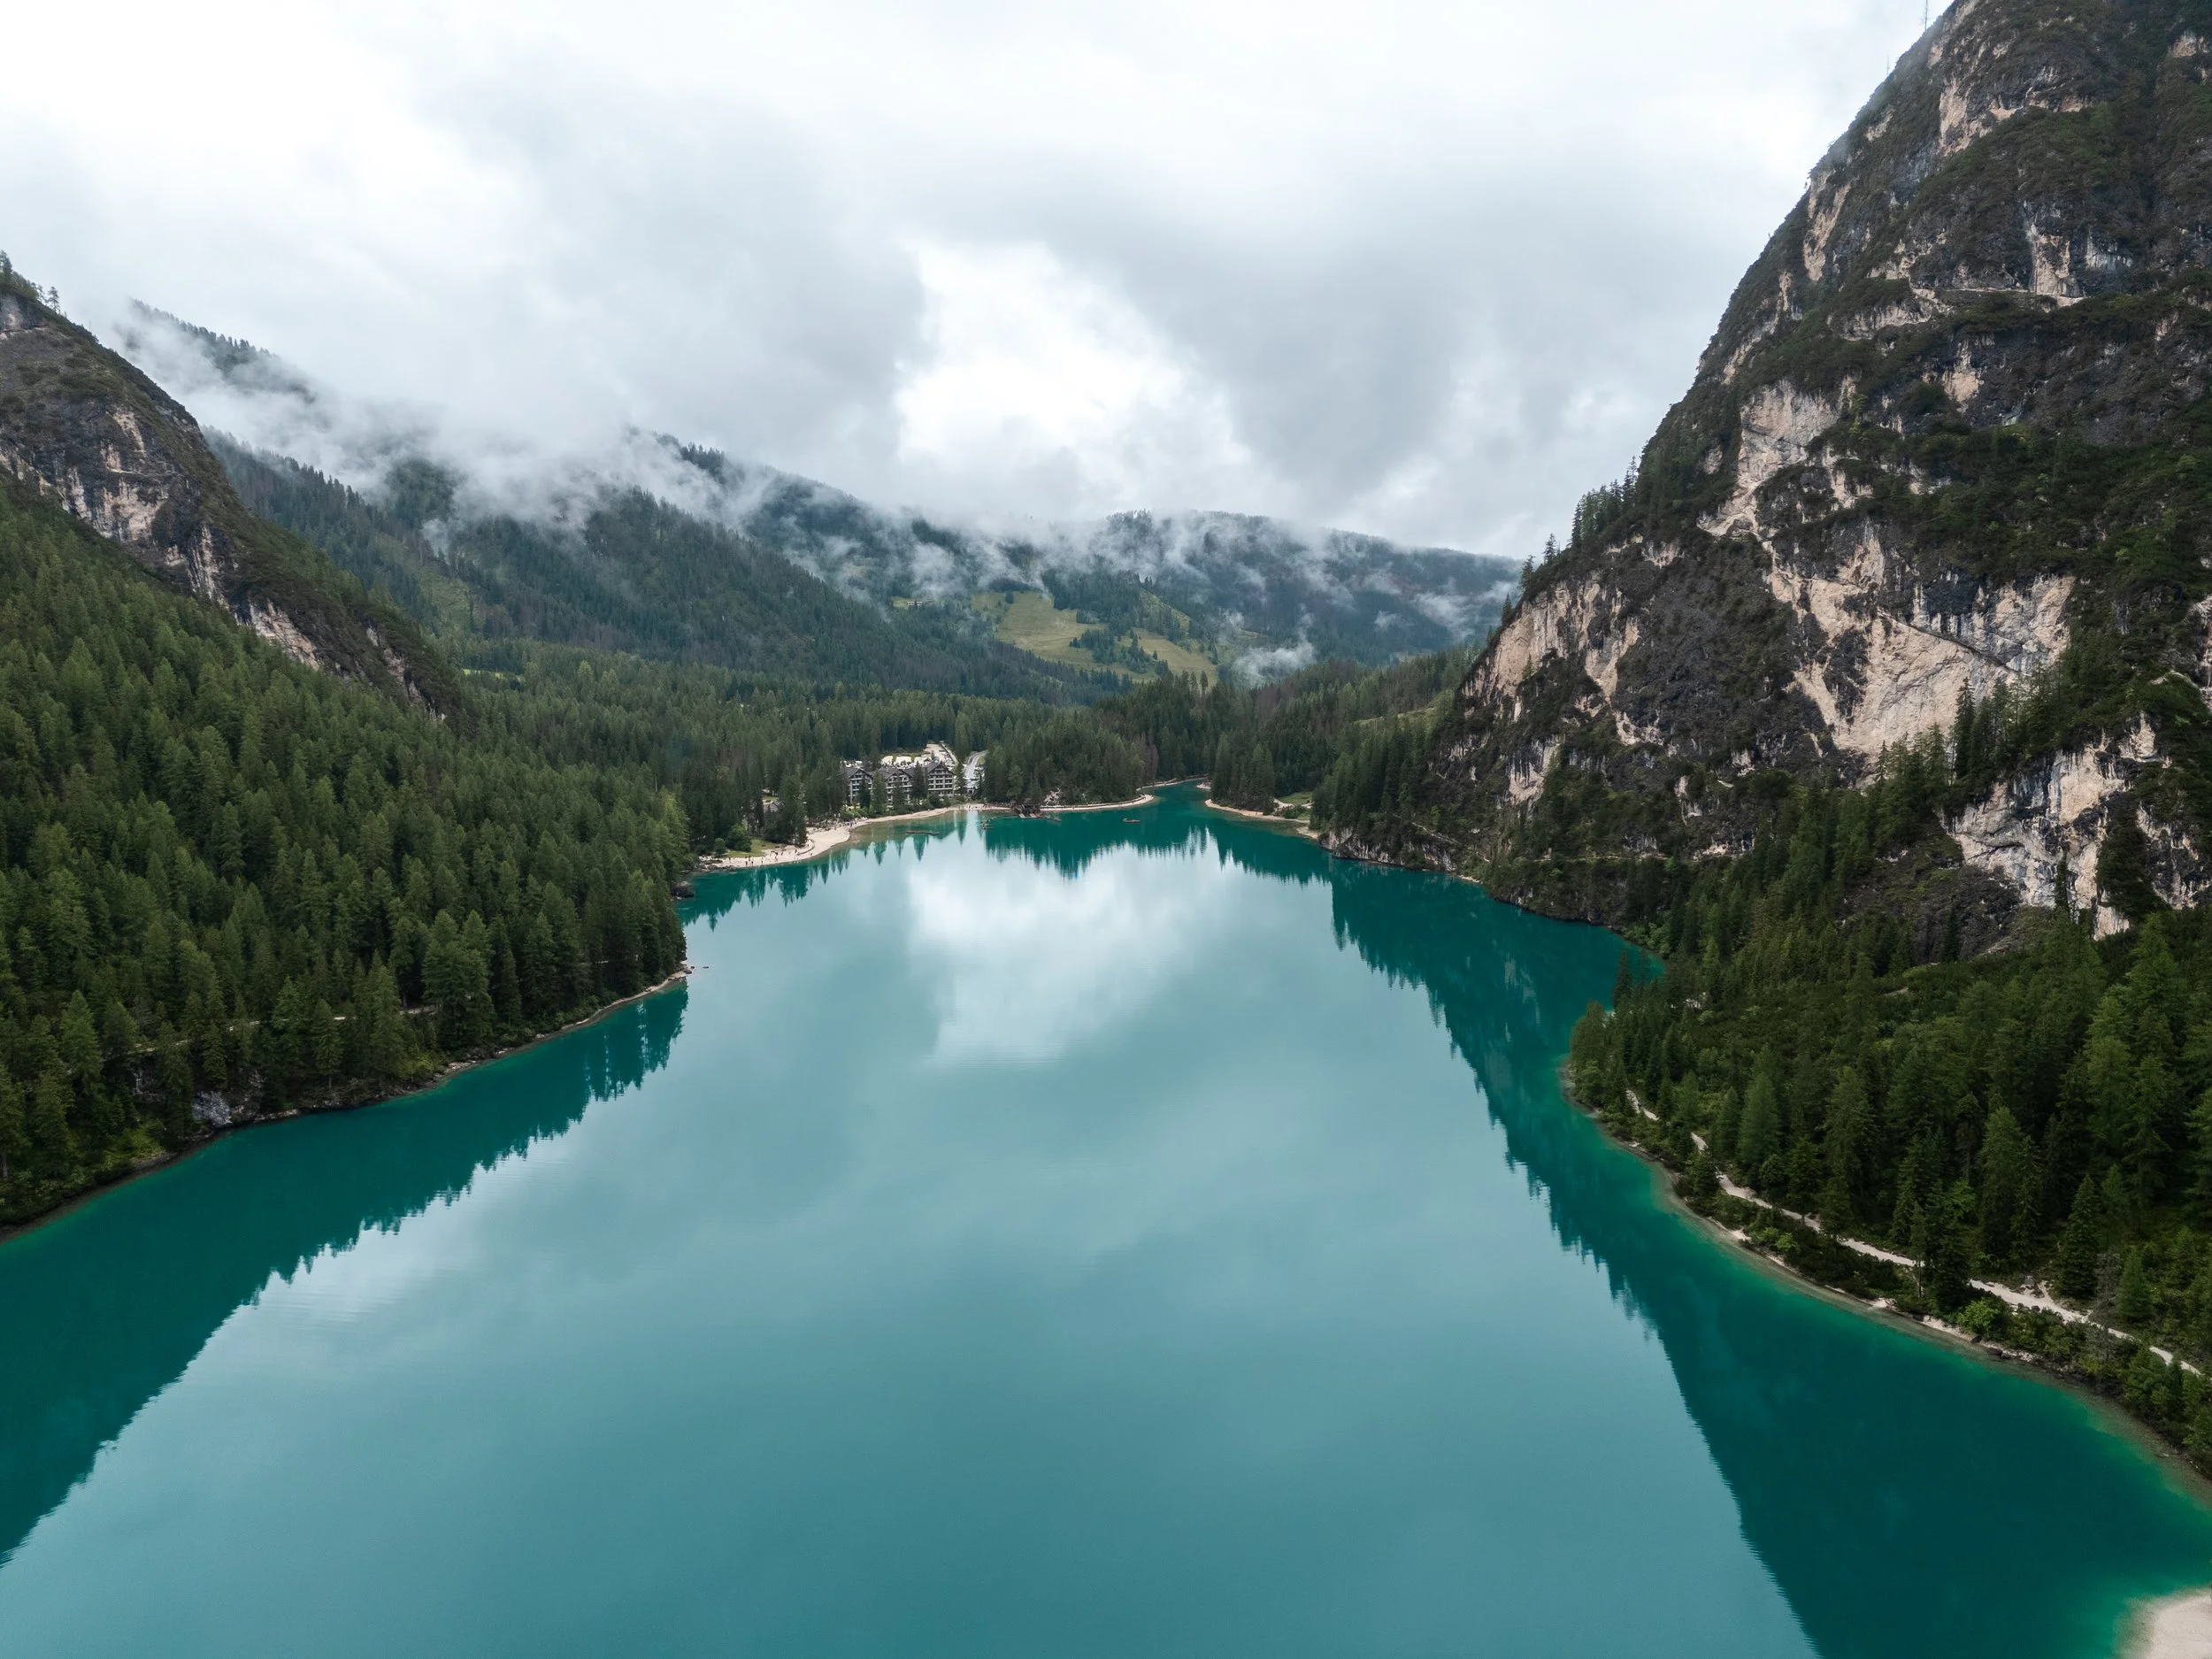
After a hearty breakfast at the hotel, we were picked up at 8:30 am by a shuttle bus and dropped off at one of the most iconic locations in the Dolomites: Lago di Braies. This marked the beginning of four days of through-hiking, with overnights stays in mix of rifugio and campsites.
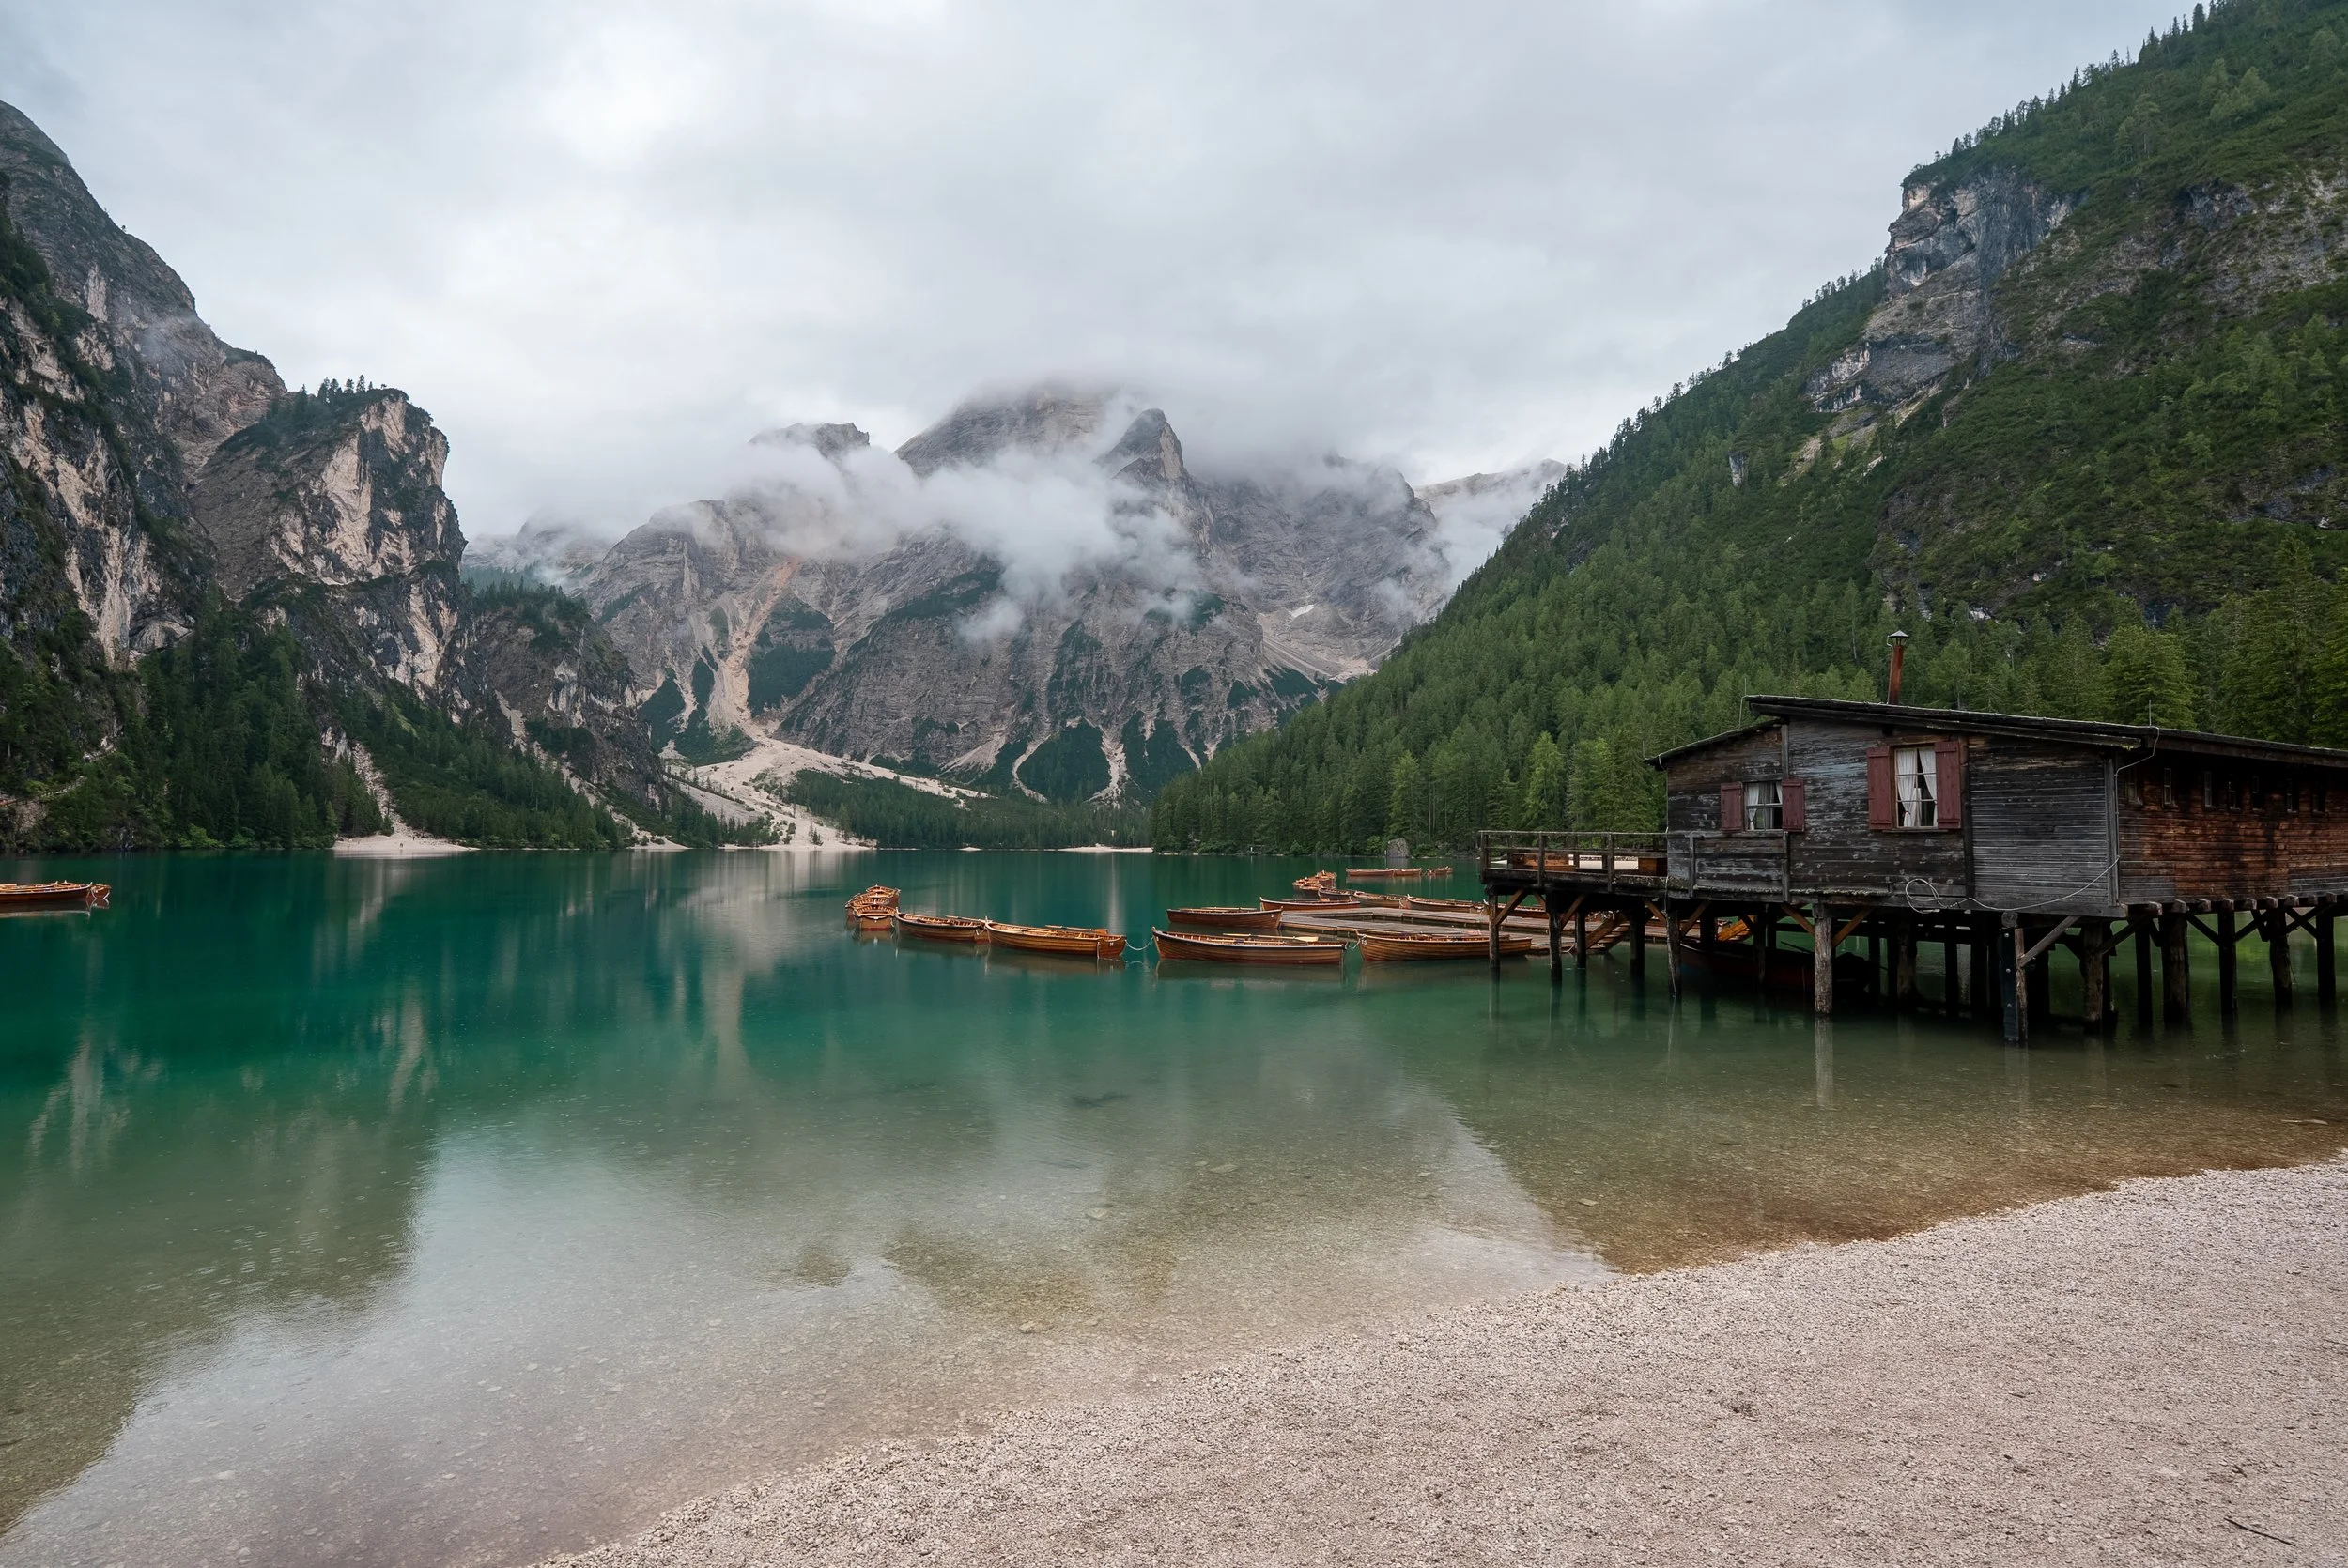
Surrounded on three sides by towering mountains, Lago di Braies is easily one of the most breathtaking lakes in Italy. Its fame is well earned thanks to its vivid turquoise water, traditional wooden boathouse, and charming rowboats that line the shore.

Luckily for us, the rain that had been falling all morning eased shortly after we arrived. After taking a good 45 minutes to soak in the scenery and film all of my content, I started the four days of through hiking.
I chose the longer, more scenic route around the lake (clockwise) before beginning the main climb into the valley.

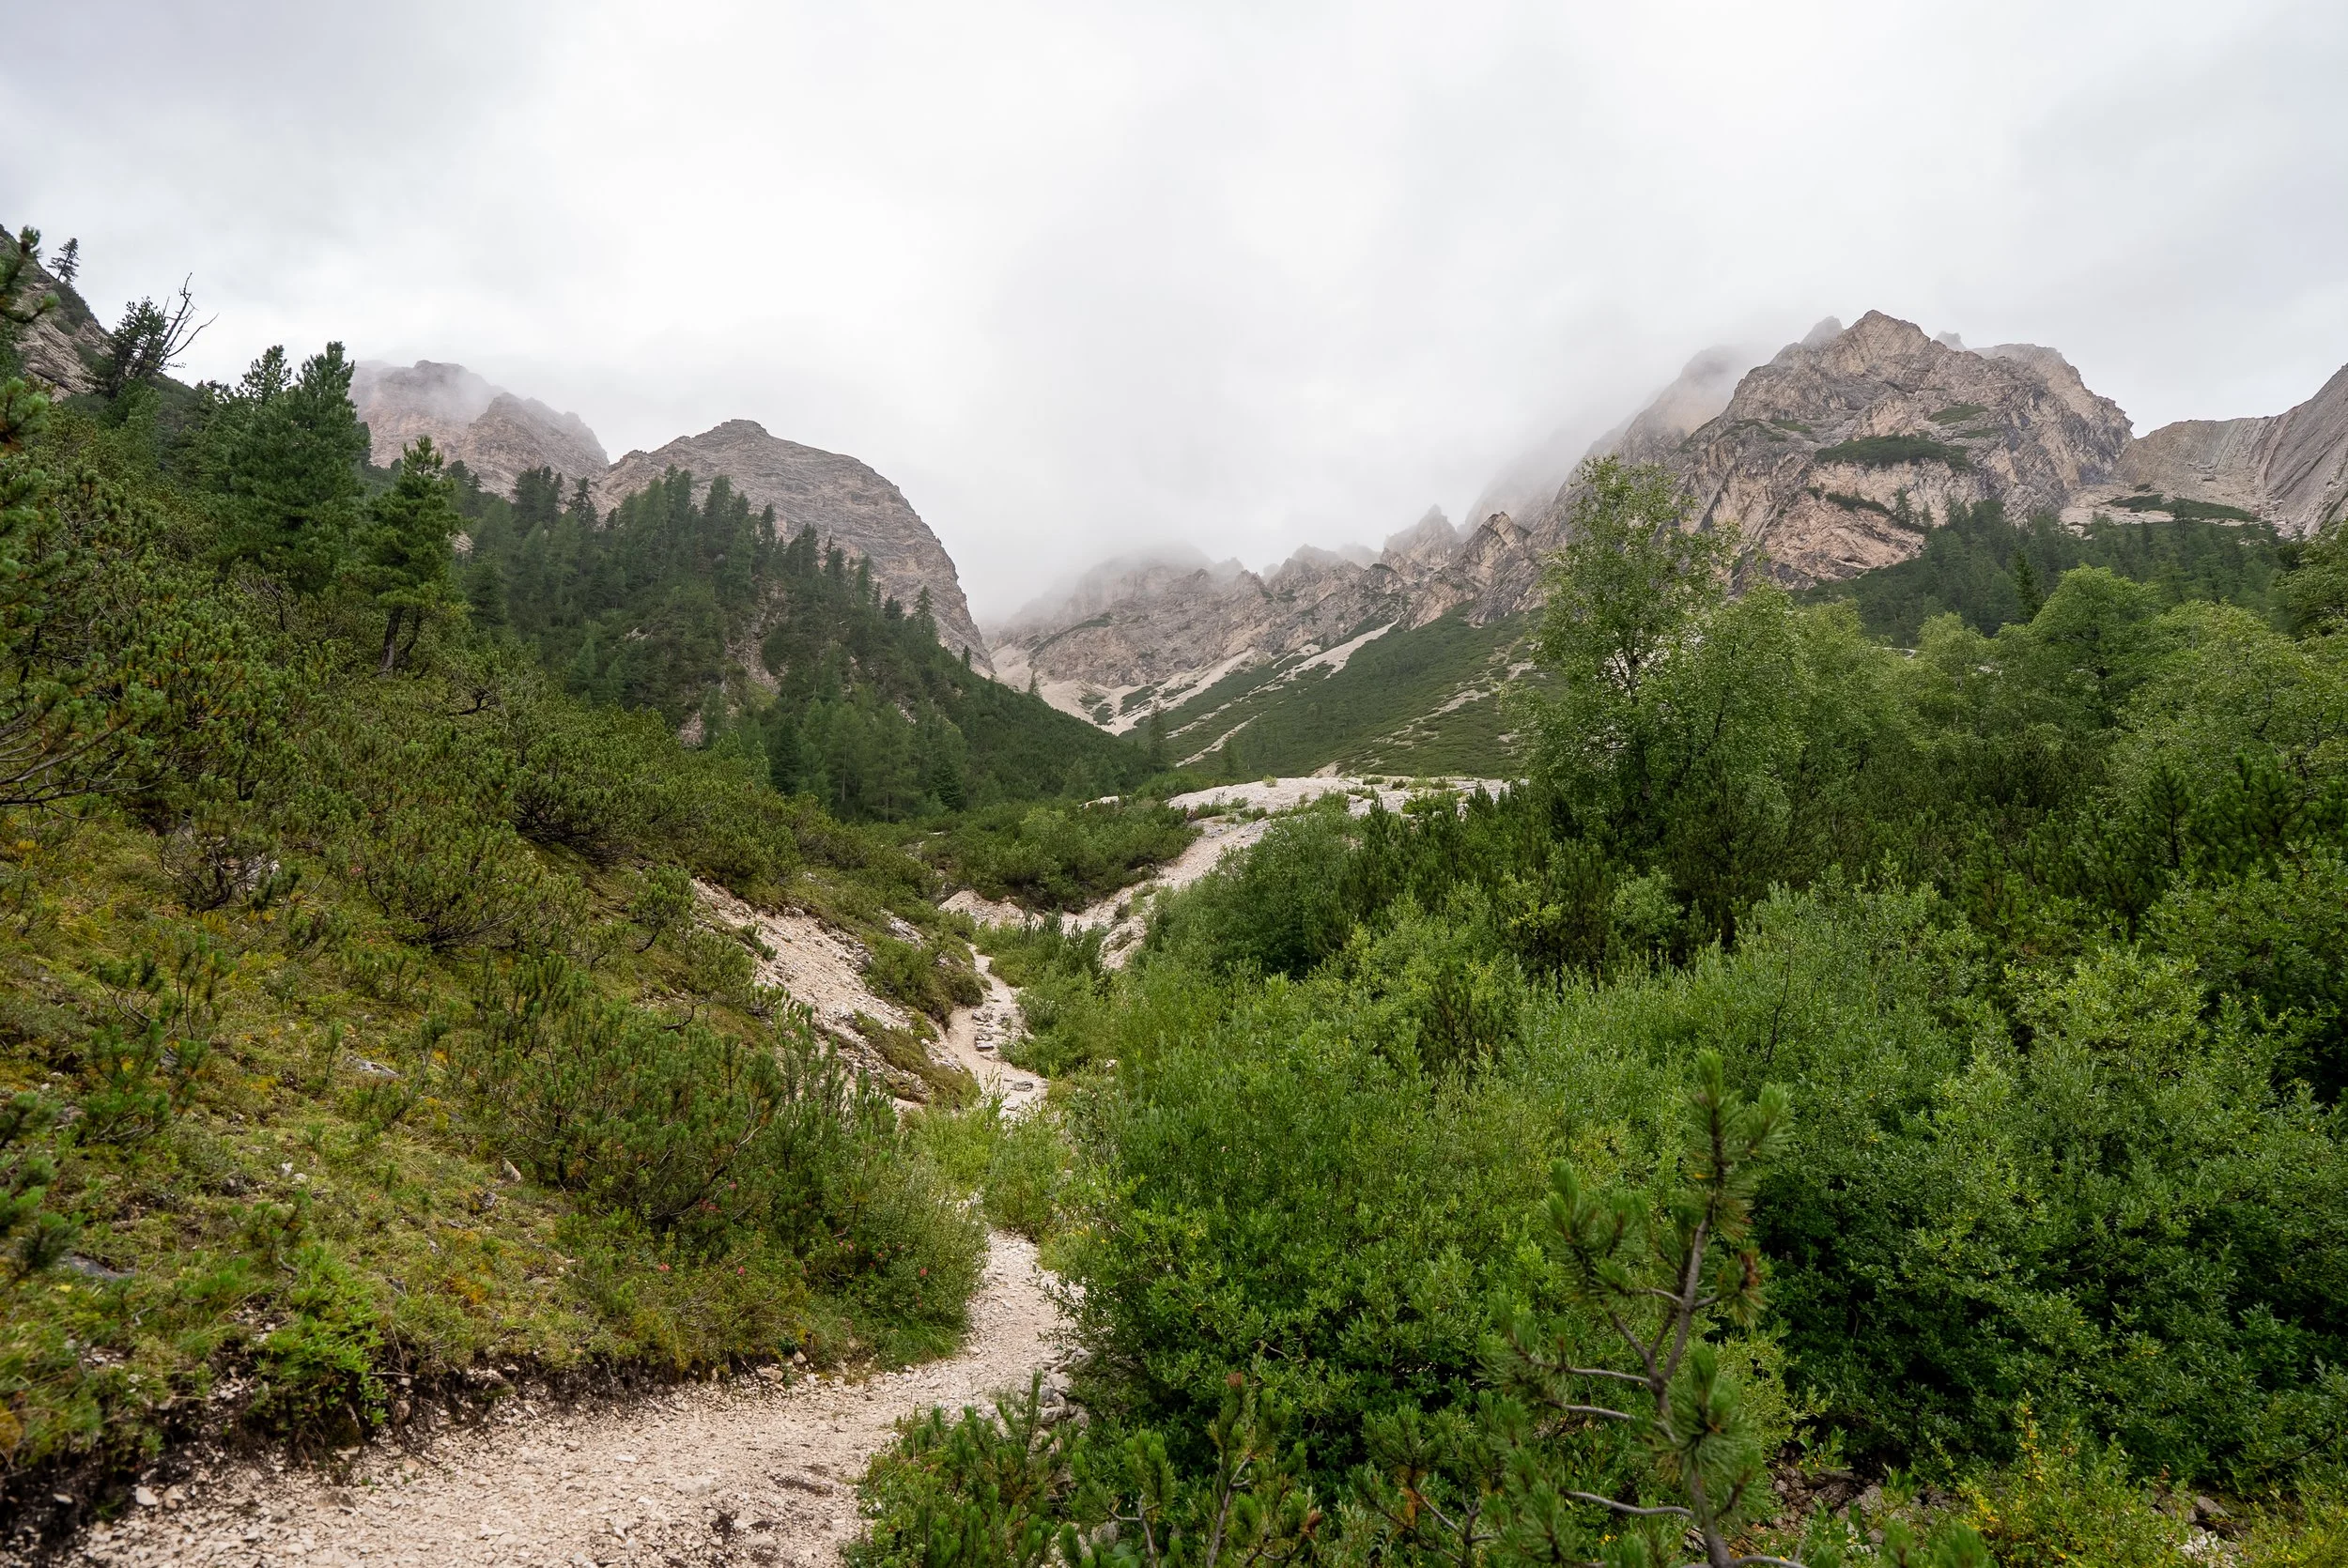
Although the lakeside will be very crowded, the moment you step onto the trail and start ascending, the crowds vanish. The initial part of the hike is fairly gentle, passing through a wide-open field and across a small river. The trail soon becomes noticeably steeper as it climbs into the forest and into the high mountains.
One section does involves navigating a steep scree slope, which can be a bit tricky and is a bit of bastard.
Once navigated the terrain levels out and becomes easier as you approach the hut. Thankfully I managed to avoid the rain for most of the day, hiking through low clouds for much of the ascent, with only a light drizzle catching me on the final km.
Rifugio Biella
We stayed at Rifugio Biella, a picturesque mountain hut nestled beneath the towering Seekofel. The hut looks out across sweeping mountain views and offers a real sense of remoteness.
It is worth nothing that what hut you stay in will be based on availability and you may not stay in Rifugio Biella.
I arrived shortly after 2:00 pm and celebrated my day of hiking with two hearty main meals and a Radler.
In operation since 1907, Rifugio Biella is an impressive three-story stone structure. It has 42 beds, spread across shared rooms for 4, 6, or 8 people.
Although rustic, the rifugio has its charms. It offers charging points for electronics, has Wi-Fi, and even showers (though you’ll need to pay to use them).
Two things to note is that the tap water is not drinkable and the toilets are long drop, so I hope your legs aren’t too sore.
Our group was given a six-person room with two single beds and two bunk beds. Dinner was served at 7:00 pm and included a pasta starter, followed by a classic alpine dish of polenta and sausage.


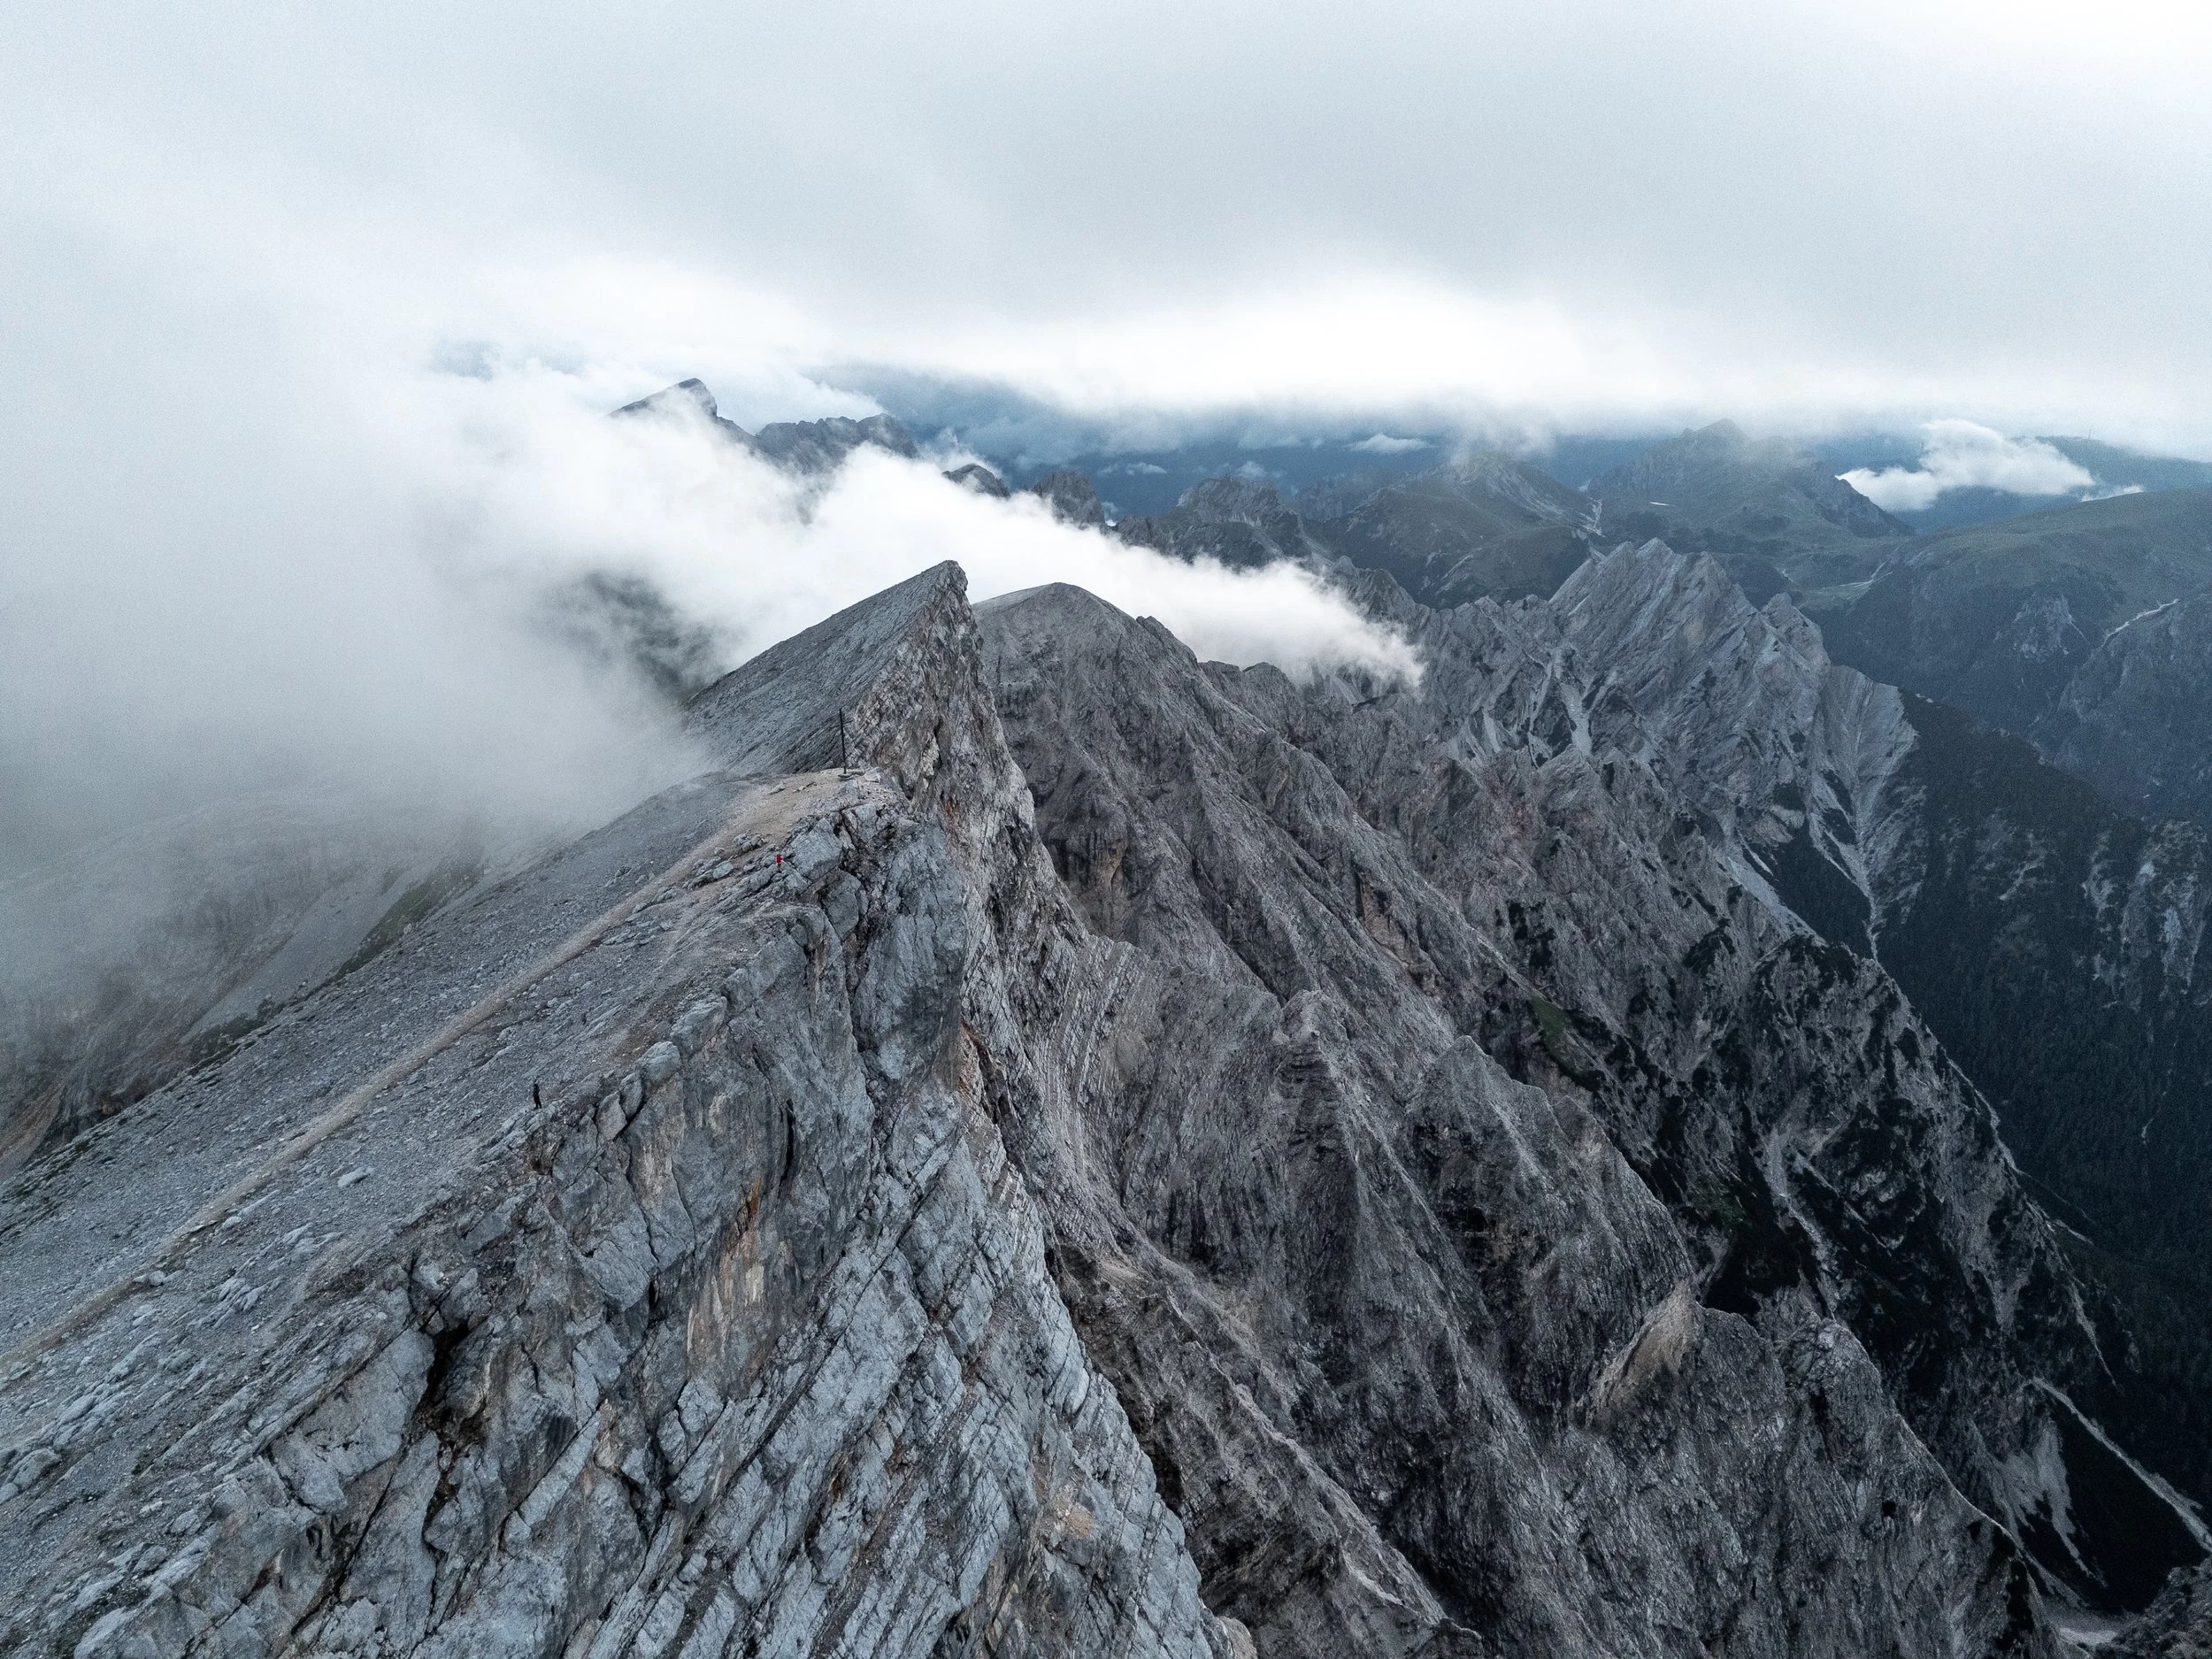
Sunset Summit of Seekofel
By the time dinner ended, the clouds had started to lift, and the weather looked more promising. Sophie and I decided to take advantage of the break in conditions and make an evening summit of Seekofel (2,800 m).
Although not part of the official Dolomiti Trail itinerary, the opportunity to summit such a prominent peak at sunset was too good to pass up. The route is only about 2 km one way, but it's steep and relentless, with several switchbacks and a short section of cables.
We reached the summit in just under an hour, and the views were nothing short of spectacular. We could see all the way back to Lago di Braies and out toward Tre Cime. Low mist swirled around the peaks, adding a dramatic touch to the scene.
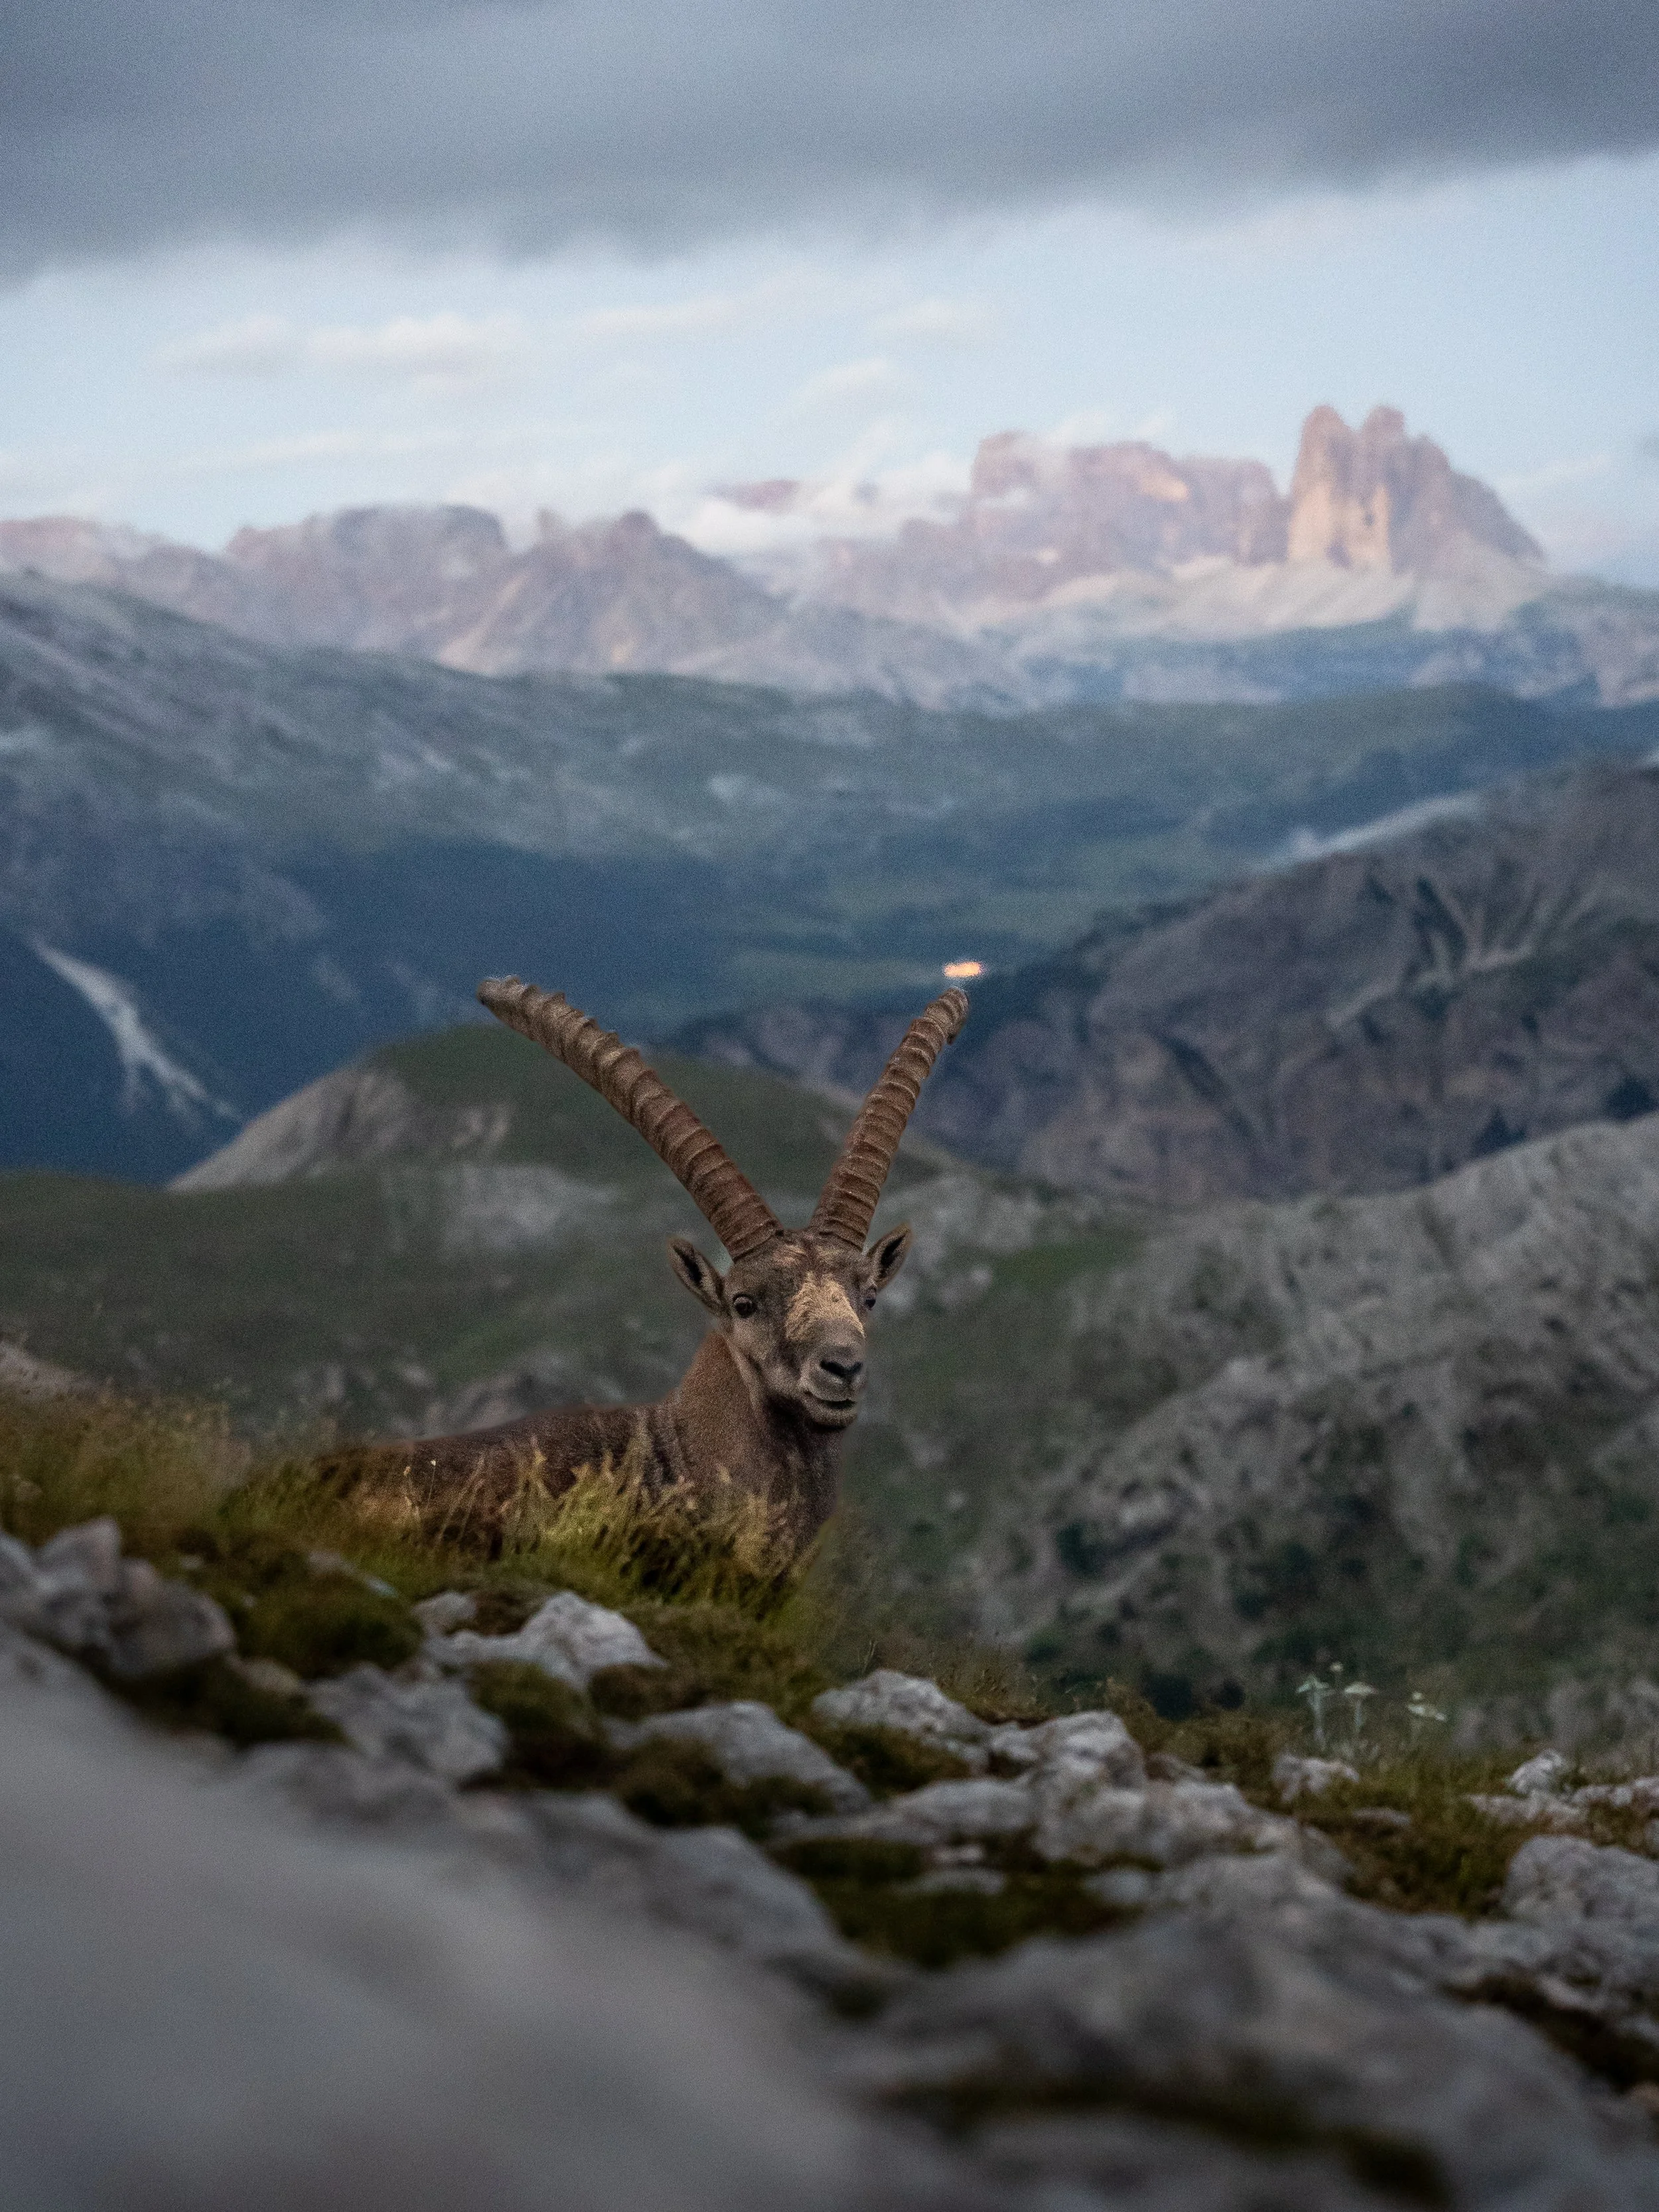
To top it all off, we spotted an ibex both on the ascent and descent. Seeing this majestic animal, set against the rugged landscape was a surreal and unforgettable moment. Especially when it was so calm and allowed me to get within 10m.
If you have the time, energy, and favourable weather, I highly recommend including this summit. It’s a cracker of a walk and will hopefully provide you with epic views.
Seekofel Hike Stats
Distance: 4.1 km
Duration: 2 hours 18 minutes (1 hour 36 minutes moving)
Elevation gain: 480 m
Difficulty: Moderate

Day Three
Today marked the longest of the entire trek, although thankfully a large portion of the hiking was downhill.
I woke to blue skies and breathtaking mountain views. After a hearty breakfast, during which I well and truly filled my boots, I left Rifugio Biella shortly after 8:30 am.
Once again, I chose to hike solo, setting off about an hour later than the rest of the group. This gave me time for a slower morning, and also allowed space for filming and content creation (which often means plenty of walking back and forth)
The unexpected theme of the day? Cows, and lots of them.
A herd had taken over the first water refill spot of the morning, which was oddly charming. Not long after, I crossed paths with a particularly feisty and rather randy group of Highland cows (one of them didn’t like me filming my vlog nearby and chased me away)


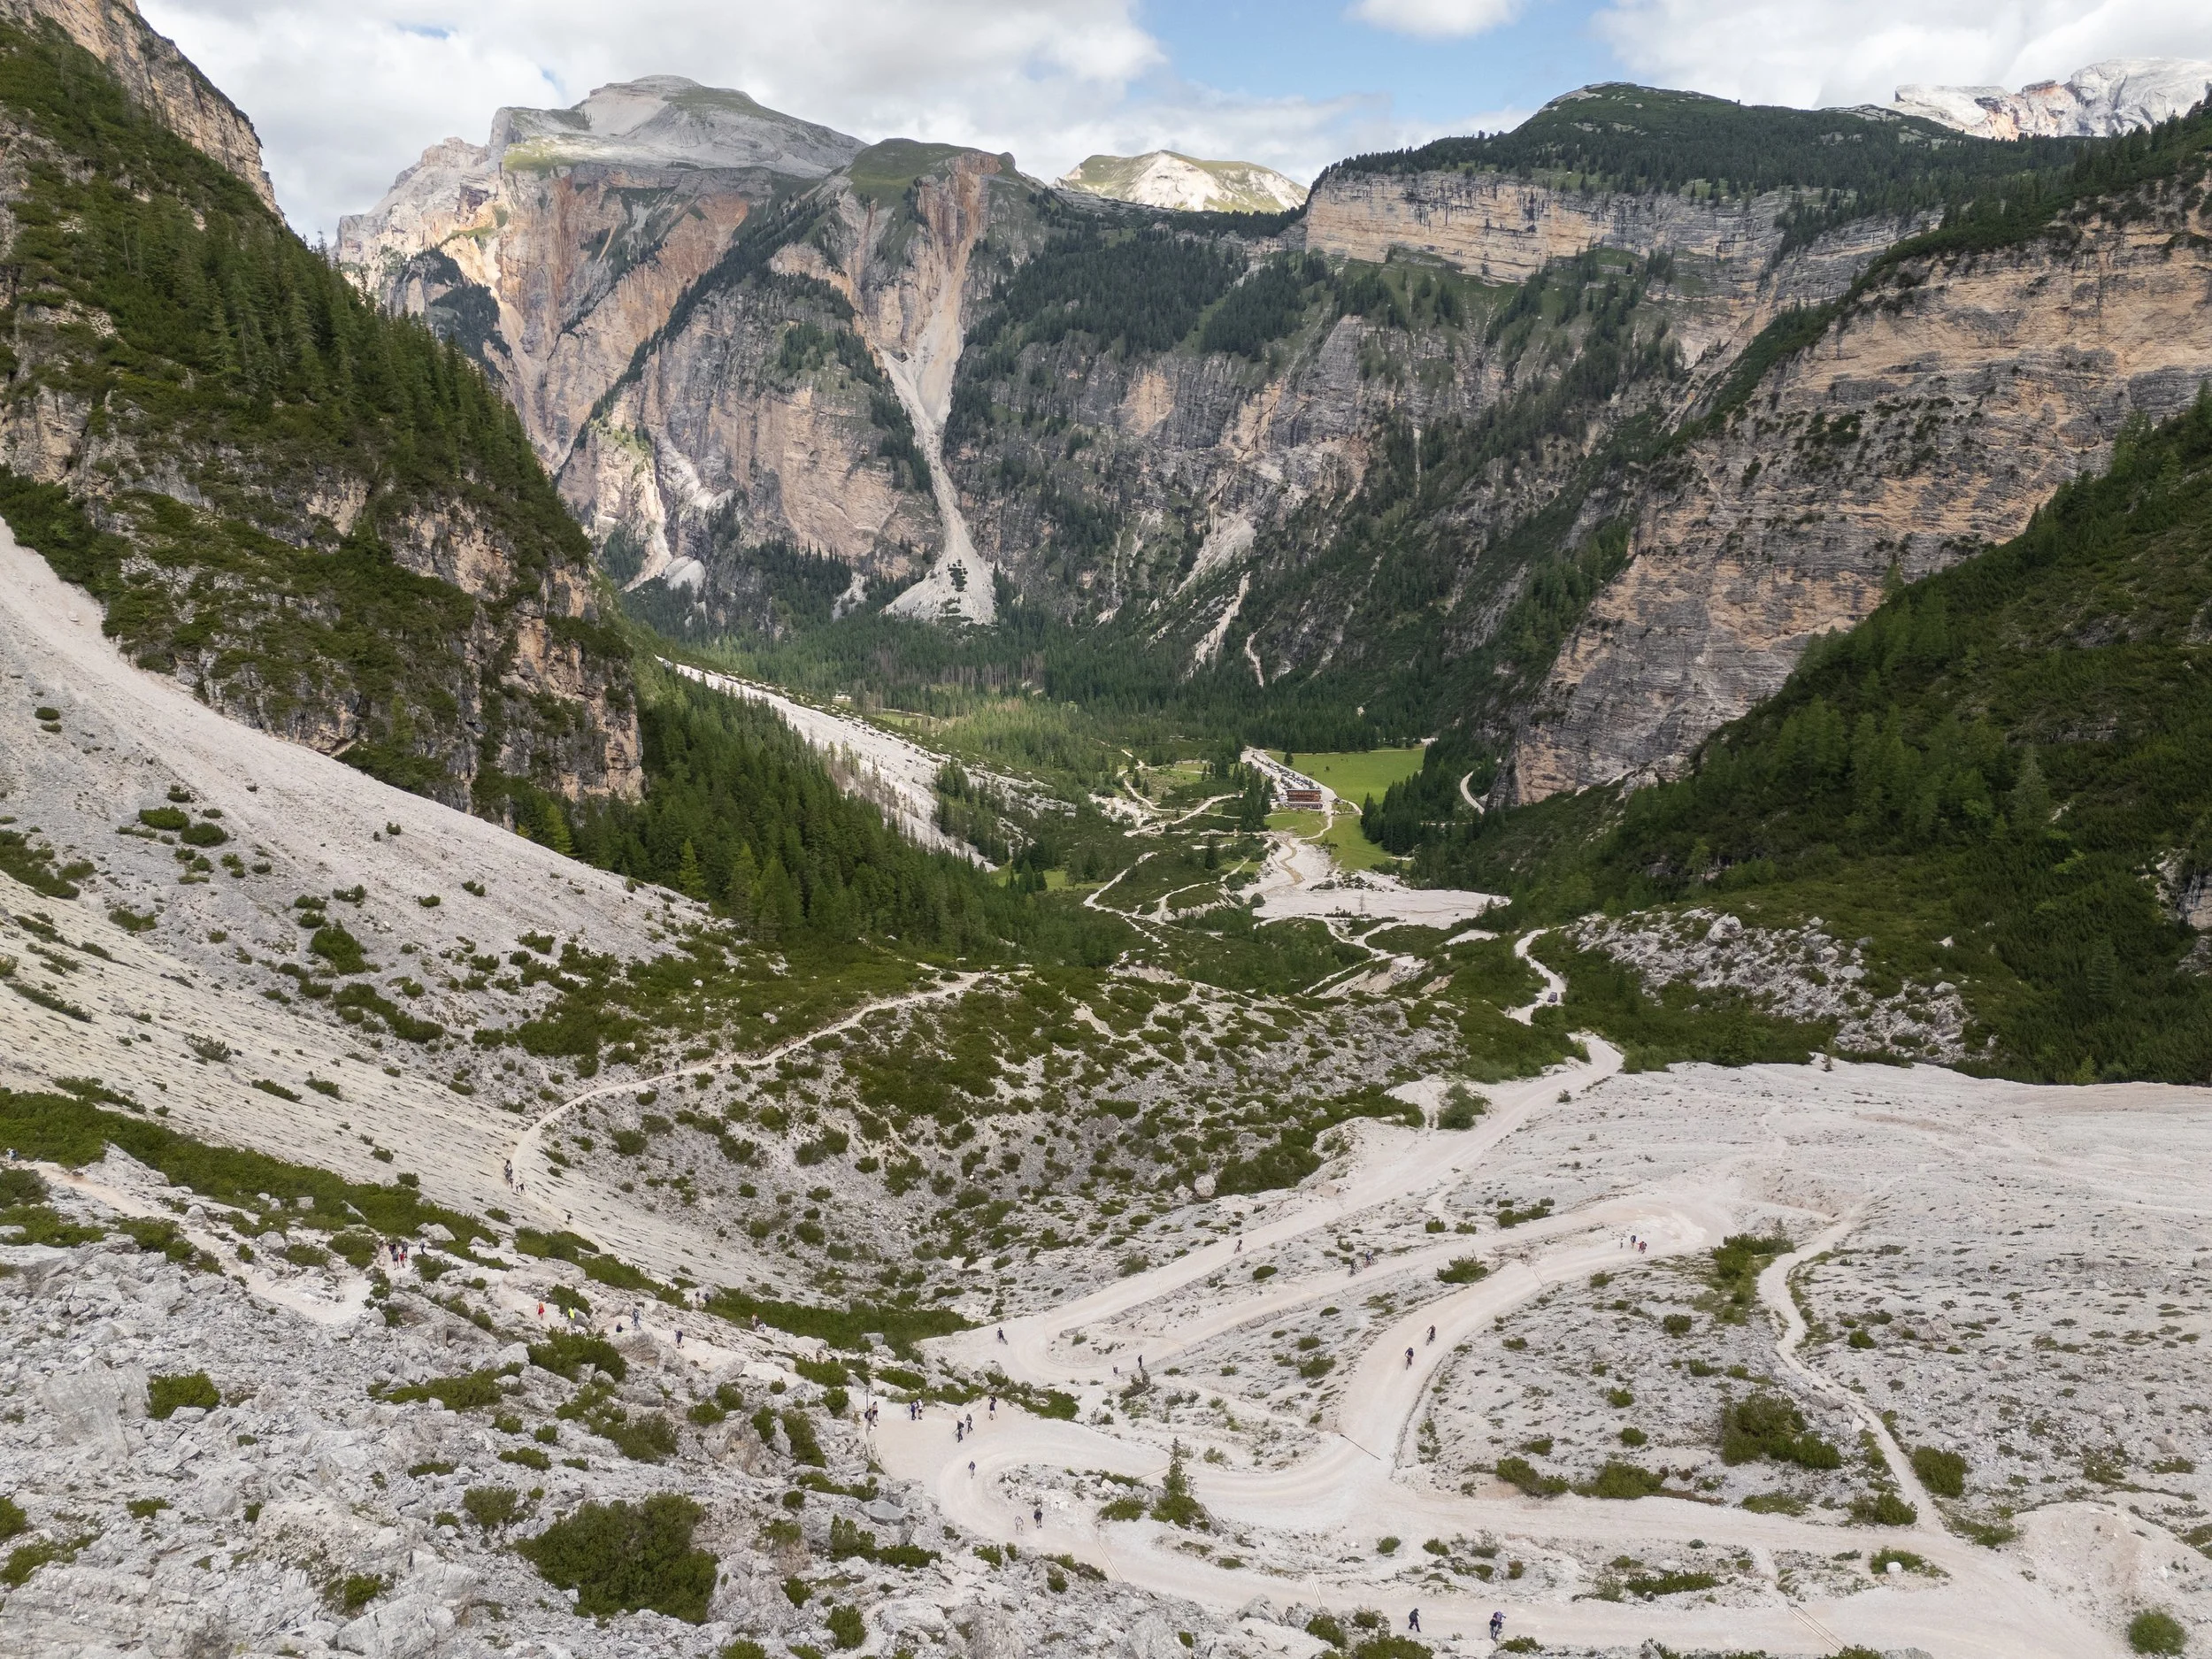
The first eight kilometres of the day were entirely downhill, with the final four of those being quite steep as the trail dropped into the valley towards Pederü. Once at the bottom, you’ll pass a large guesthouse before beginning the first of two climbs for the day.
This first ascent is around two kilometres long and leads into a striking mountainous valley. This section of trail was noticeably busier, likely due to a combination of it being the weekend and Pederü acting as a start point for several popular day hikes.
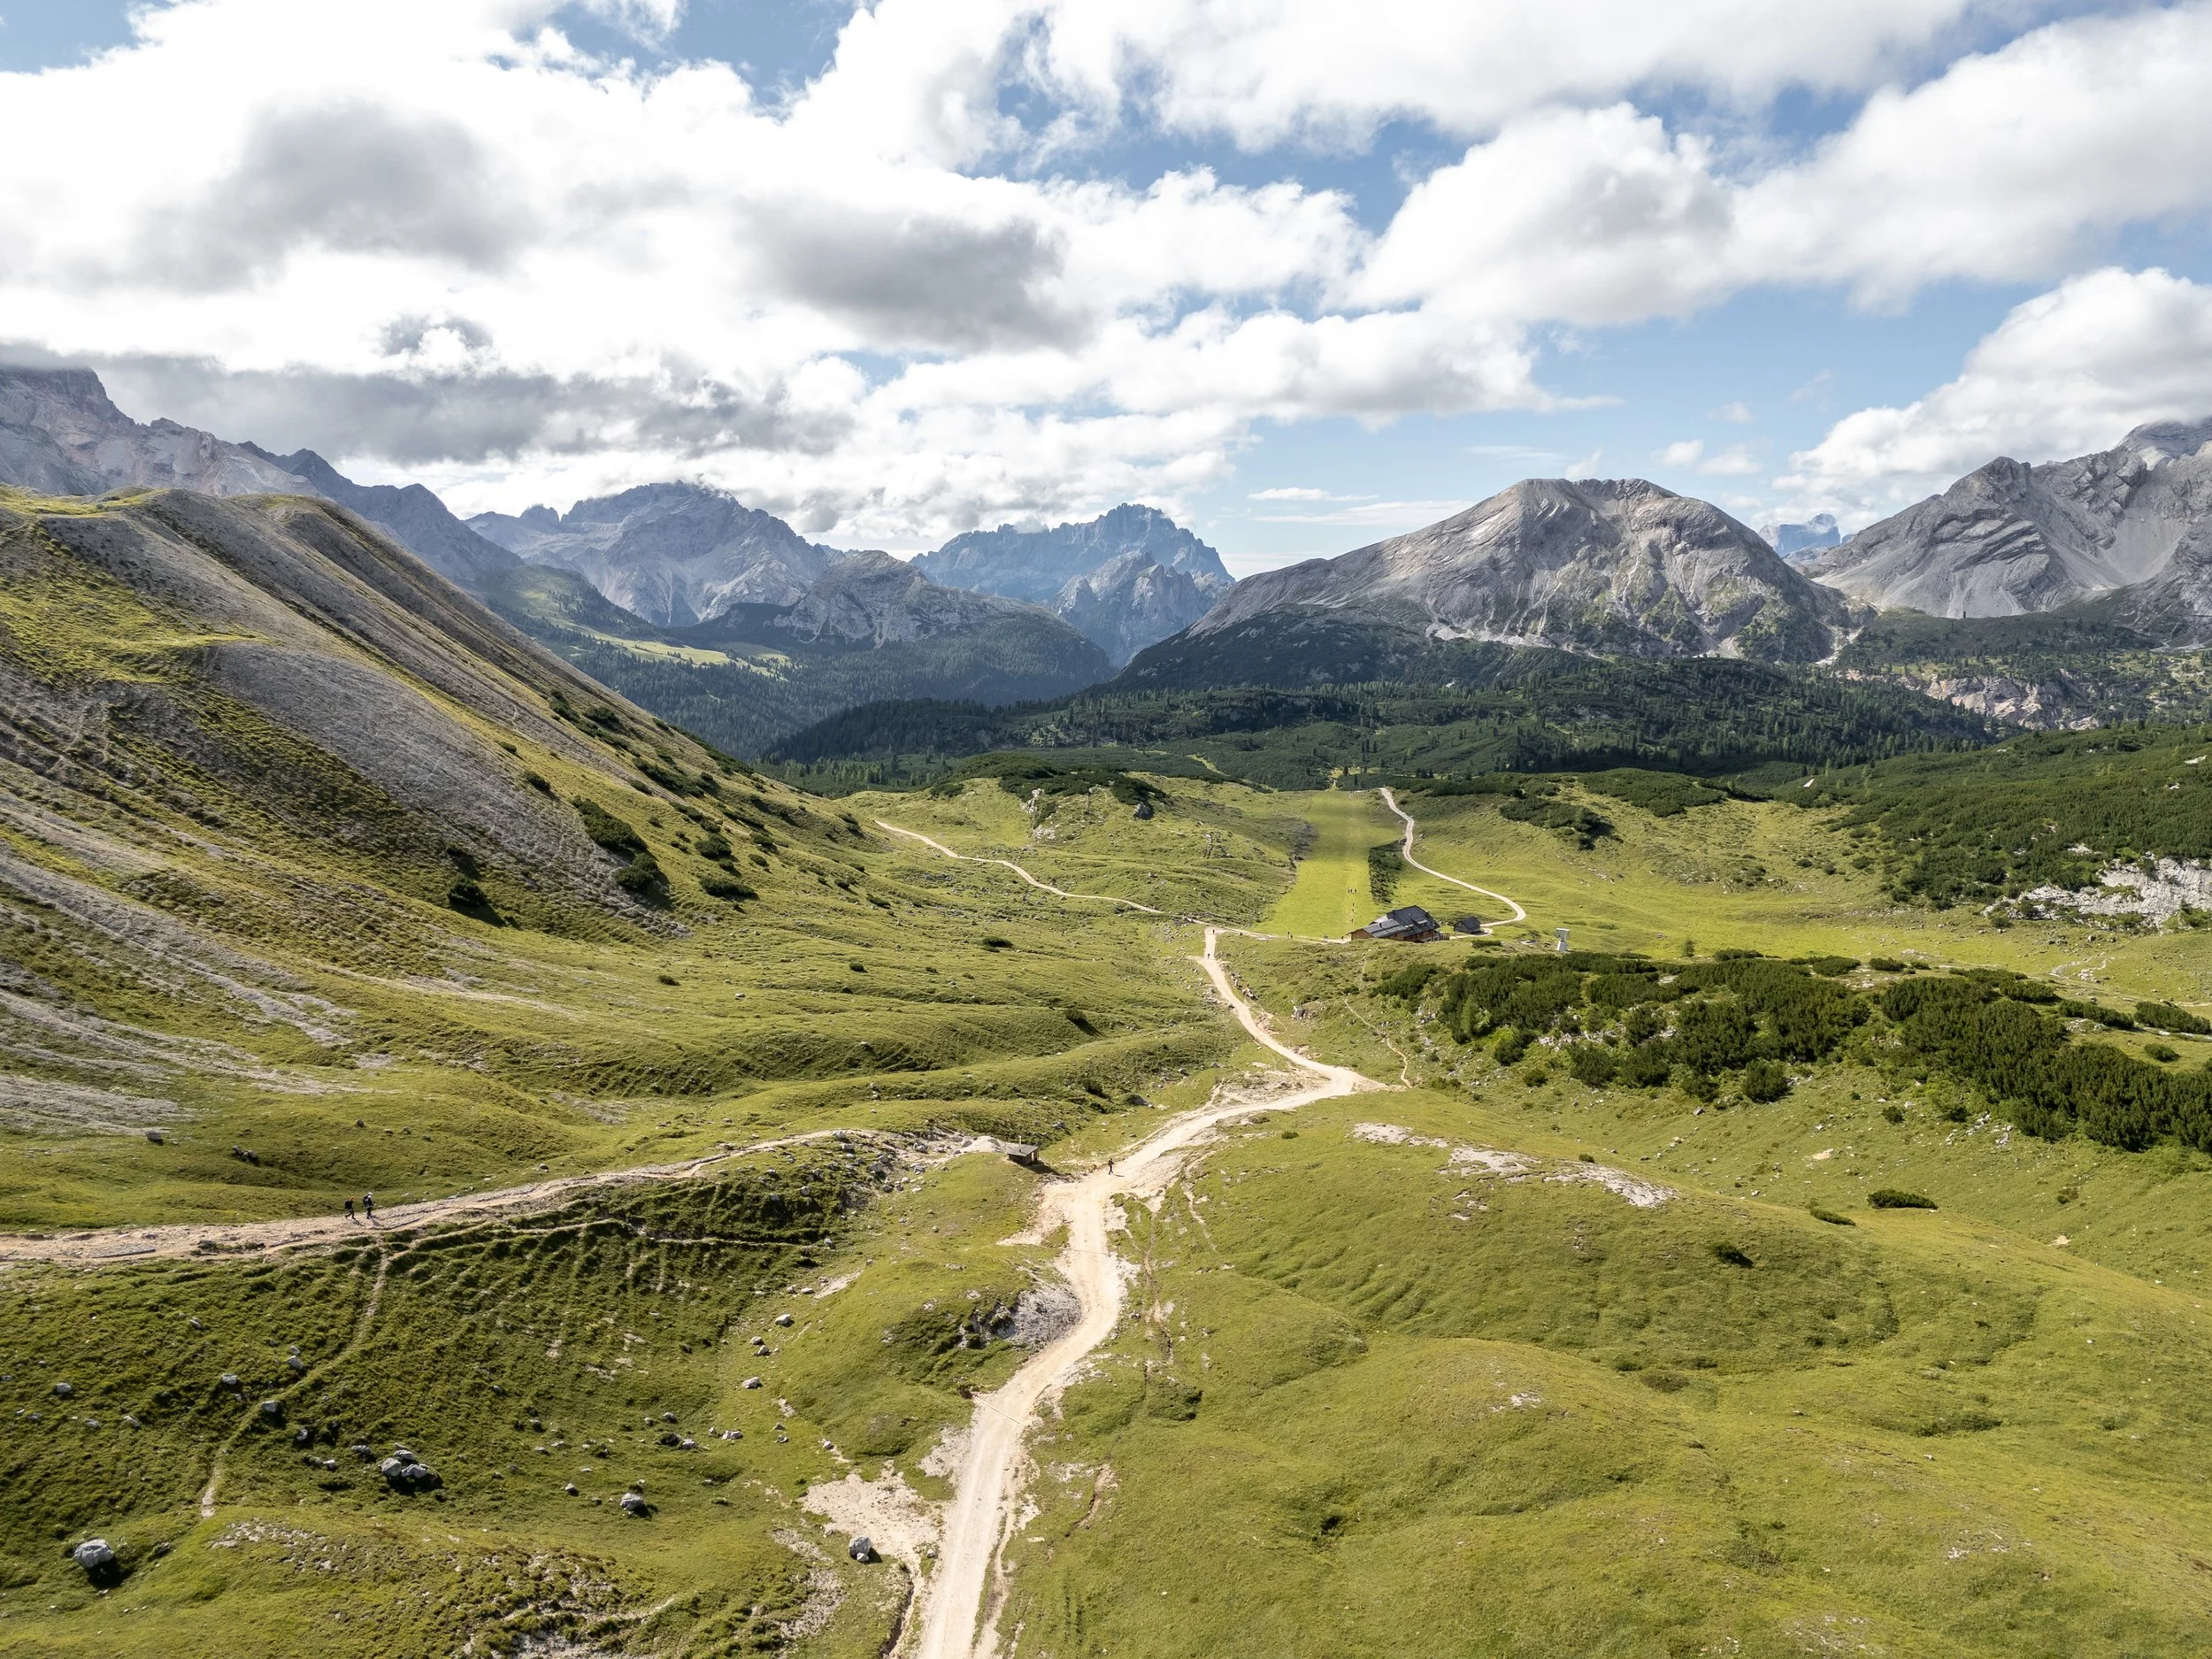
After a short descent, the second climb of the day begins: a more gradual, four-kilometre ascent leading to the highest point on the route.
Along the way, you’ll pass a handful of rifugios and alpine restaurants, offering plenty of options to stop, recharge, and enjoy the views. The scenery through this stretch is stunning, with vast open meadows, jagged peaks, and peaceful grazing pastures keeping your mind occupied even through the tougher inclines.

Around the 16-kilometre mark, just after finishing the main ascent, I stopped for lunch at Großfanesalm (Malga di Gran Fanes). Having completed the majority of the climbing for the day, I figured it was the perfect spot to rest, refuel, and take in the view. A pint and pasta is optional
From that point on, the trail quietened down dramatically. I found myself hiking alone again, passing through wide, cow filled valleys surrounded by dramatic mountains.
The final stretch involved a steep descent down into a valley towards Sass Dlacia Campsite, where we’d spend the night.


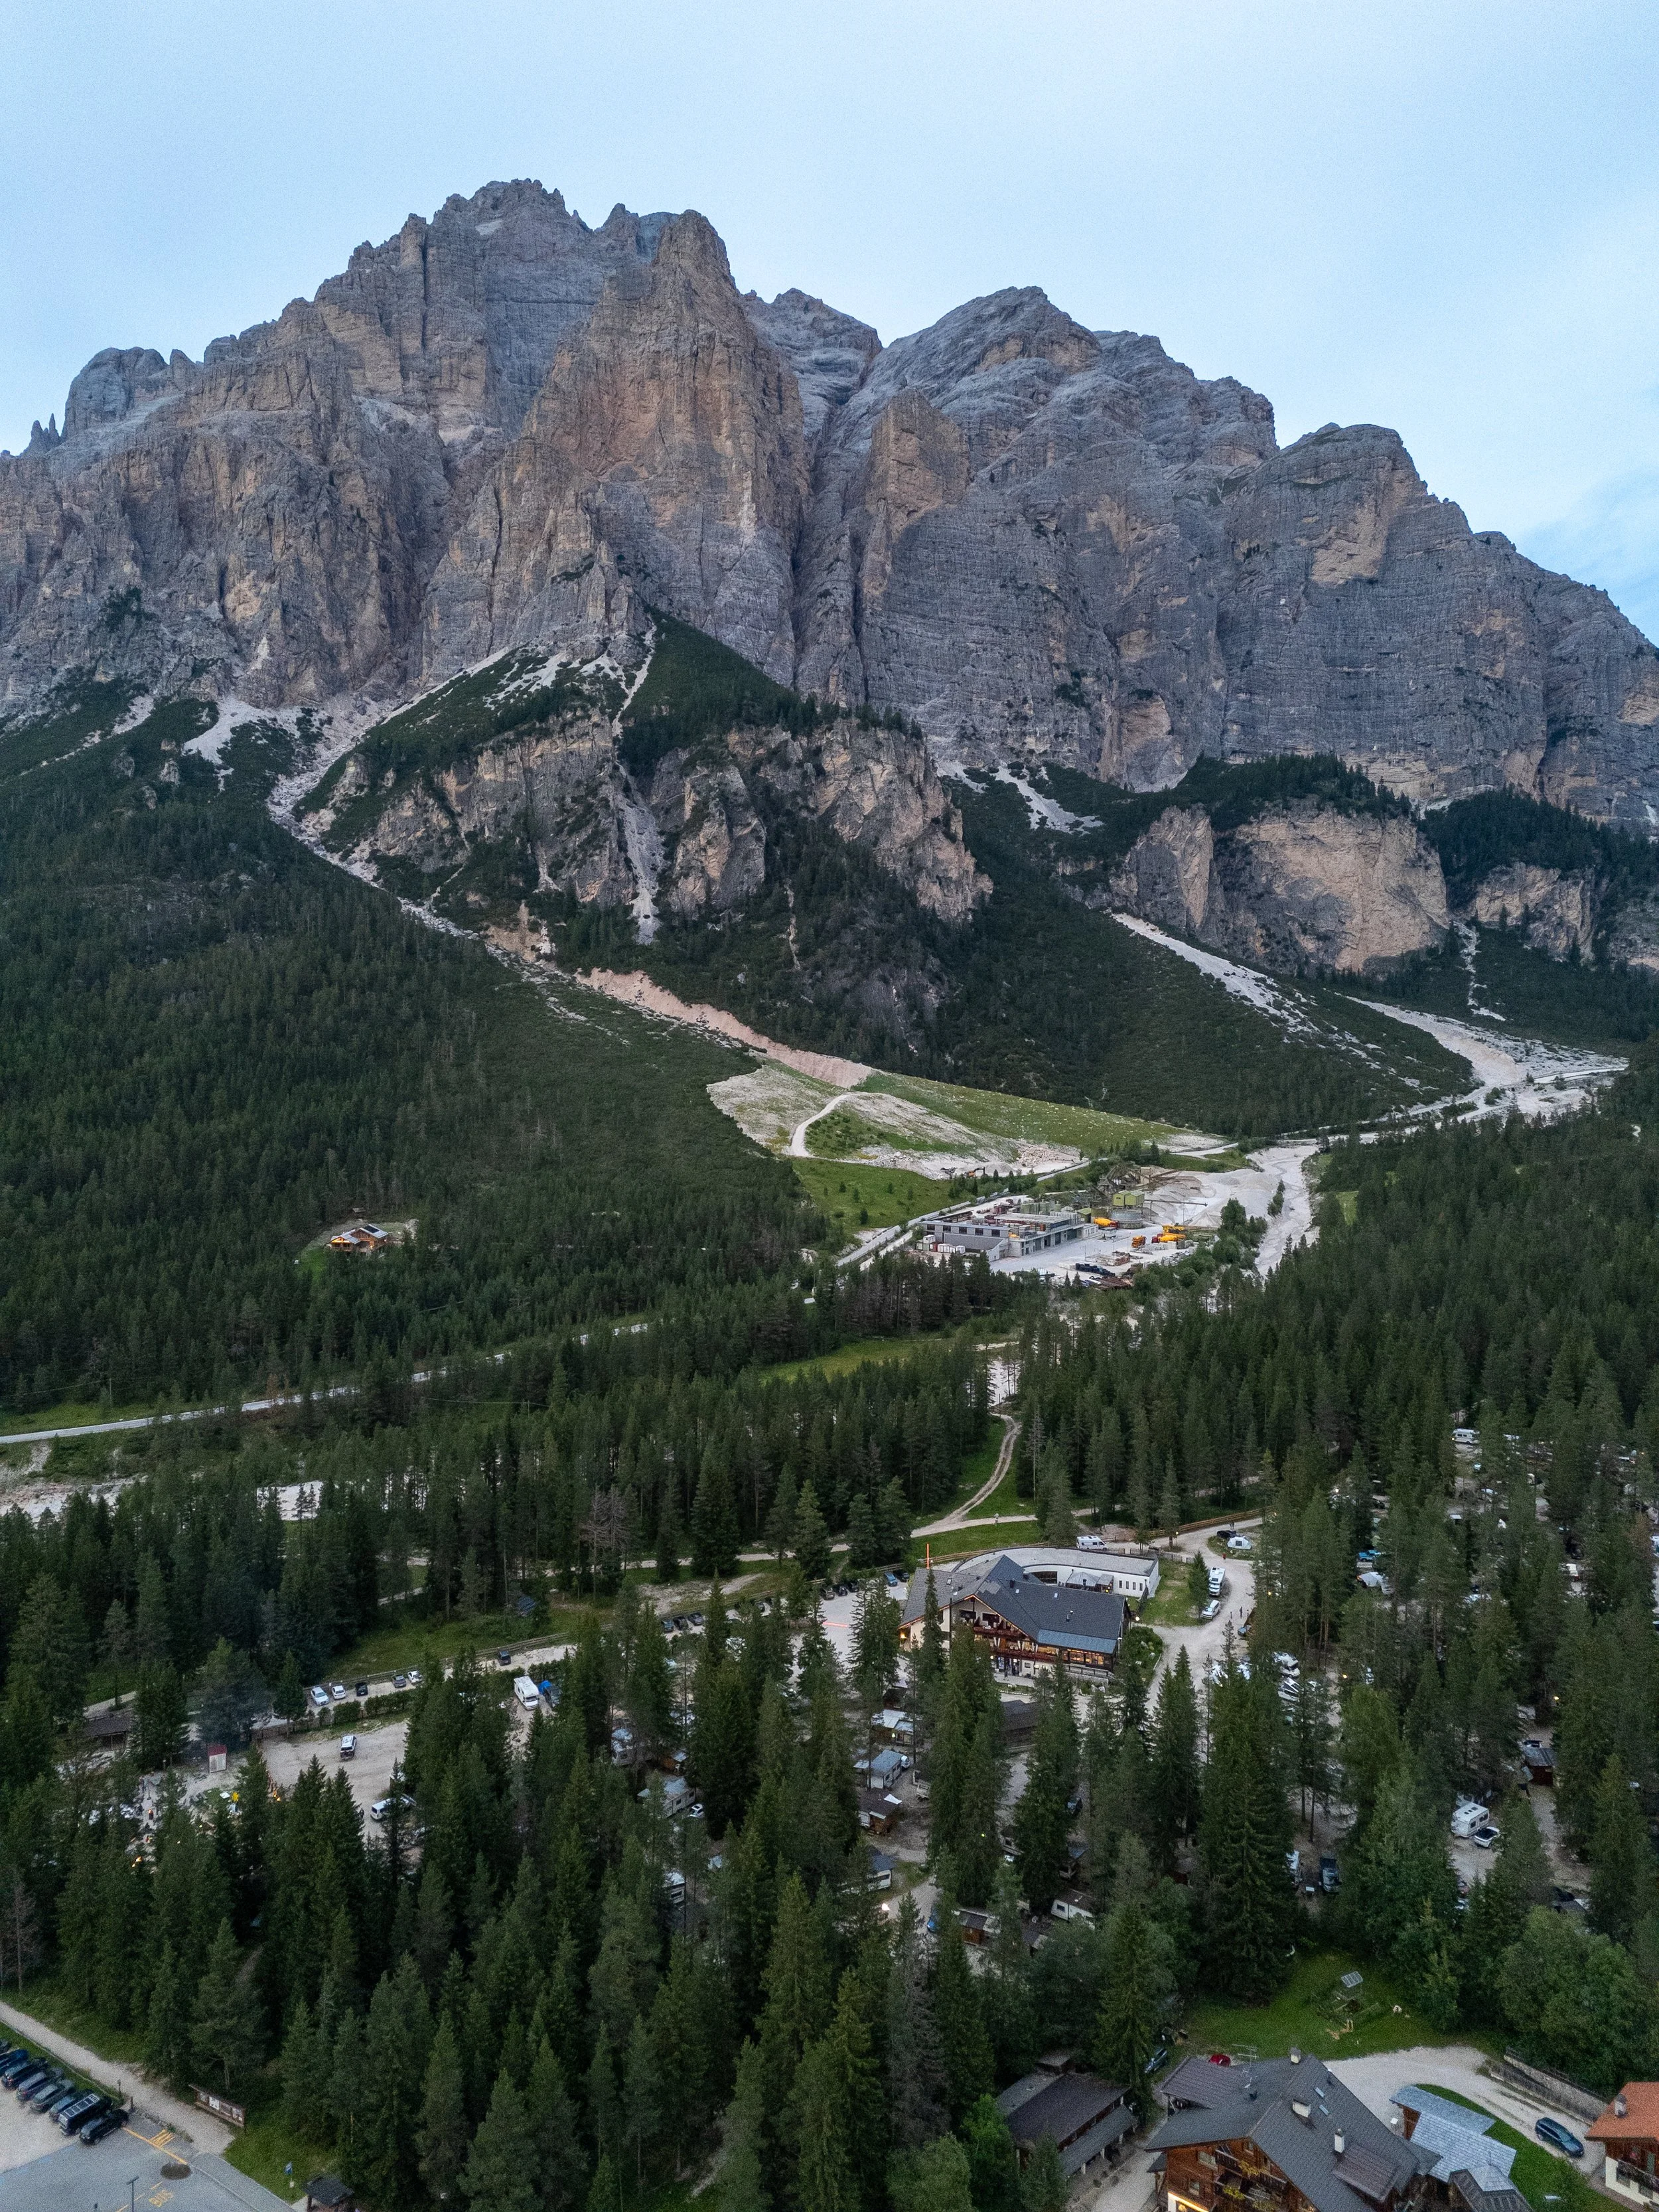
Sass Dlacia Campsite
This incredible campsite exceeded all expectations.
Tucked beneath towering mountain peaks and set within a forest, the site is well-equipped with modern, hiker-friendly facilities.
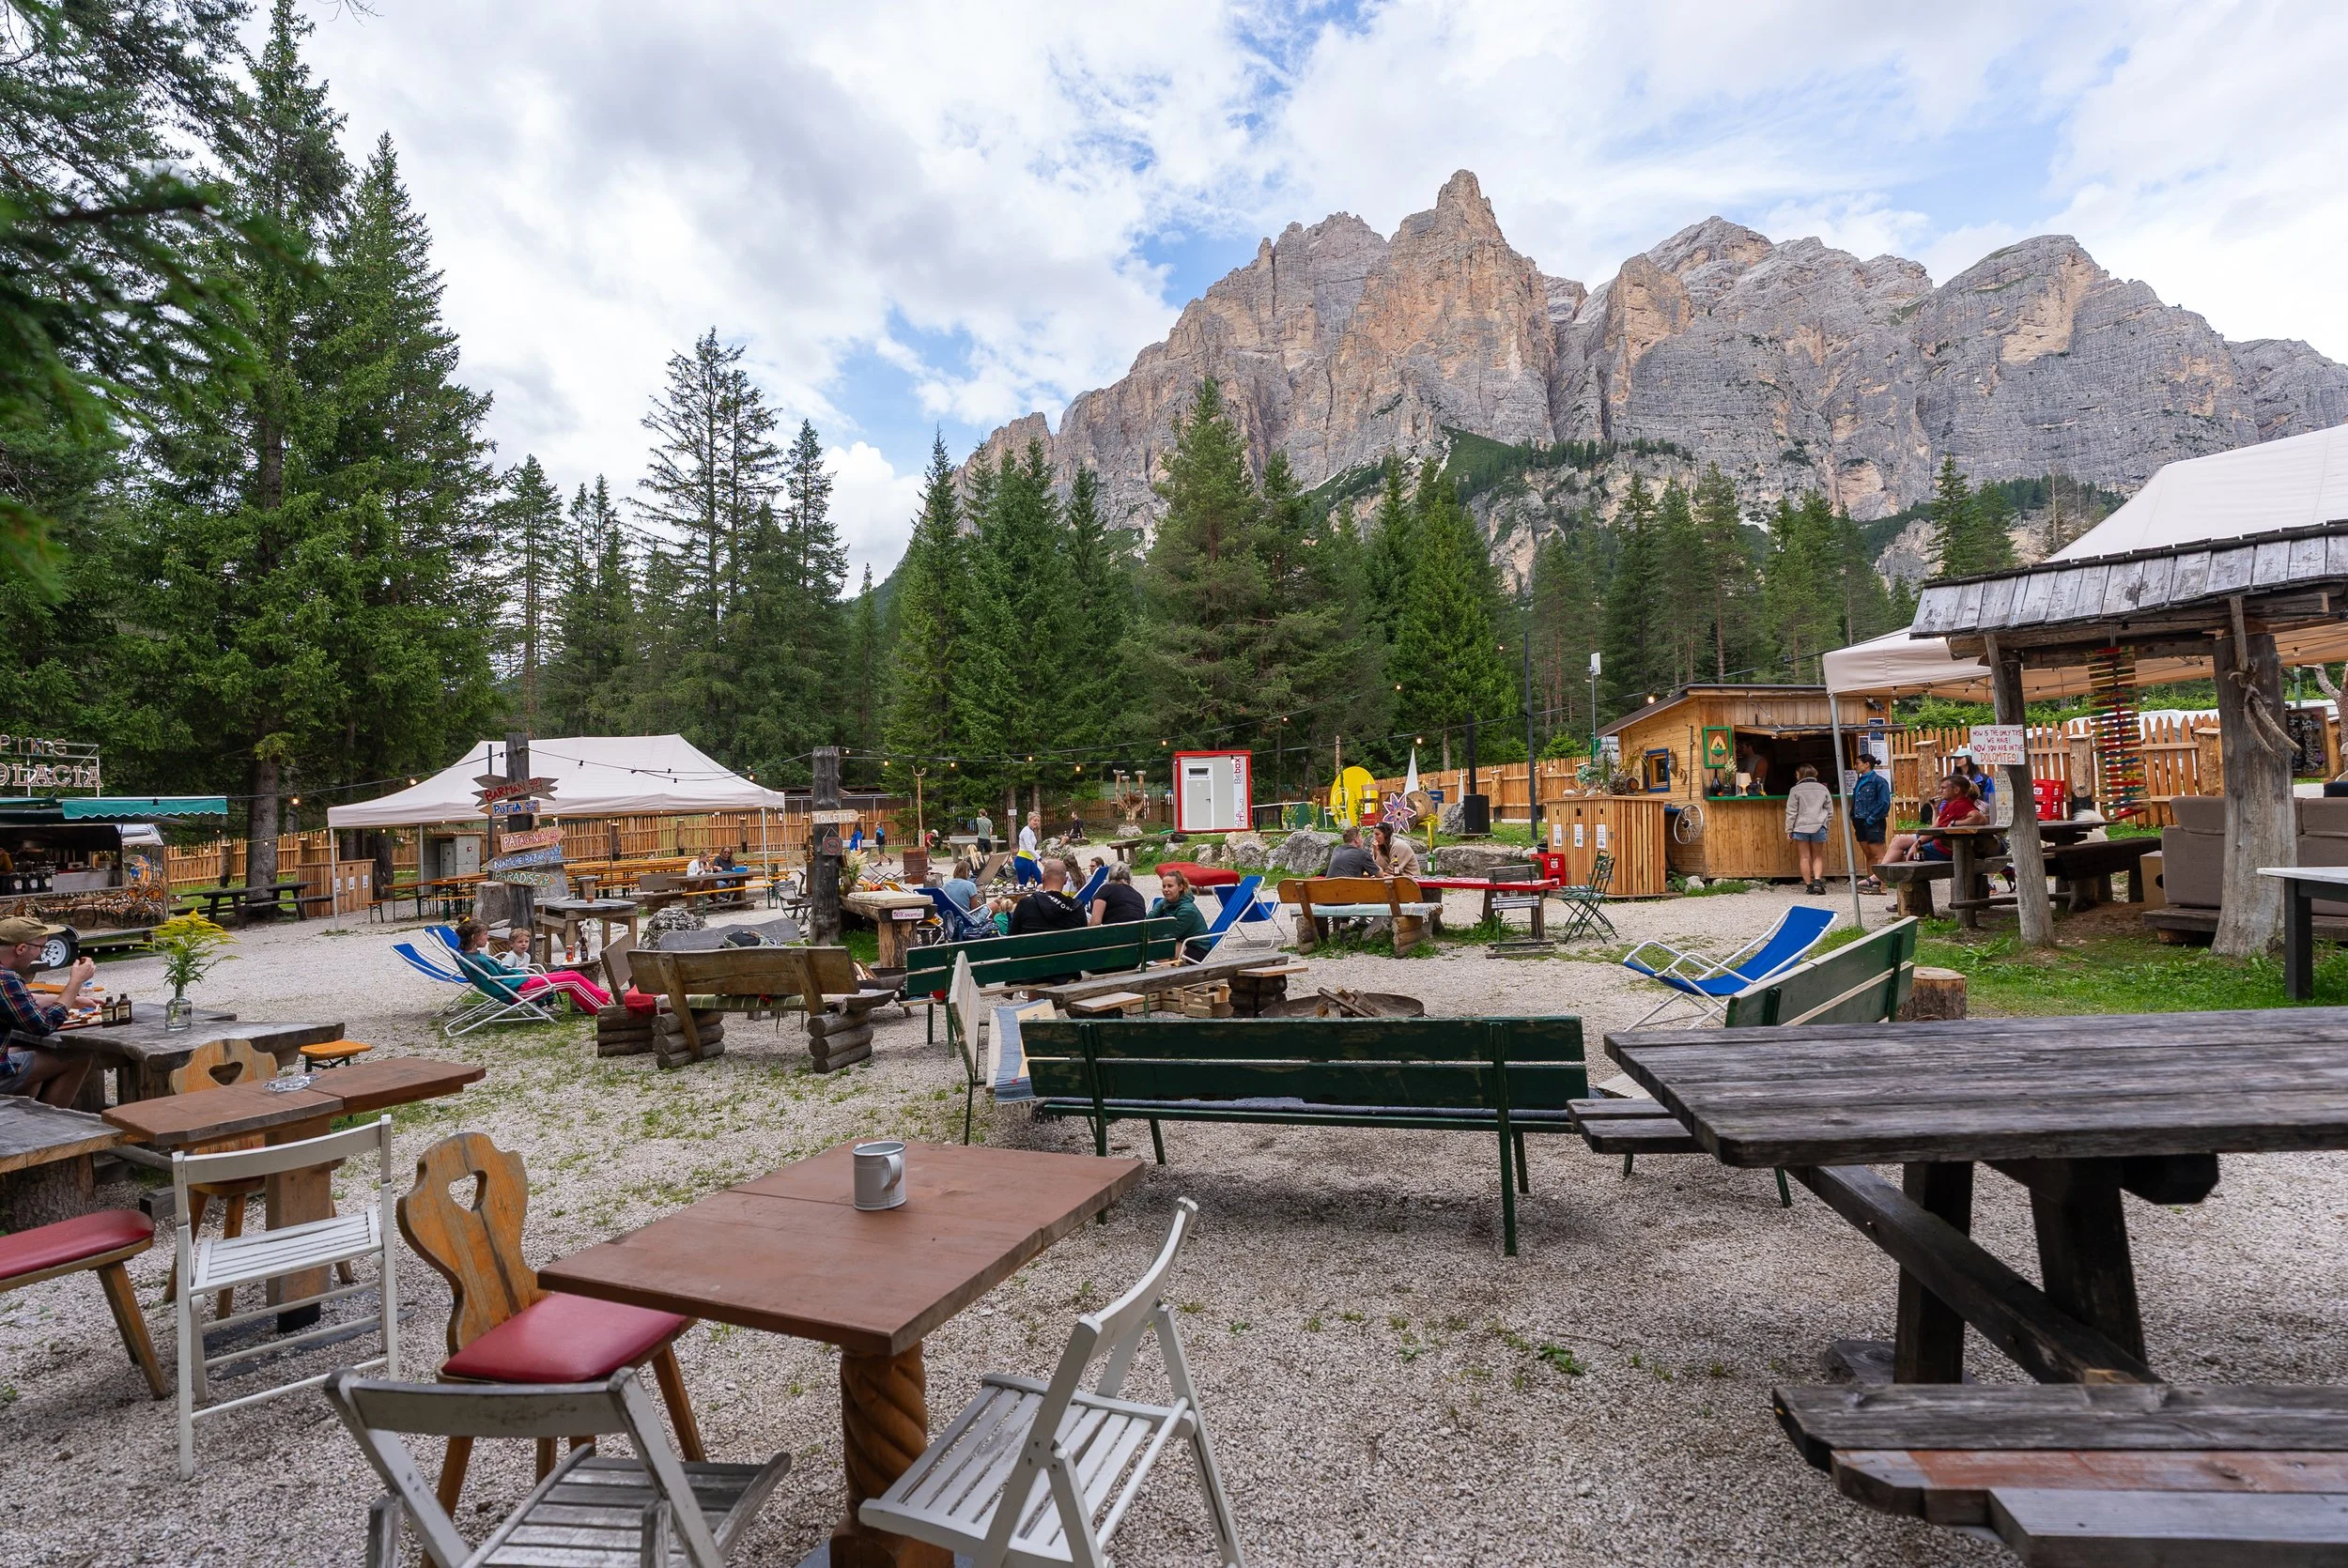
The toilets and showers were a joy (especially after a long day on the trail), and there’s a solid selection of food and drink available. You’ll find a pizza restaurant, grocery shop, wellness area, and even a stylish outdoor bar with a food truck.
To top it off, there was live music being performed that evening by a professional snowboarder from Austria (an unexpected but lovely touch). We spent the evening relaxing in the bar area, catching up with the group, refuelling ( I had two meals, chicken and chips when i arrived then a pizza later that evening), and soaking up the scenery and sounds.
Accommodation is in the form of large tents, divided into two compartments which are already set up when you arrive. Each tent includes a sleeping mat, sleeping bag, and a freeze-dried adventure meal for both dinner and breakfast (though I’d personally recommend treating yourself to a pizza or burger from the on-site options instead).
Day four
Day four is arguably the most demanding section of the Dolomiti Trail in terms of both elevation gain and terrain. On a more positive note, you're officially past the halfway mark of the six-day trek.
With heavy rain forecast for the afternoon, Sophie and I decided to set off early to make the most of the dry morning. We were up at sunrise and on the trail by 6:00 am. Aside from the optional Seekofel summit earlier in the trip, this was the first day I hiked alongside someone from the group and it was a welcome change.
While I genuinely enjoy the solitude and freedom that comes with hiking alone, it is far more enjoyable sharing the experience with someone else. Over the previous few days, Sophie and I had discovered that our hiking pace, energy levels, and sense of humour were pretty well matched.
Hiking together felt natural and comfortable, without the need to force awkward conversation or spent ages waiting for the other person (only when I stopped to film)
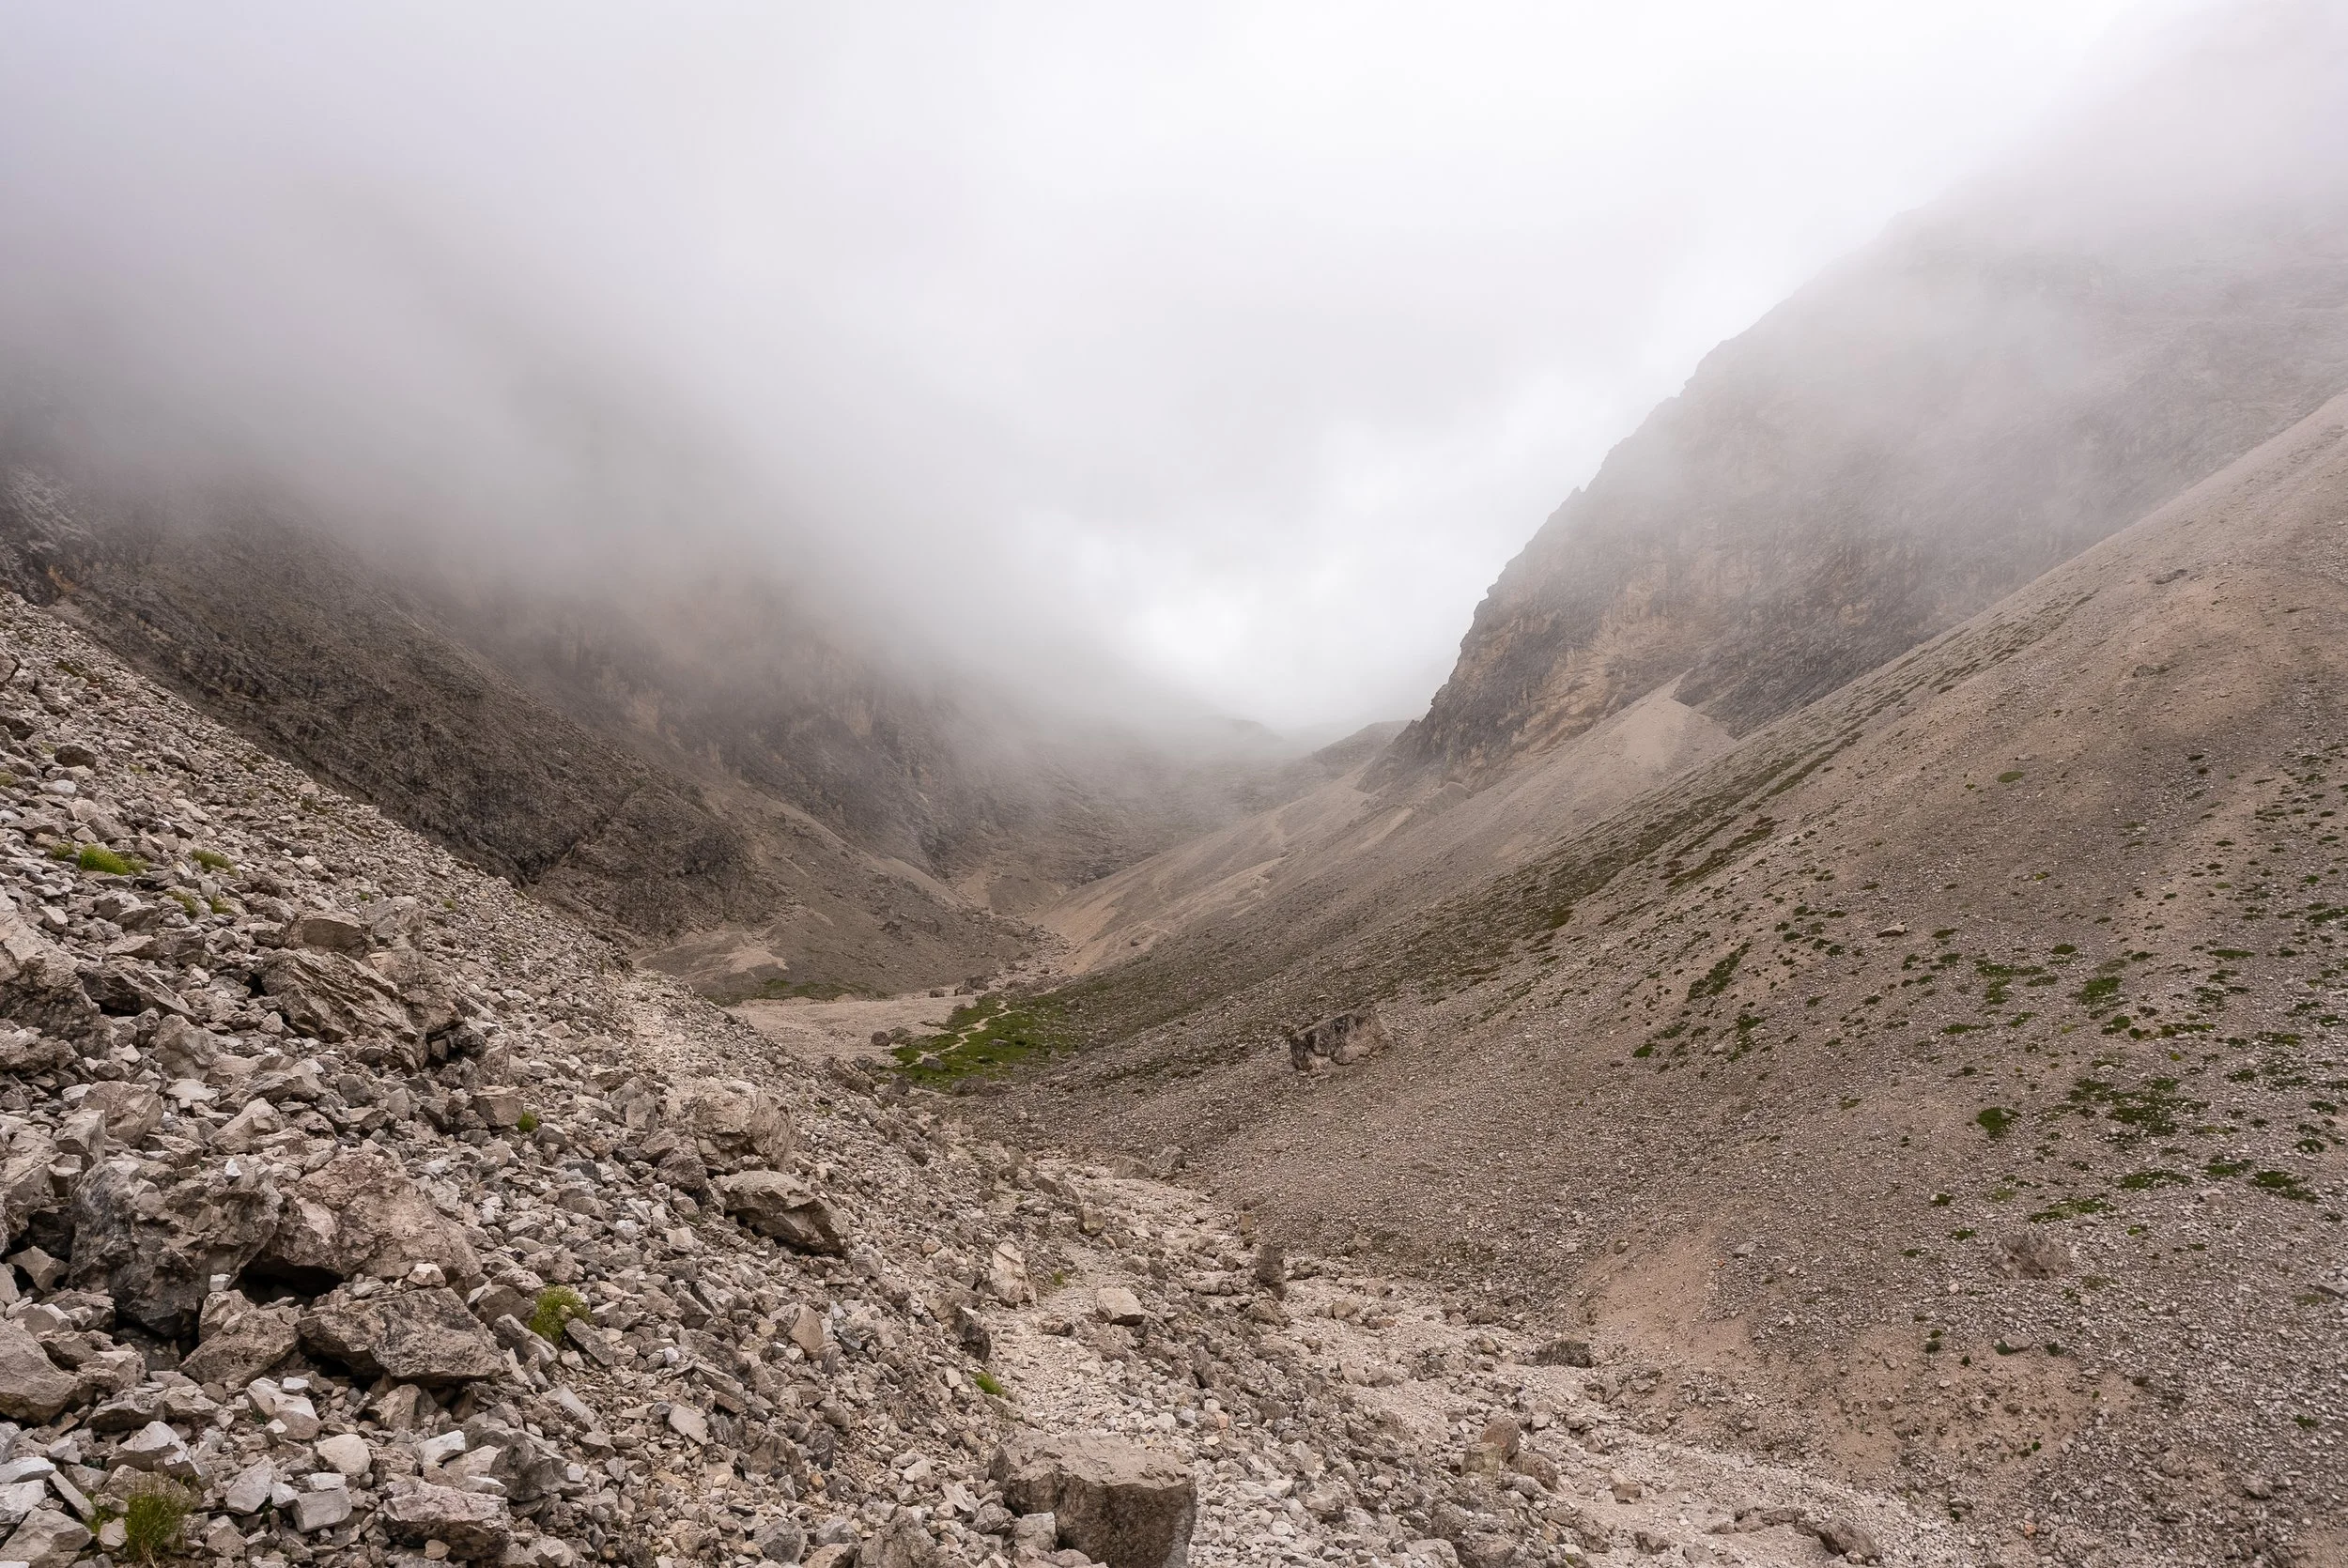
The first two kilometres offered a gentle, gradual ascent that eased us into the day. But soon after, the real challenge began — a 4.5-kilometre climb gaining roughly 800 metres in elevation. Two sections of this climb were particularly steep. Though not technically difficult, they did require a head down and stomp approach.
Thankfully, the views along the way were outstanding. The dramatic scenery helped distract from the burning legs and provided countless opportunies to pause and soak it all in. Having started so early, we enjoyed the trail in complete solitude for the first two hours, moving peacefully through the towering valleys.
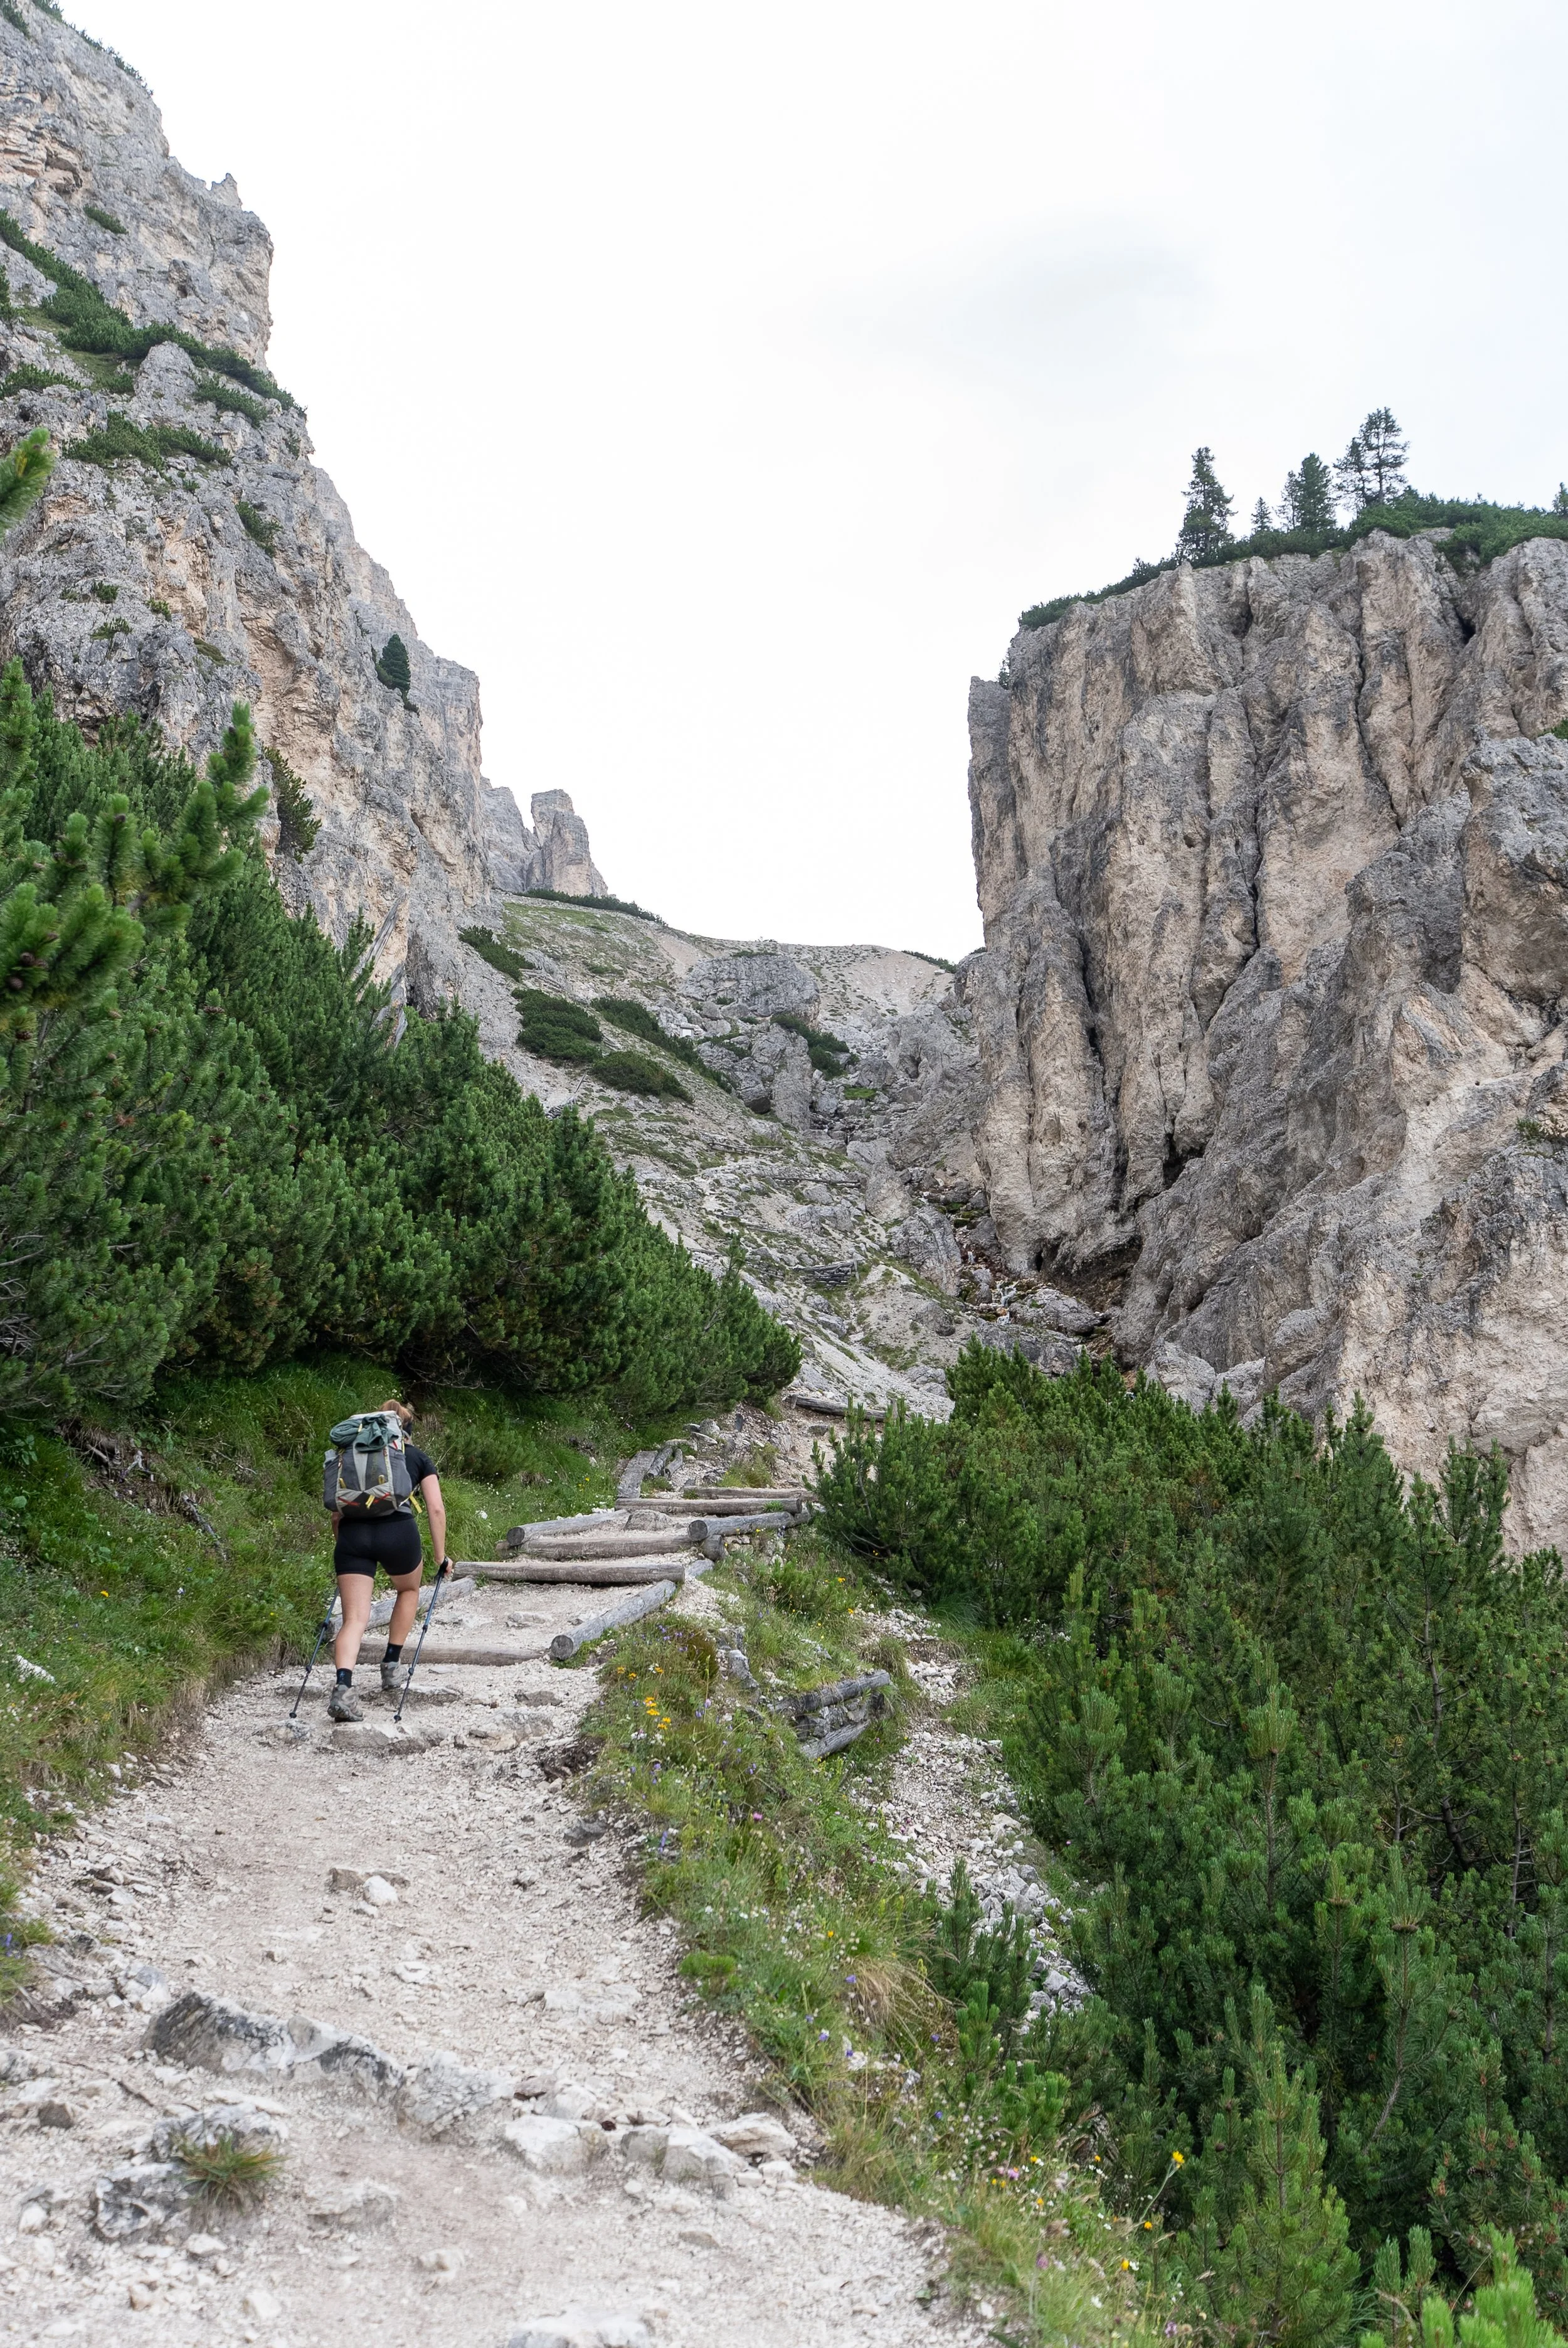

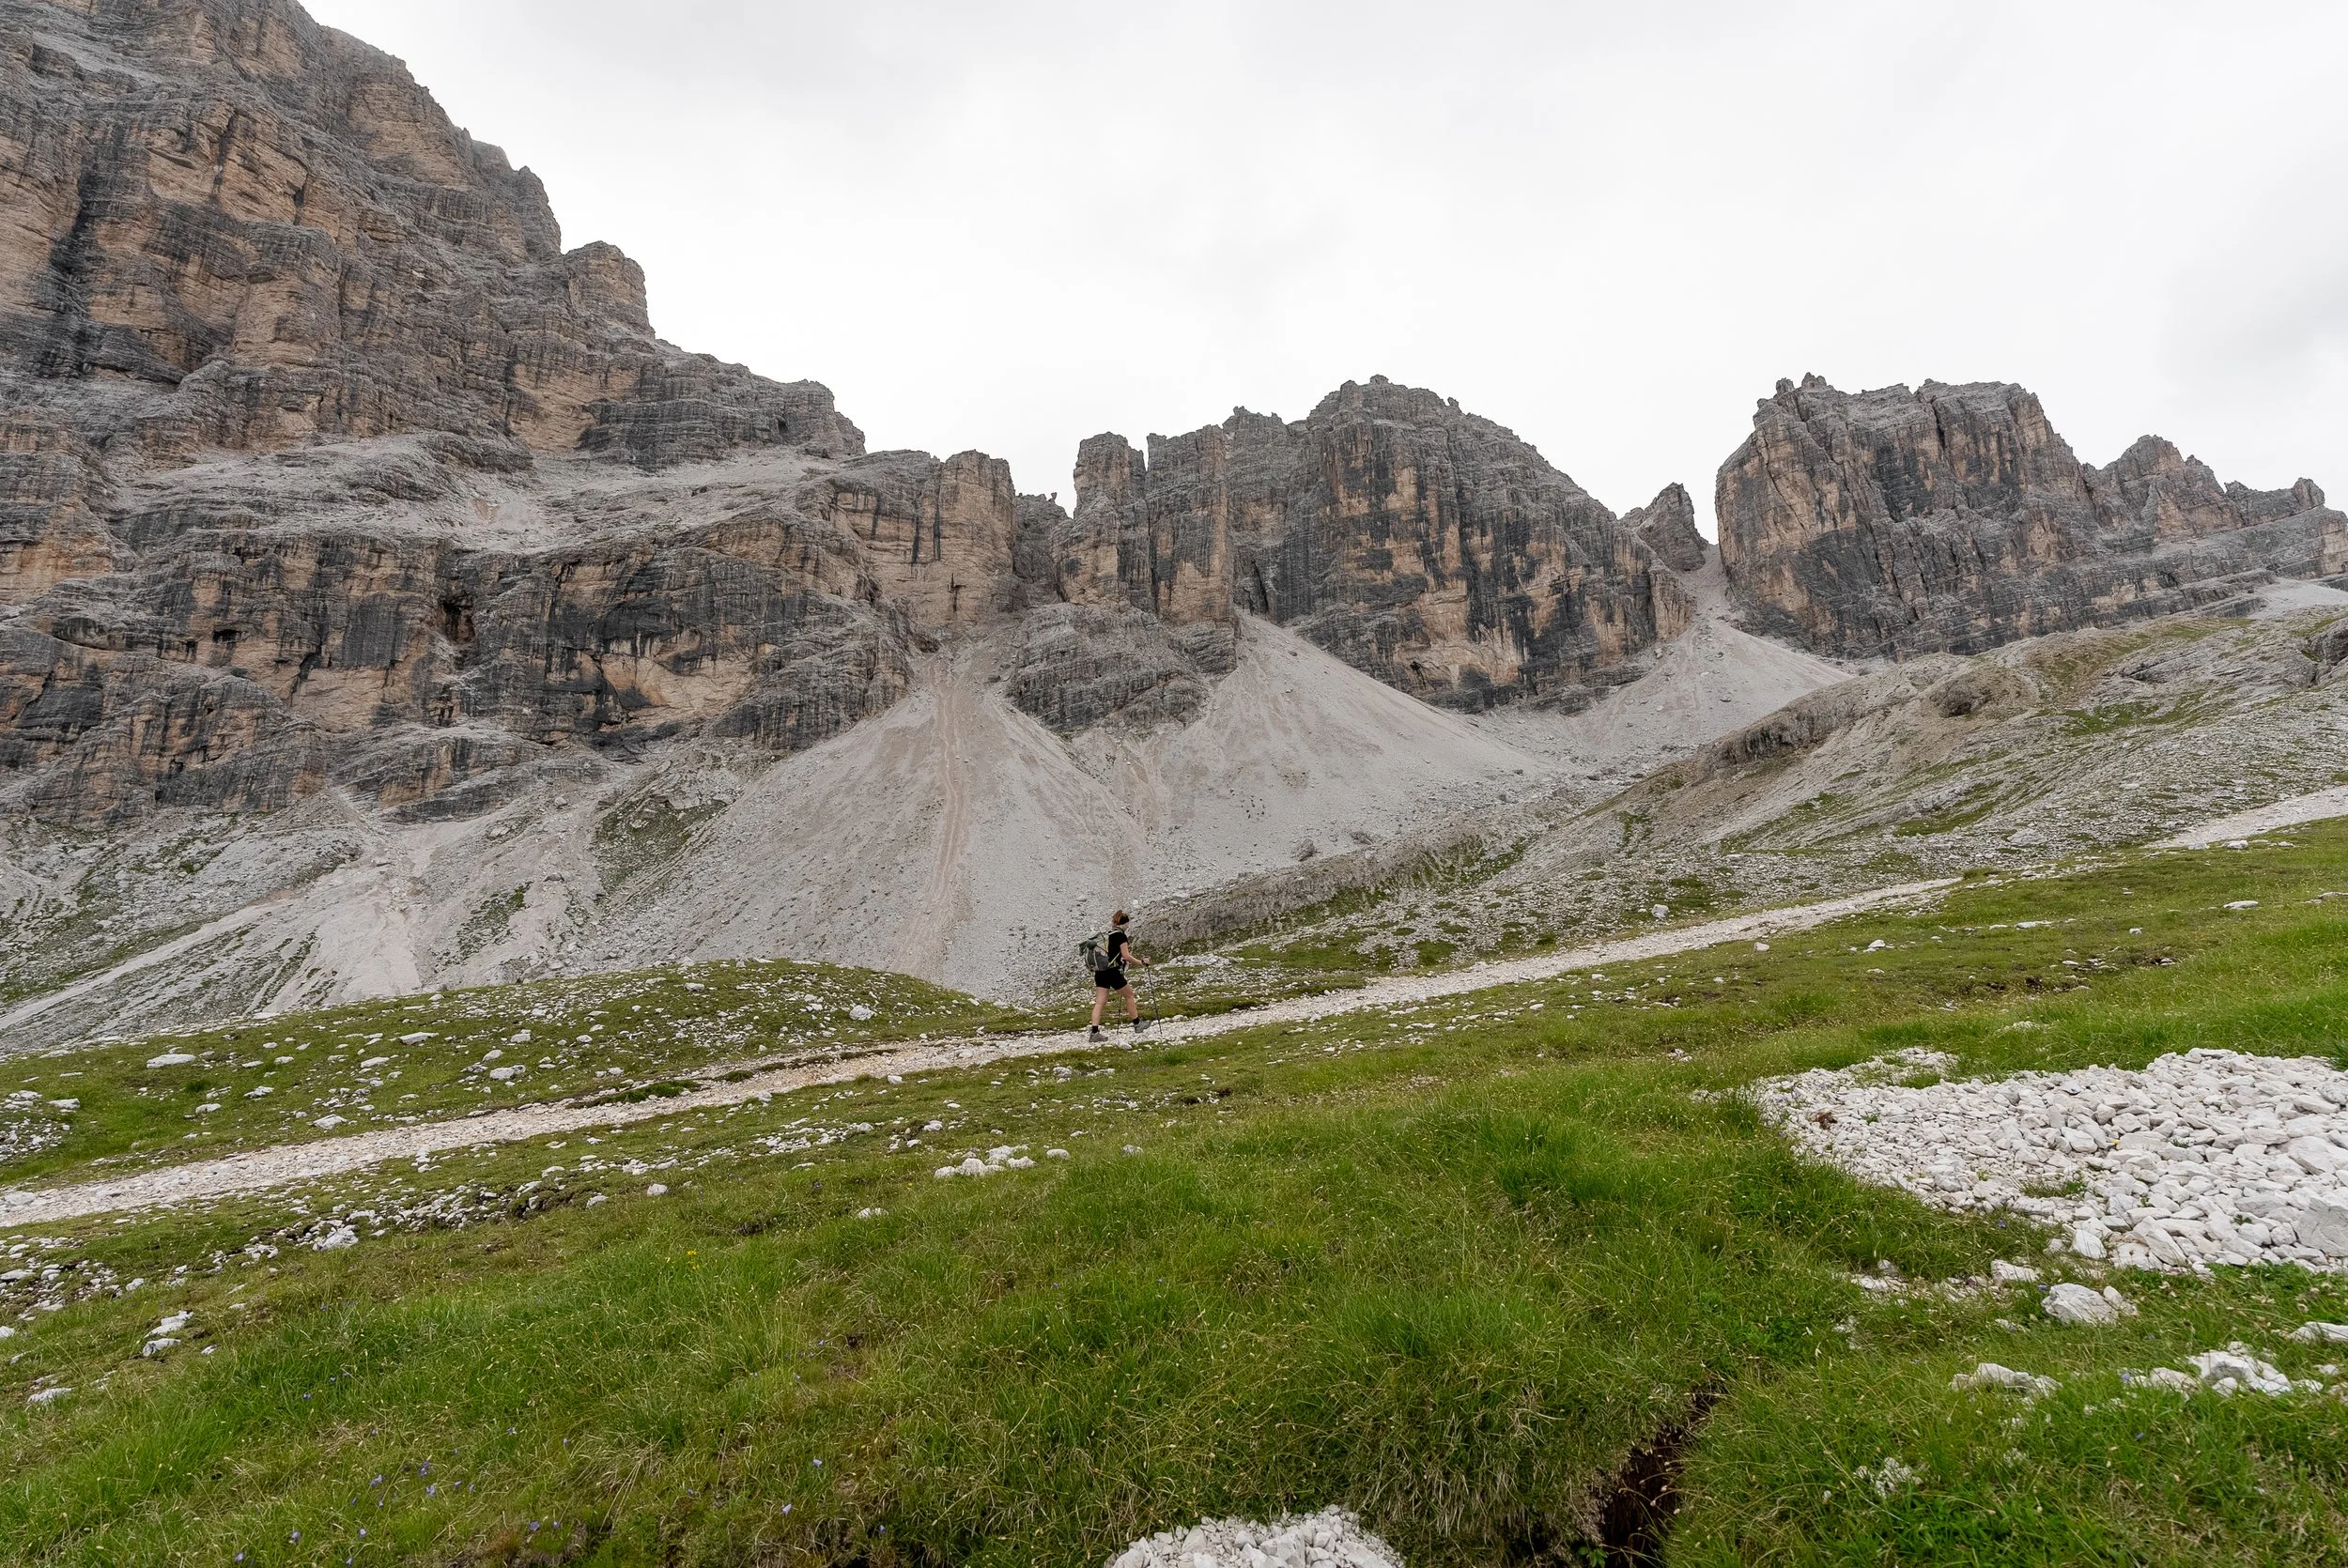
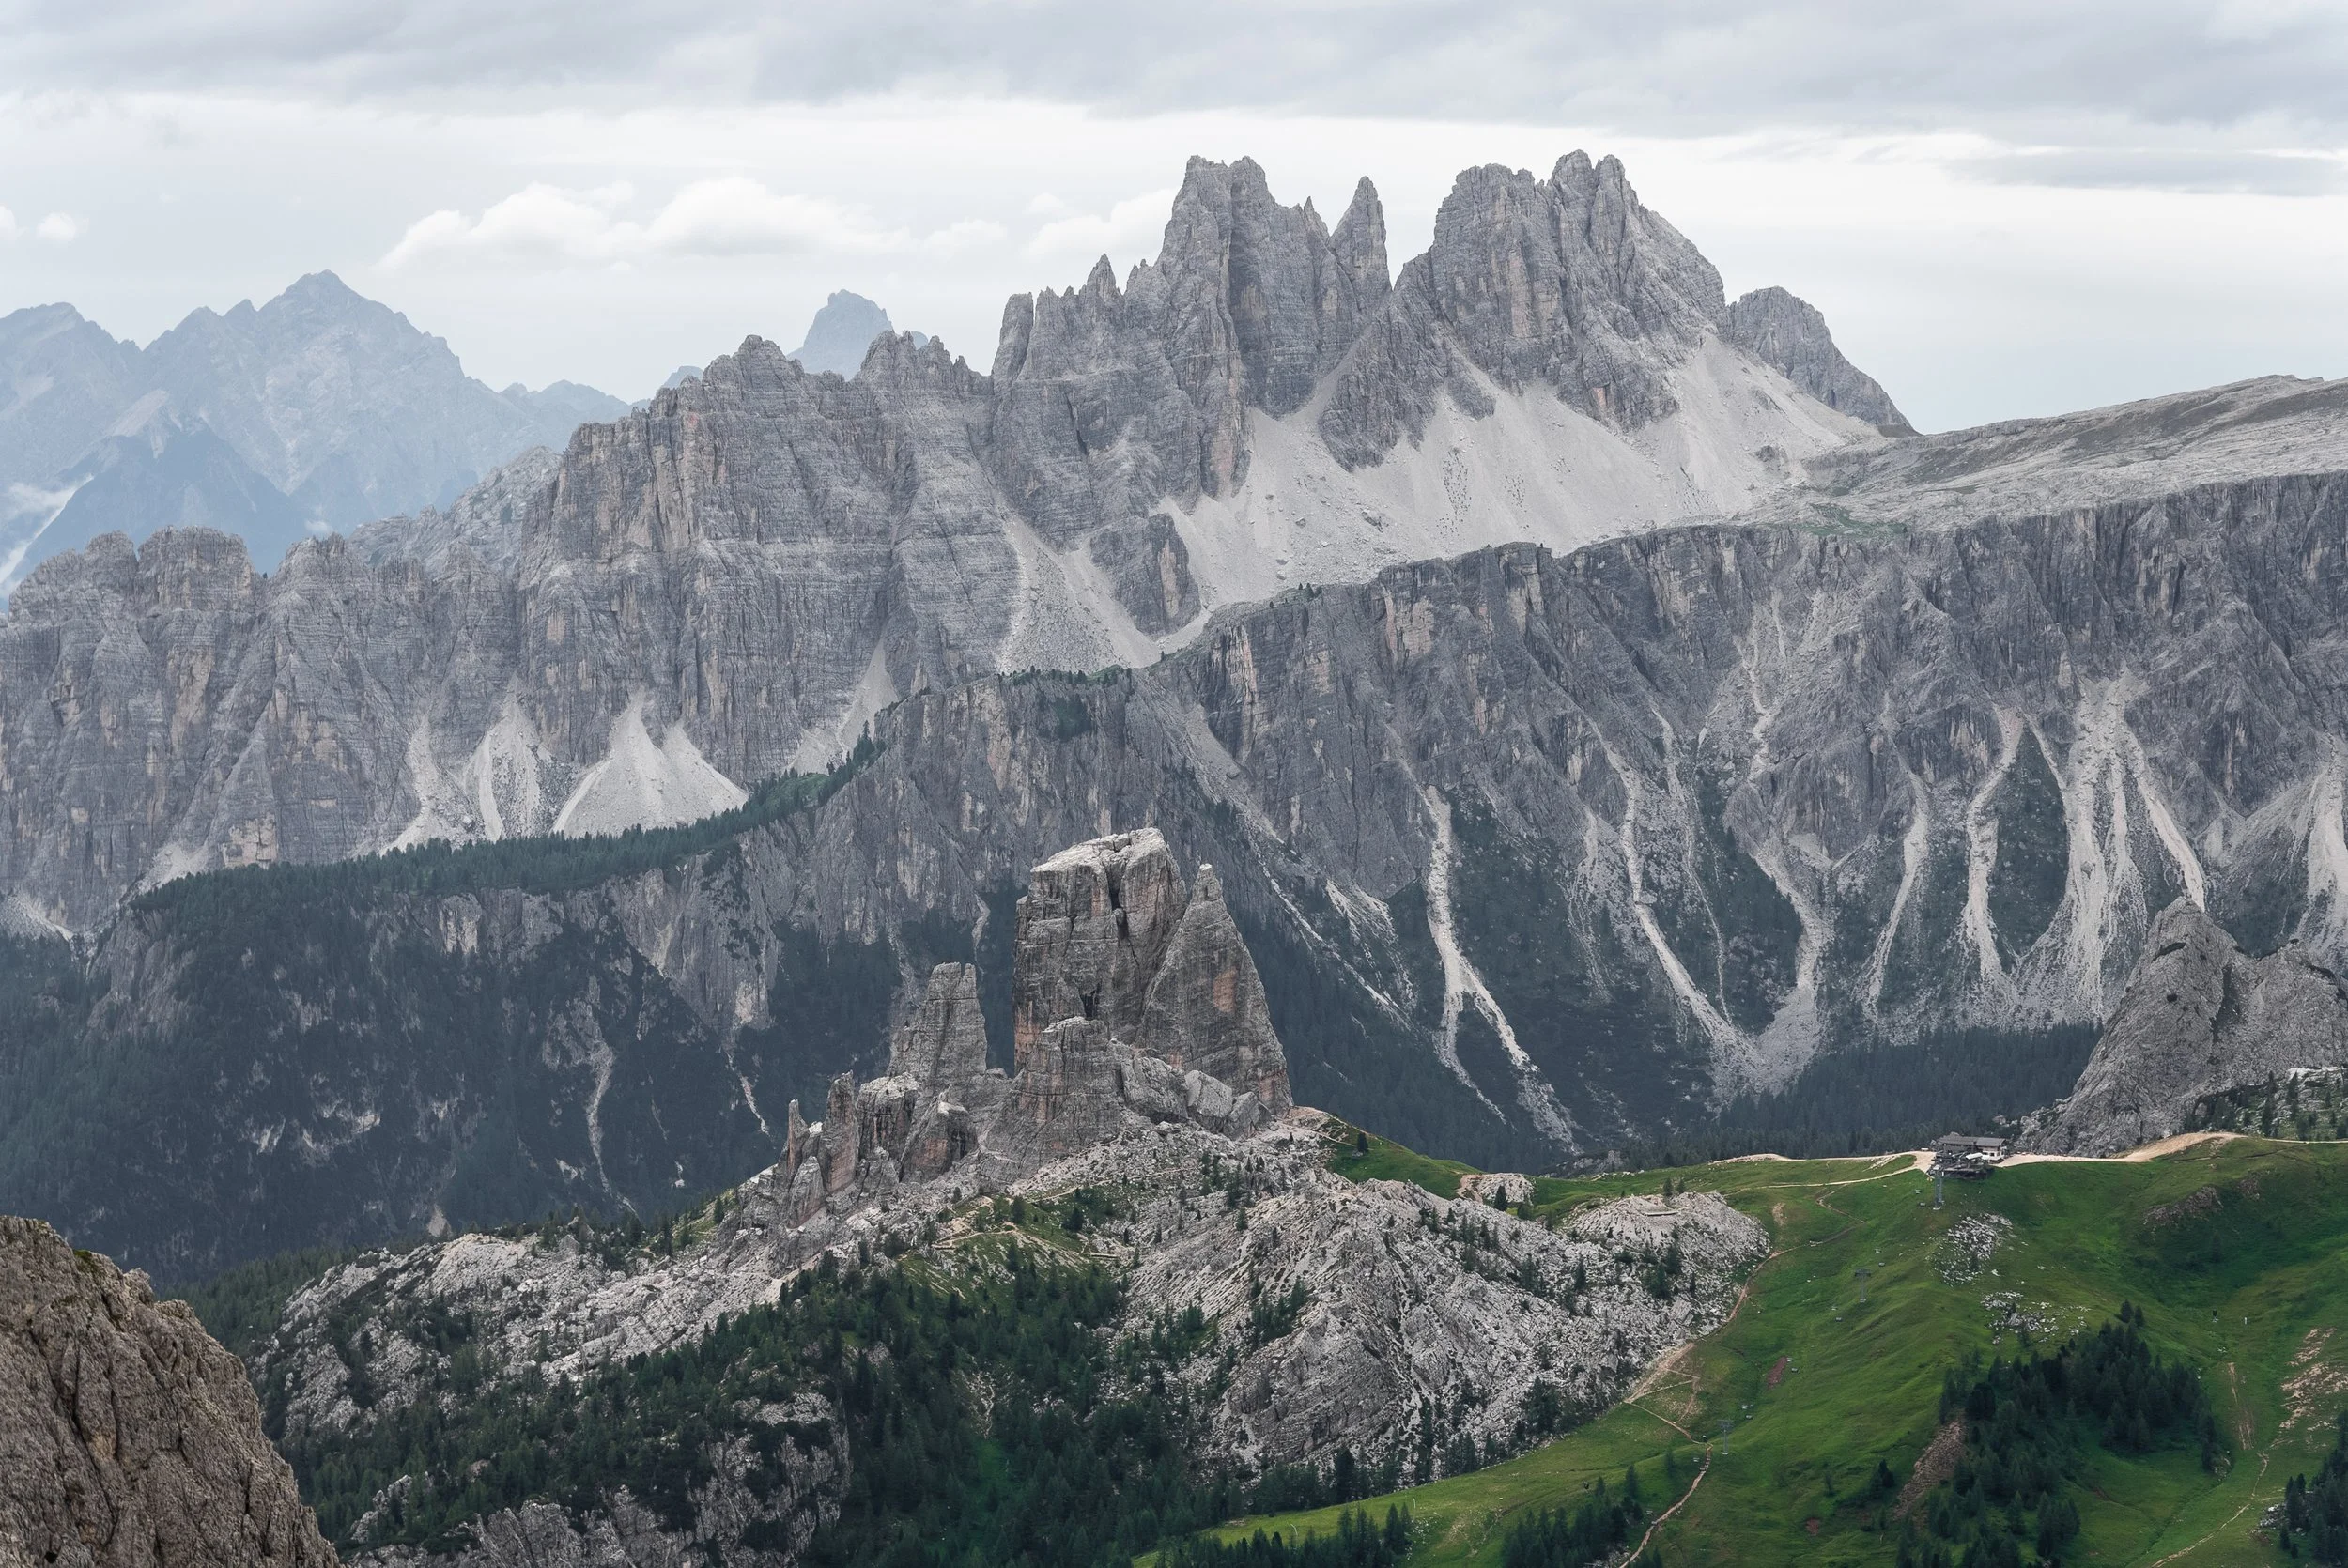
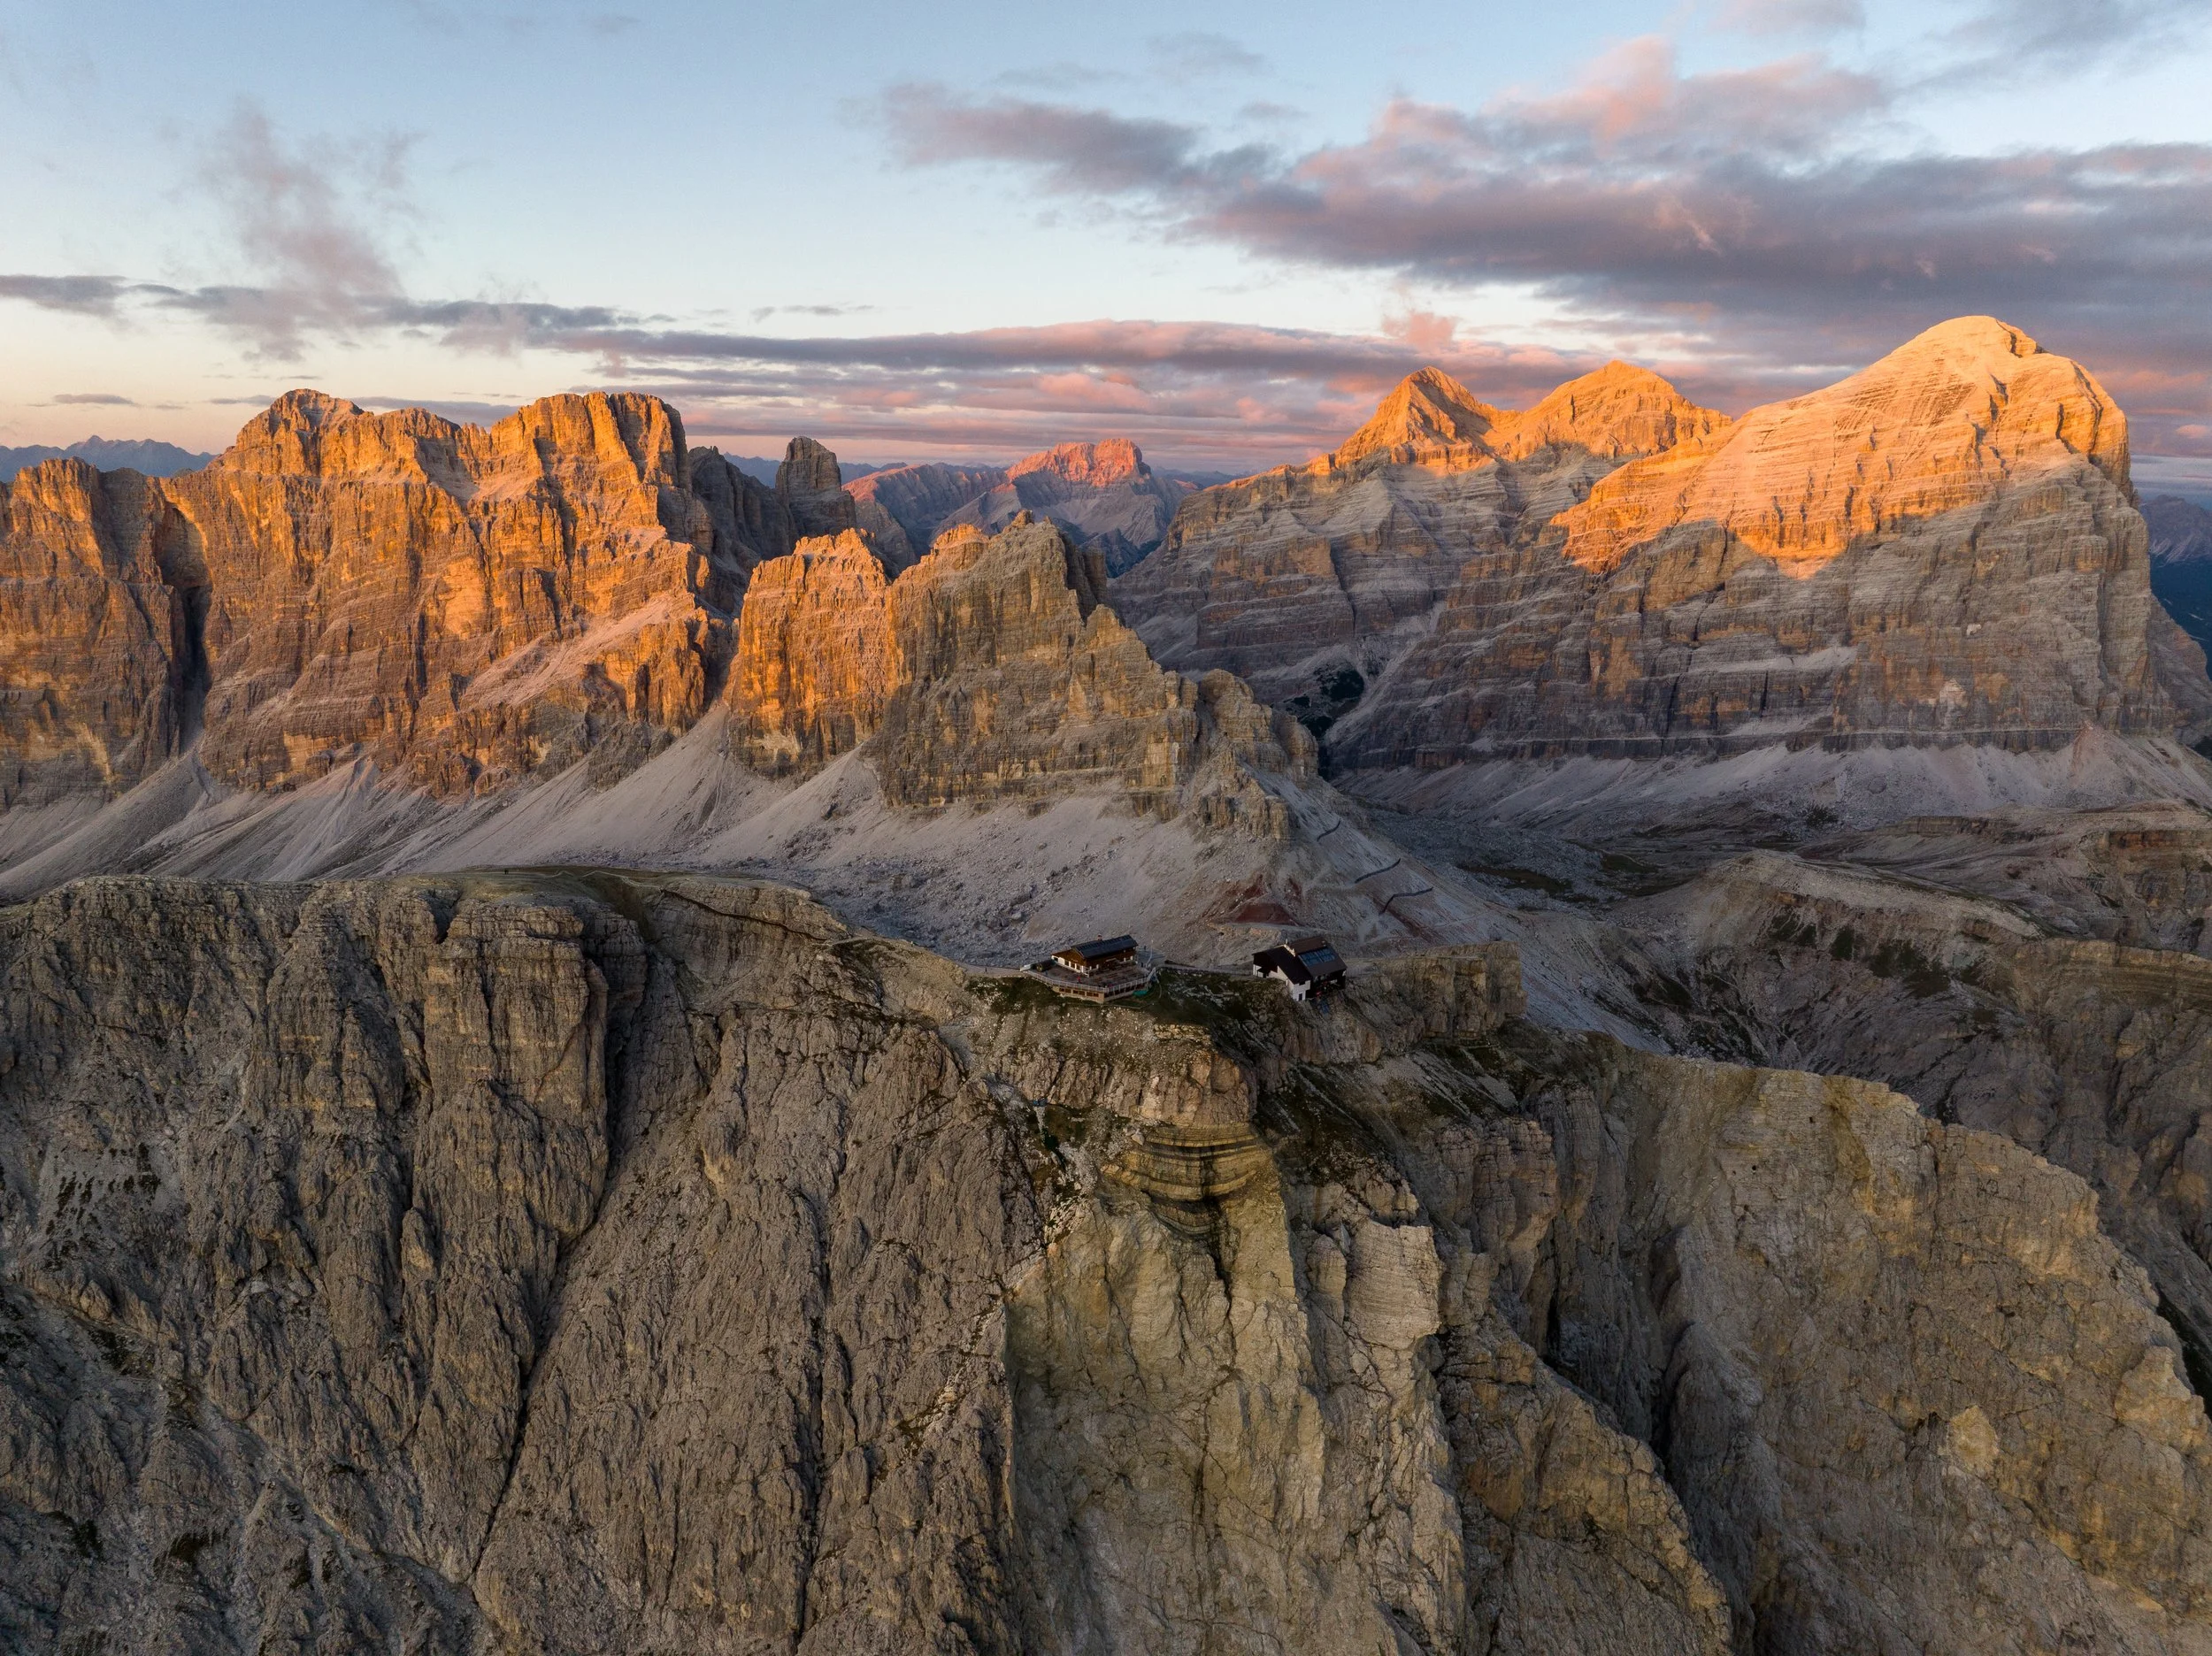
It wasn’t until we reached Forcella Lagazuoi, the high point of the route, that we encountered other hikers. From this vantage point, we were rewarded with breathtaking panoramic views stretching south towards Cinque Torri, across the Nuvolau mountains, and over the wide expanse of the eastern Dolomites.
It’s a place to catch your breath and absorb the incredible panoramic views, towering rock formations, and distant peaks.
At this point, the official Dolomiti Trail begins its descent to Passo Falzarego. But having hiked this area before, I knew there was an optional extension that not only offered even better views, but also a chance to connect with the area’s rich and humbling history, alongside a far more enjoyable way to descend the mountain.
The skies were still clear, our legs were feeling strong, and we had time on our side. So we decided to go for it.


Optional Extension to Rifugio Lagazuoi
This optional detour takes you just under one kilometre further, with around 180 metres of extra elevation gain.
In my opinion, Lagazuoi is one of the most impressive rifugio in the Dolomites. Its panoramic terrace offers sweeping, unobstructed views across the mountains. I stayed there in 2024, and it remains one of the most memorable experiences I’ve had in the region.
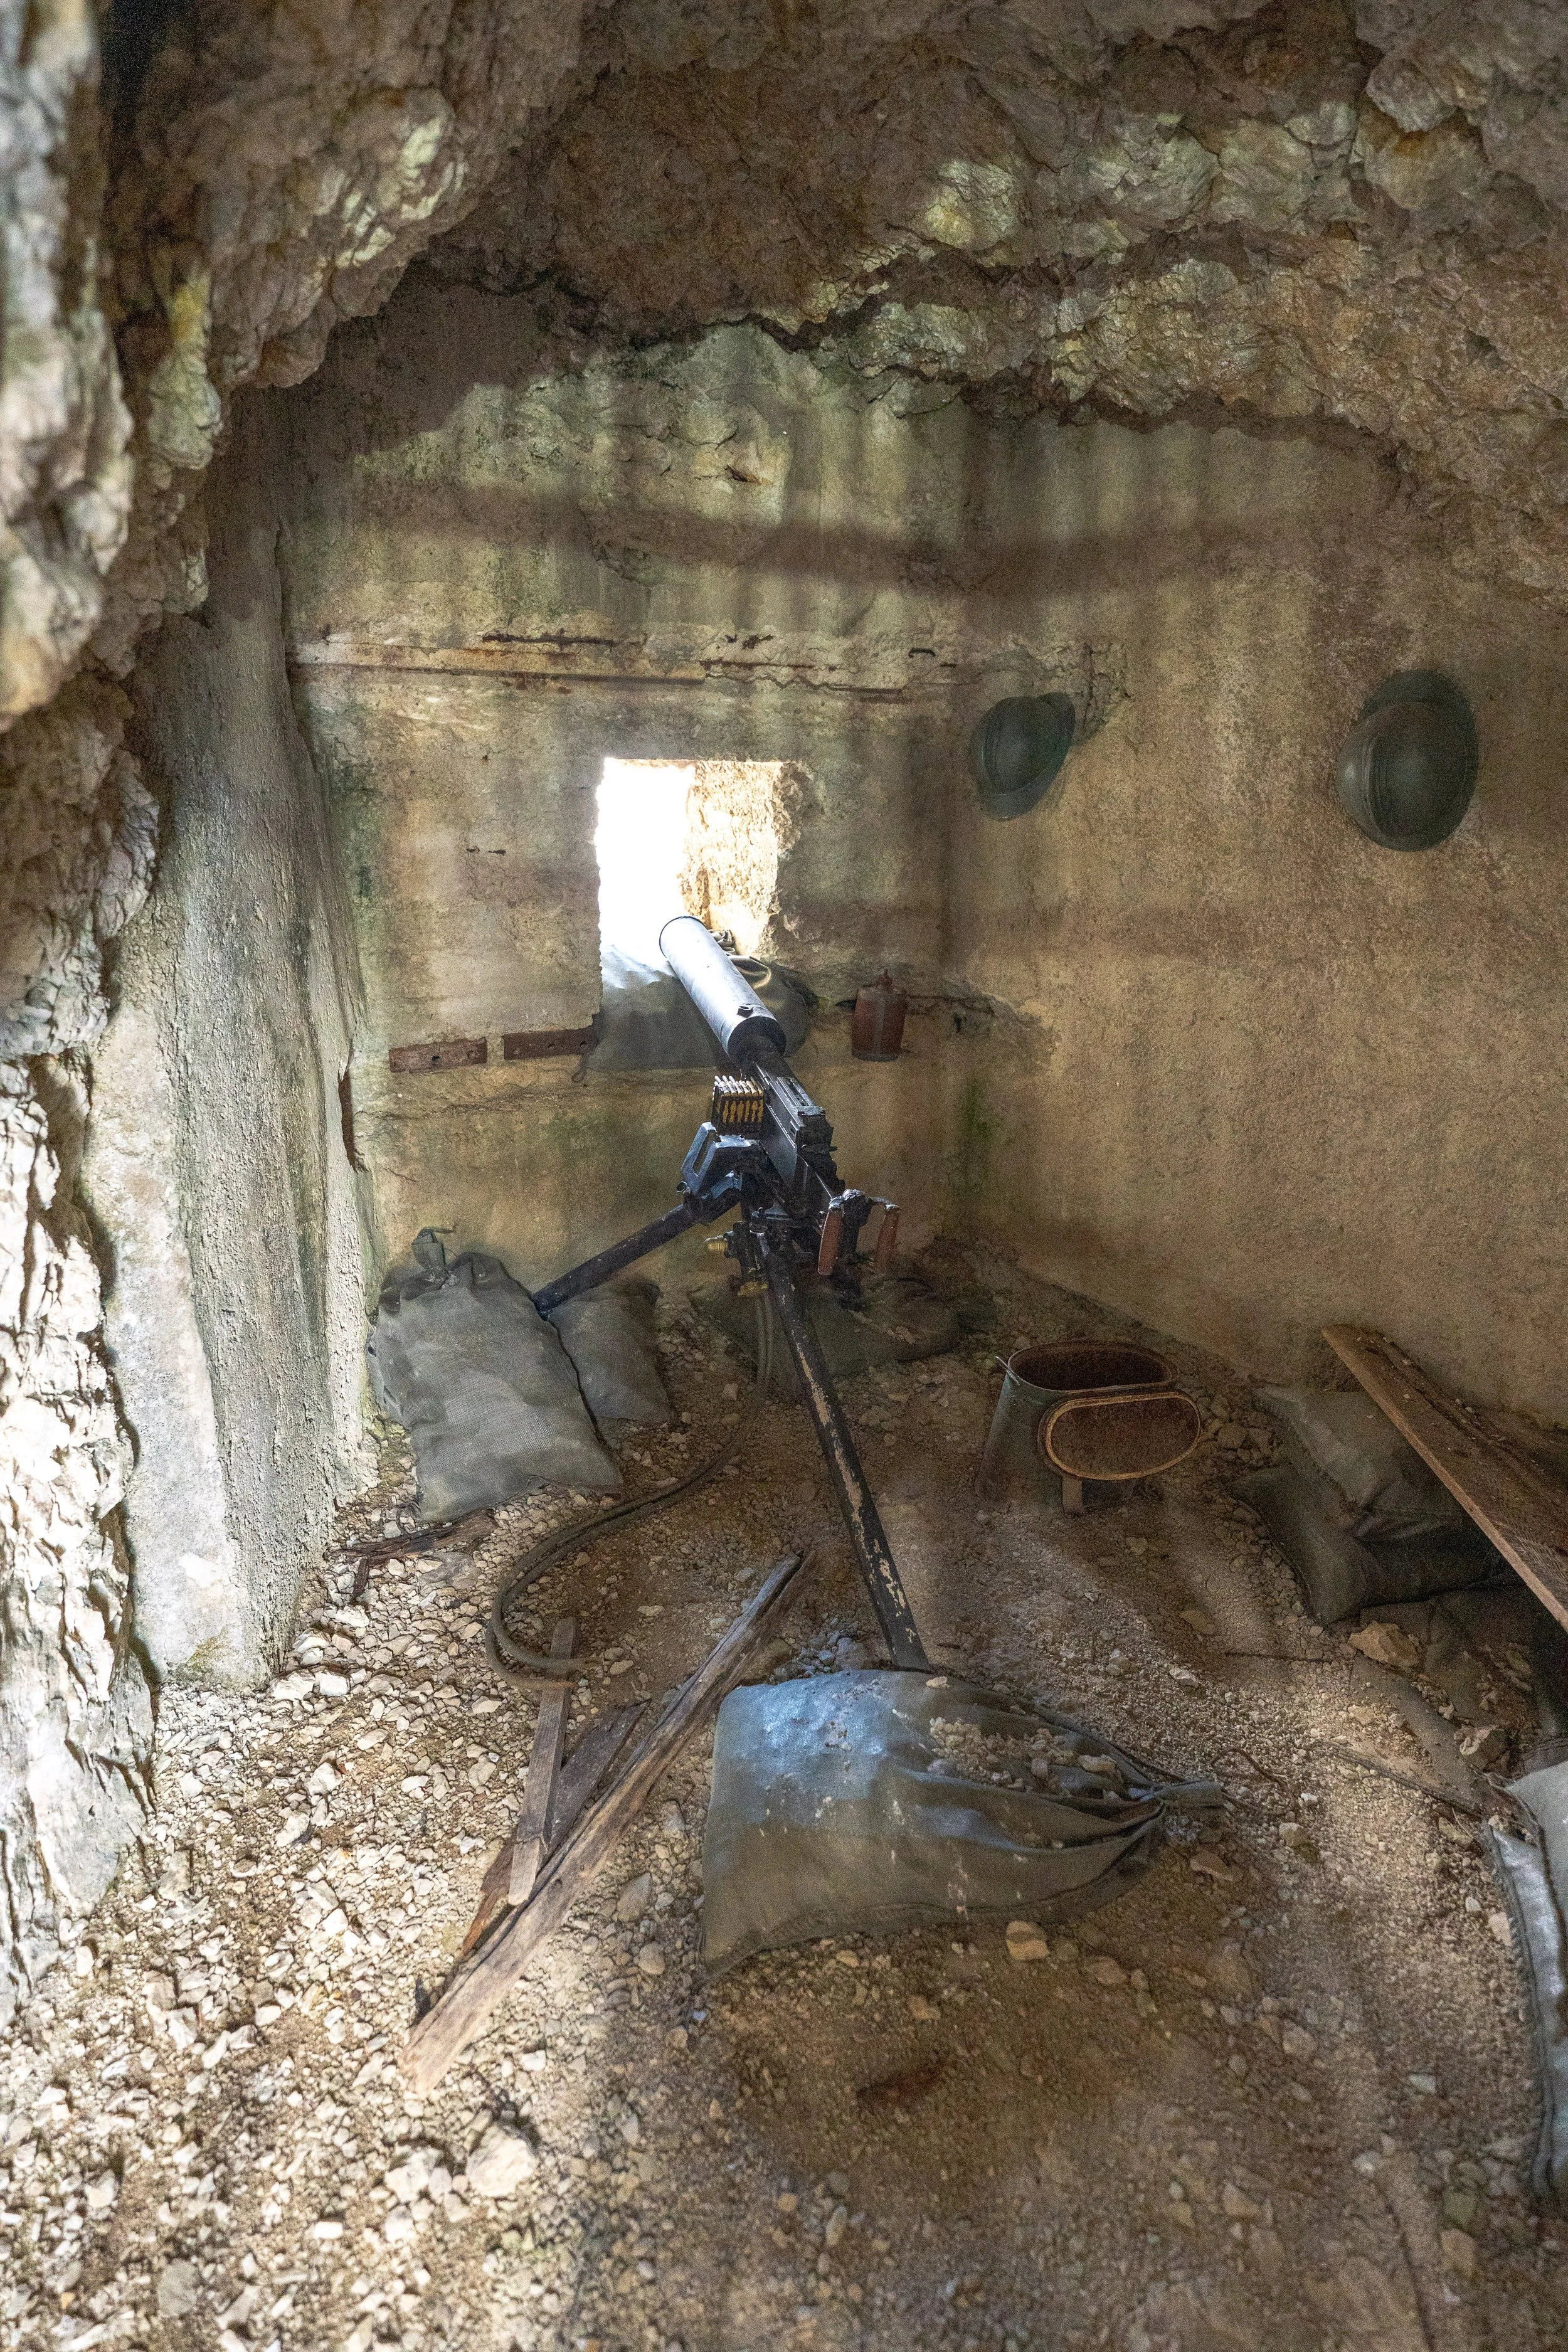
The mountain is also rich in history. During the First World War, Lagazuoi was a strategic stronghold, and today it is surrounded by remnants from that era. The steep but short climb to the rifugio takes you past several open-air museums, with artefacts and information panels that bring the past vividly to life.


As well as the views and the chance to enjoy a hot drink or snack at the top, another major highlight is the option to descend via the World War I tunnels. I would consider this route an absolute must. It is not only a fascinating and humbling experience, but also a much more enjoyable and manageable way to descend the mountain.
The standard descent from Forcella Lagazuoi to Passo Falzarego involves a steep slope of loose scree, which can be difficult and frustrating to navigate.
By contrast, the tunnels can provide a unique and far more engaging alternative. Essentially, they are a continuous set of indoor steps carved through the mountain itself. They begin next to the cable car station and are clearly signposted.
While the tunnels are not particularly difficult to access or follow, the top and bottom sections include one or two short cable-protected areas with mild exposure. You don’t need via ferrata gear or a helmet, but a head torch is essential, and you’ll need to watch your footing - especially if you are tall, as the ceiling is quite low in places.
The first portion of the tunnel is the narrowest and includes a few side passages that can be confusing. However, the main tunnel is wide, well-marked, and easy to follow. A continuous safety cable runs along the wall, making the descent more secure and comfortable.
In addition to being a practical route, descending through these tunnels is a profound experience. You are quite literally walking through history, and along the way you will encounter small museums, artefacts, and viewing windows that look out onto the valley far below. It is one of the most unique aspects of the entire trek.


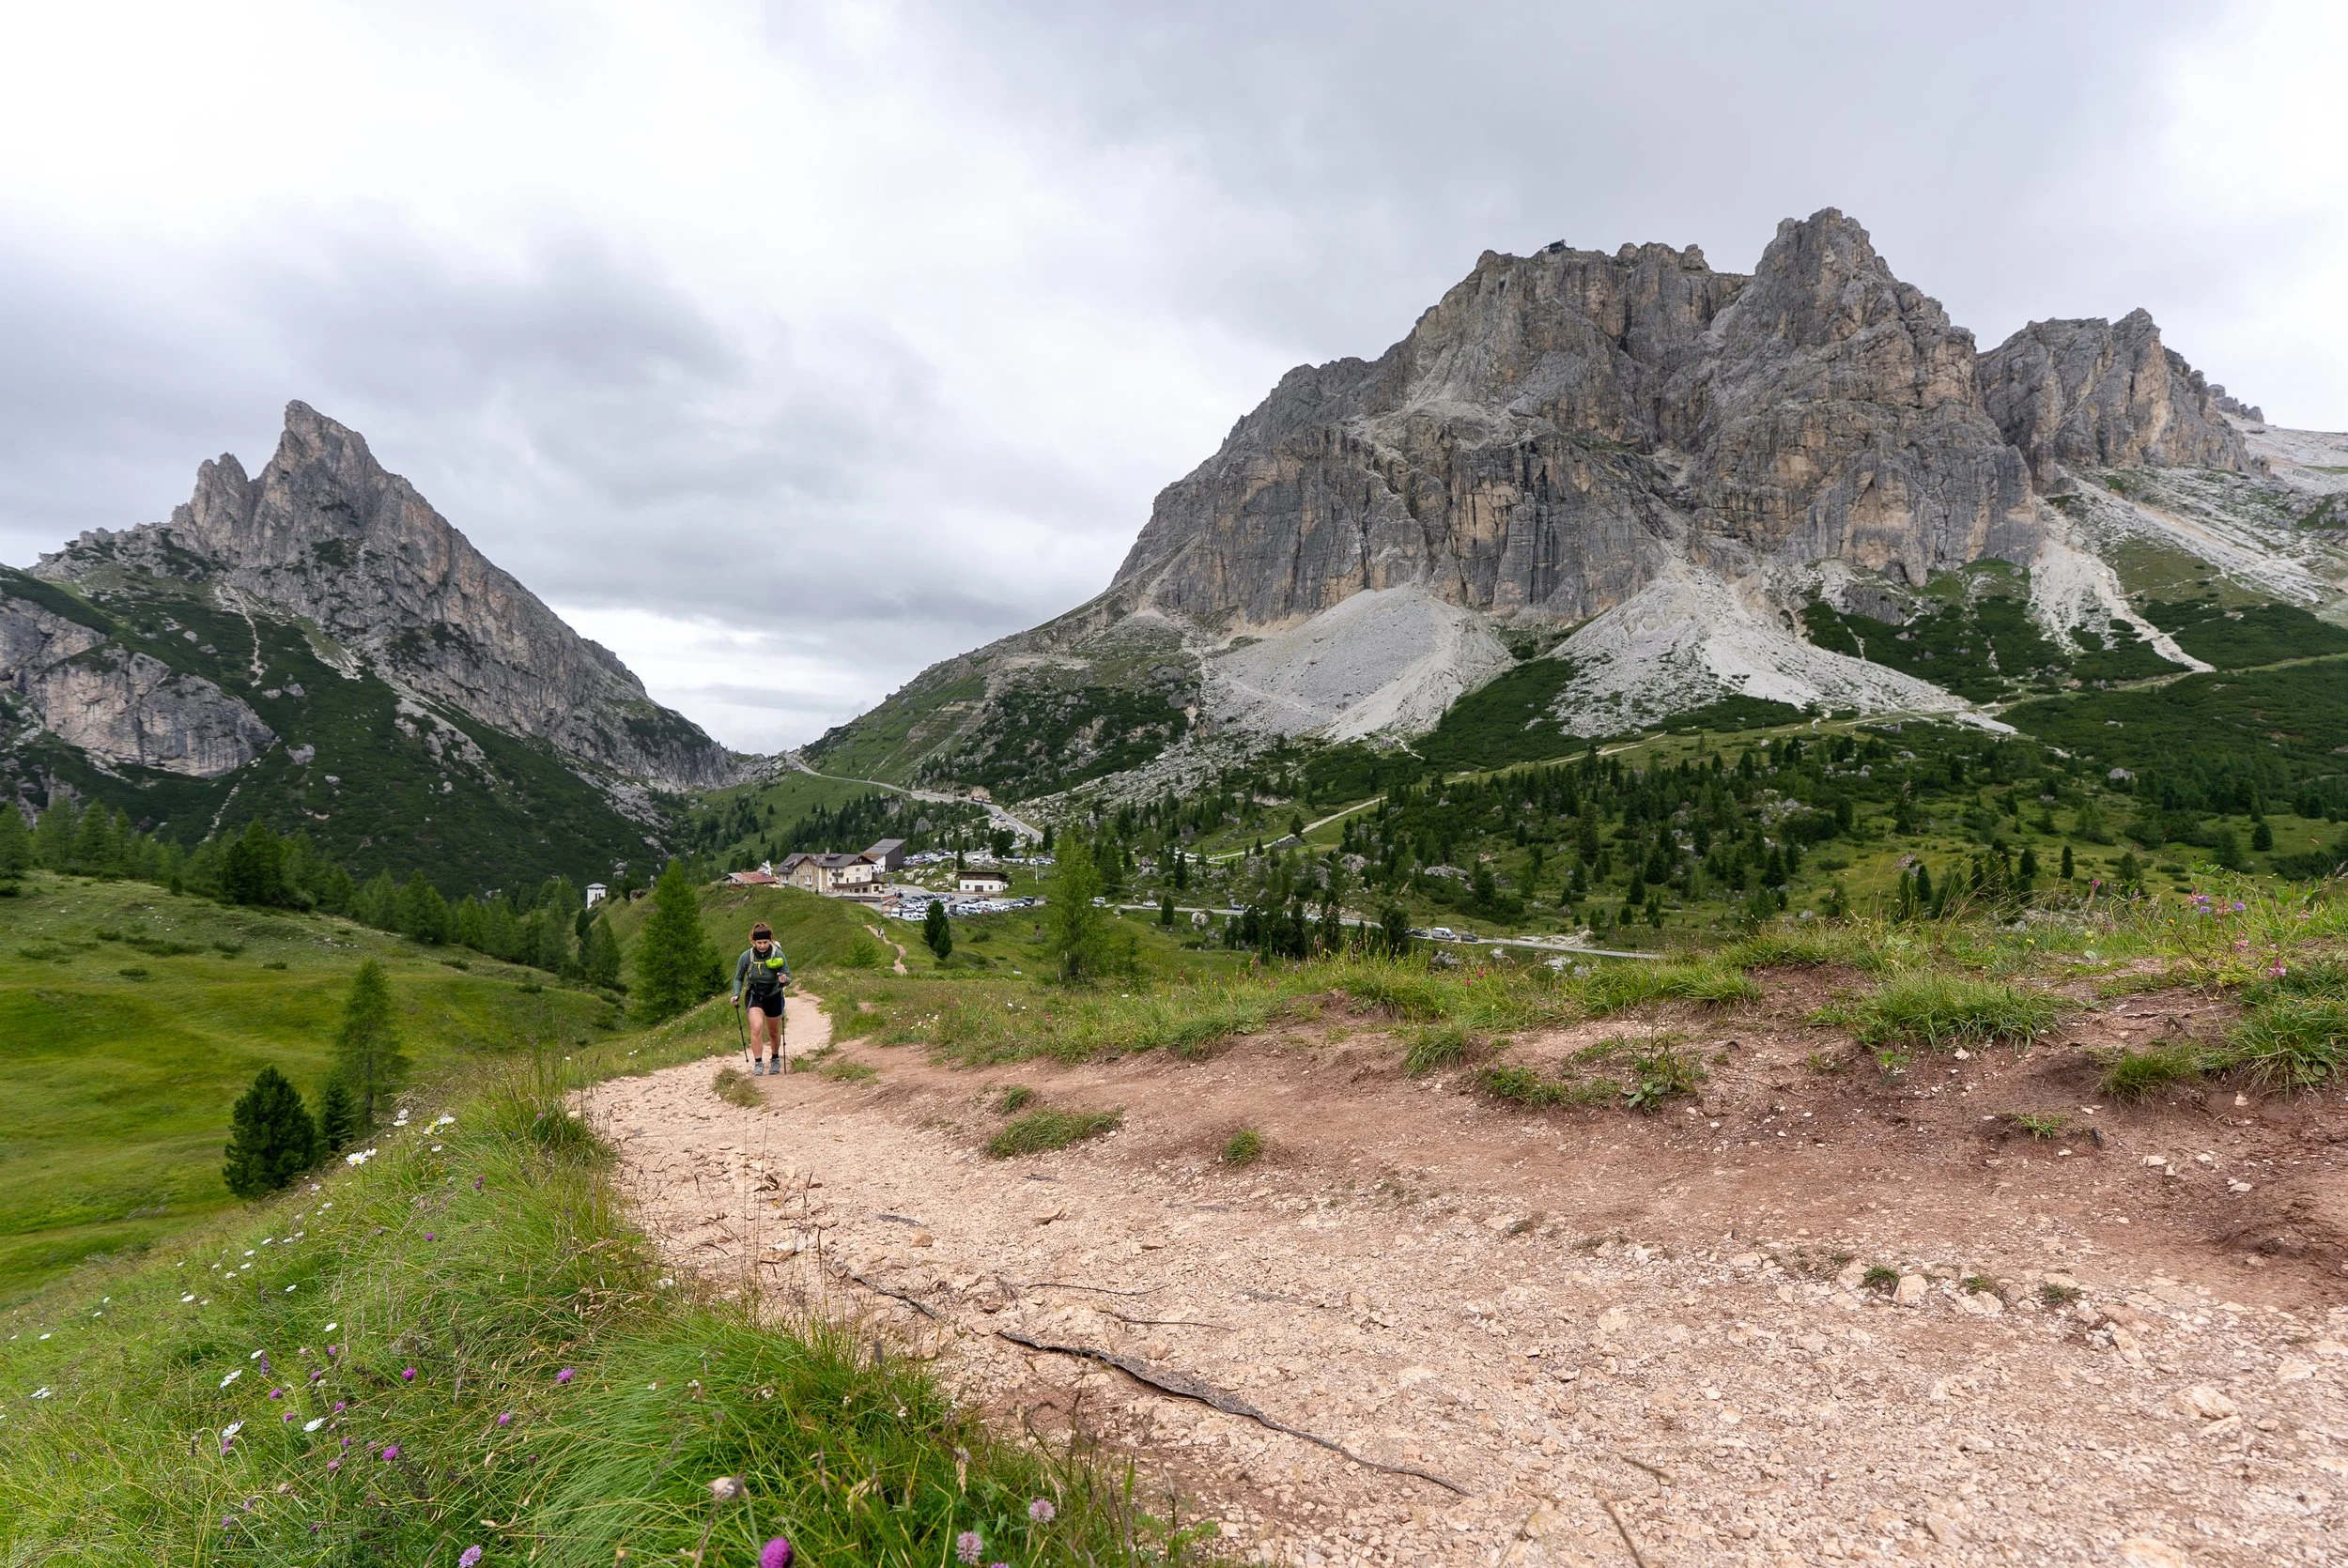
Passo Falzarego to Rifugio Averau
Once you reach Passo Falzarego, this is a good spot to refill your water and take a short break. There are a few cafés and a rifugio nearby where you can grab a coffee or a bite to eat before continuing.
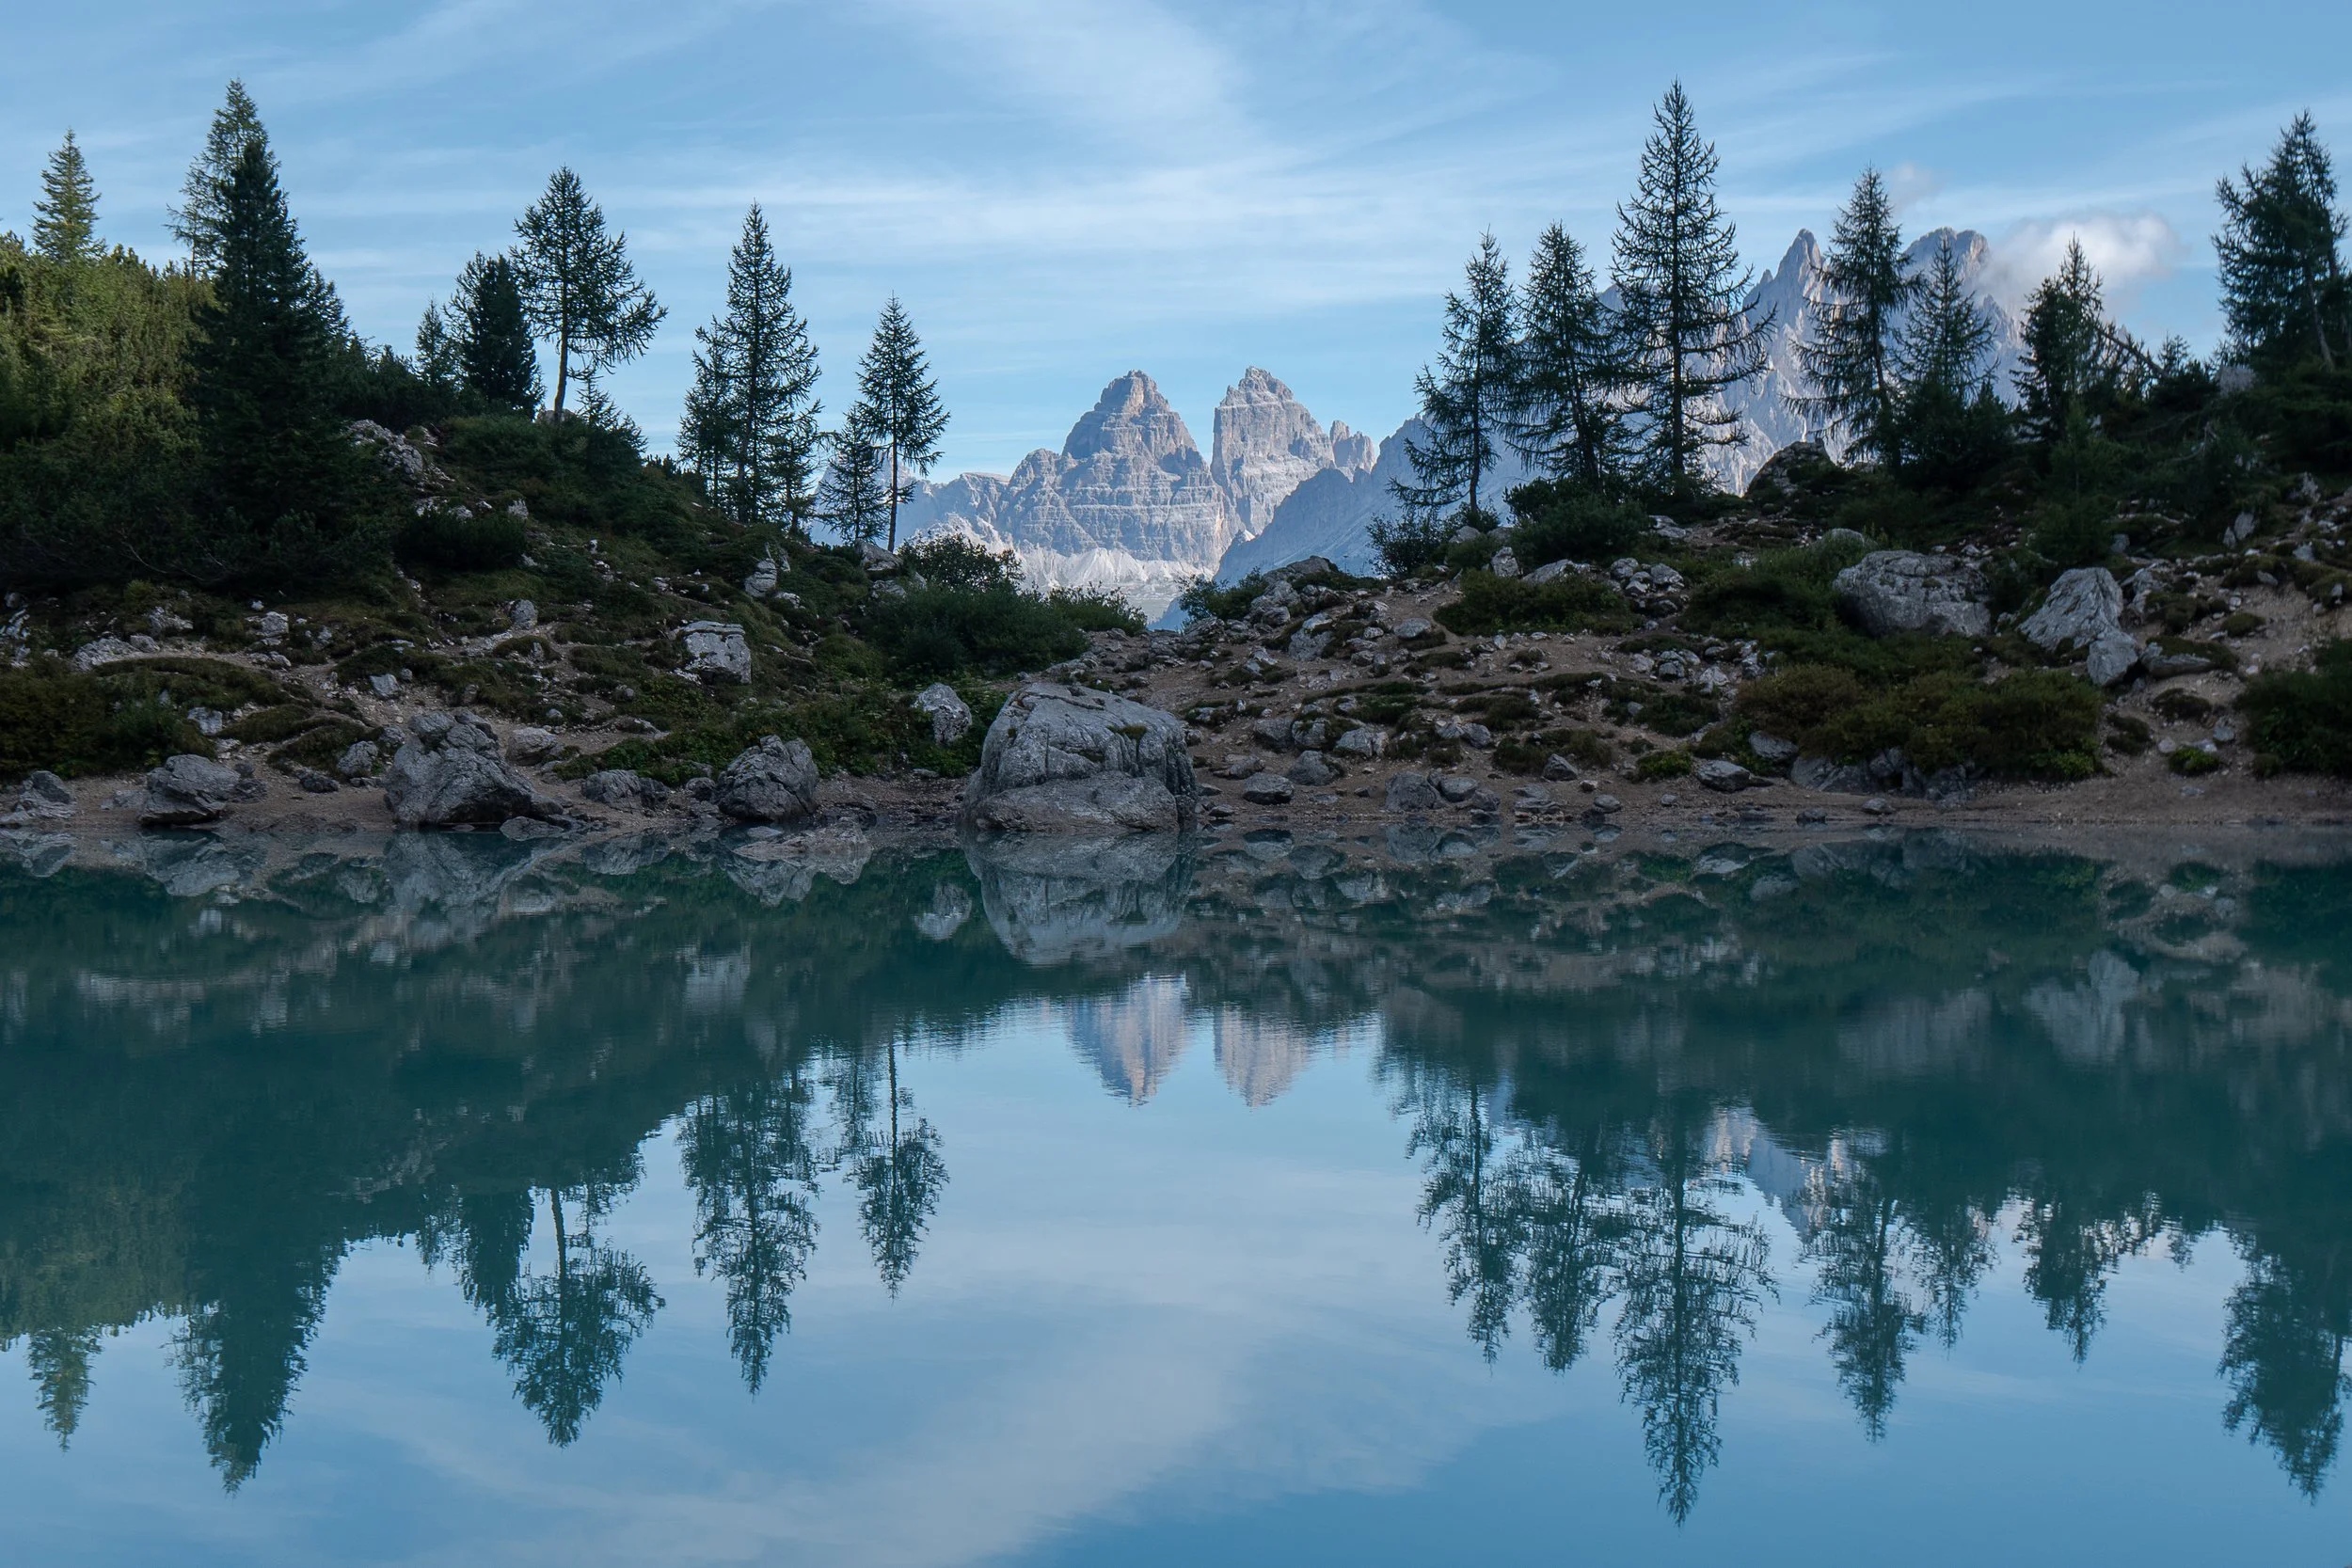
From here, you begin the second climb of the day, making your way up towards Rifugio Averau. The initial section of the ascent is fairly gradual and passes by Lago Limides, a picturesque alpine lake that’s definitely worth a short detour.
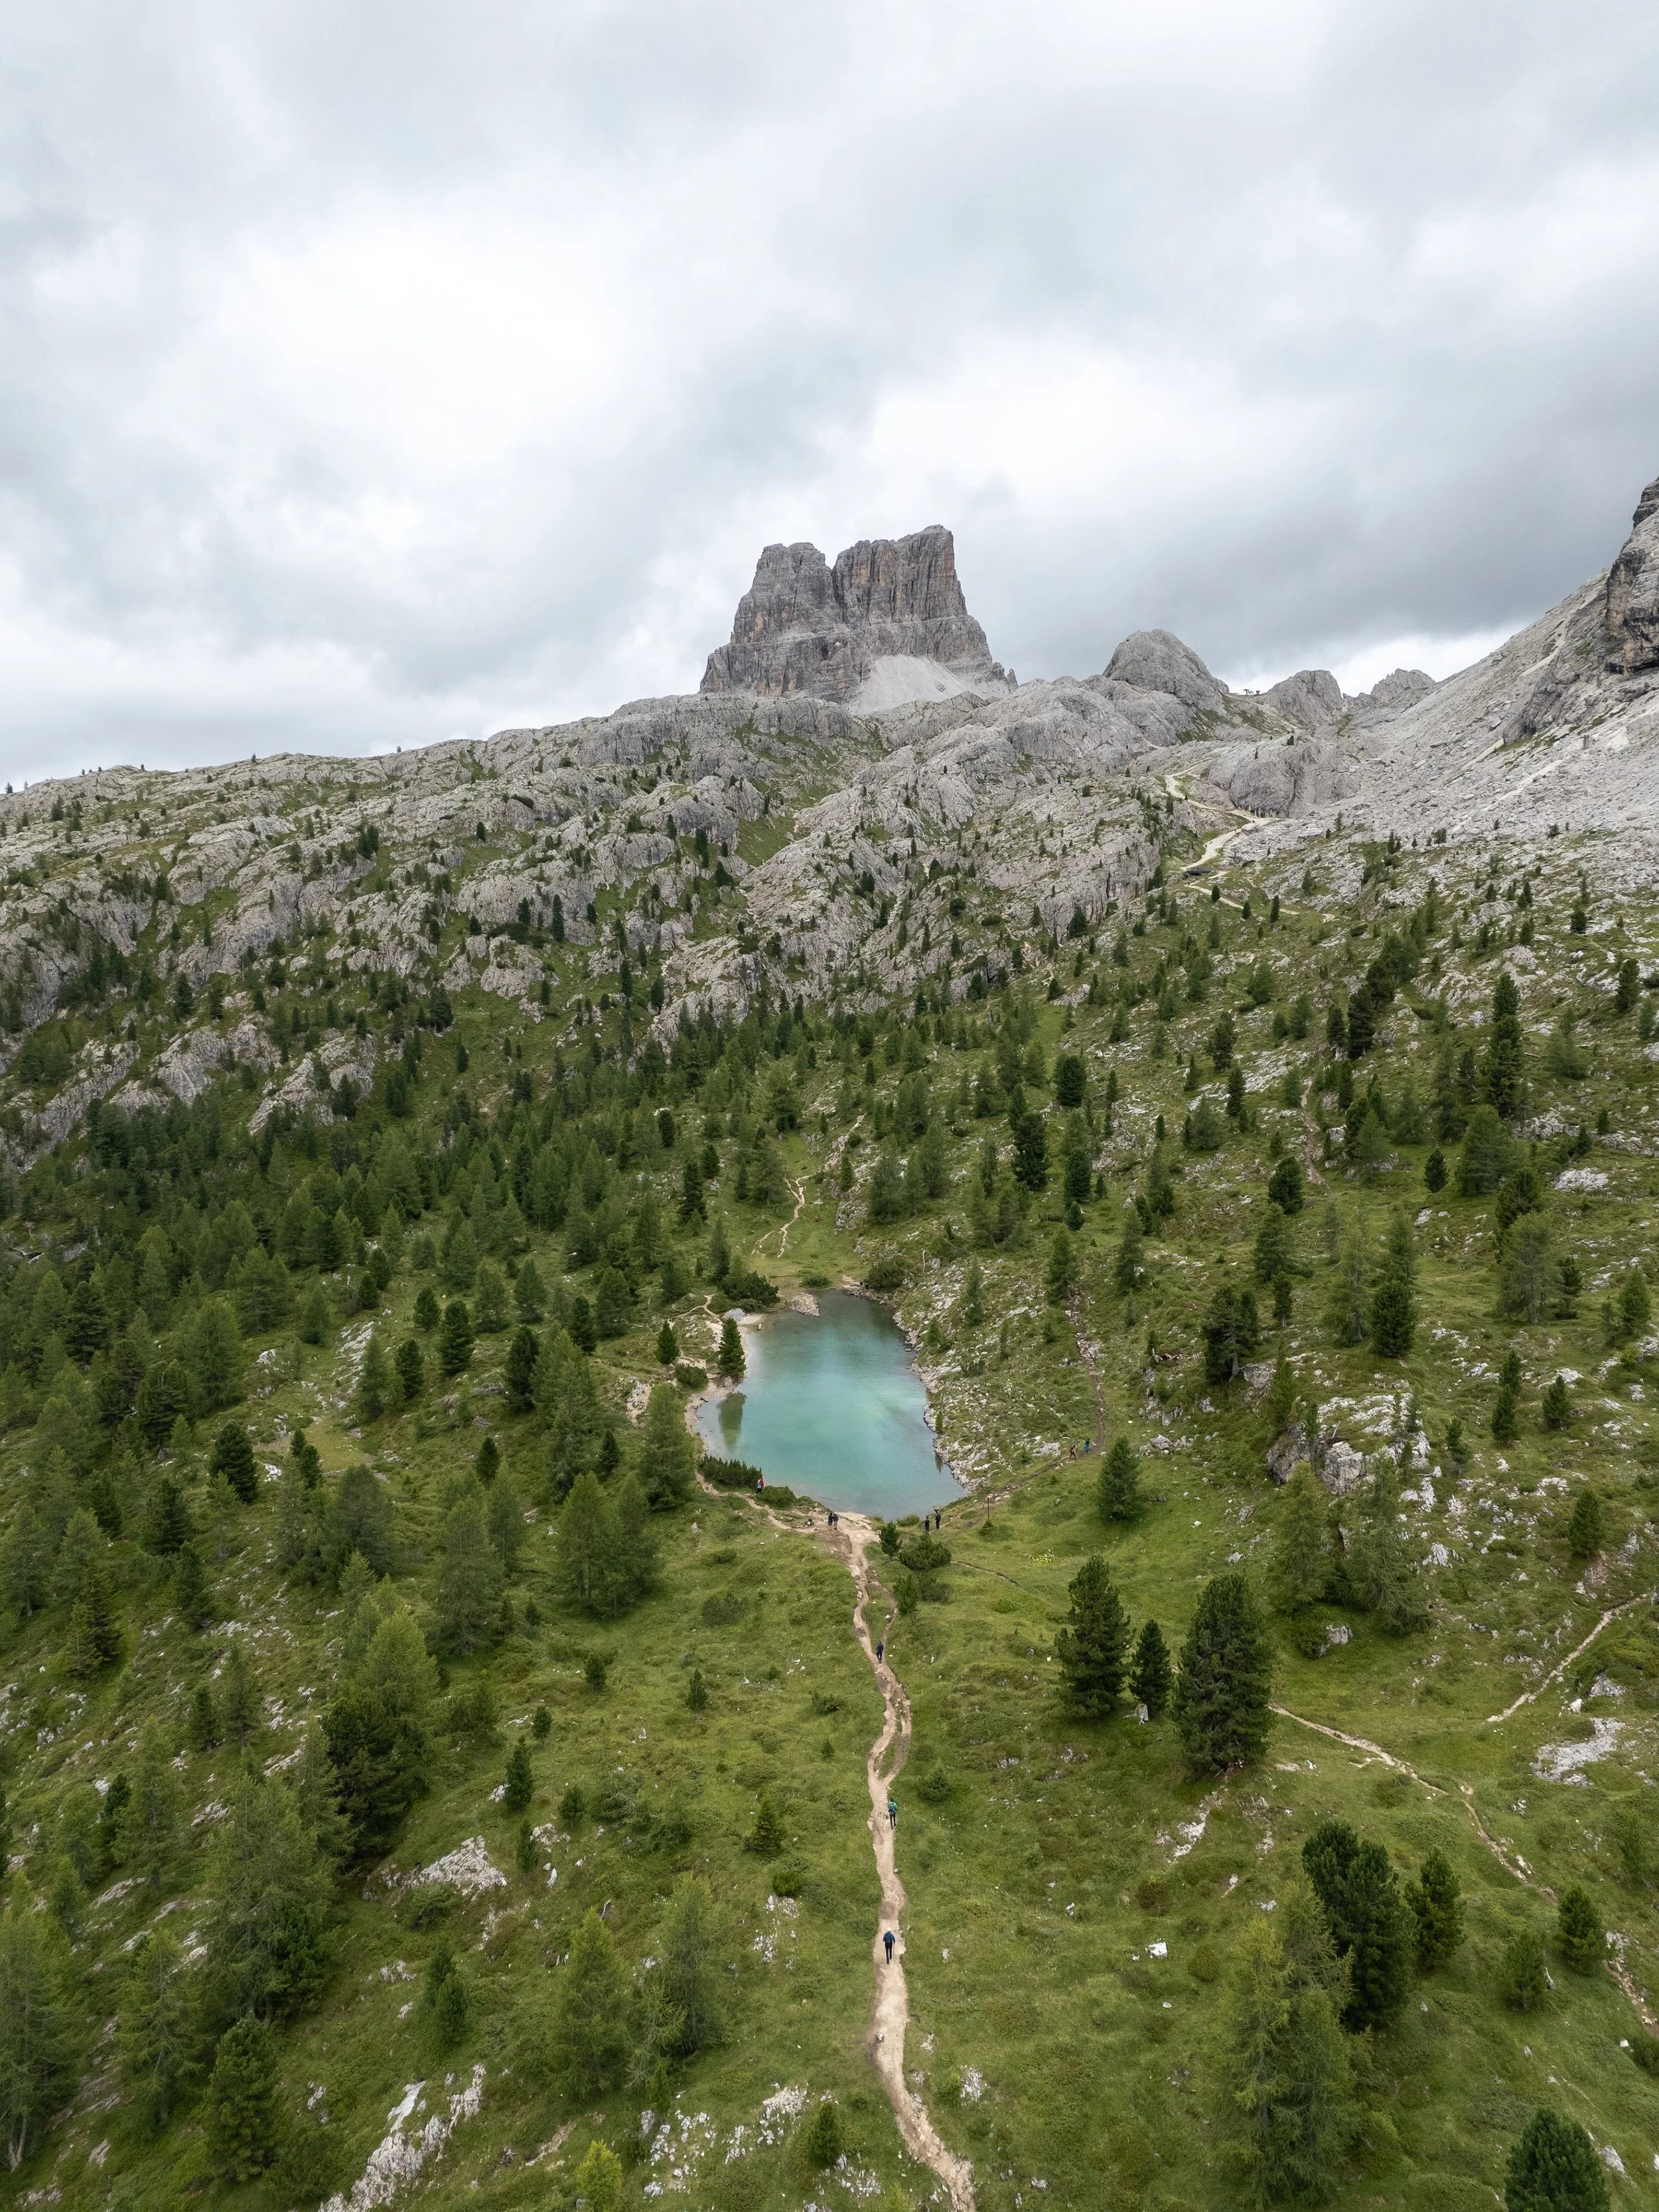

As you progress, the path becomes significantly steeper, particularly towards the top. The final section requires some light scrambling over rocky terrain, where you may need to use your hands for balance.
Near the end of the climb, the trail skirts around the western flank of Mount Averau. As you round the bend, the expansive mountain views return, revealing the dramatic peaks of Cinque Torri, Tofana di Rozes, and other surrounding massifs. Shortly after that, you’ll arrive at your accommodation for the evening, Rifugio Averau.
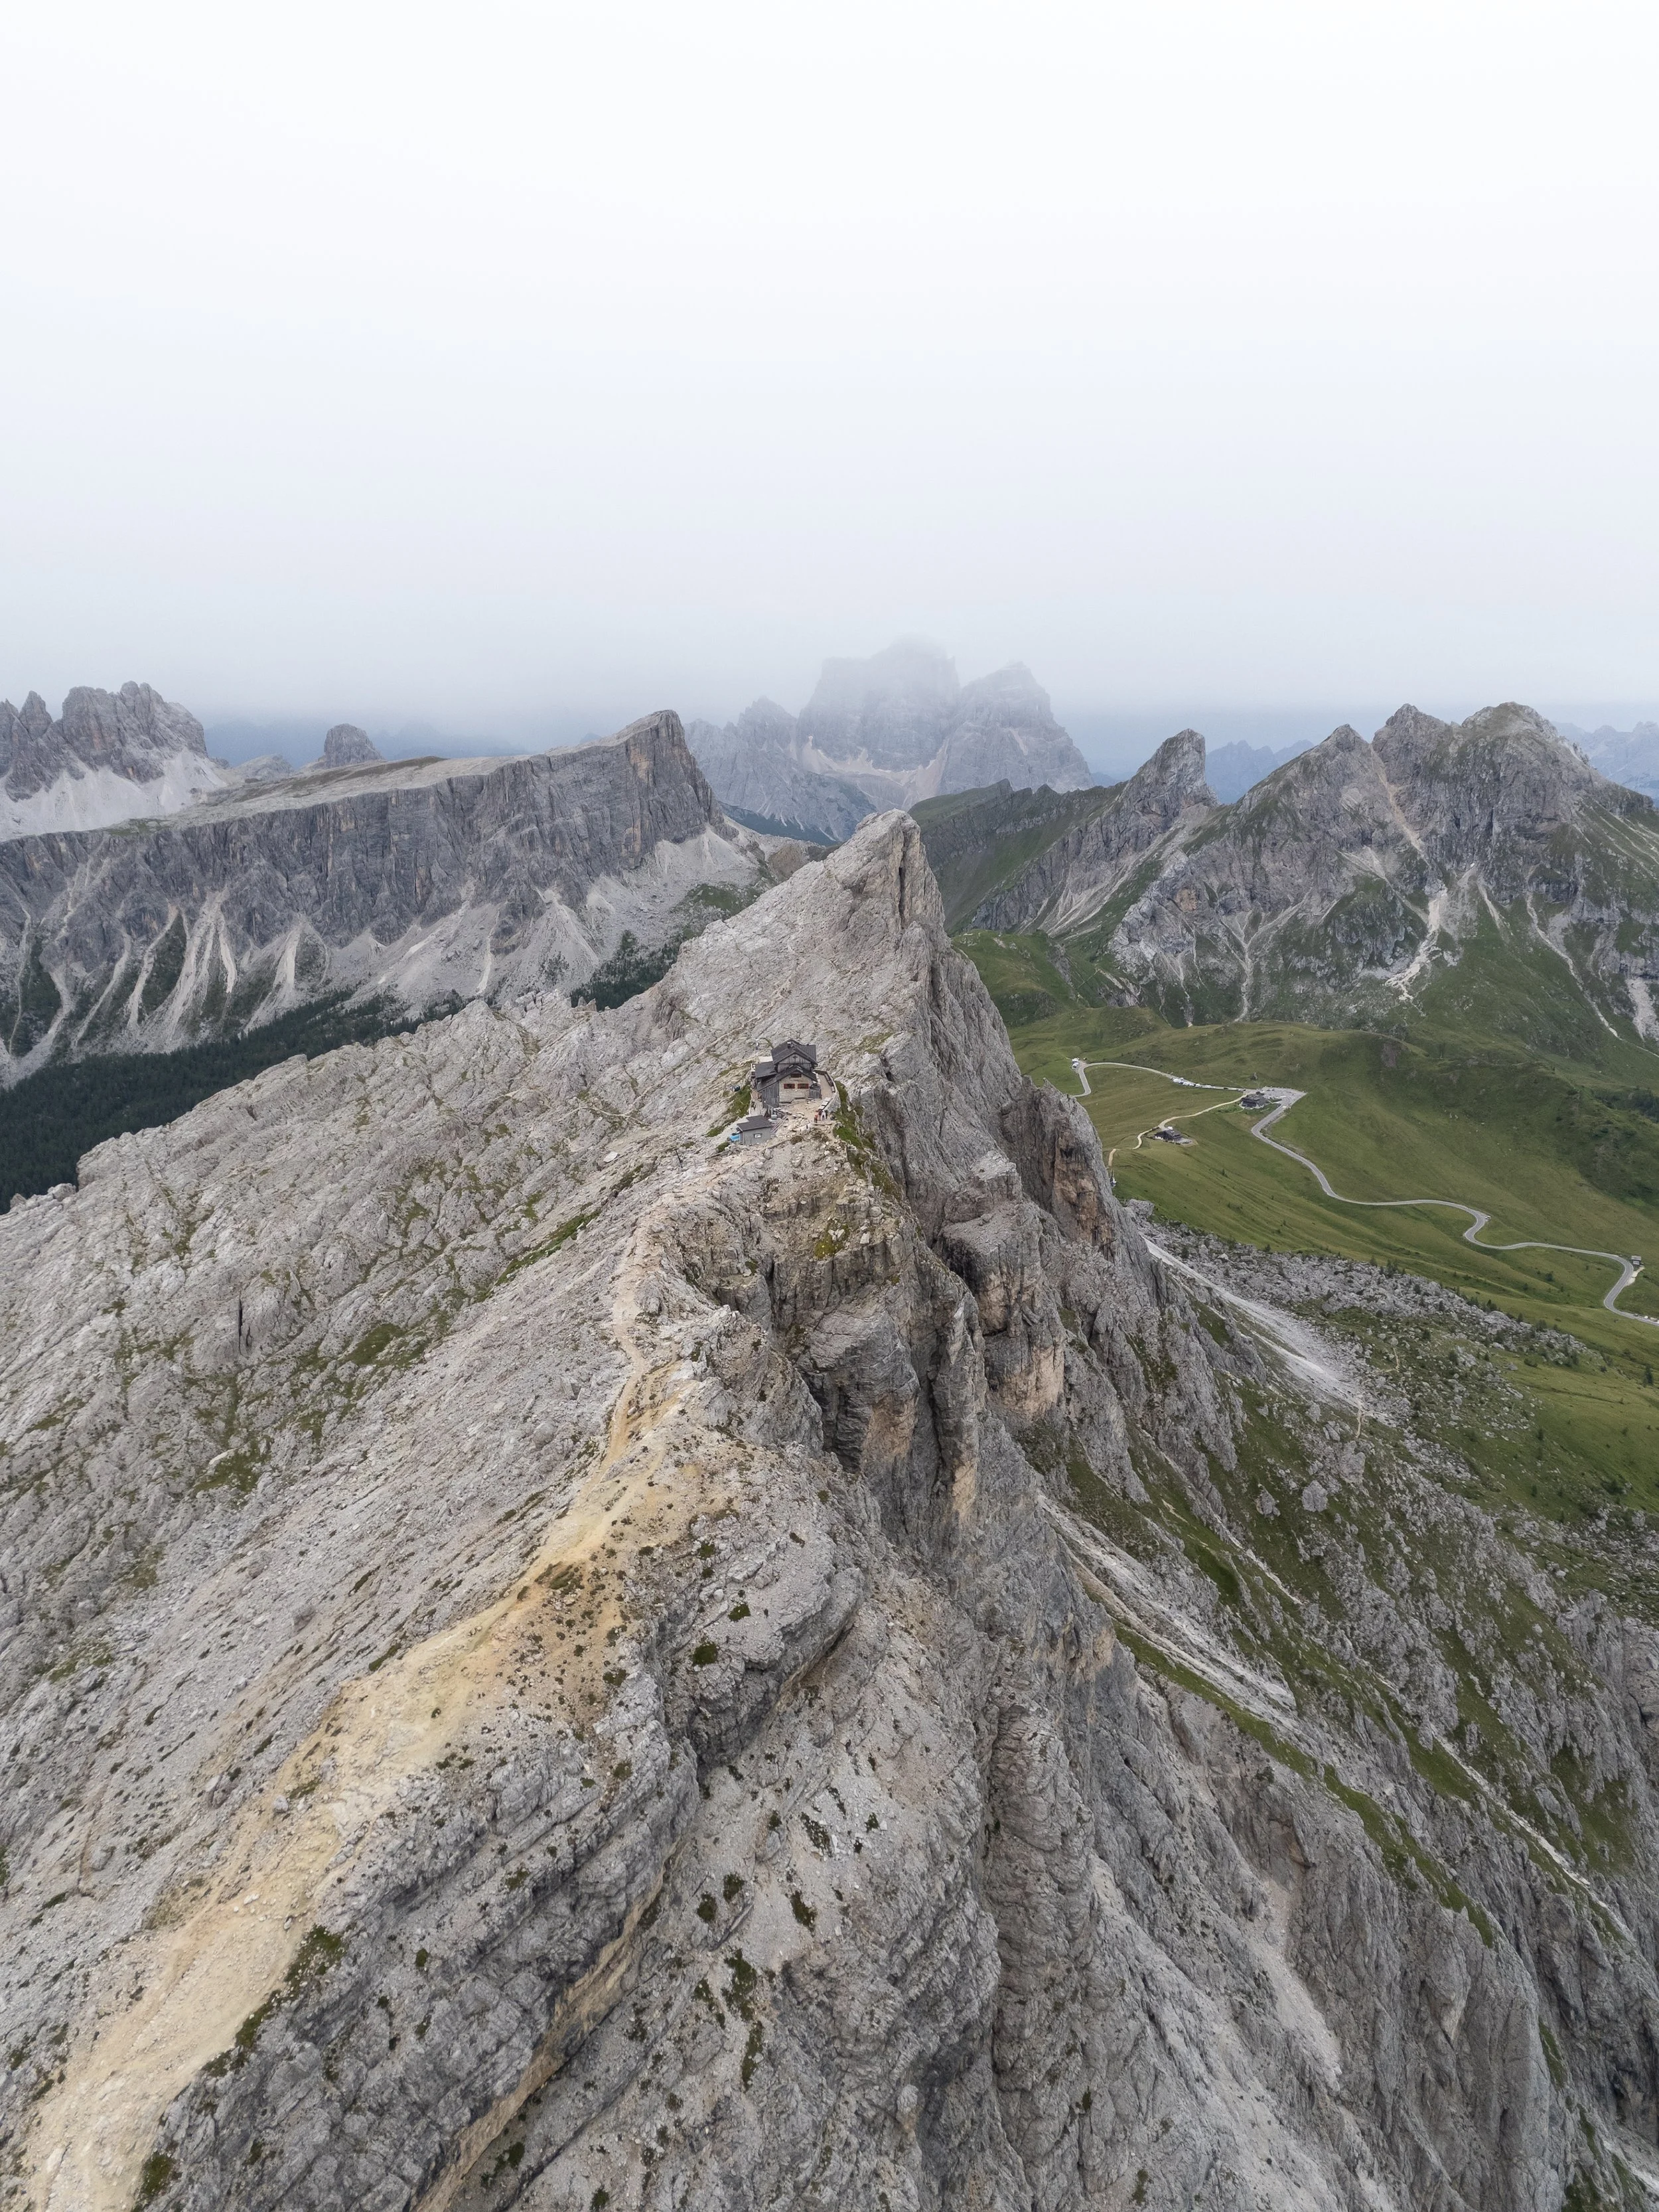
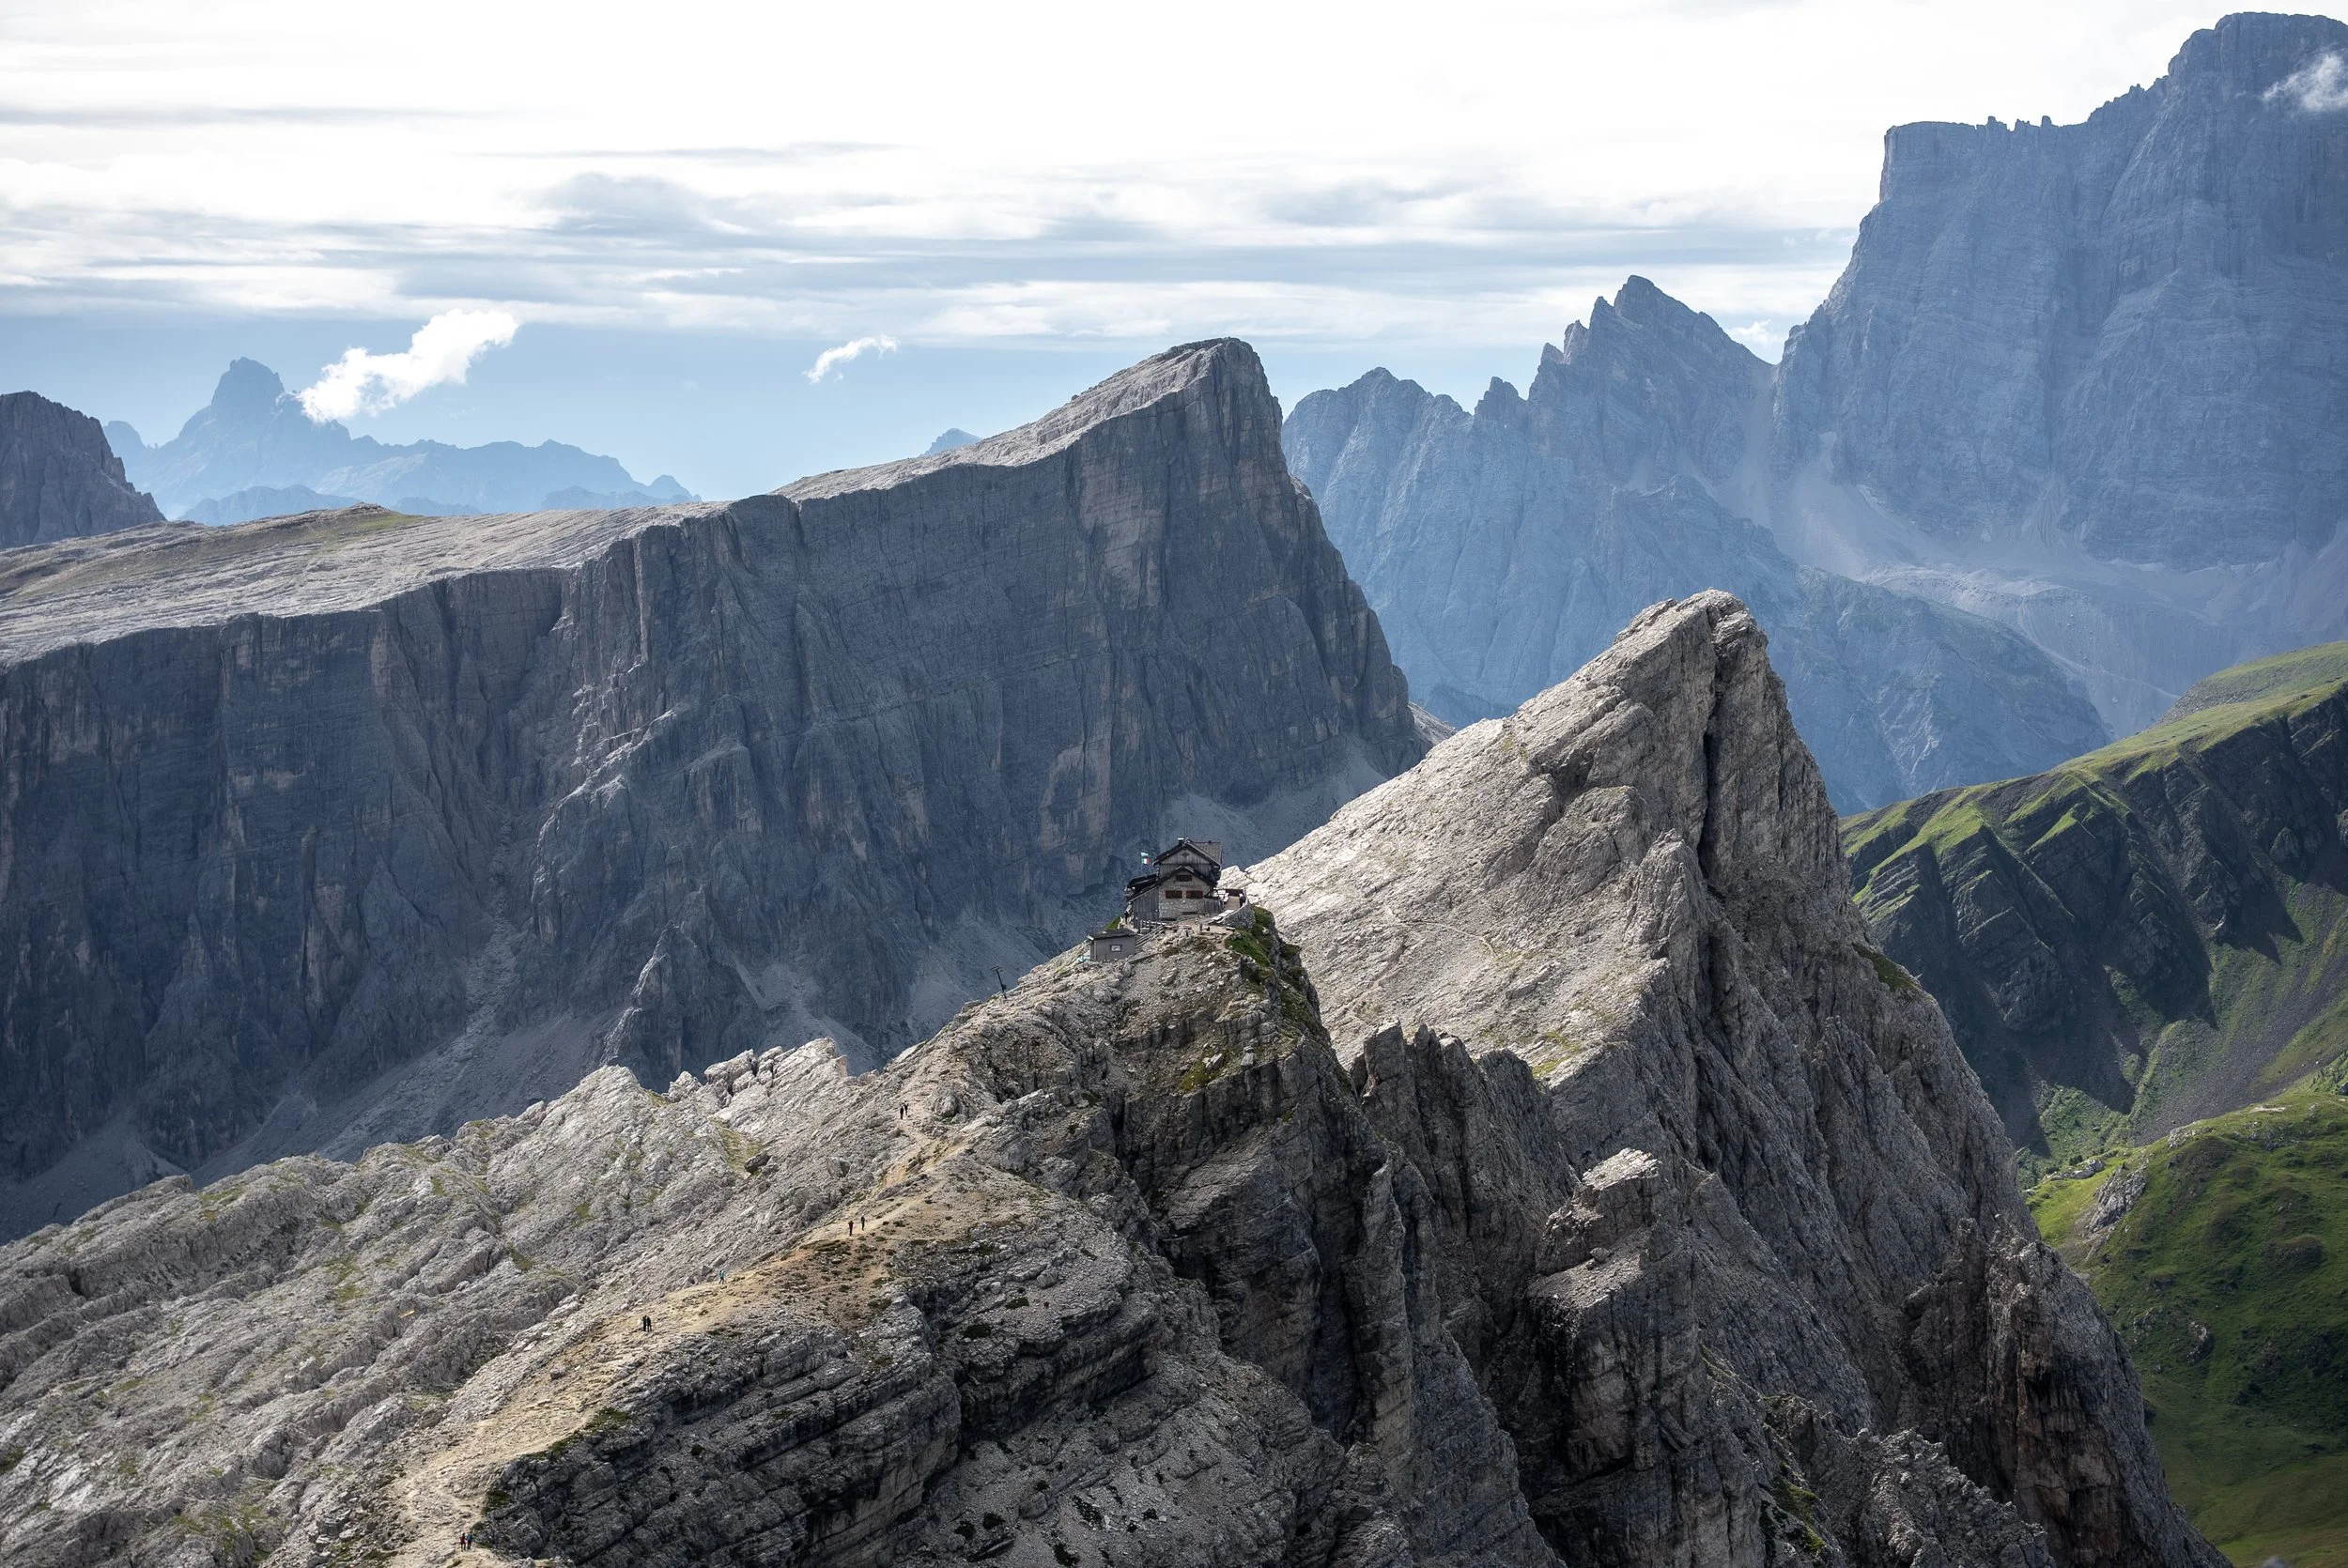
Rifugio Averau
Situated at 2,413 metres, Rifugio Averau is one of those places that feels like it's right in the middle of everything. It’s nestled on a saddle between the Averau and Nuvolau peaks and can be conveniently accessed on foot or by cable car from either Passo Falzarego or Passo Giau.
Its location is not only central but incredibly dramatic as you’re surrounded by some of the most iconic mountains in the Dolomites, including Monte Civetta, Monte Pelmo, Marmolada, and Tofana di Rozes.


Inside, it’s one of the more modern and well-equipped rifugios I’ve come across. Honestly, it felt more like a boutique hotel than a mountain hut. We stayed in a 10-person dorm, but were given full linen (no need for a sleeping bag liner), proper duvets, comfy pillows, and even towels. The bathrooms were spotless and modern, with free hot showers, hair dryers, and even bidets.
The food was also the best I’ve had in a rifugio. Dinner was a full three-course meal which included a generous pasta starter, a choice of meat, fish (I went for the fish), or veggie mains, and a proper dessert menu. Breakfast was just as good, with a big buffet spread and the option to order barista-made coffee. If I were to recommend a rifugio to a first-timer, this would be it; easy to access, with amazing views, great facilities, and top-notch service.


Day five
This was the final day of our through-hike, and luckily, it was pretty much all downhill.
Since the descent isn’t too demanding, I’d really recommend making the short detour up to Rifugio Nuvolau before leaving Averau.
The hike is around 900 metres one way, with about 169 metres of elevation gain, and should take roughly 15–25 minutes, depending on your pace.
Breakfast at Averau is served between 7–9am, so we set off as a group at 7am.
Sitting at a jaw-dropping 2,575 metres, Rifugio Nuvolau is easily one of the most dramatic huts in the Dolomites. Perched right on the edge of a rocky peak above Passo Giau, it offers completely open, panoramic views in every direction.
It’s also the oldest rifugio in the Dolomites, originally built in 1883, which makes the whole place feel even more special. We were a bit unlucky with low cloud rolling through that morning, so the mountains were partly hidden. but even with the mist, the views were still absolutely stunning.
We were up and down in under an hour and eating breakfast at 8am.

Descent to CorTina
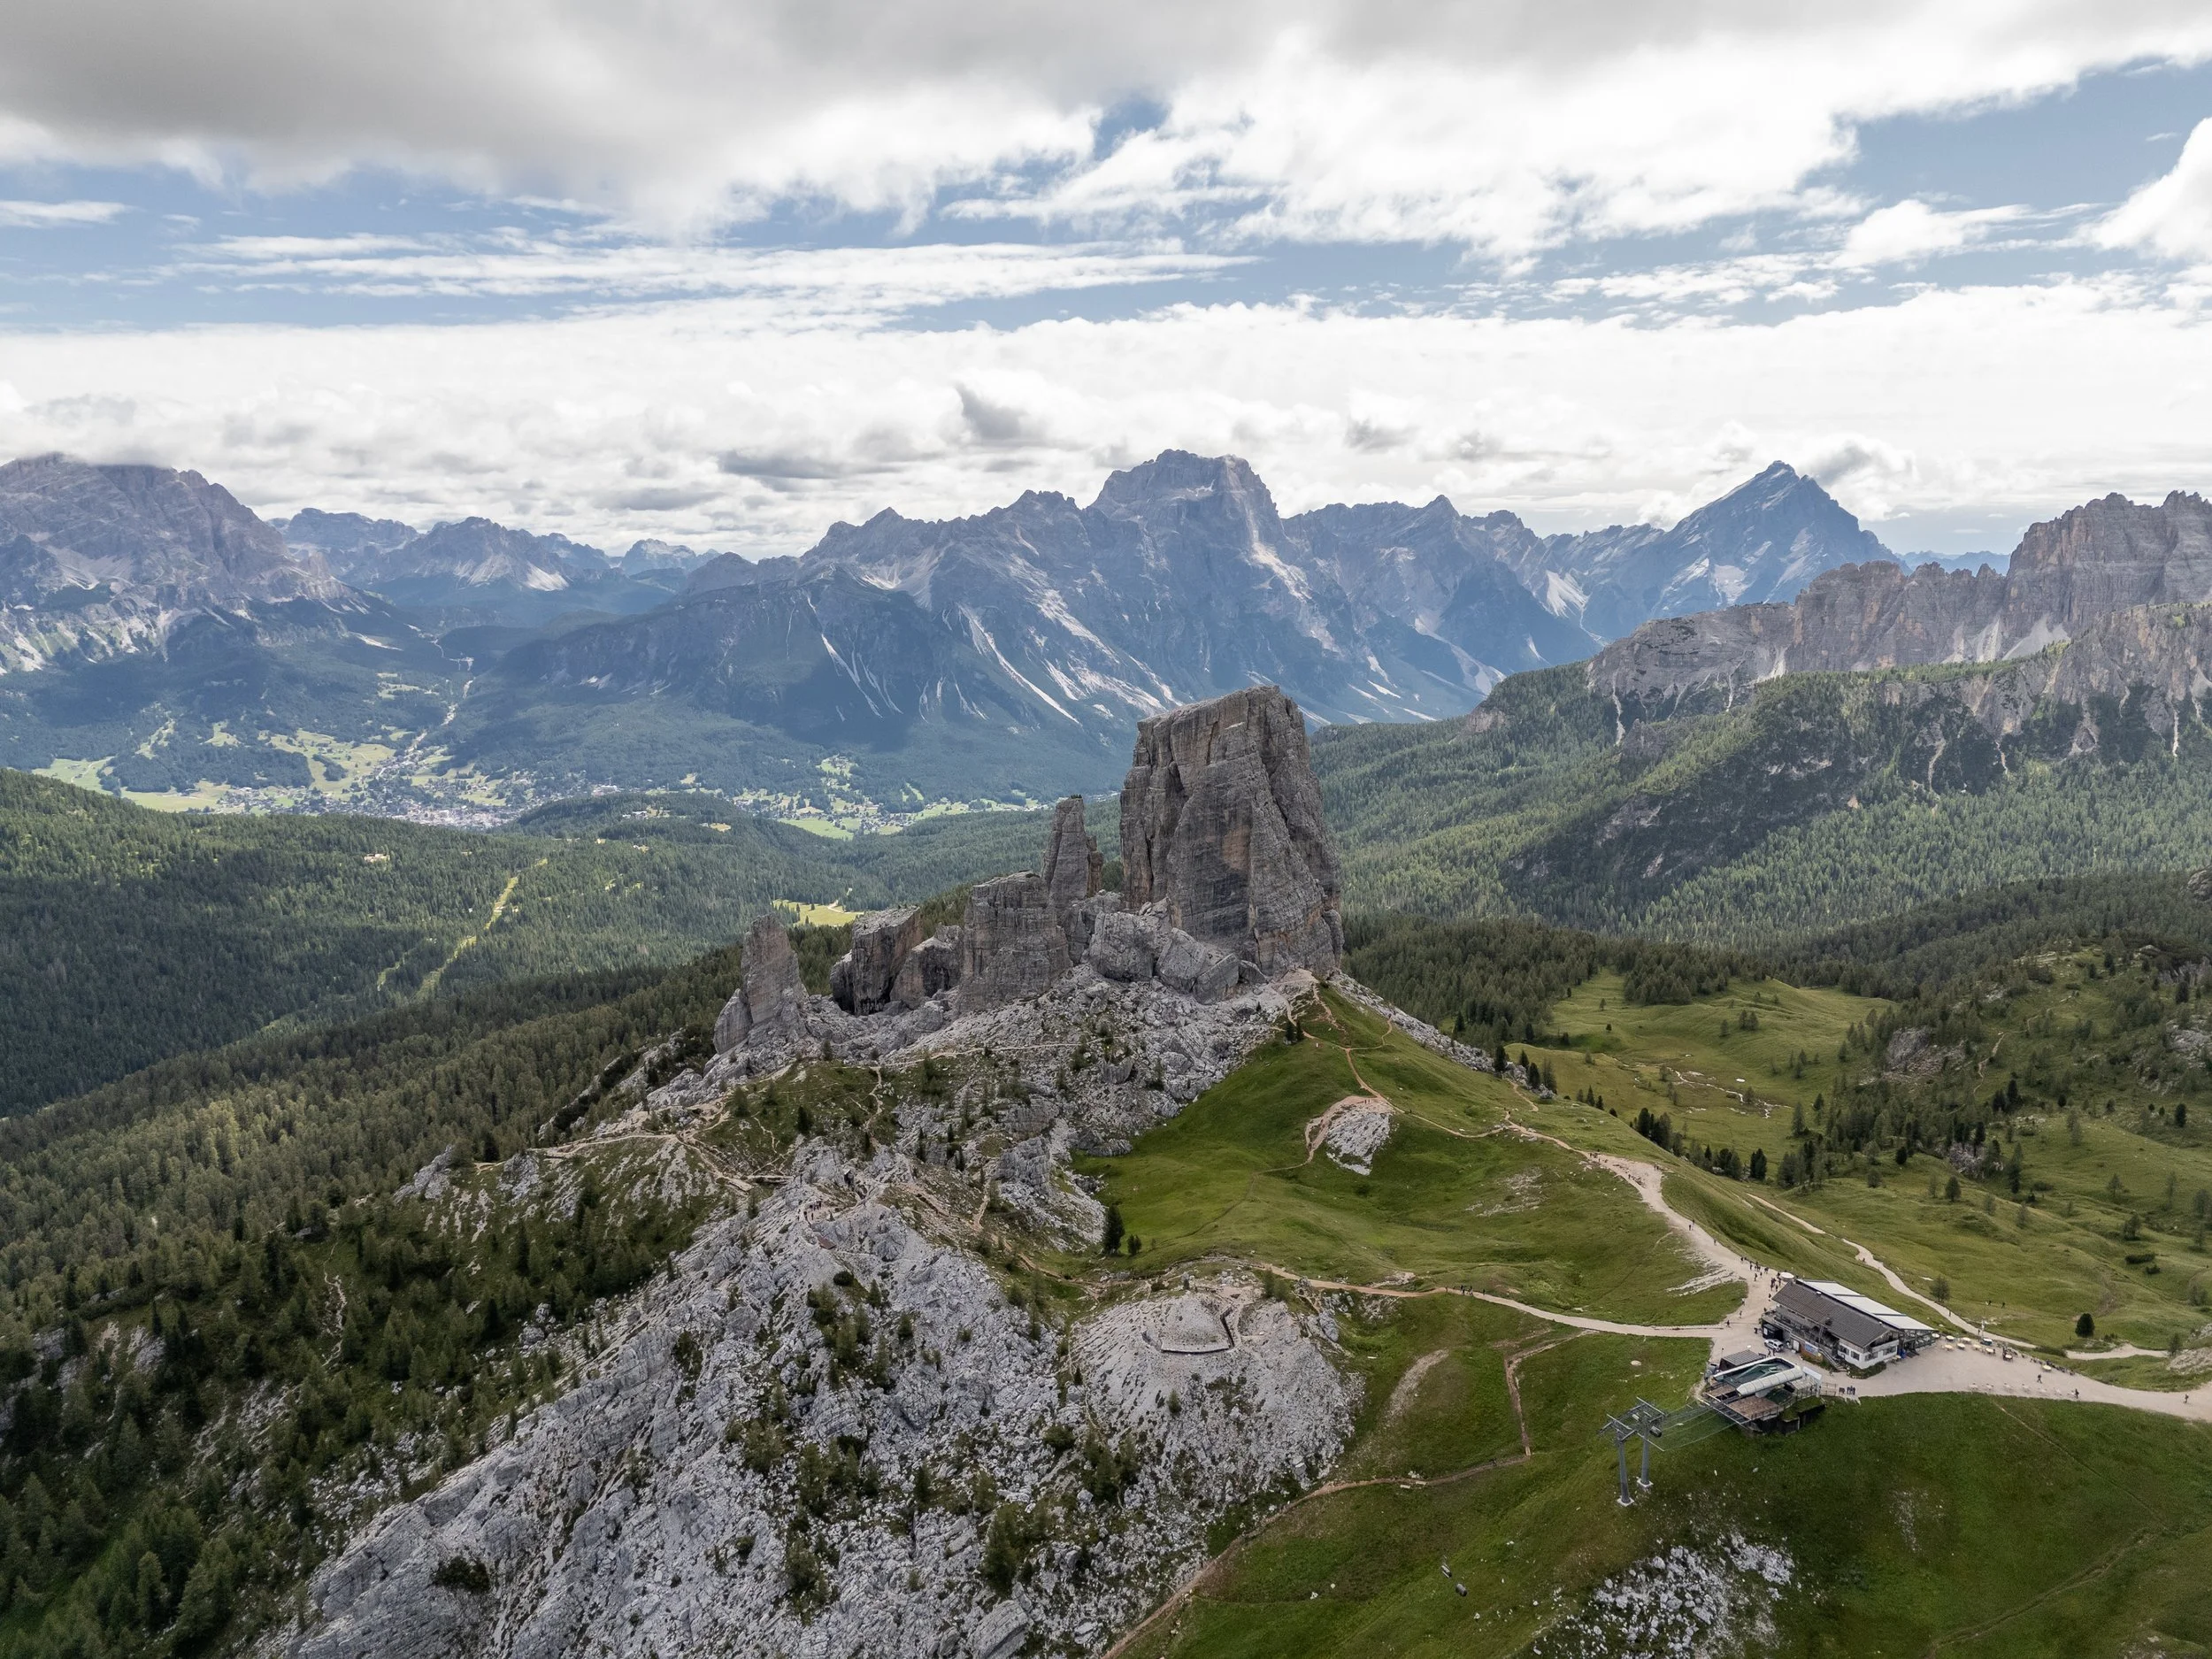
On the way back to Cortina, you’ll pass Cinque Torri, a striking cluster of five limestone towers that rise suddenly from the landscape. Located just off the main trail, this area is not only geologically impressive, but also historically significant.
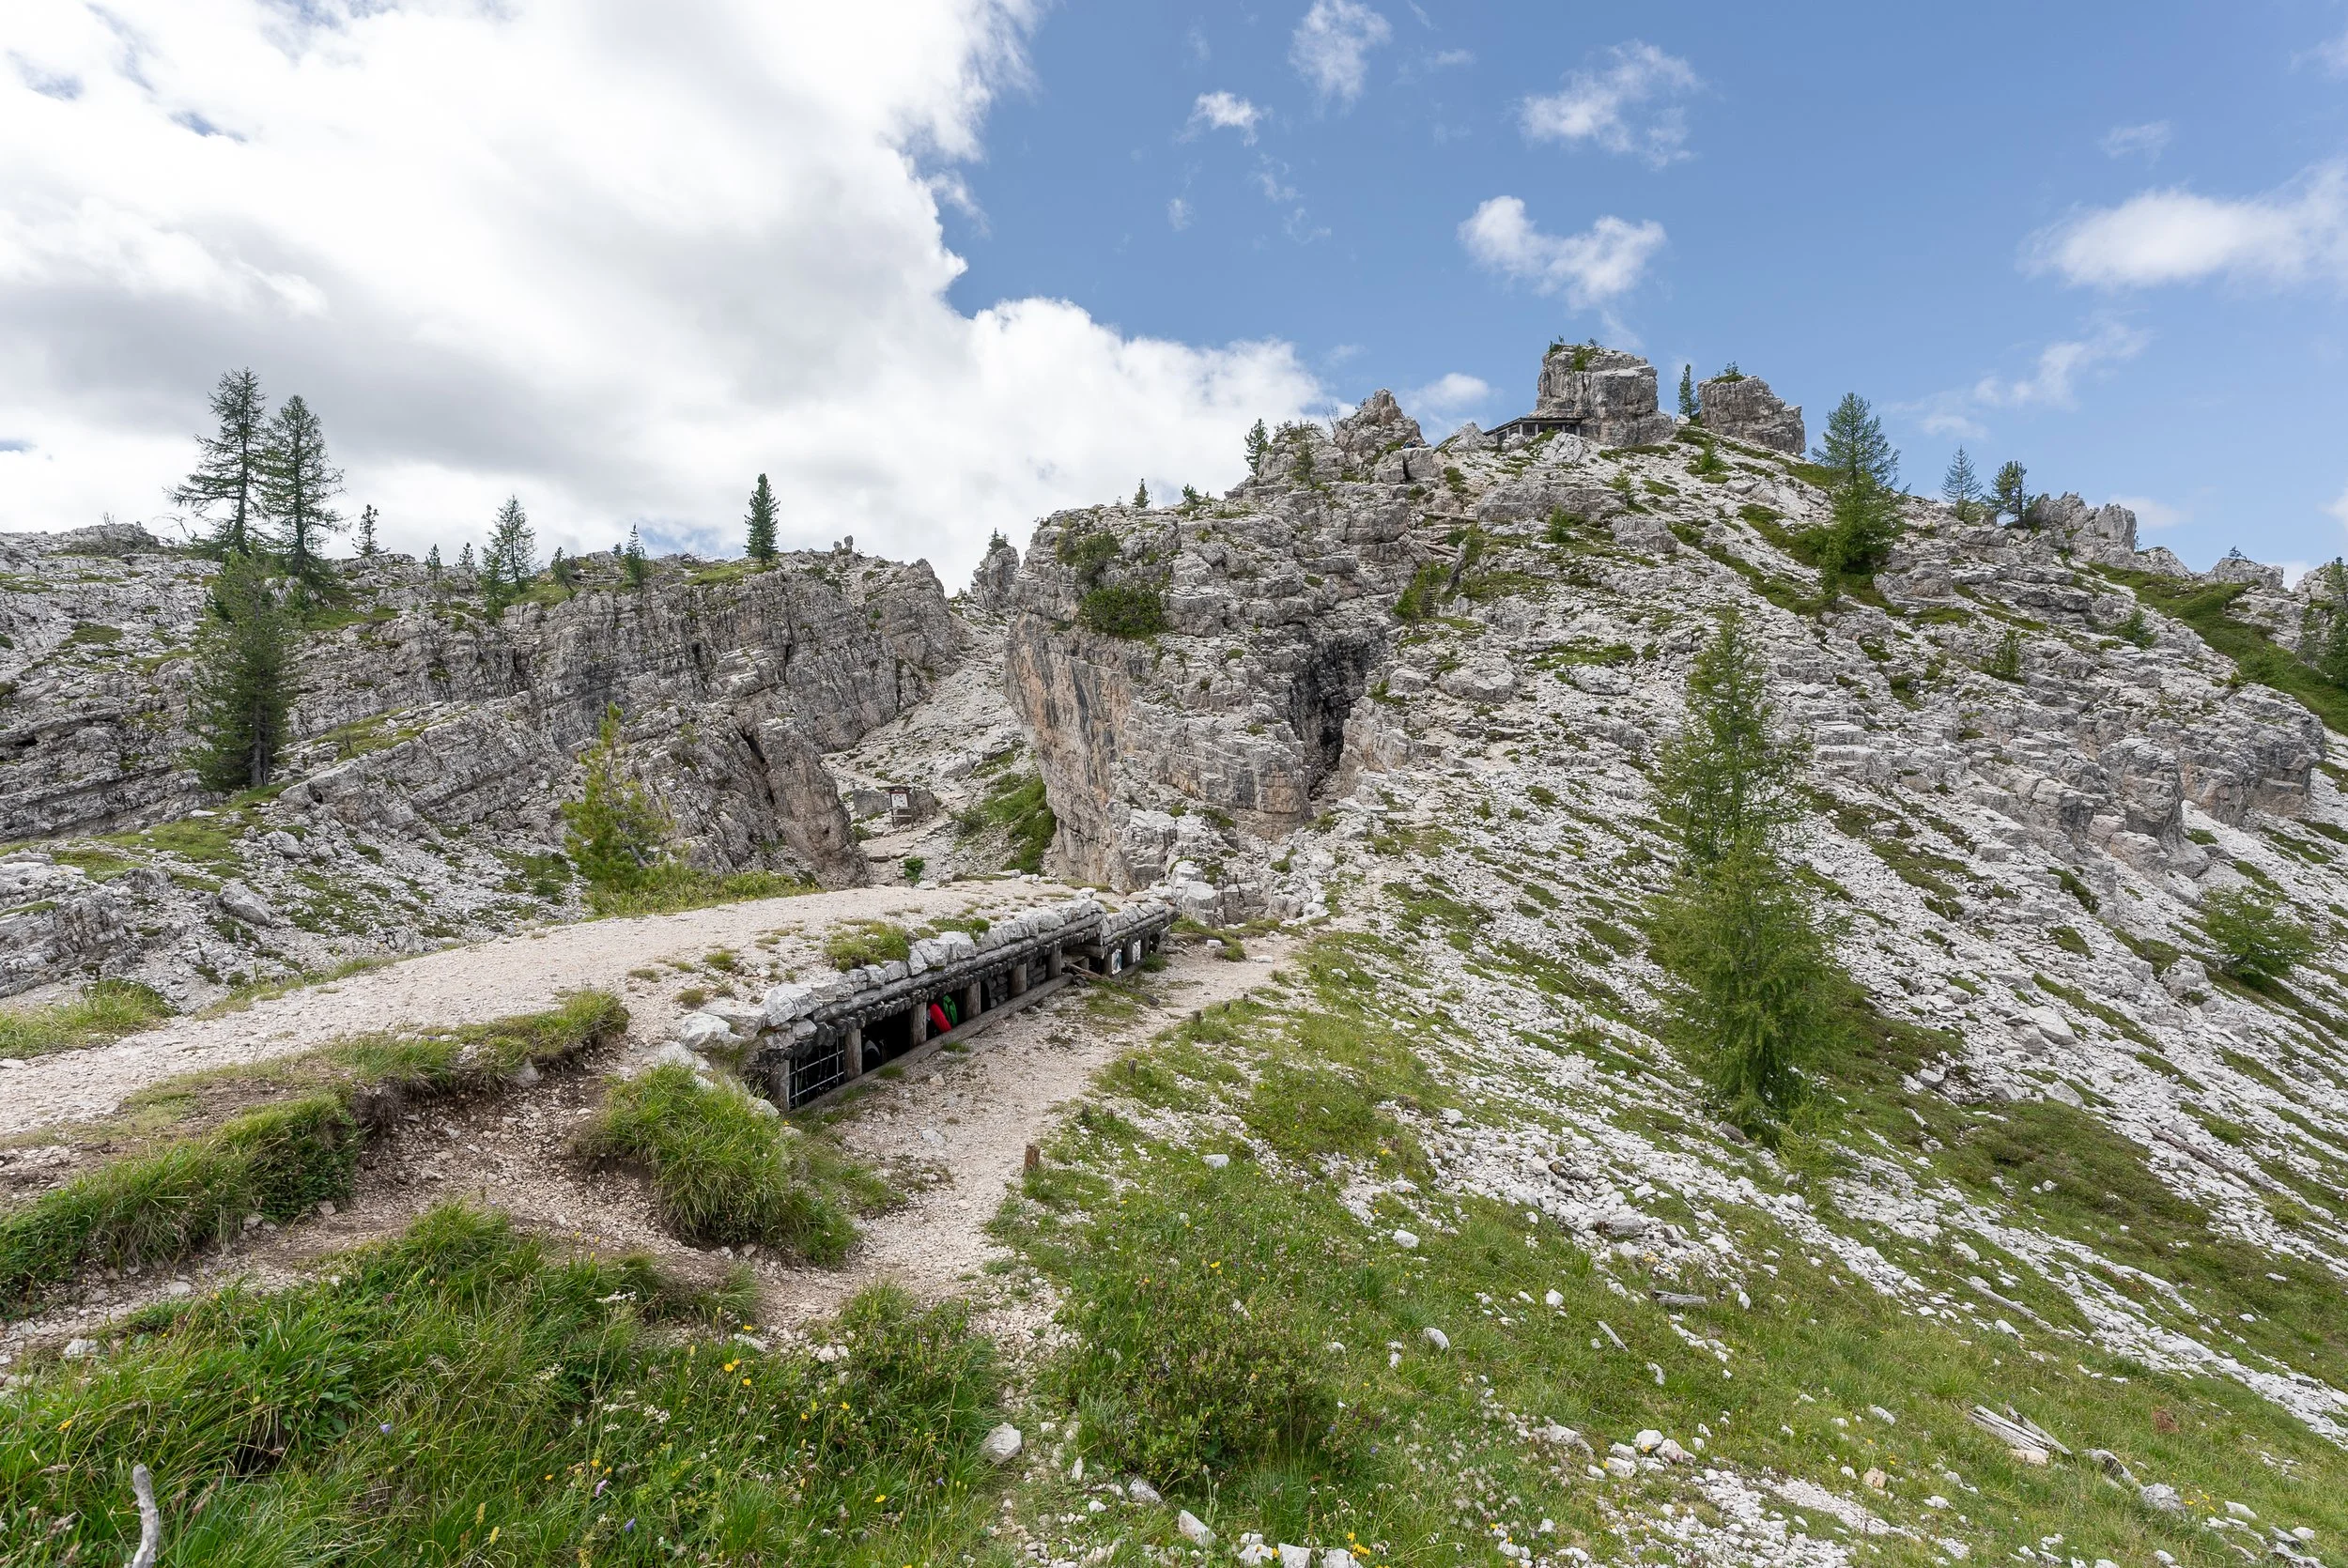
During World War I, it served as a key battleground between Italian and Austro-Hungarian forces, and many of the original trenches, lookouts, and bunkers have been preserved and turned into an open-air museum.
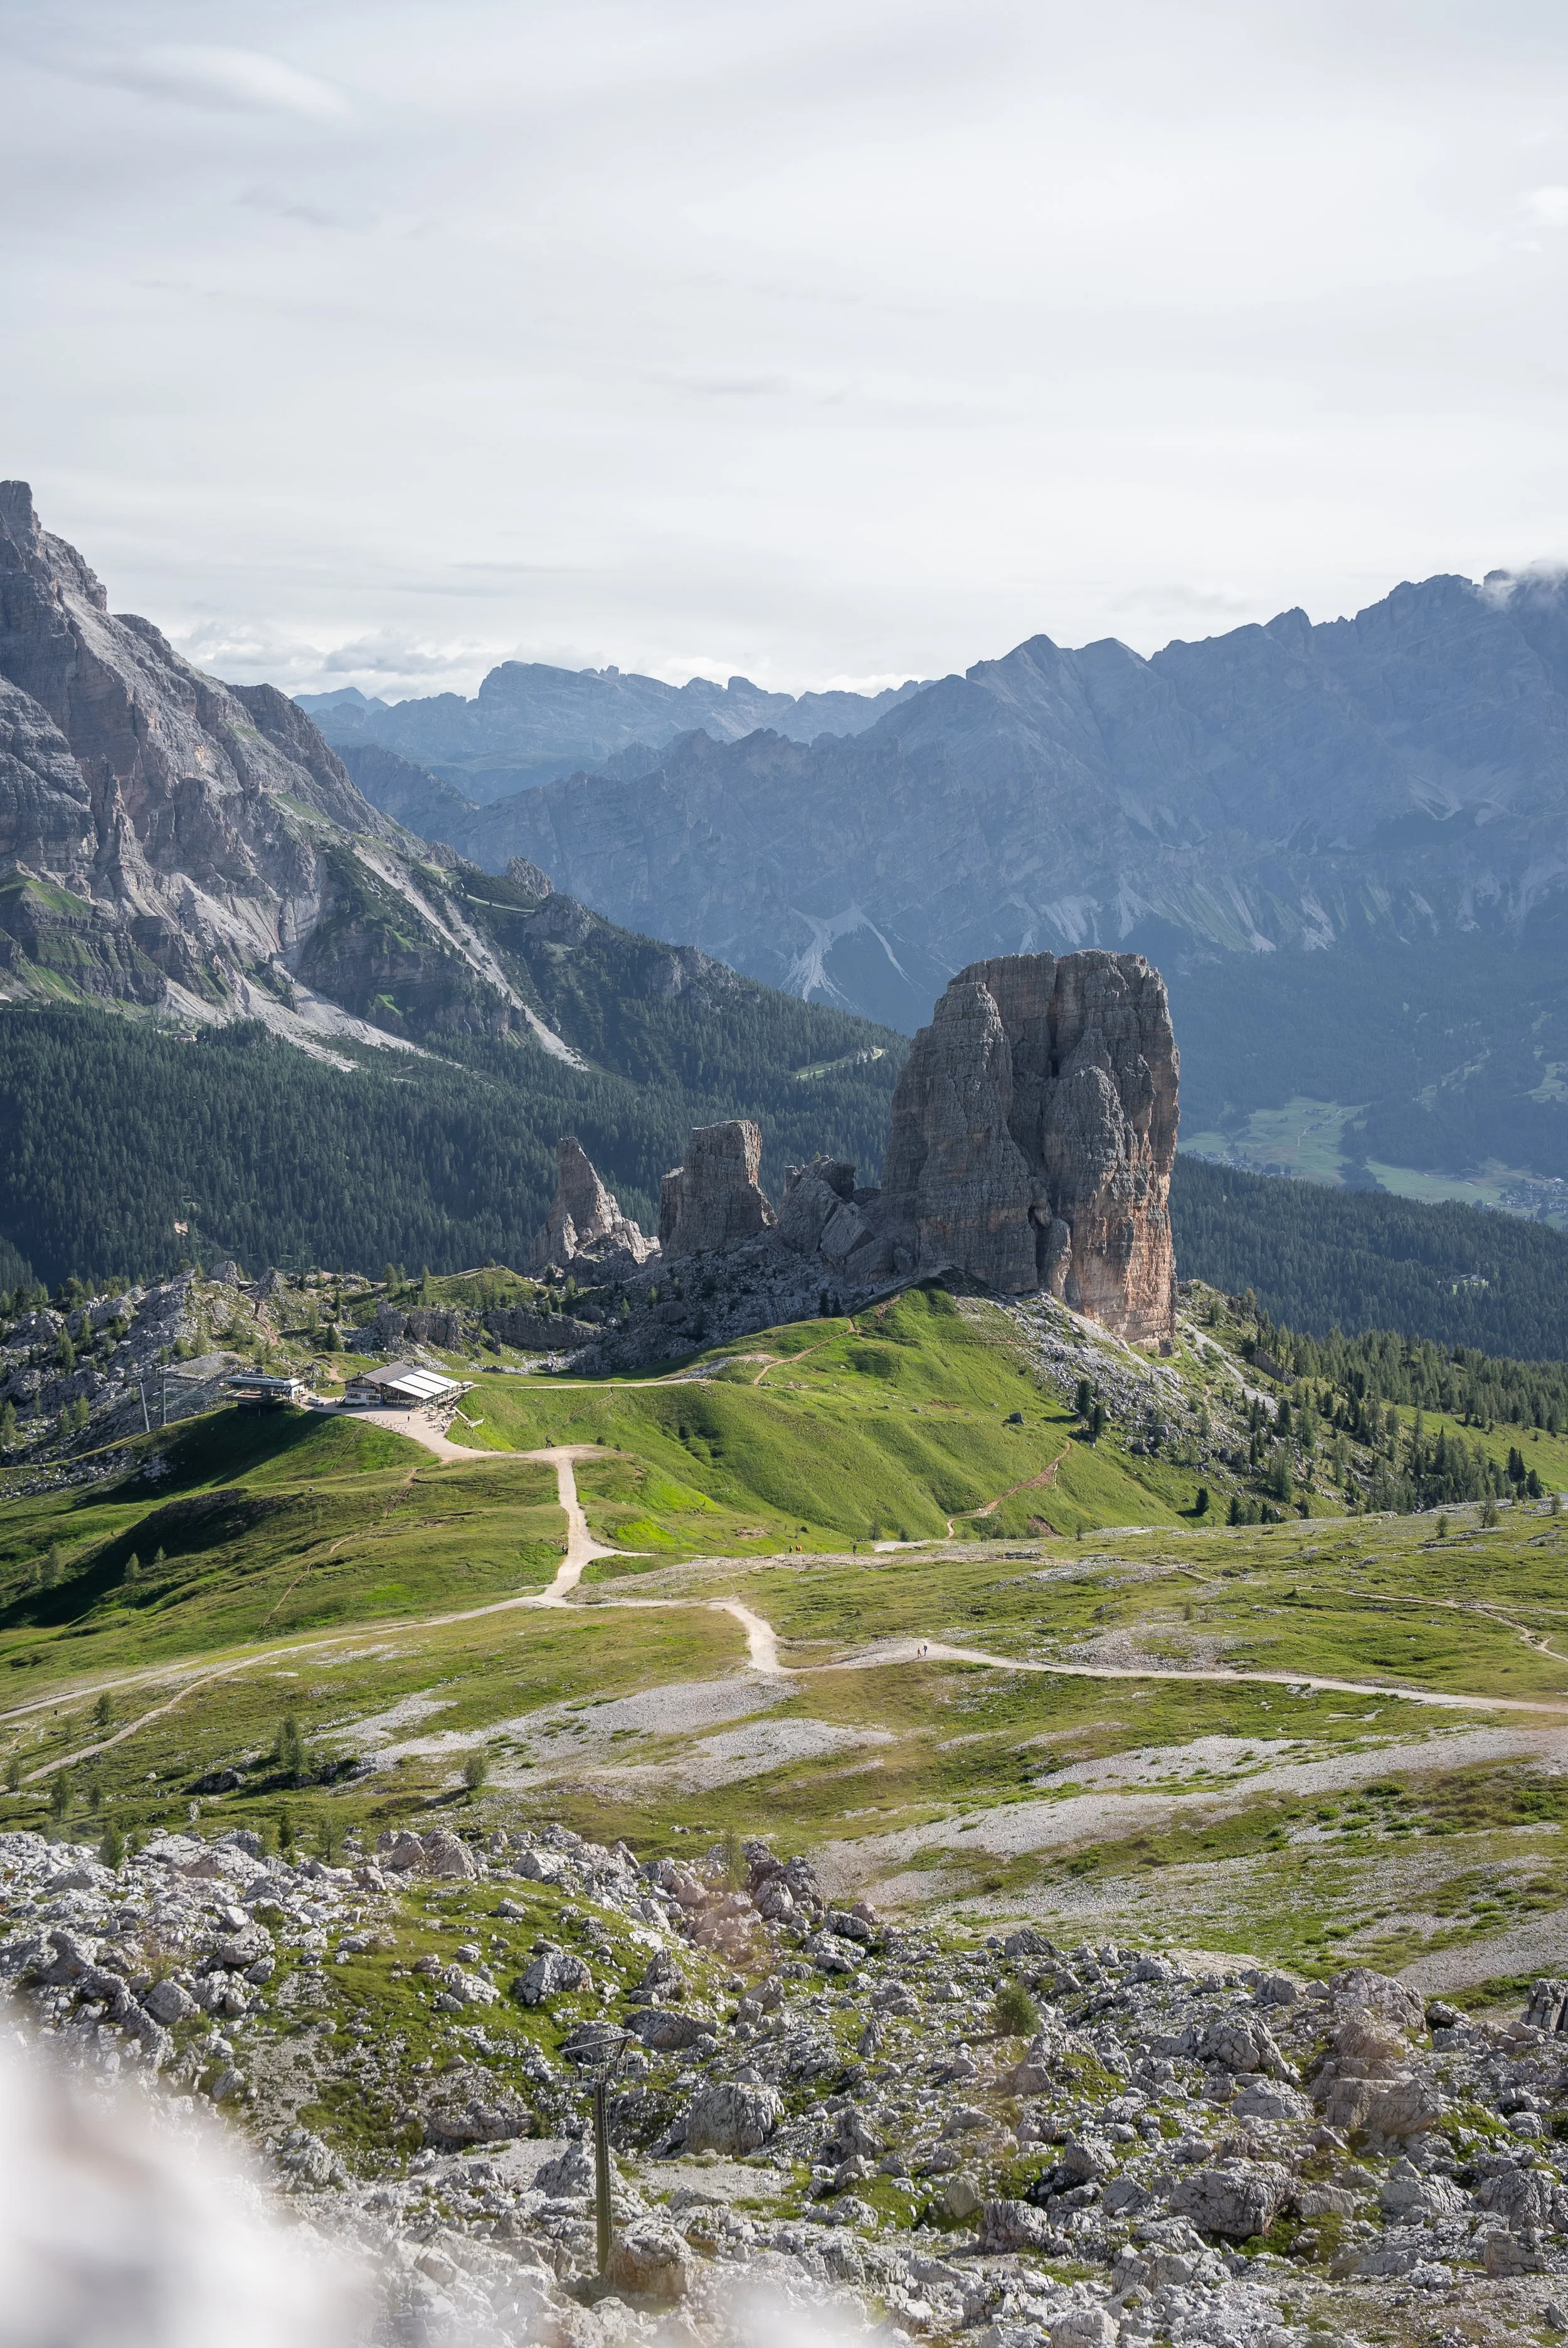
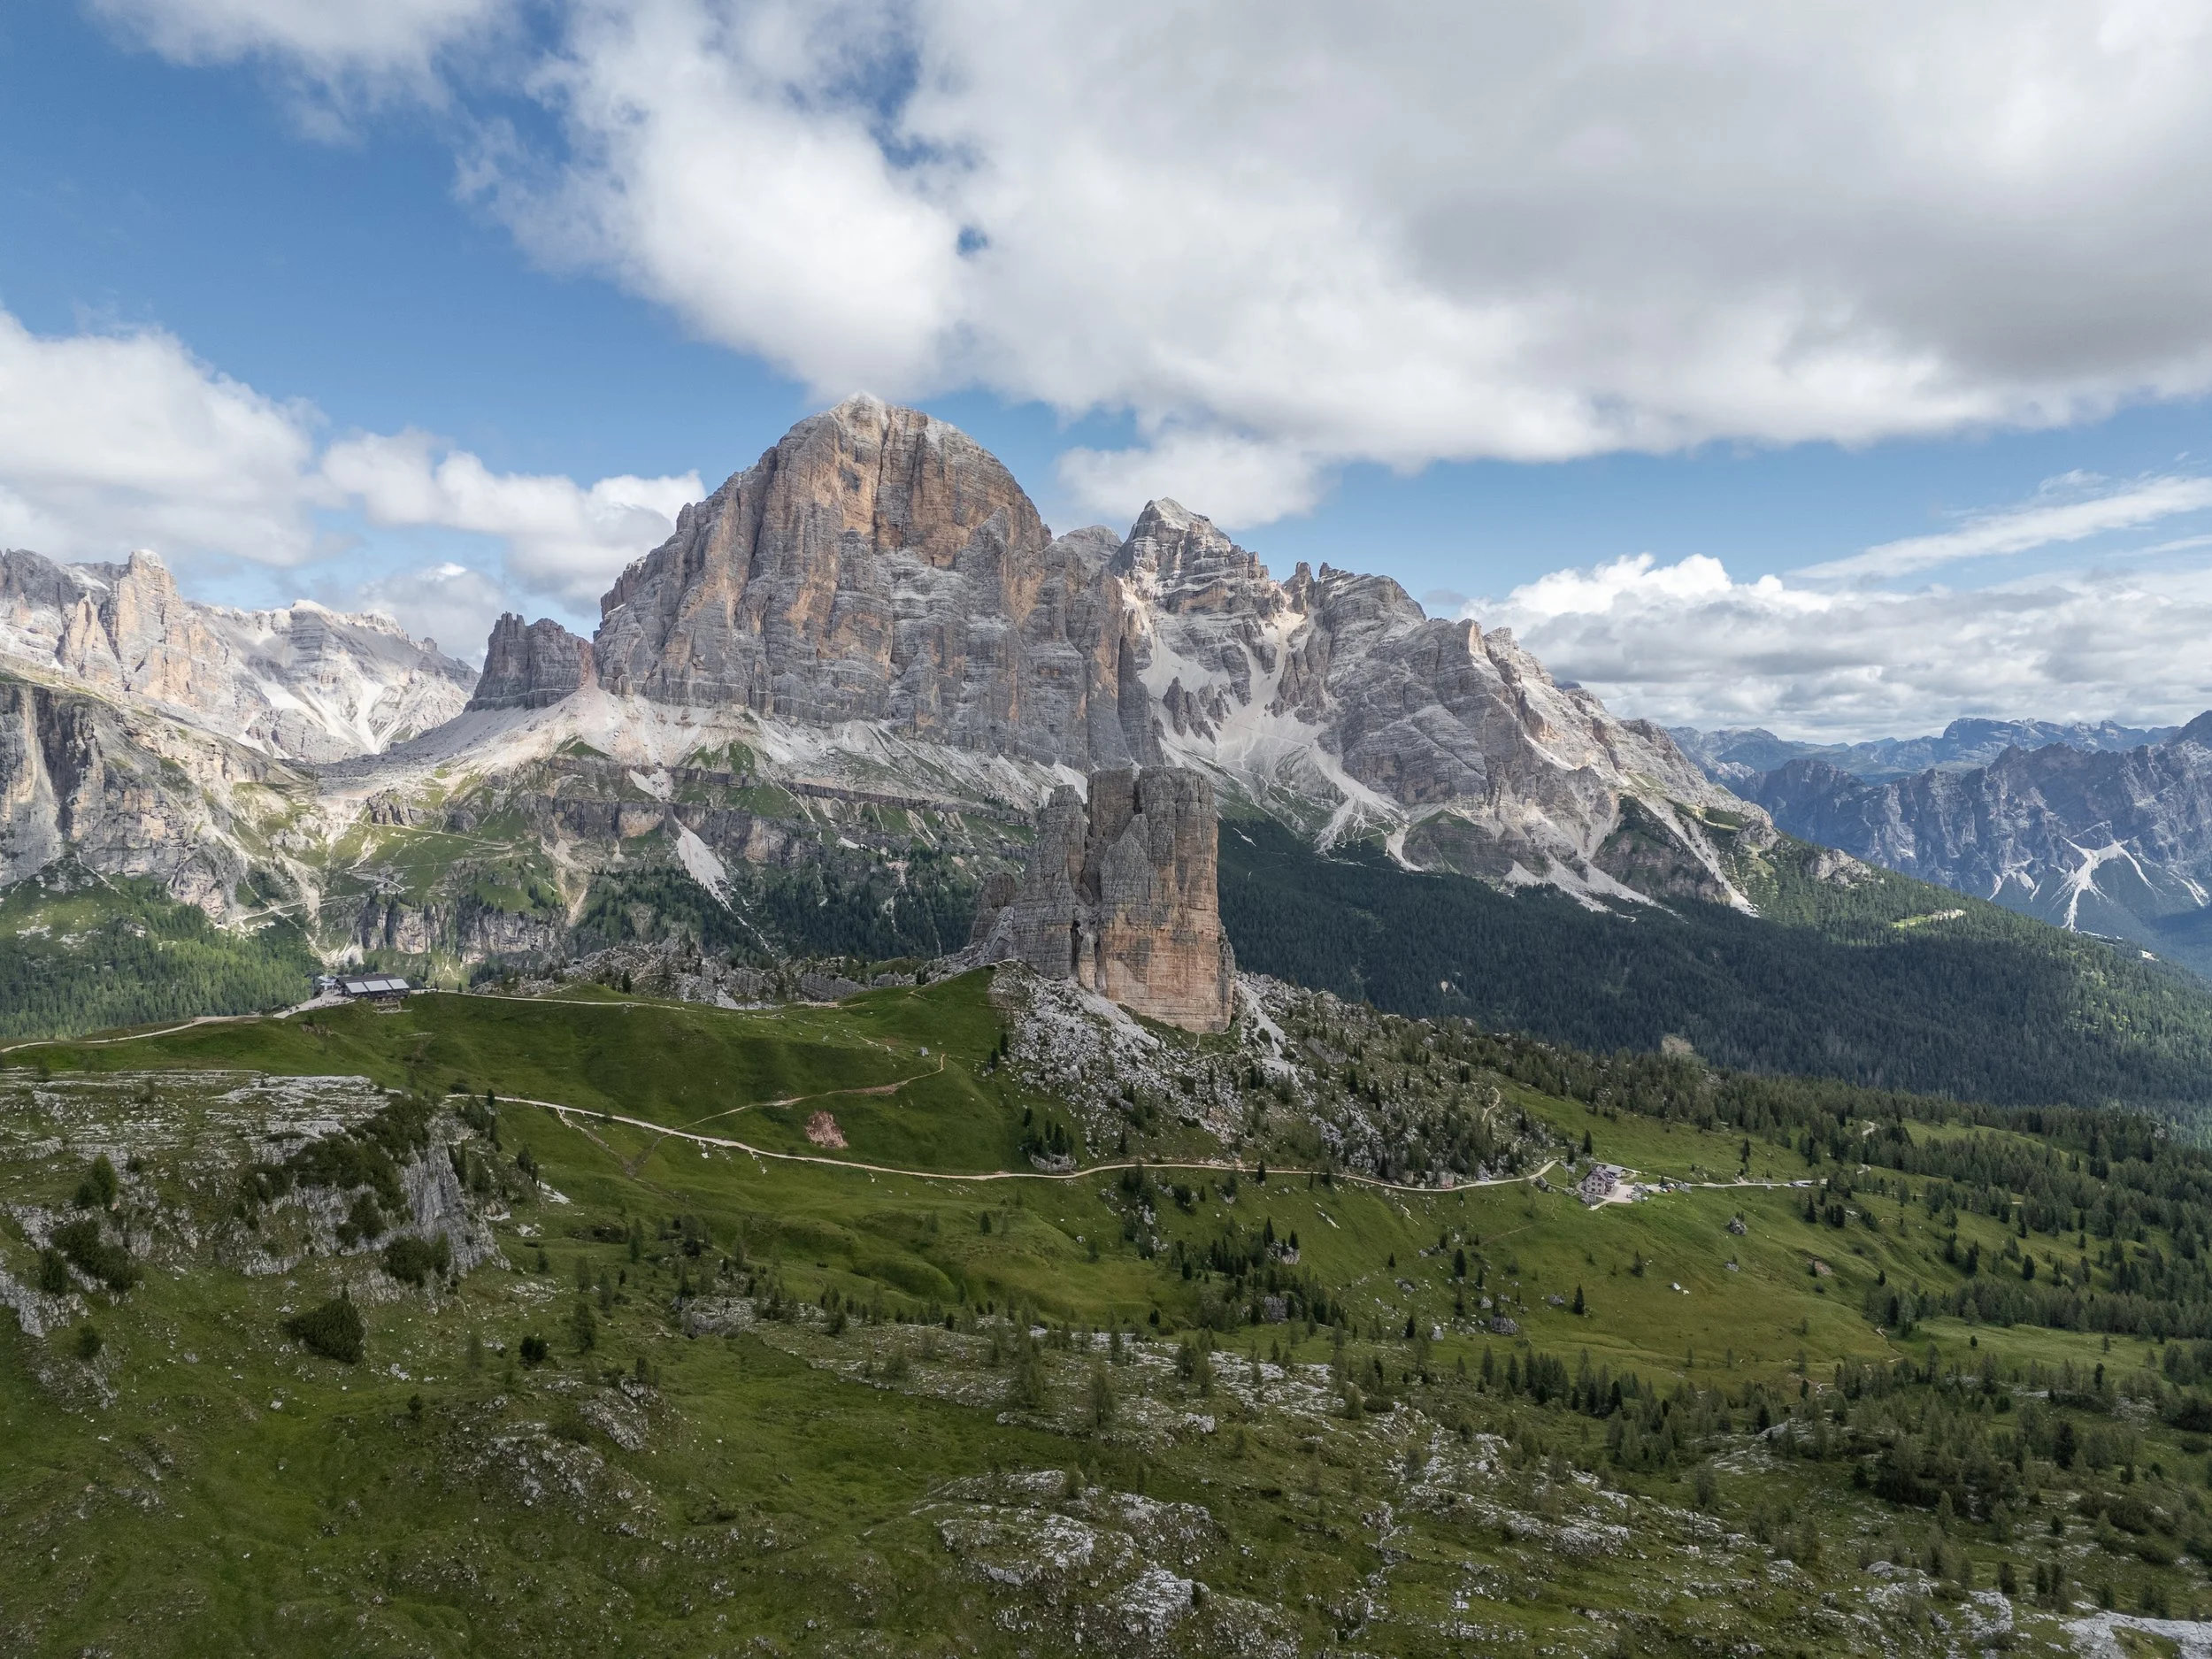
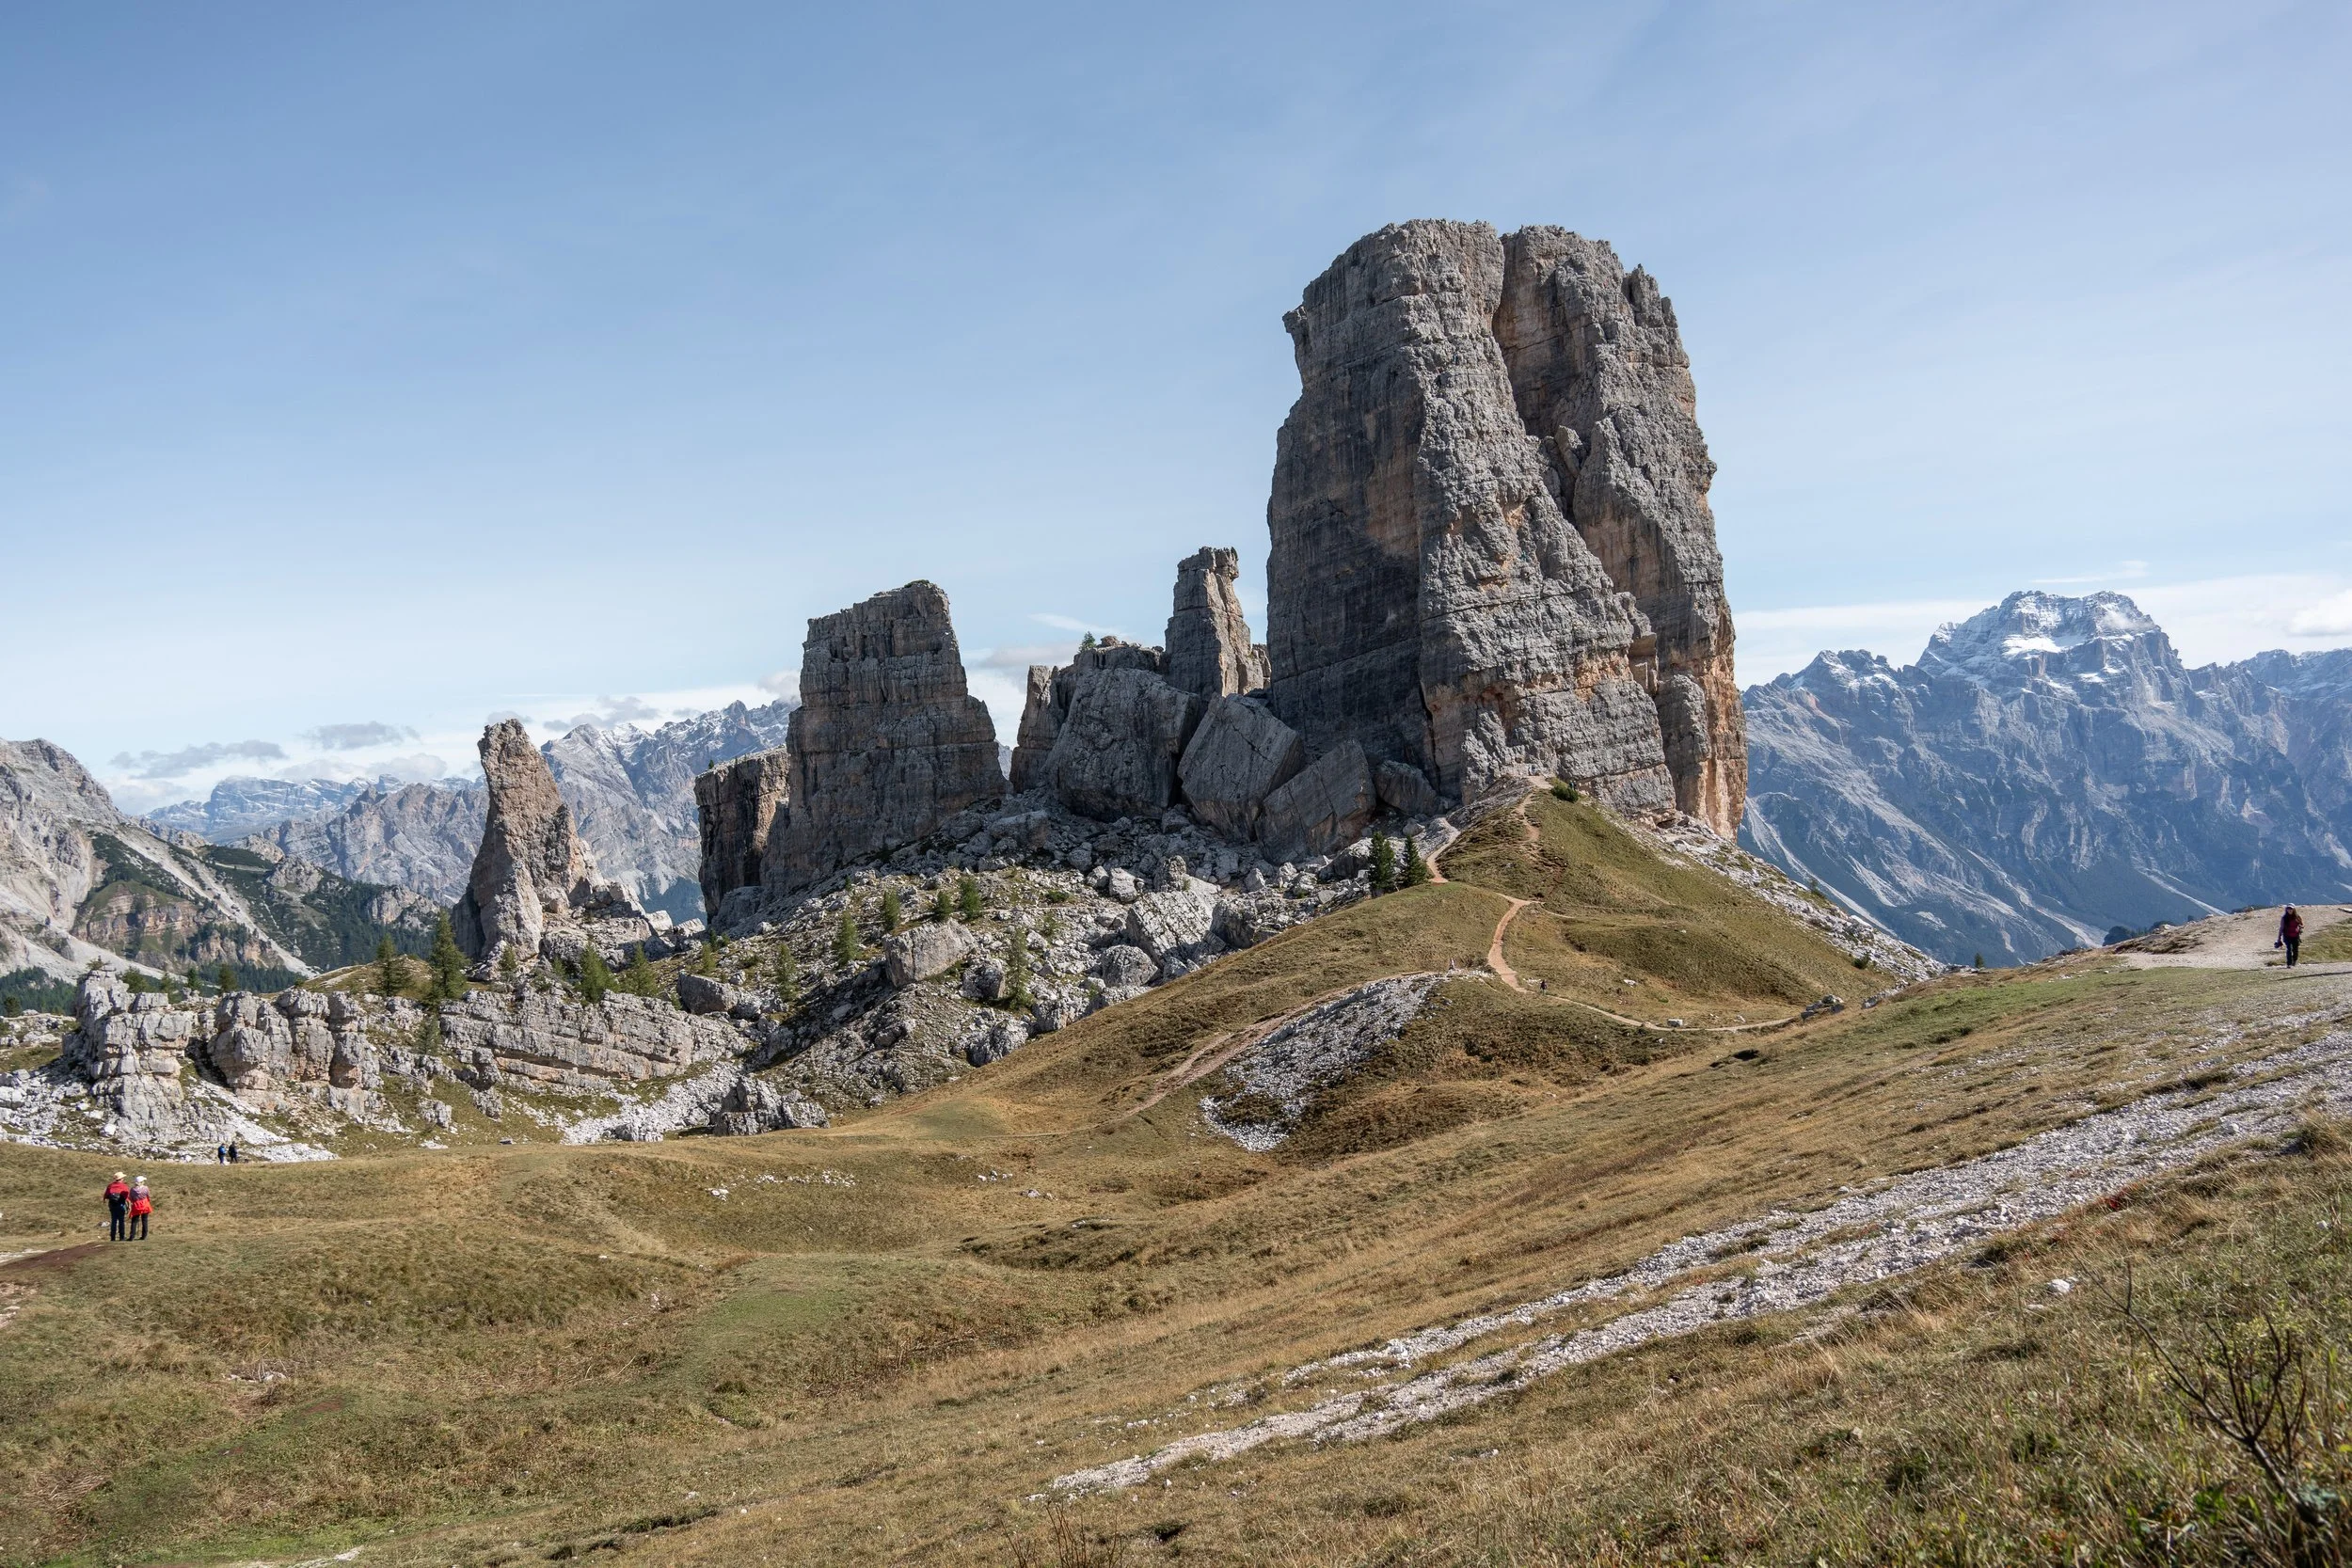
It's definitely worth taking the time to explore the network of paths that weave between the towers. The scenery is incredible, and walking through the remnants of wartime history is both eye-opening and humbling.
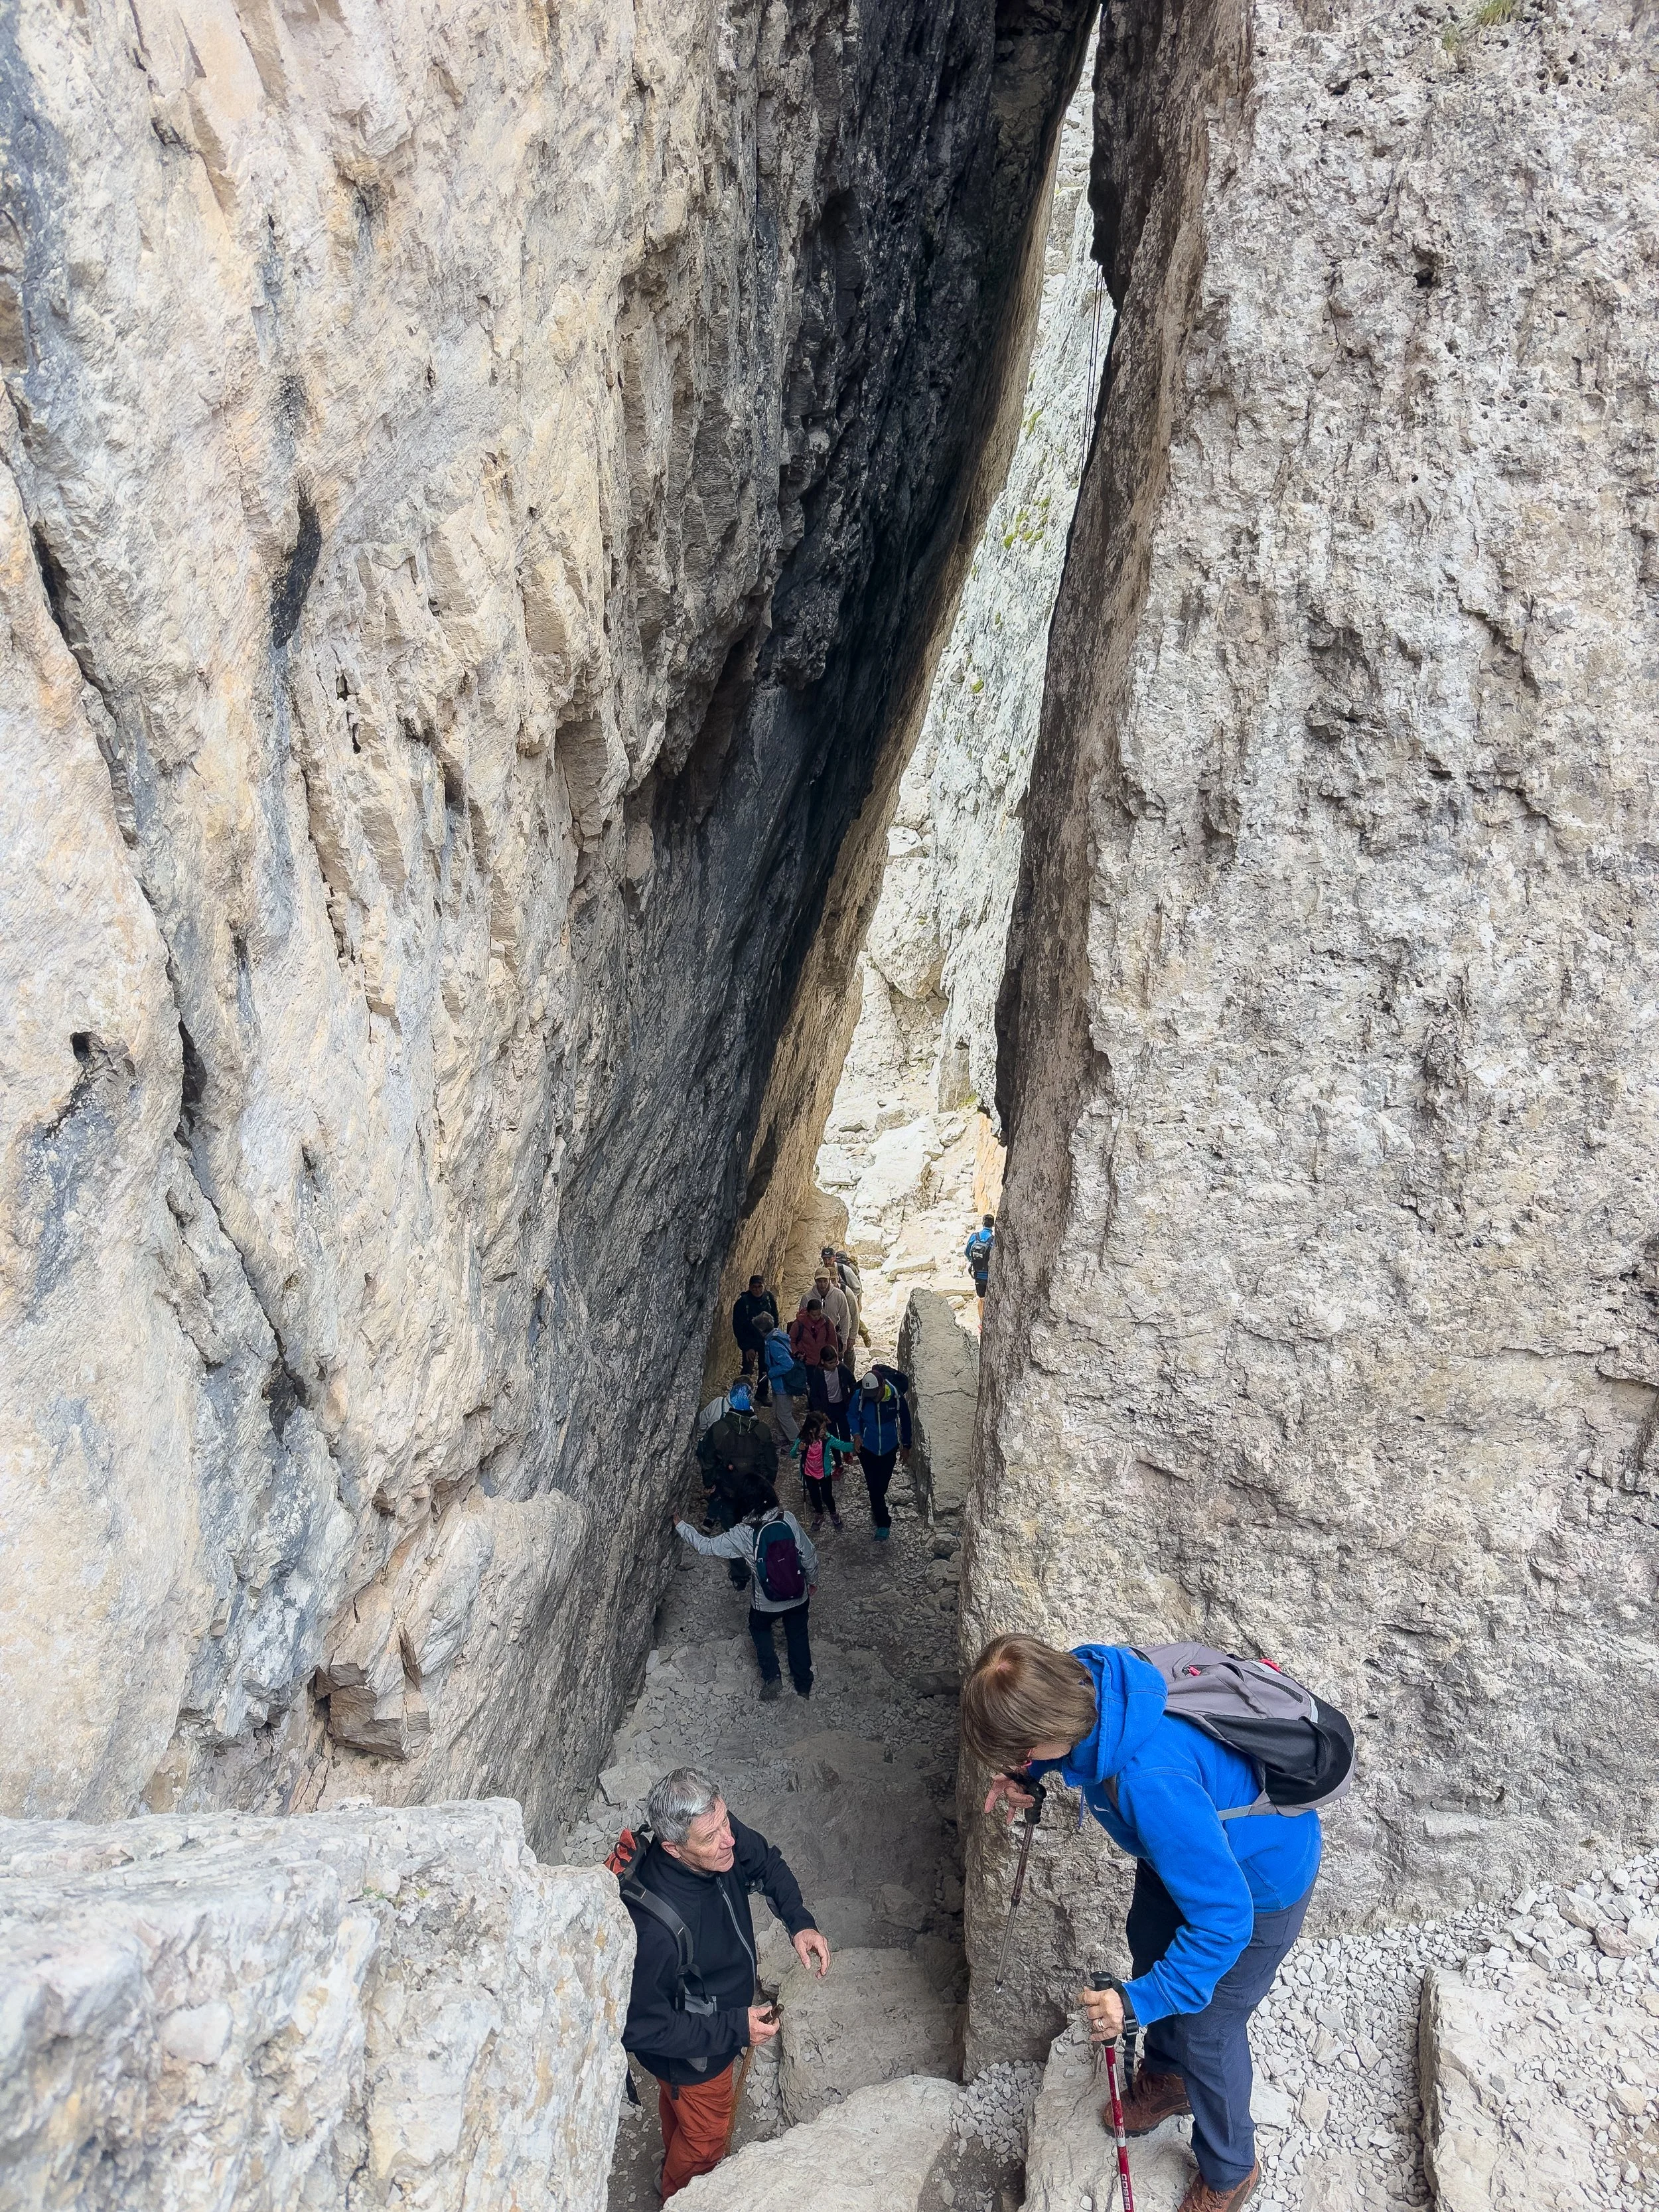
One of the highlights is a small tunnel carved through the rock, which you can pass through as part of the loop. You'll also likely spot climbers tackling the vertical faces as Cinque Torri is a well-known climbing area with routes for all levels. It's a fascinating mix of natural beauty, history, and adventure.


After leaving Cinque Torri, the route winds gradually downhill through the forest for about 12km, all the way to Cortina.
There’s not much to report here. It’s a peaceful, quiet trail, but views are mostly hidden by the trees. If your legs are feeling wrecked and the idea of a long forest descent isn’t appealing, you have an alternative option: from Cinque Torri, you can either hike or take the chairlift down to Passo Falzarego and catch a bus back to Cortina.
Once I arrived in town, the first thing I did was smash a huge pizza from Pizzeria Ai Due Forni. You can grab it by the slice or order a full one. It’s takeaway only, so no need to wait around for table service.
If you’ve got the energy, you can have a wander through the overpriced shops and streets of Cortina.
Now if you are doing the optional 6th day (you definitely should) you will need to head towards the ice rink, where you’ll be picked up and driven back to Hotel Miralago for some well-earned rest.
Day six
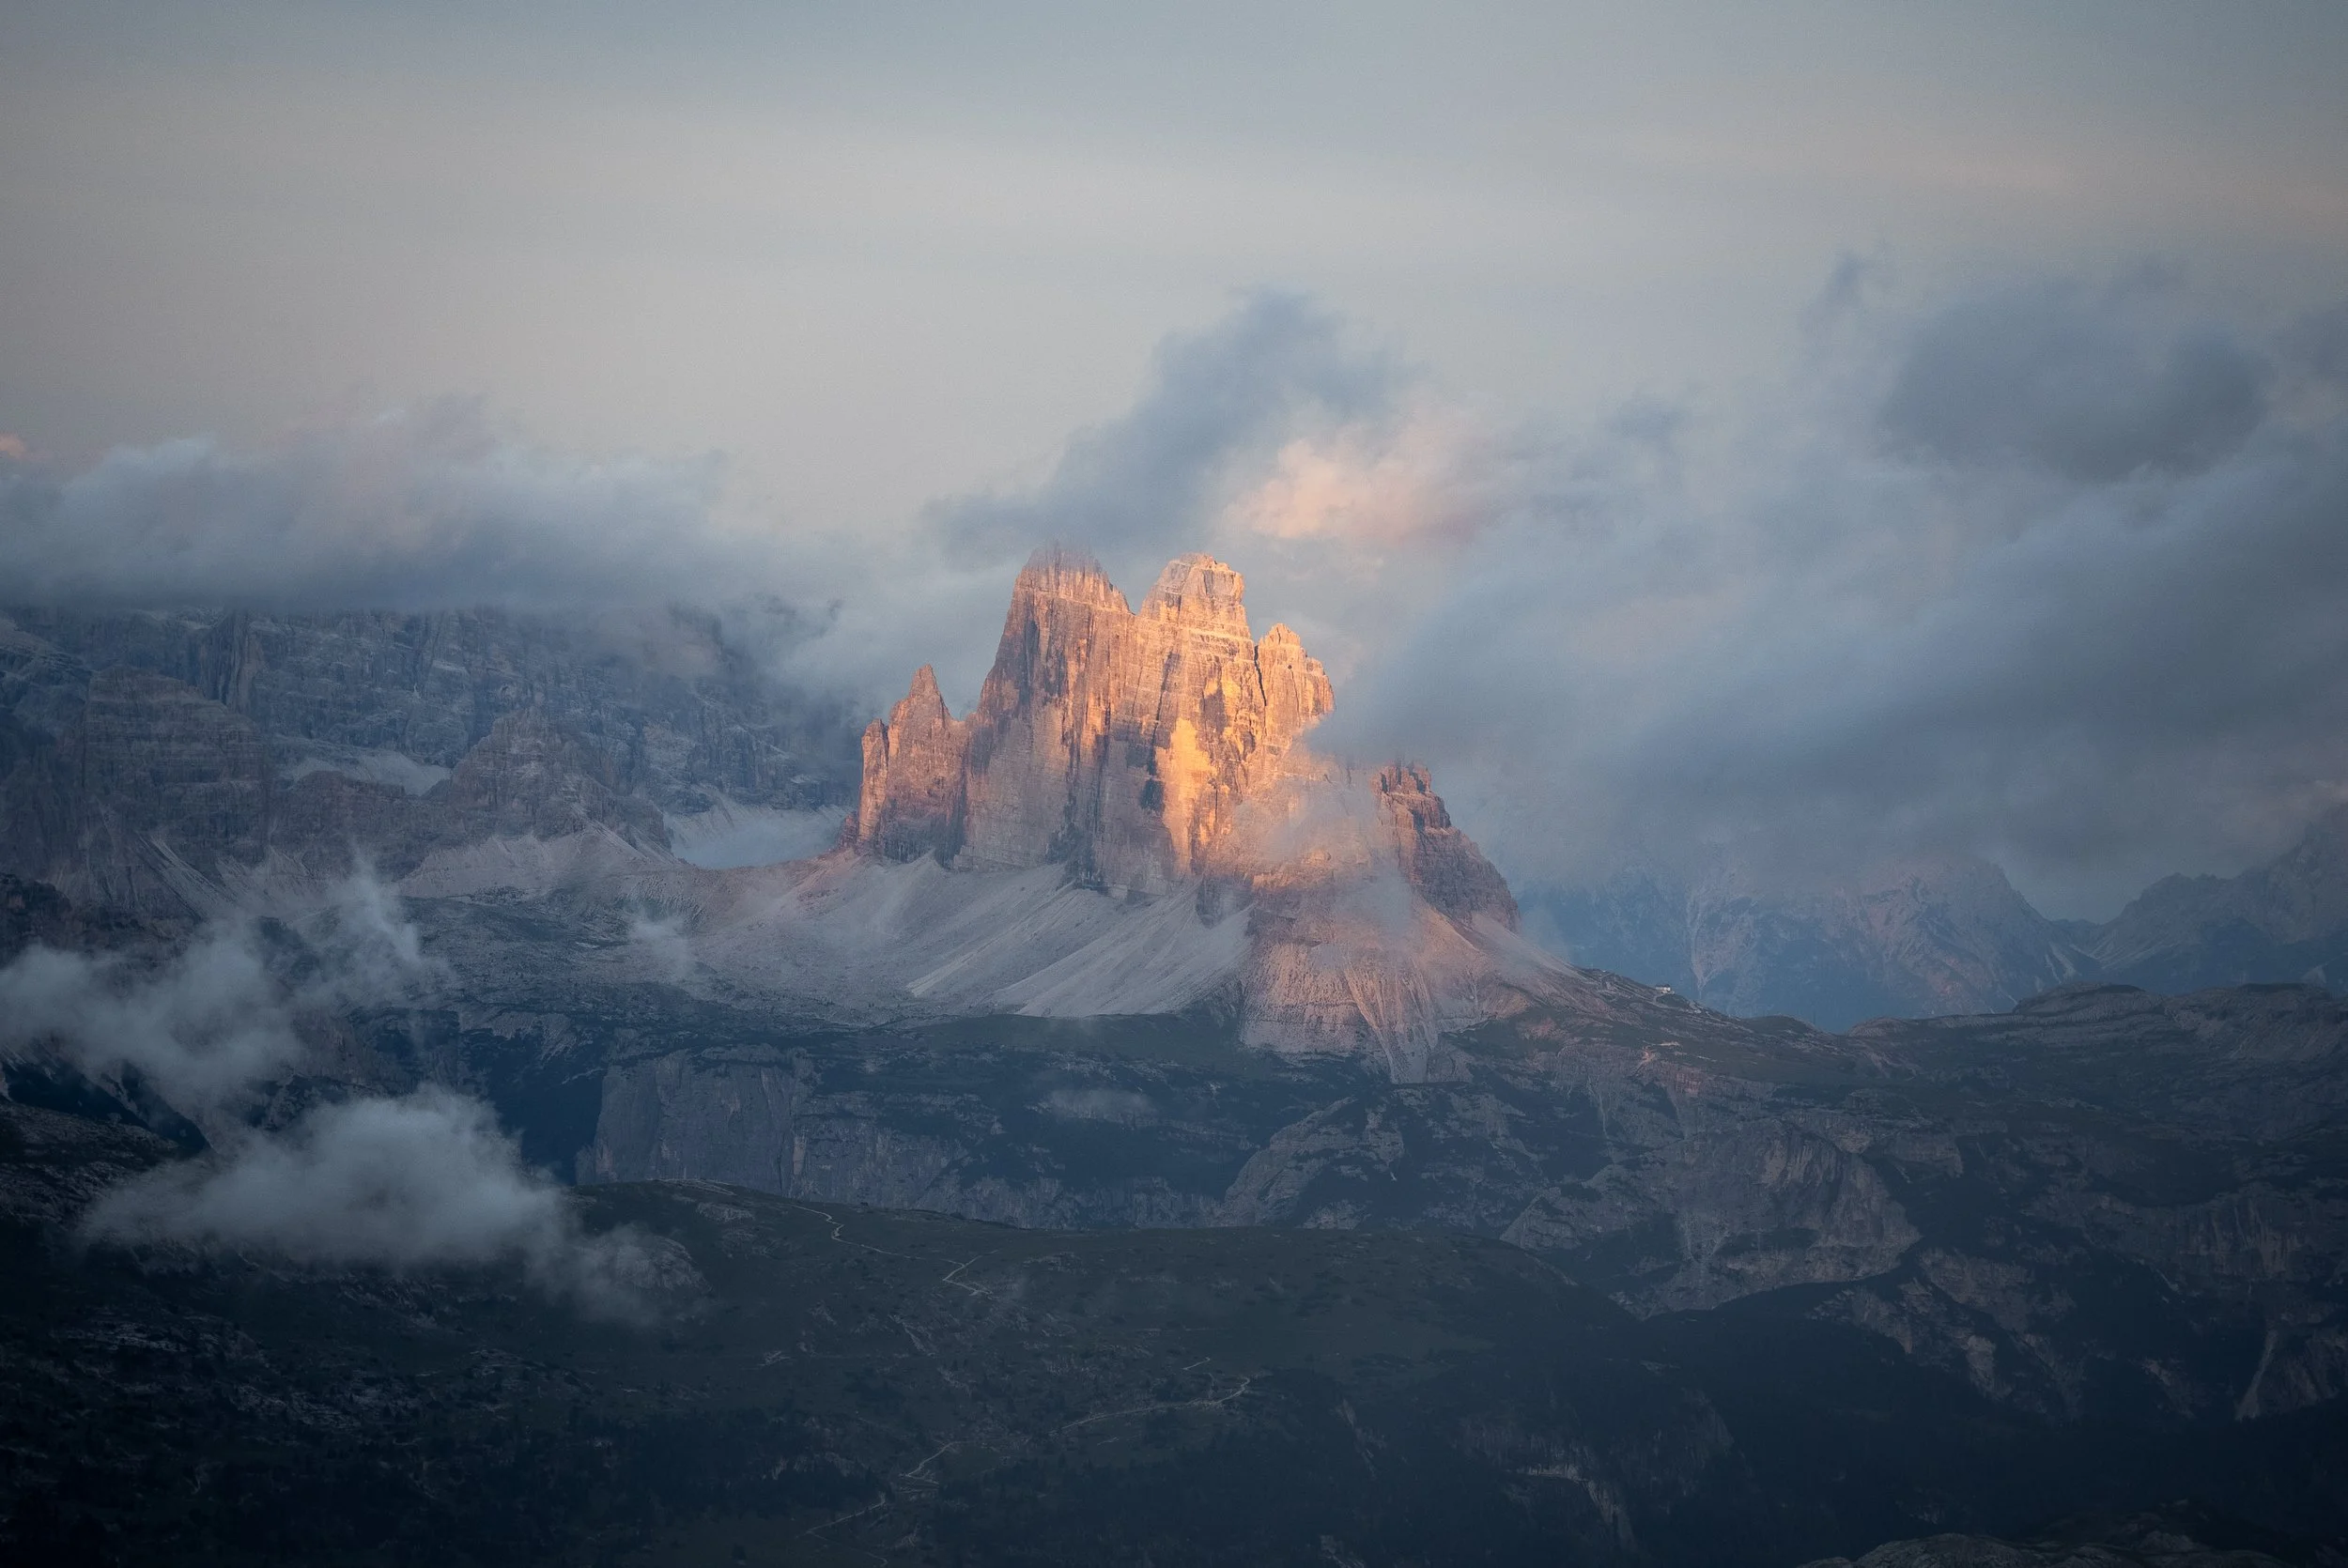
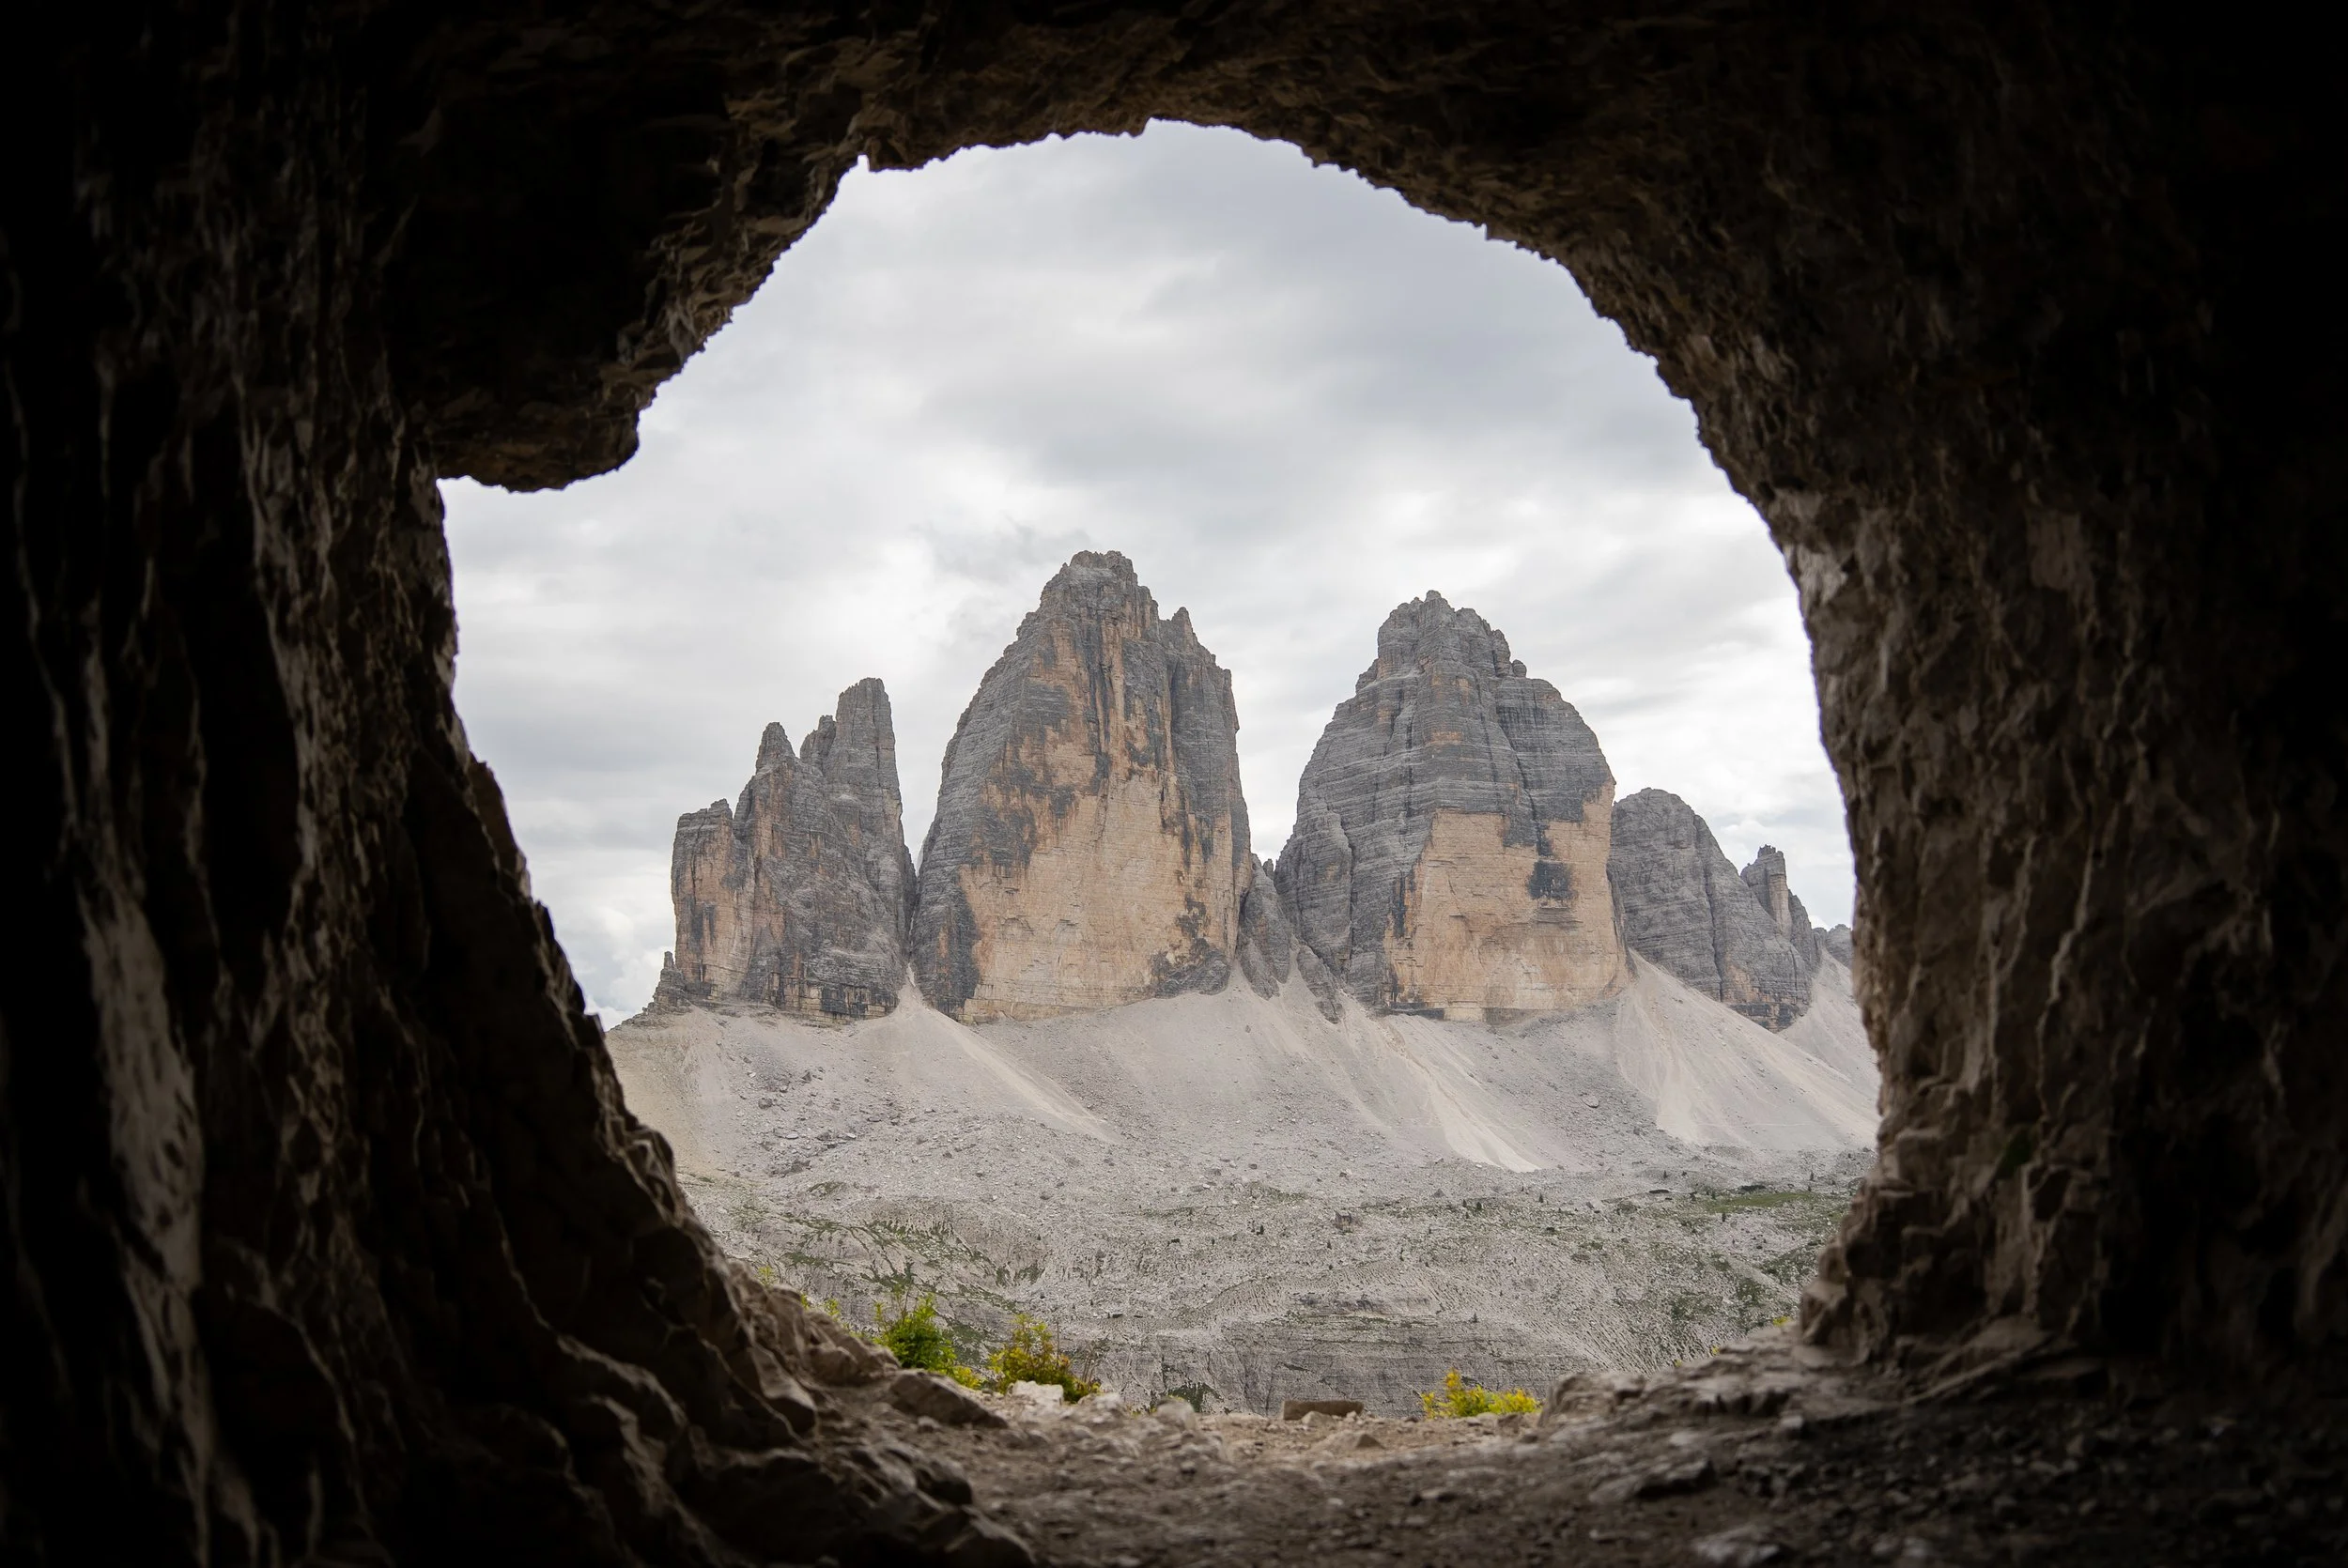
This final day is optional, but I would highly recommend it. It includes two of the most iconic and visually stunning locations in the Dolomites: the Cadini di Misurina viewpoint and the Tre Cime di Lavaredo circuit.
Yes, you could hike these areas before the Dolomiti Trail officially begins, but I suggest saving them for the end. By this point in the trek, you've likely bonded with your group, and sharing the experience together makes it even more special.
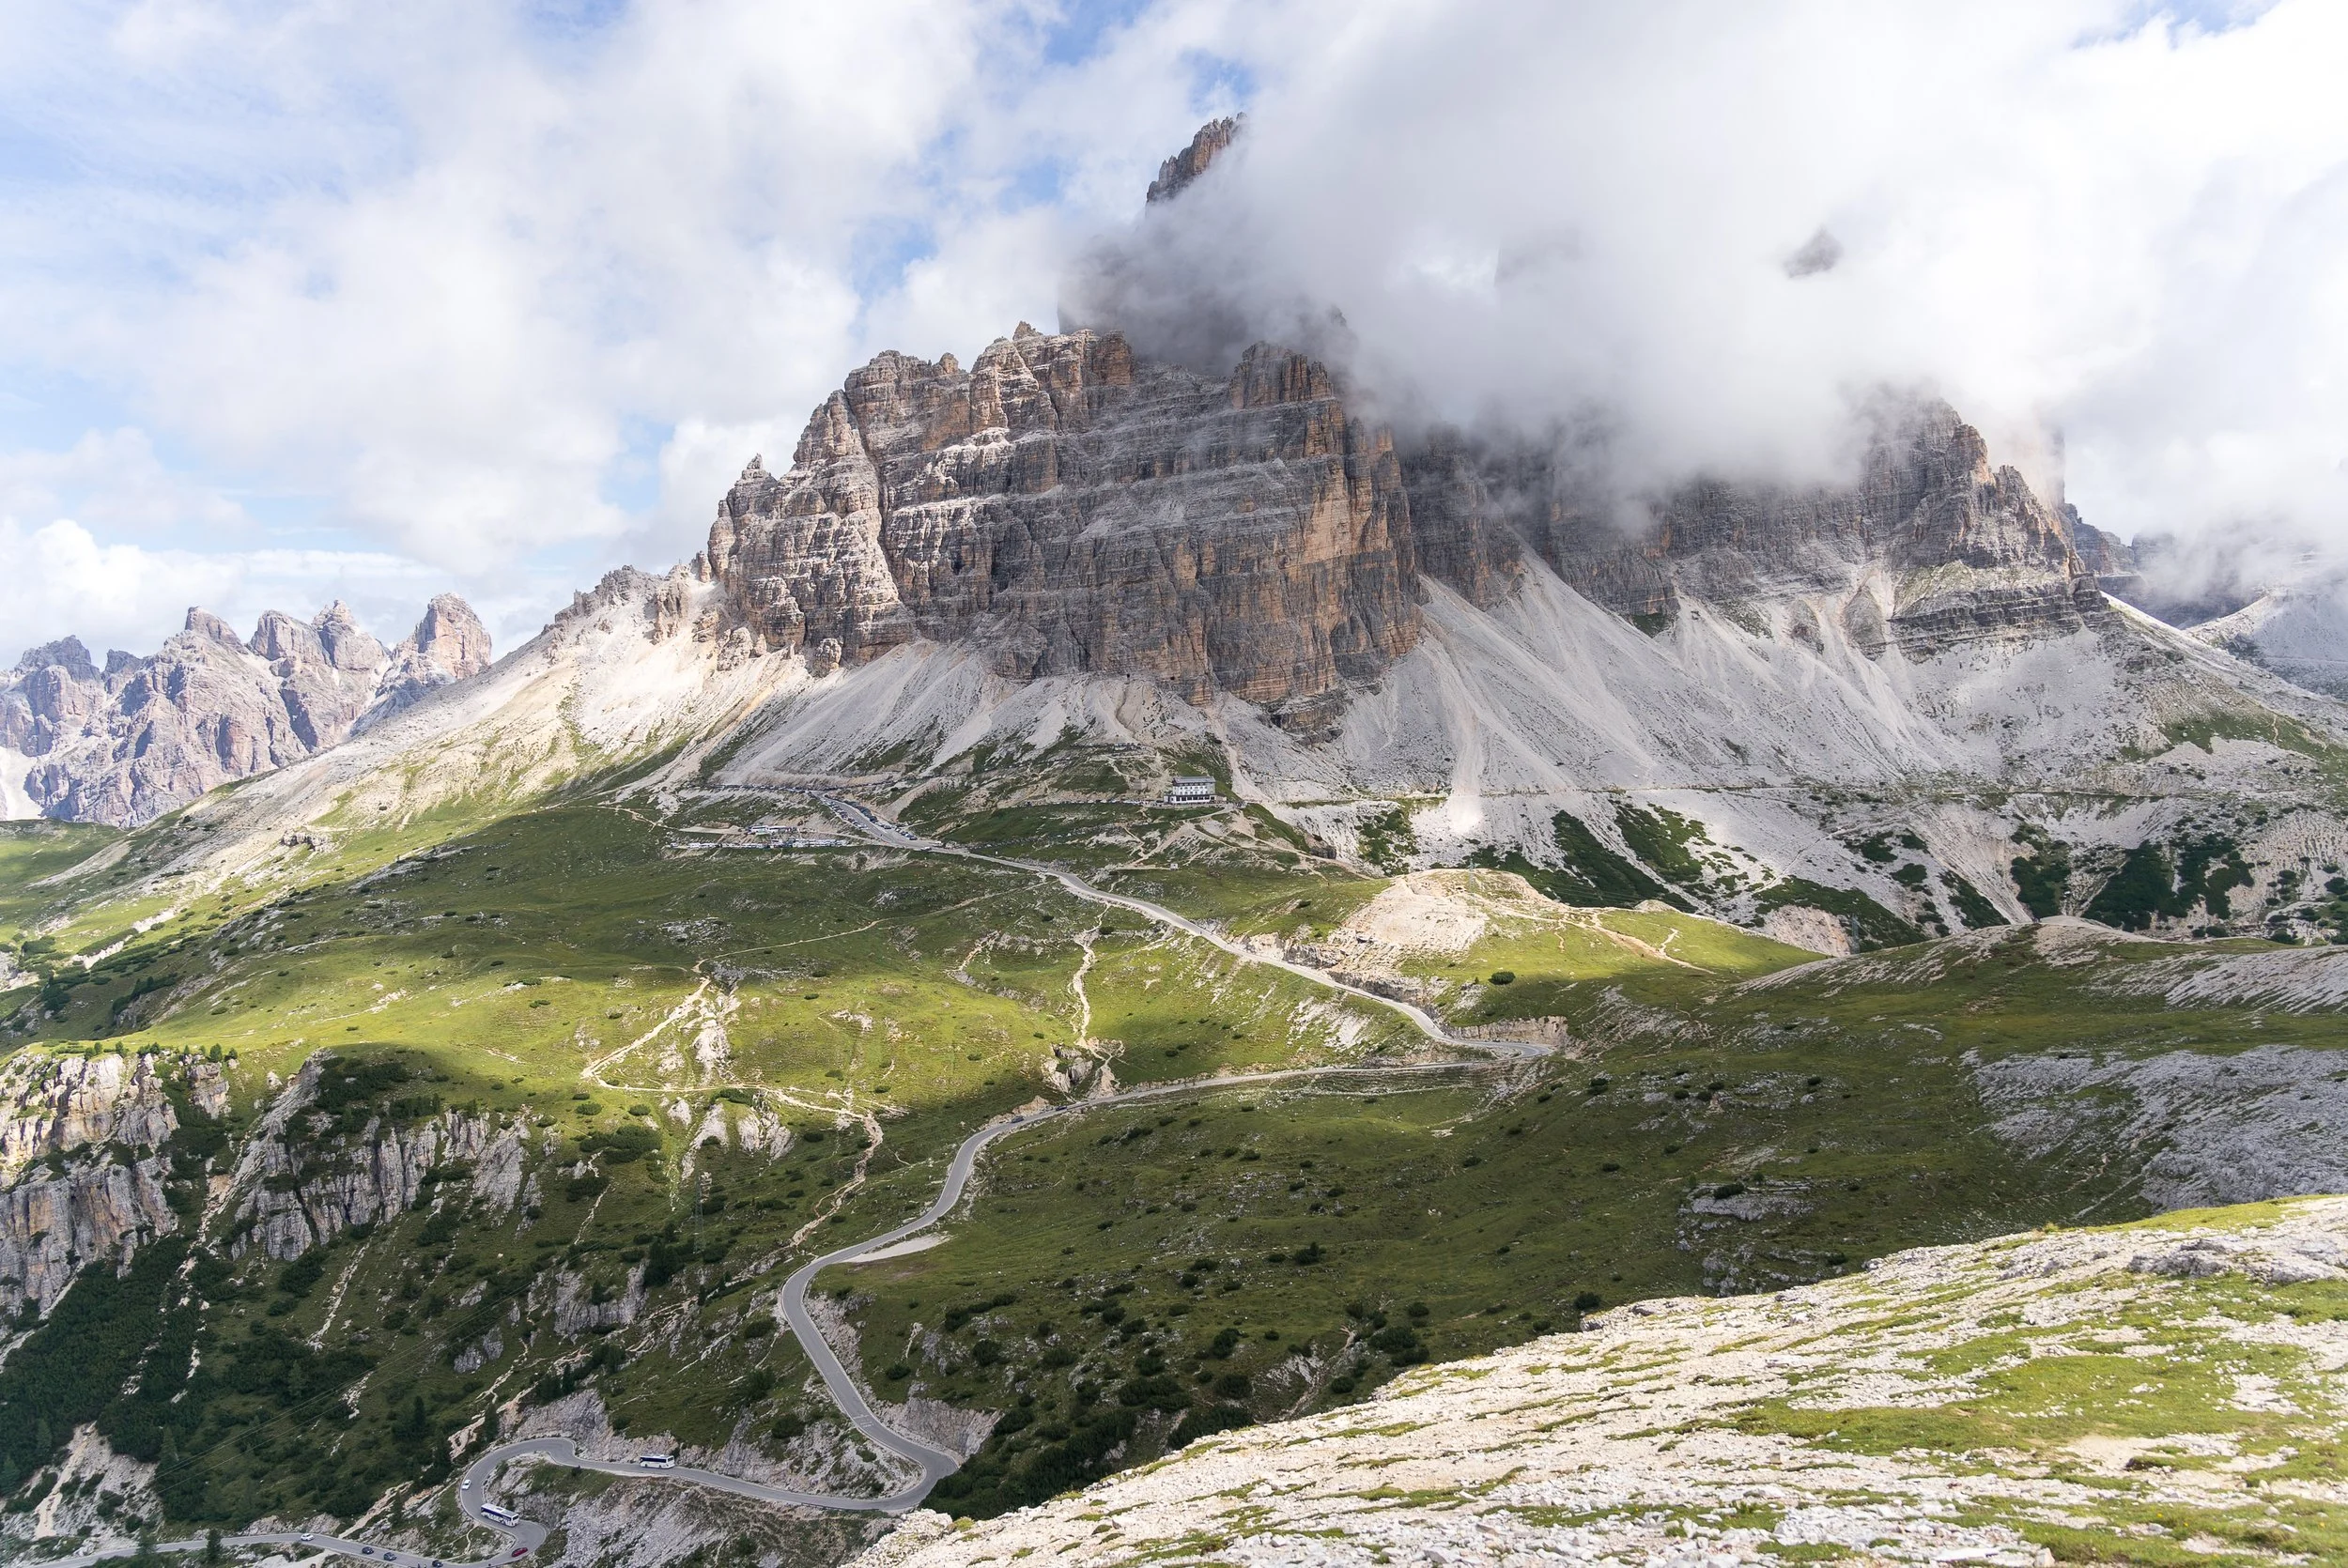
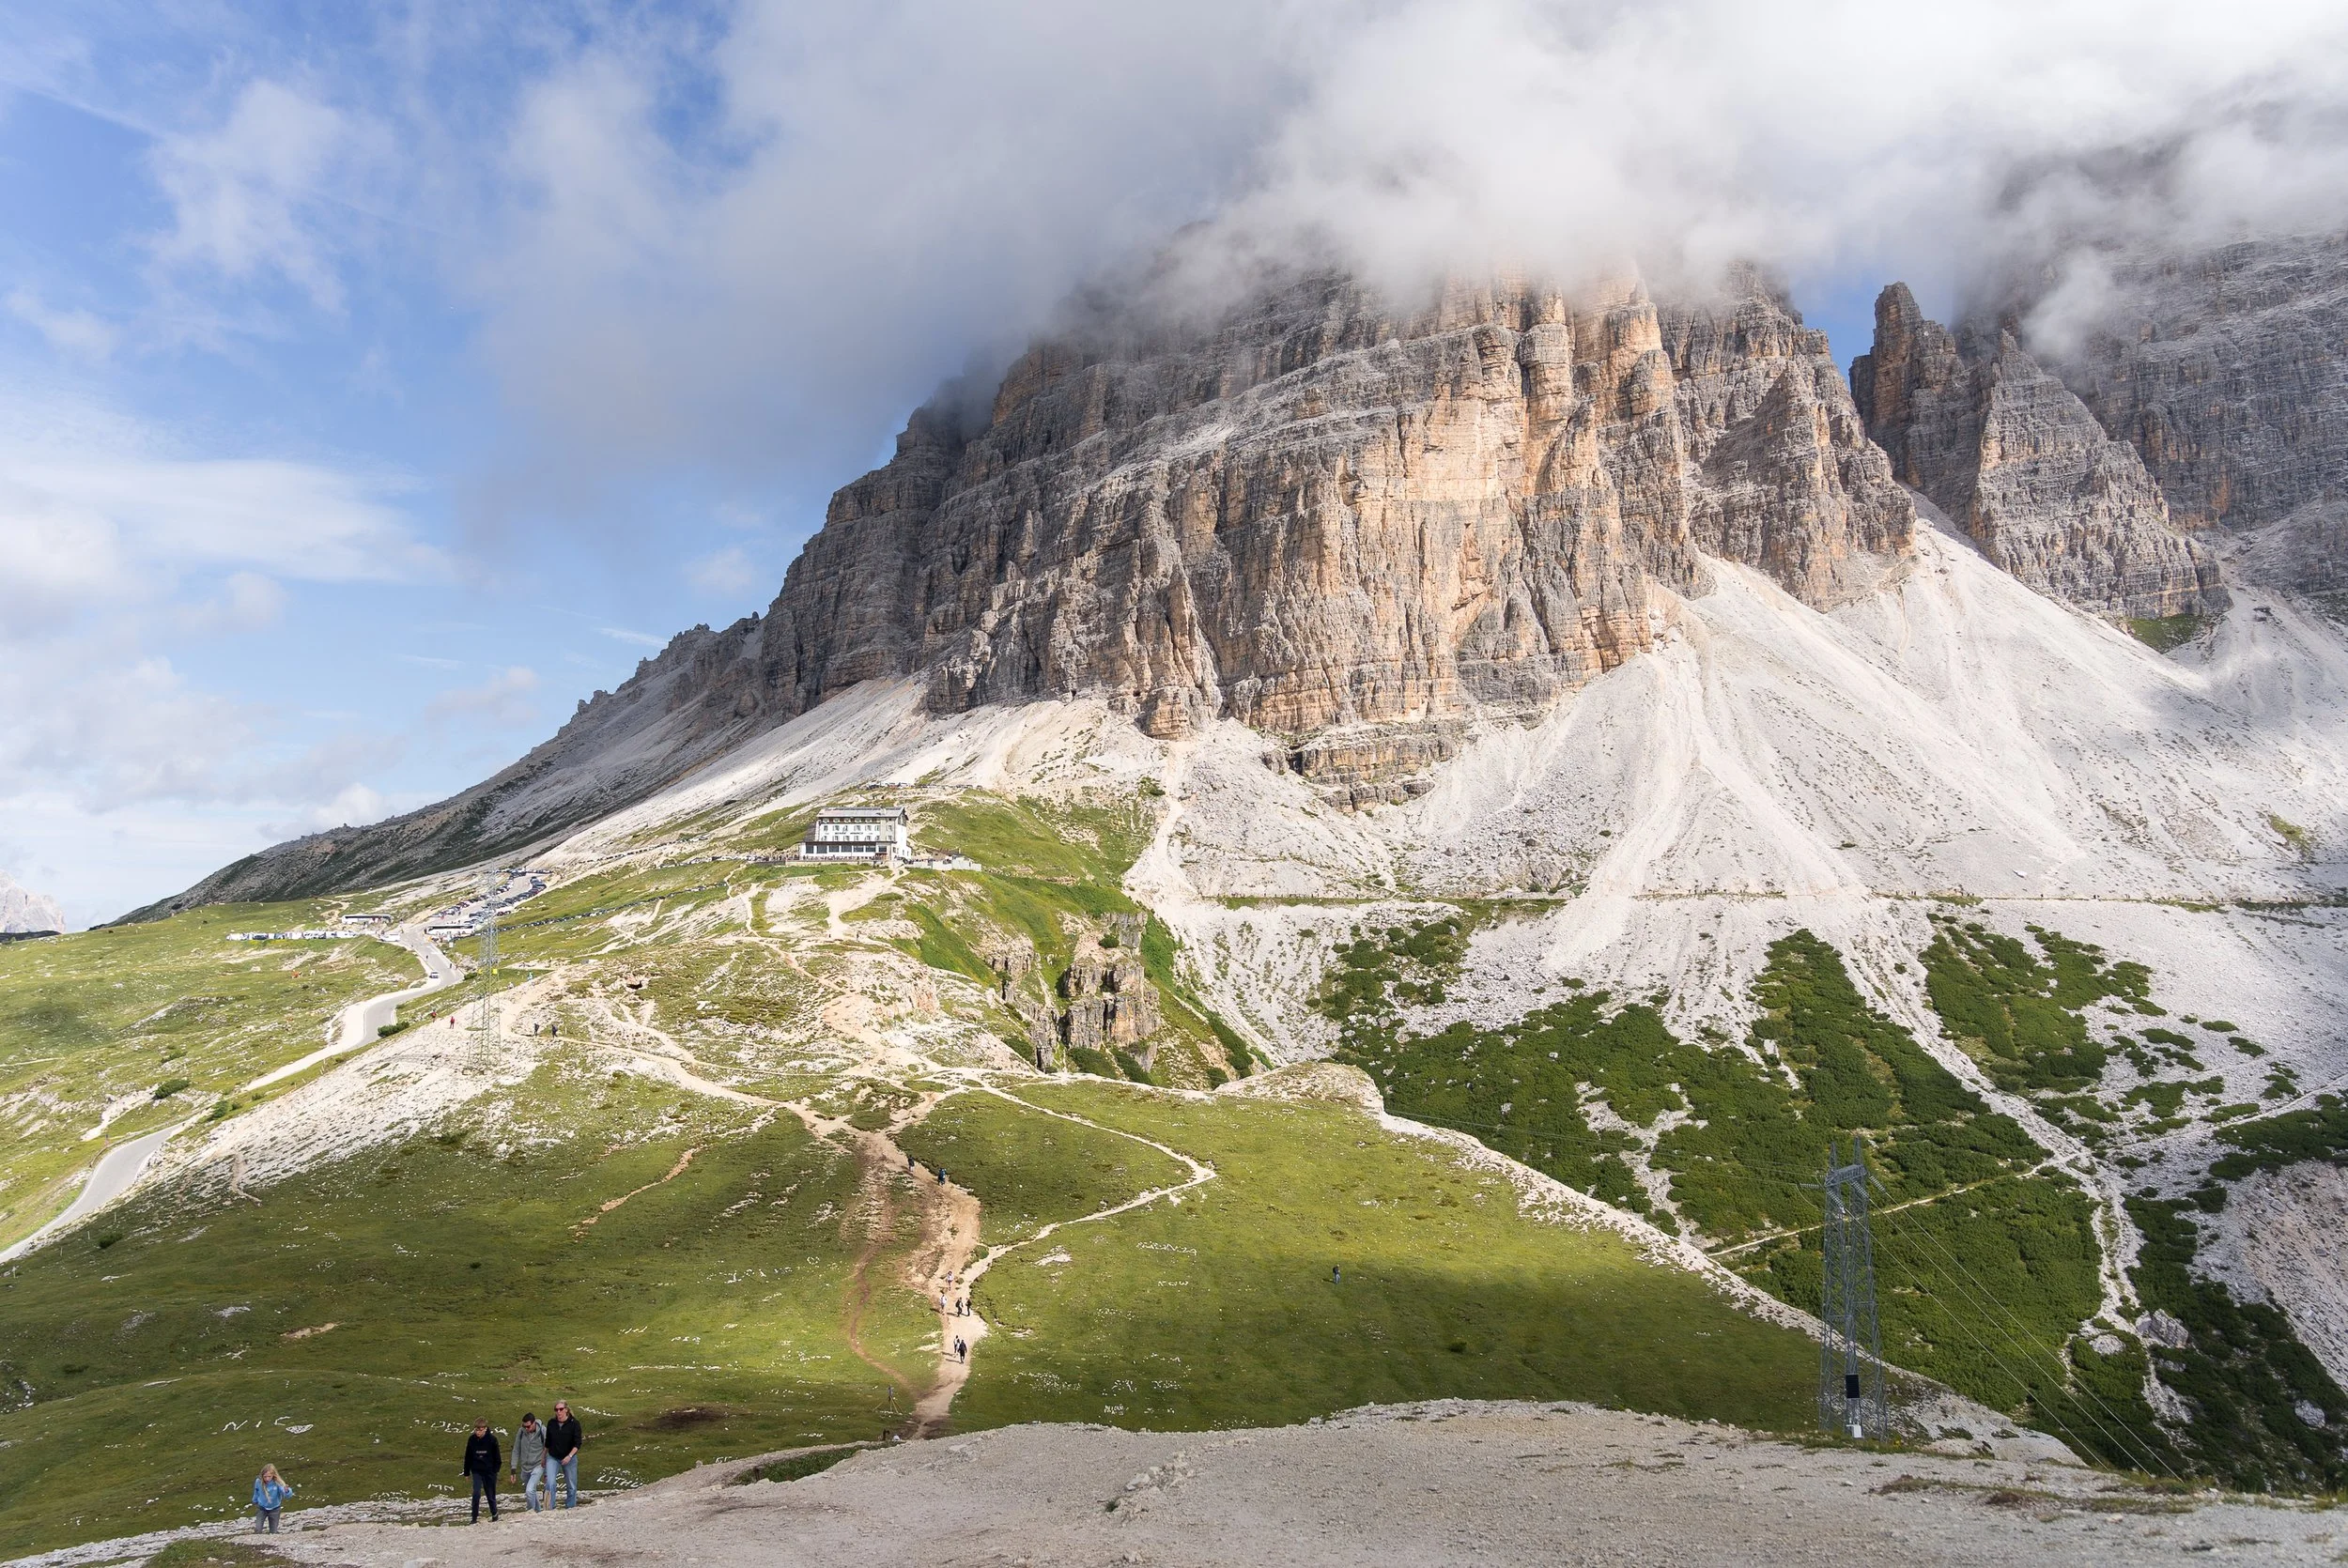
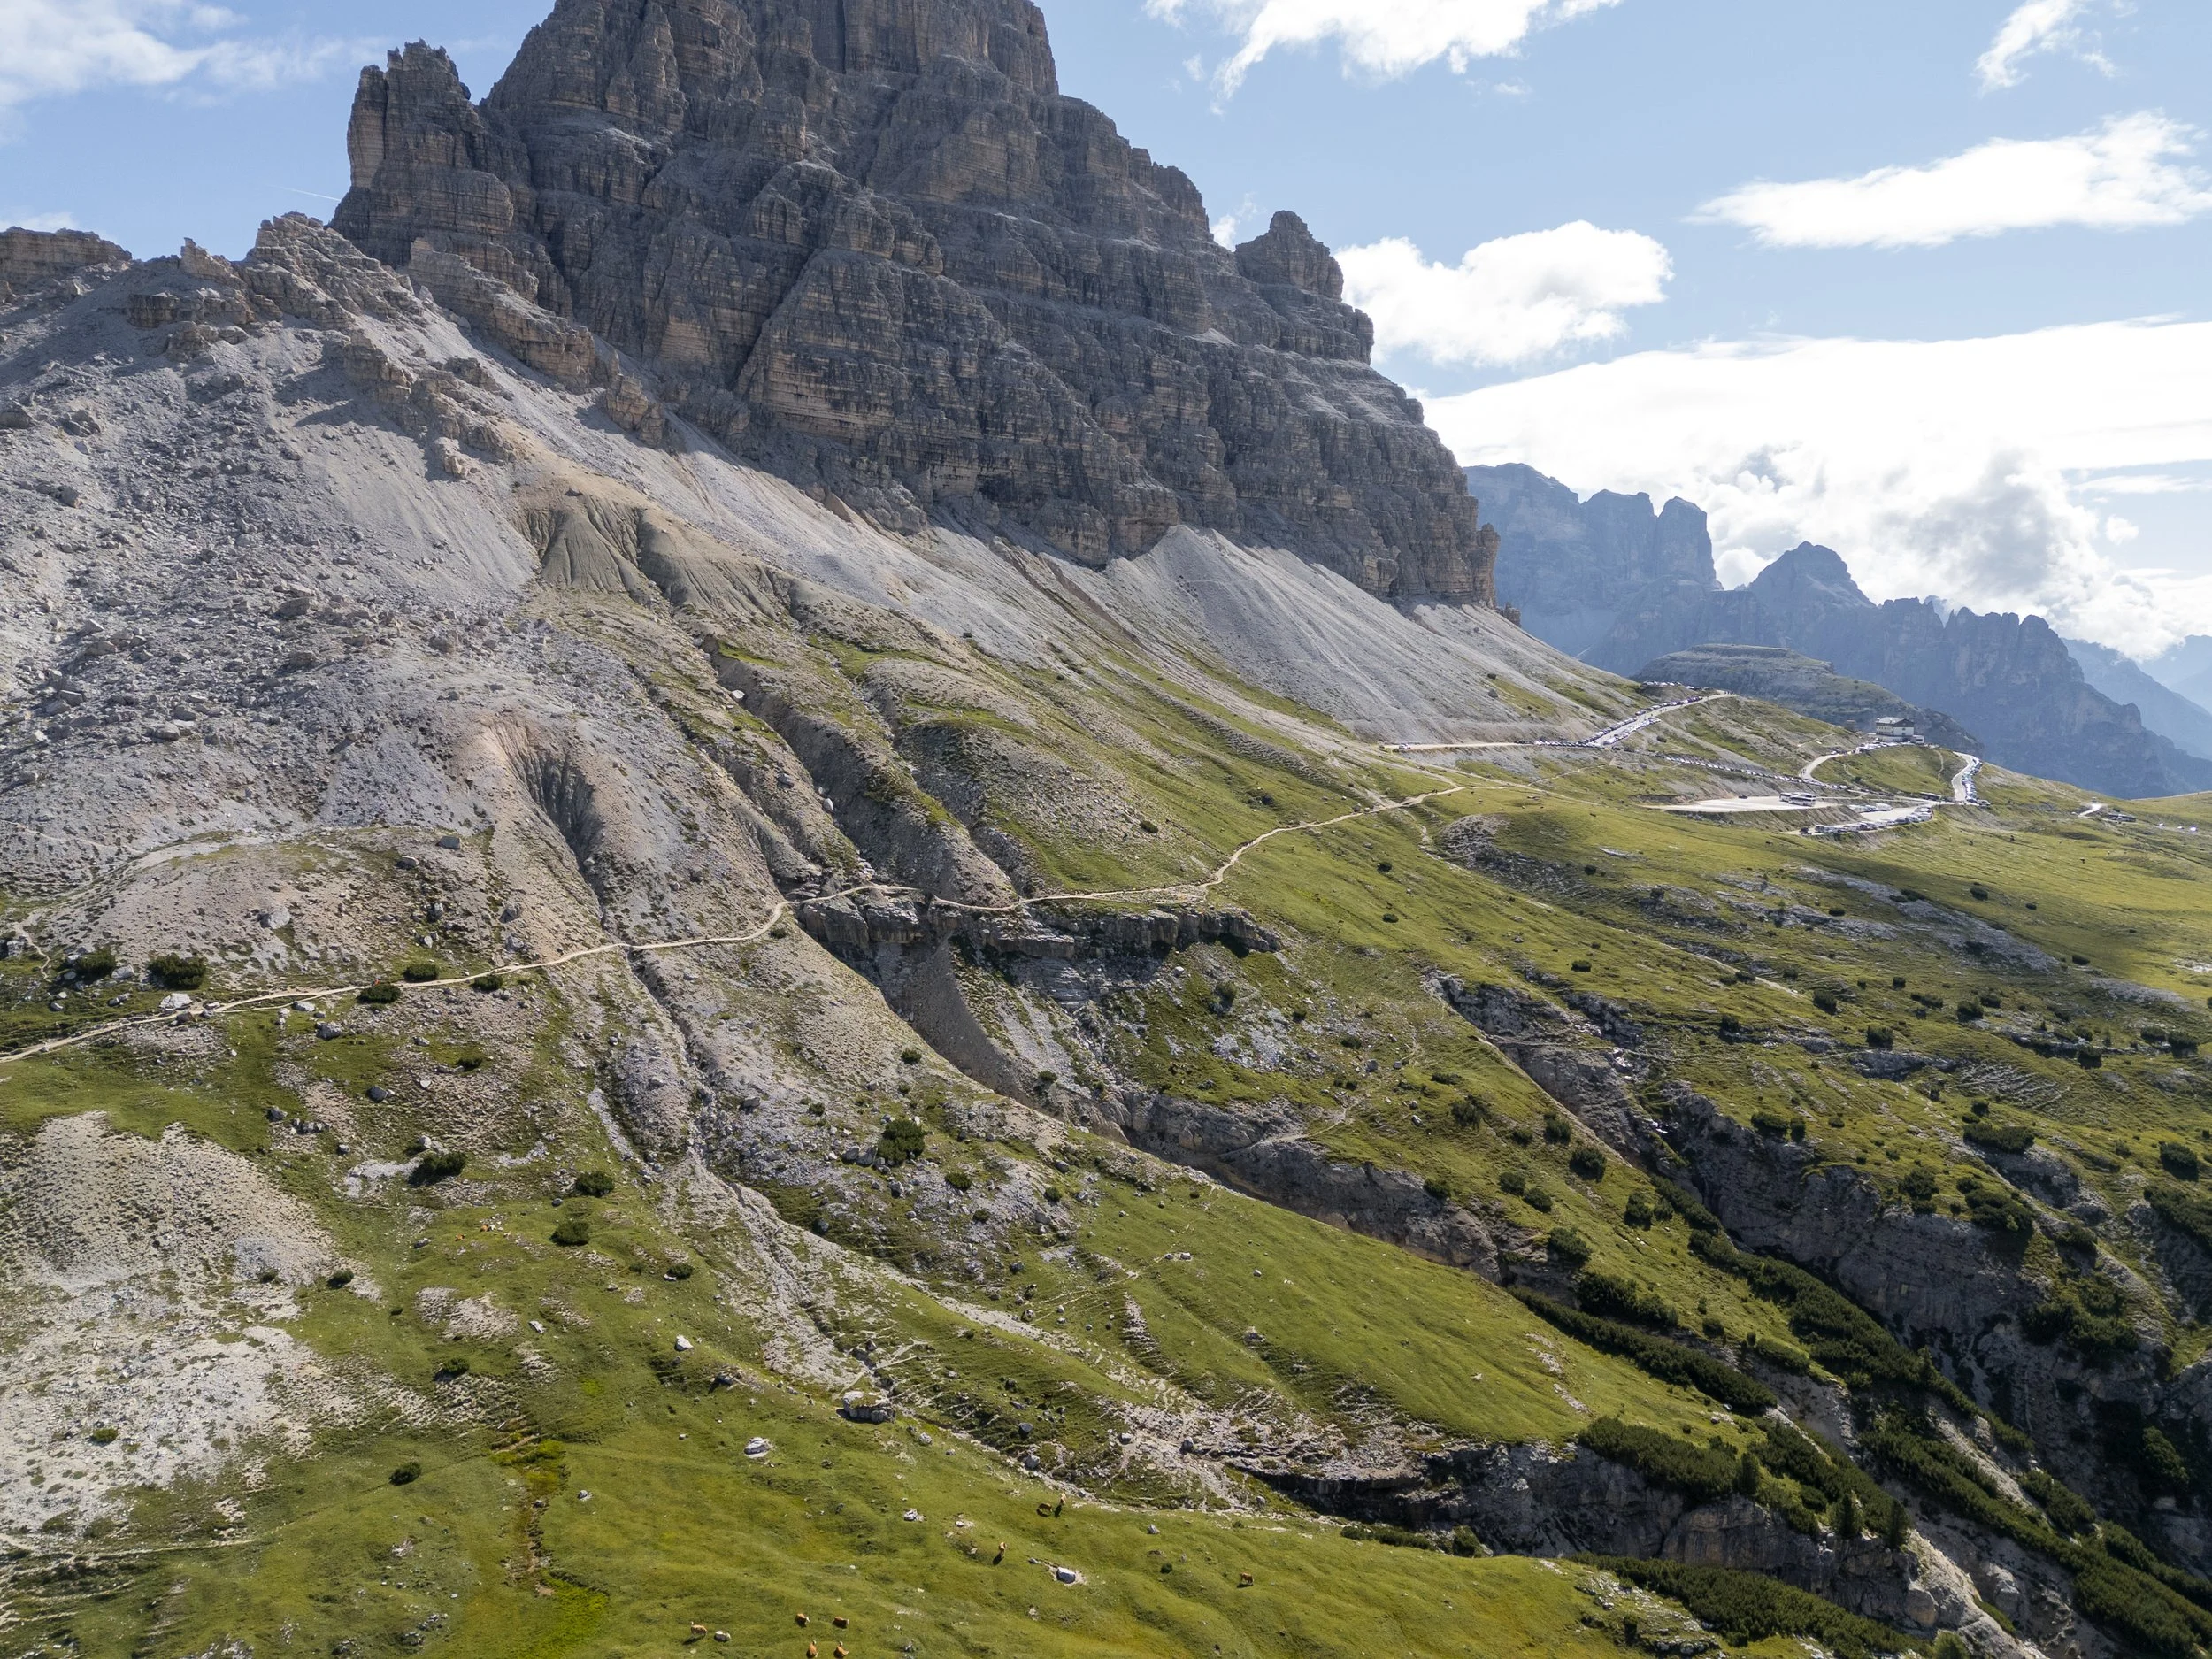
Getting to Rifugio Auronzo
The official Dolomiti Trail route starts from the hotel, but I would argue this includes several hours of unnecessary uphill hiking (5km and 550m of elevation gain) just to reach the iconic sights.
After five days and more than 80 kilometres on the trail, your legs will likely be tired, so it's better to save your energy for the most scenic sections.
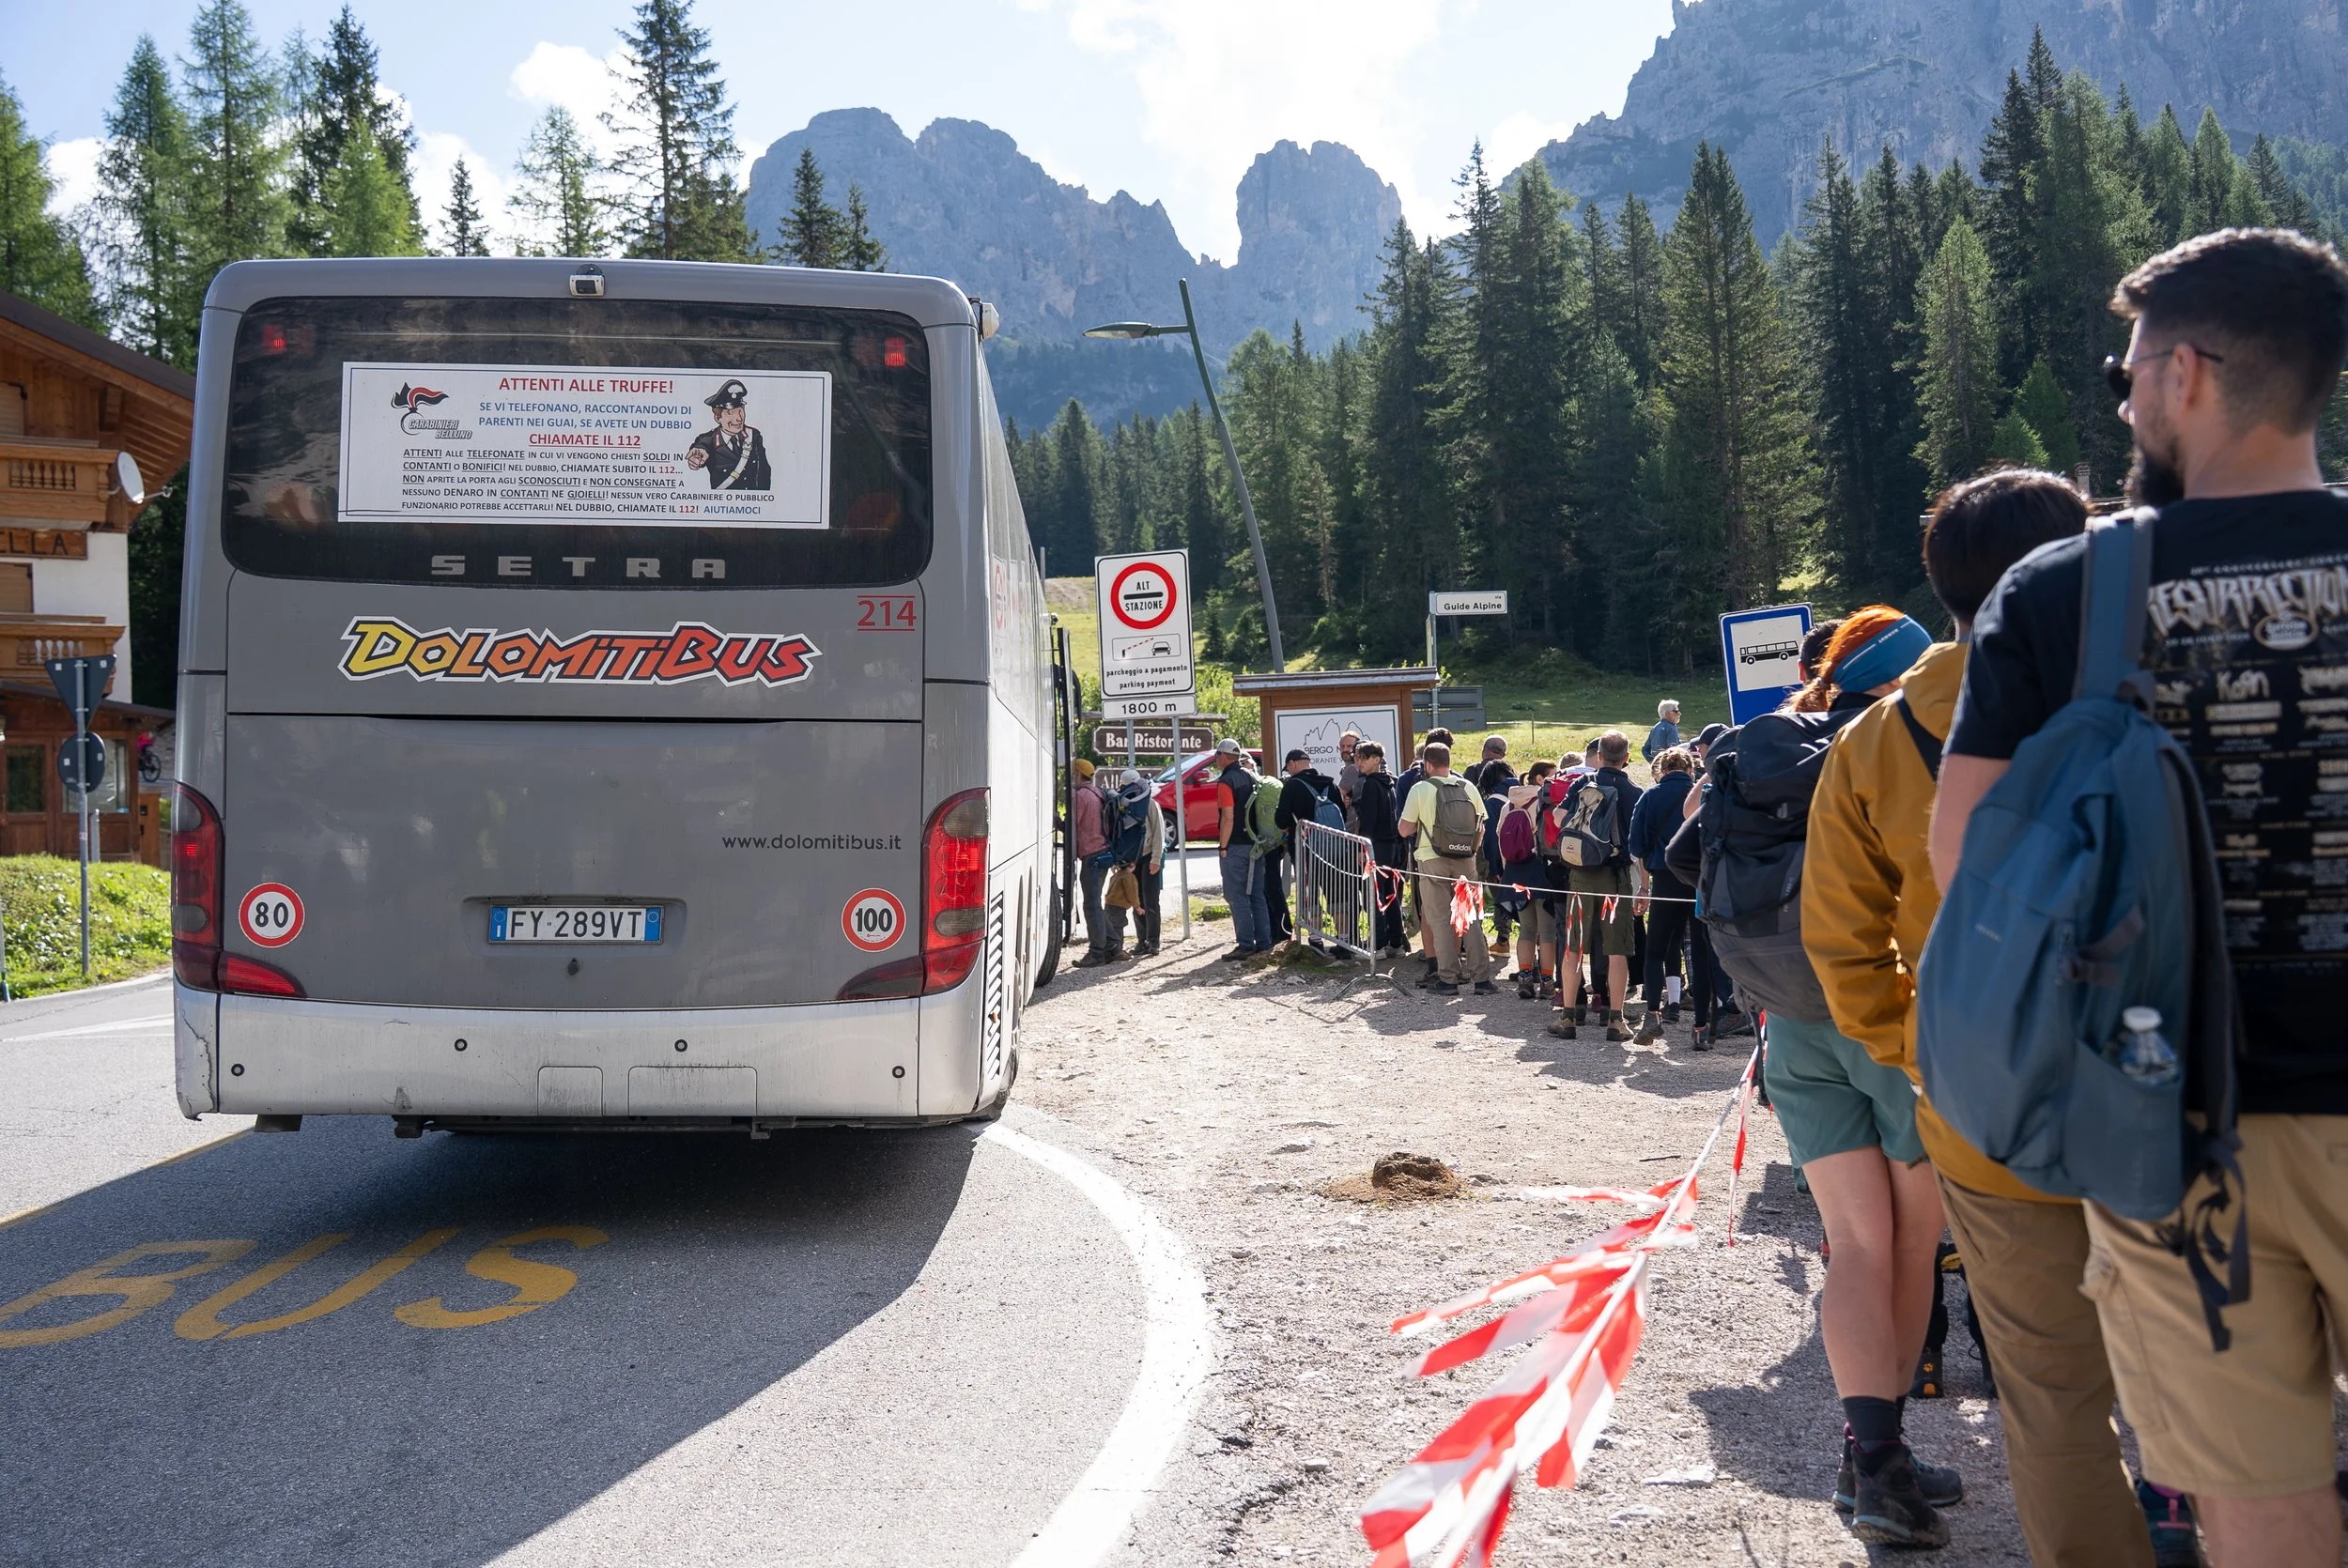
My top tip: Take the bus to Rifugio Auronzo.
The bus costs €10 return, takes around 20 minutes, and departs from Misurina Genzianella—less than a five-minute walk from the hotel. Buses generally run twice per hour from 8:05 am to 4:20 pm.
You can find the full timetable here
If possible, catch the first bus (8:05 am) to beat the crowds and have more time on the trails. Alternatively, head up in the late afternoon and enjoy golden hour or sunset light. The last bus back from Rifugio Auronzo is at 7:00 pm.
Be sure to arrive at the bus stop at least 20 minutes early to secure a seat. The queues can get long, and while the dram and everyone on and standing is allowed, it's not ideal.
Cadini Viewpoint
If you arrive early, I recommend visiting the Cadini Viewpoint first.
You’ll have fresher legs and, if you've caught the first bus, you'll beat the bulk of the crowds. If you're hiking in the afternoon, save this for the end as it's a brilliant spot for sunset.
The route begins from the car park and is very straightforward, covering about 3.6km round-trip with 130 metres of elevation gain. Several scenic viewpoints line the trail, including epic vistas looking back down toward Auronzo.
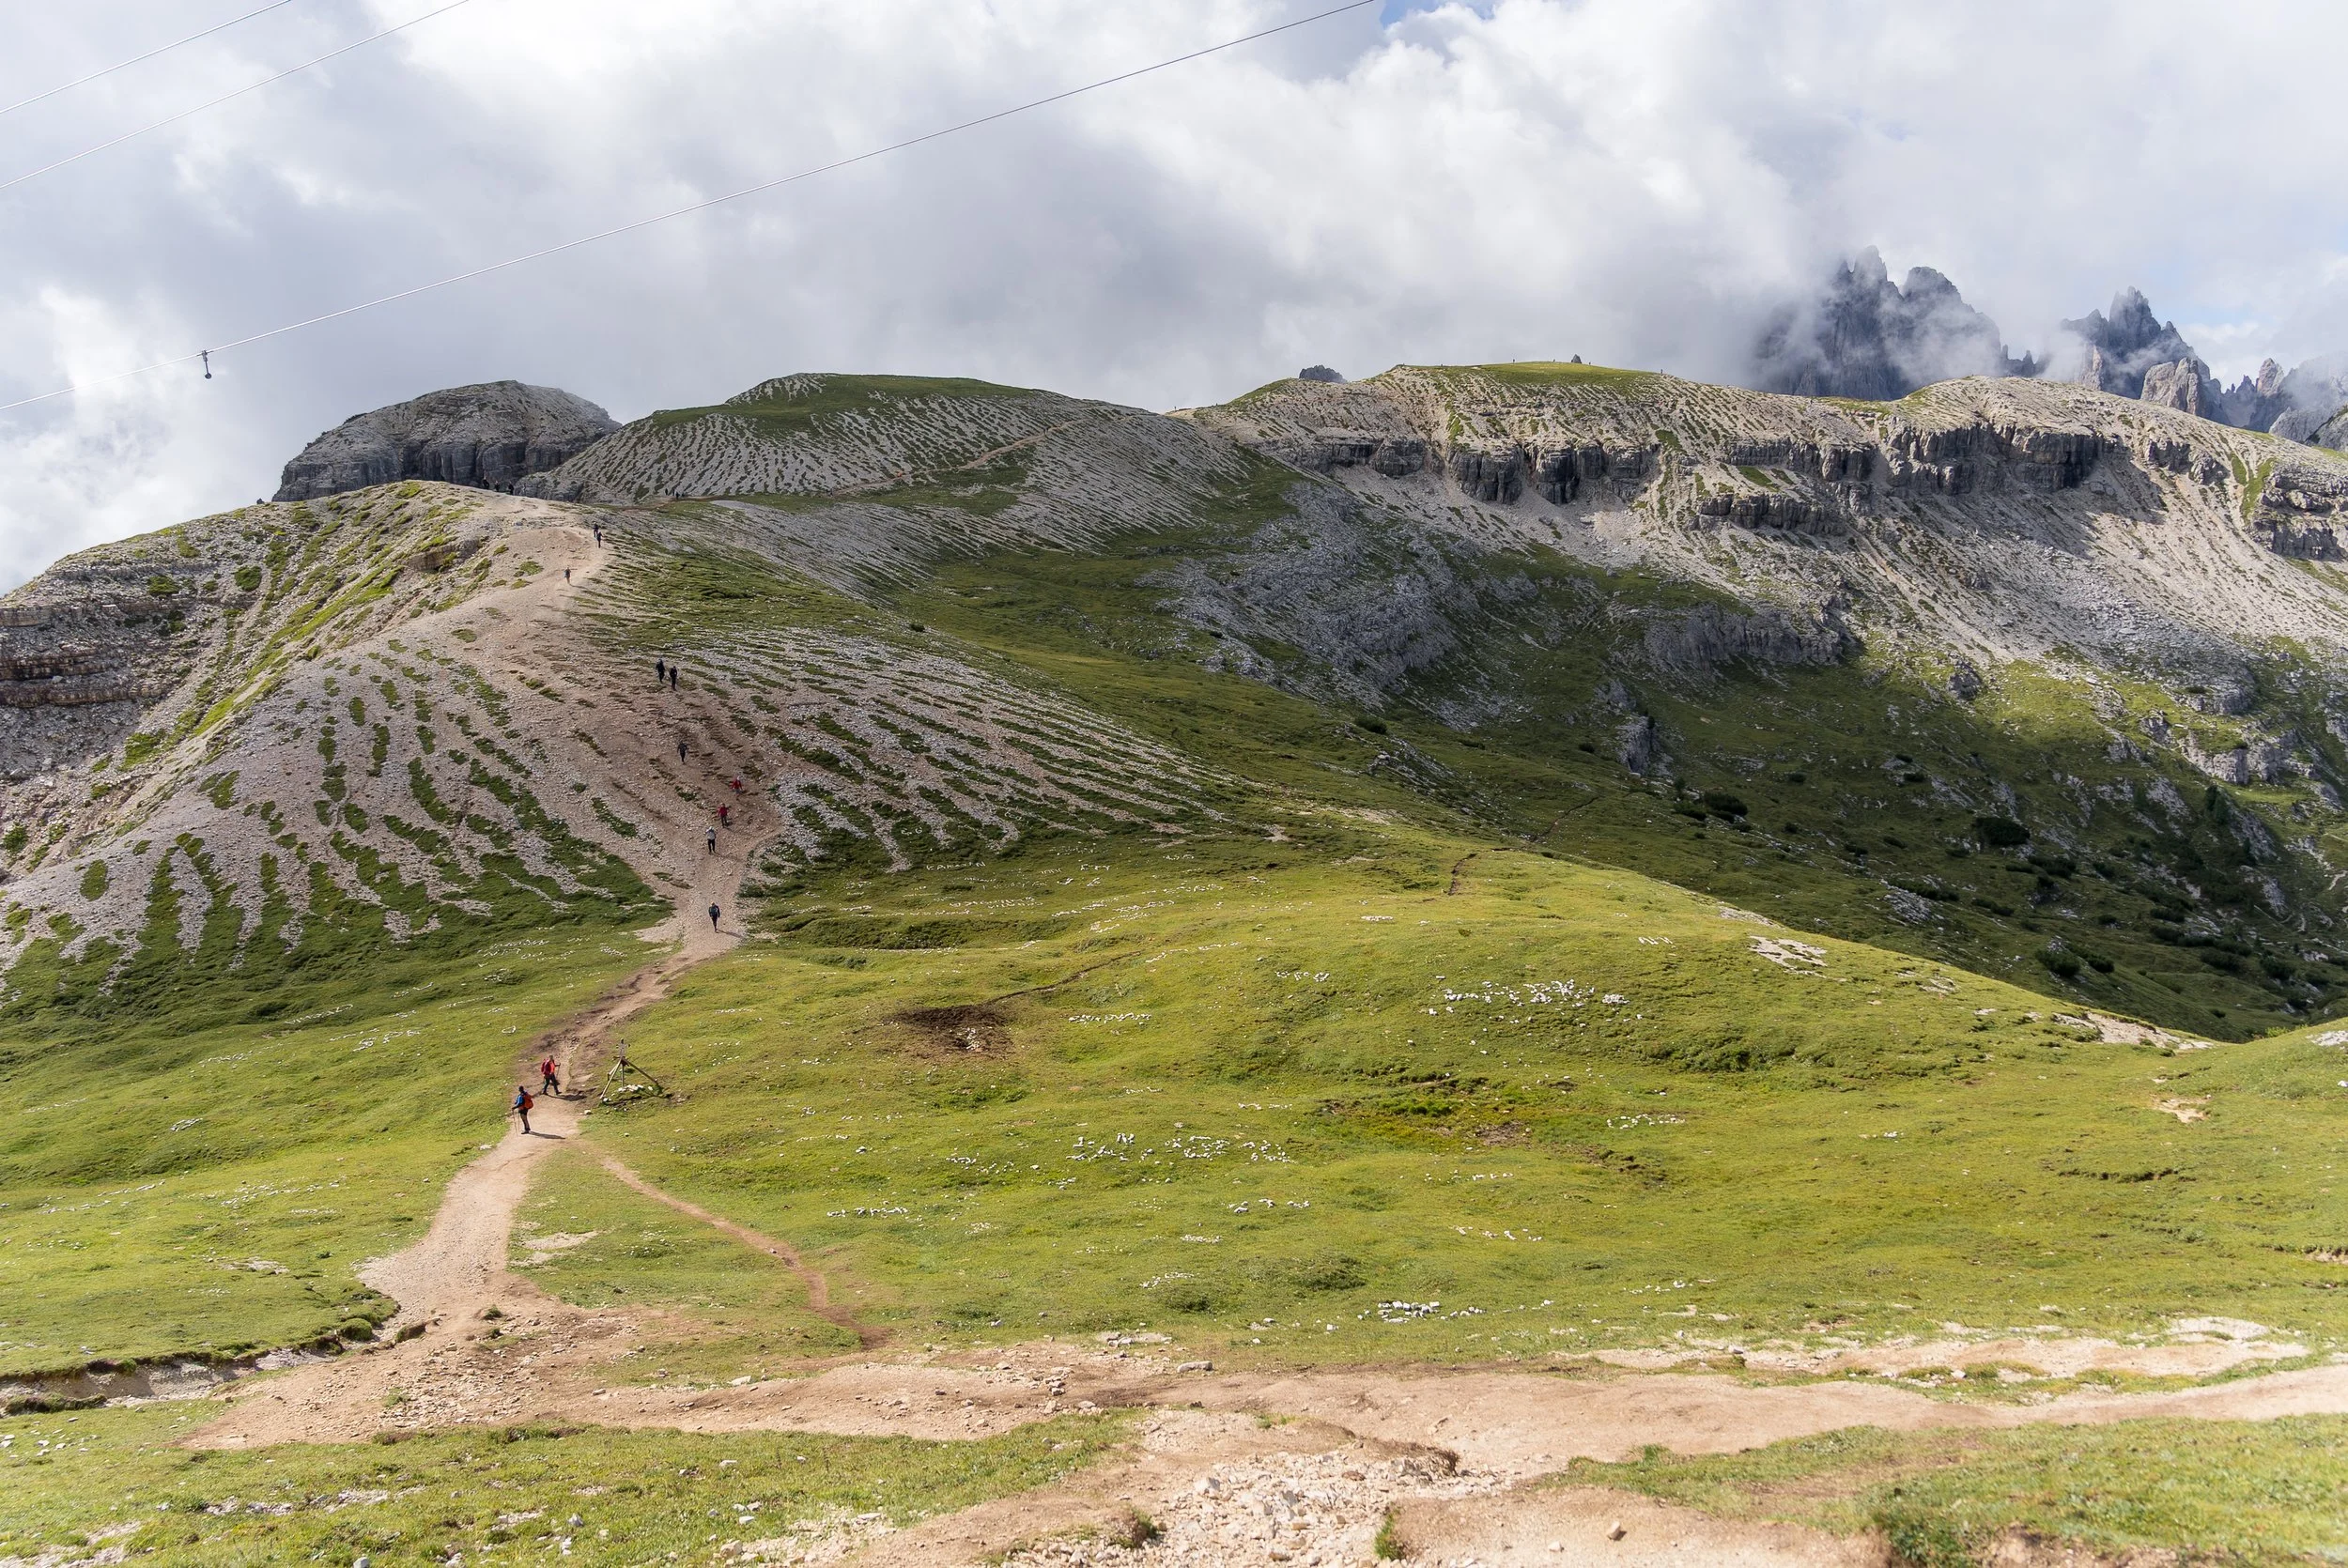
The best perspective of the Cadini peaks is from the cliffs just above the main viewpoint.
One particularly popular spot is a narrow path that leads to a small platform framed by dramatic peaks. This has become famous on social media, so expect a queue. If it's too crowded, the views from the cliffs are just as good and far less stressful.
Once you've enjoyed the scenery, retrace your steps to Rifugio Auronzo and begin the loop around Tre Cime.
Cadini Viewpoint hiking stats
Distance: 3.6 km
Duration: 1–2 hours
Elevation gain: 130 m
Difficulty: Easy

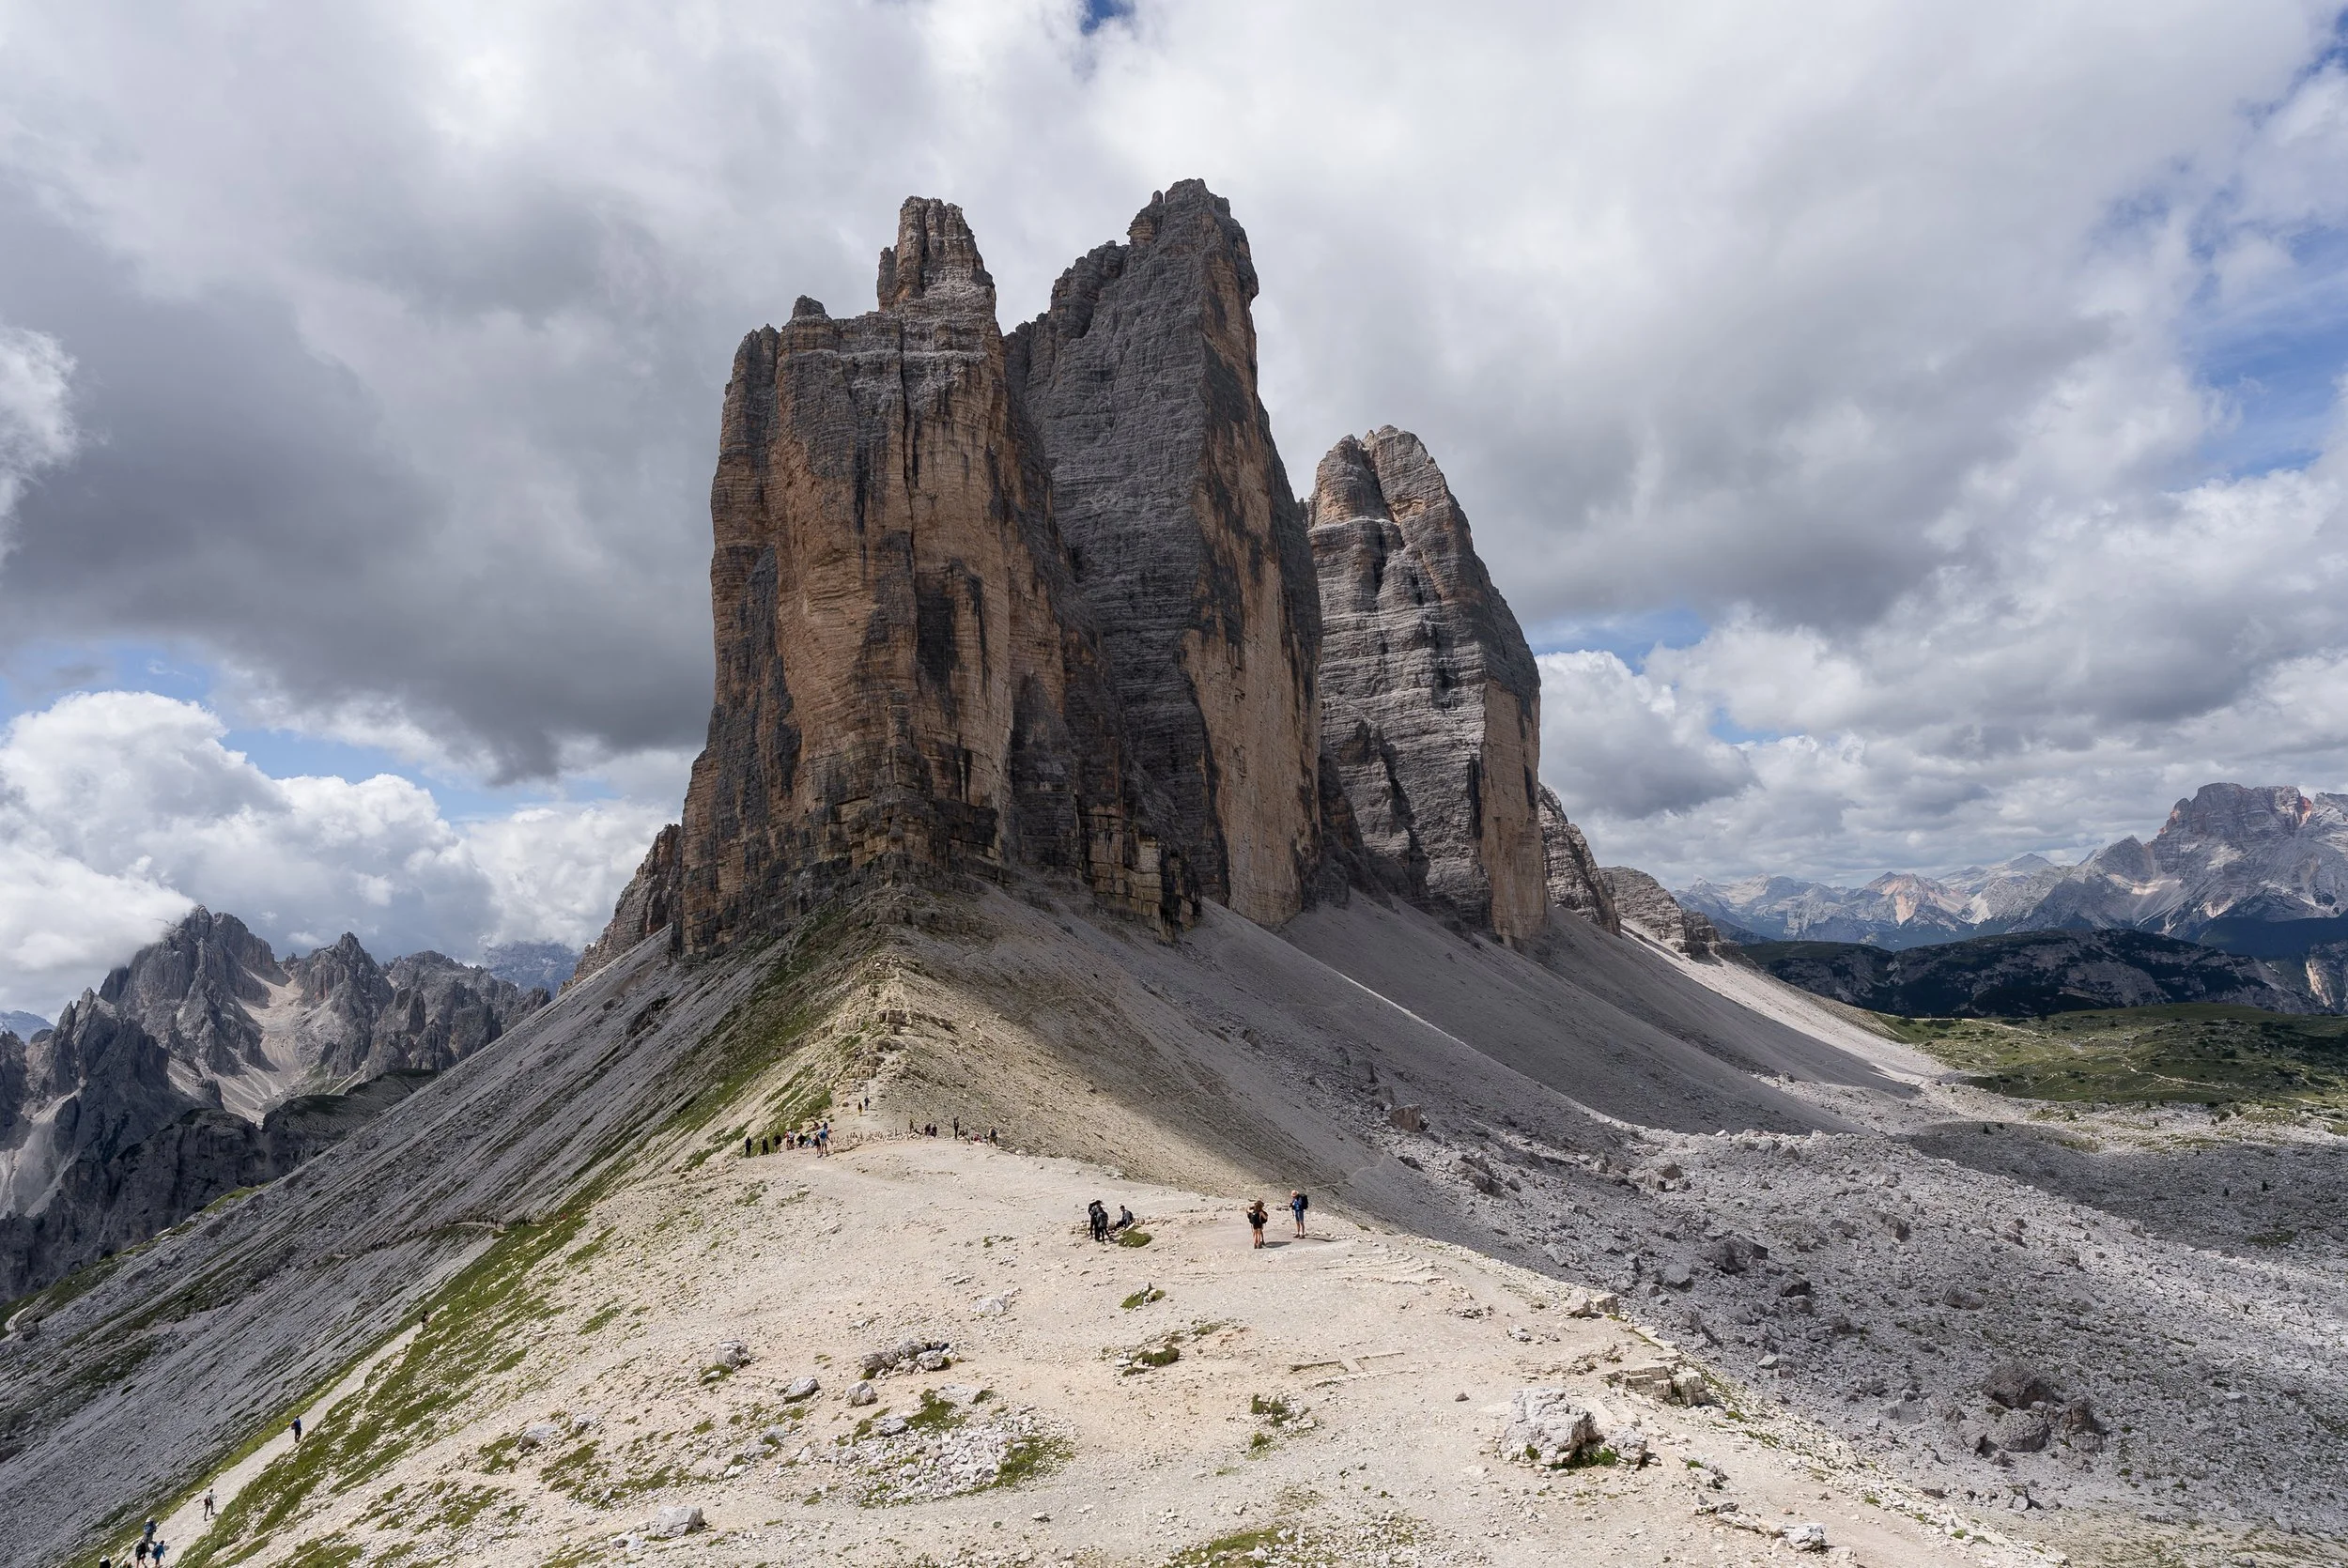
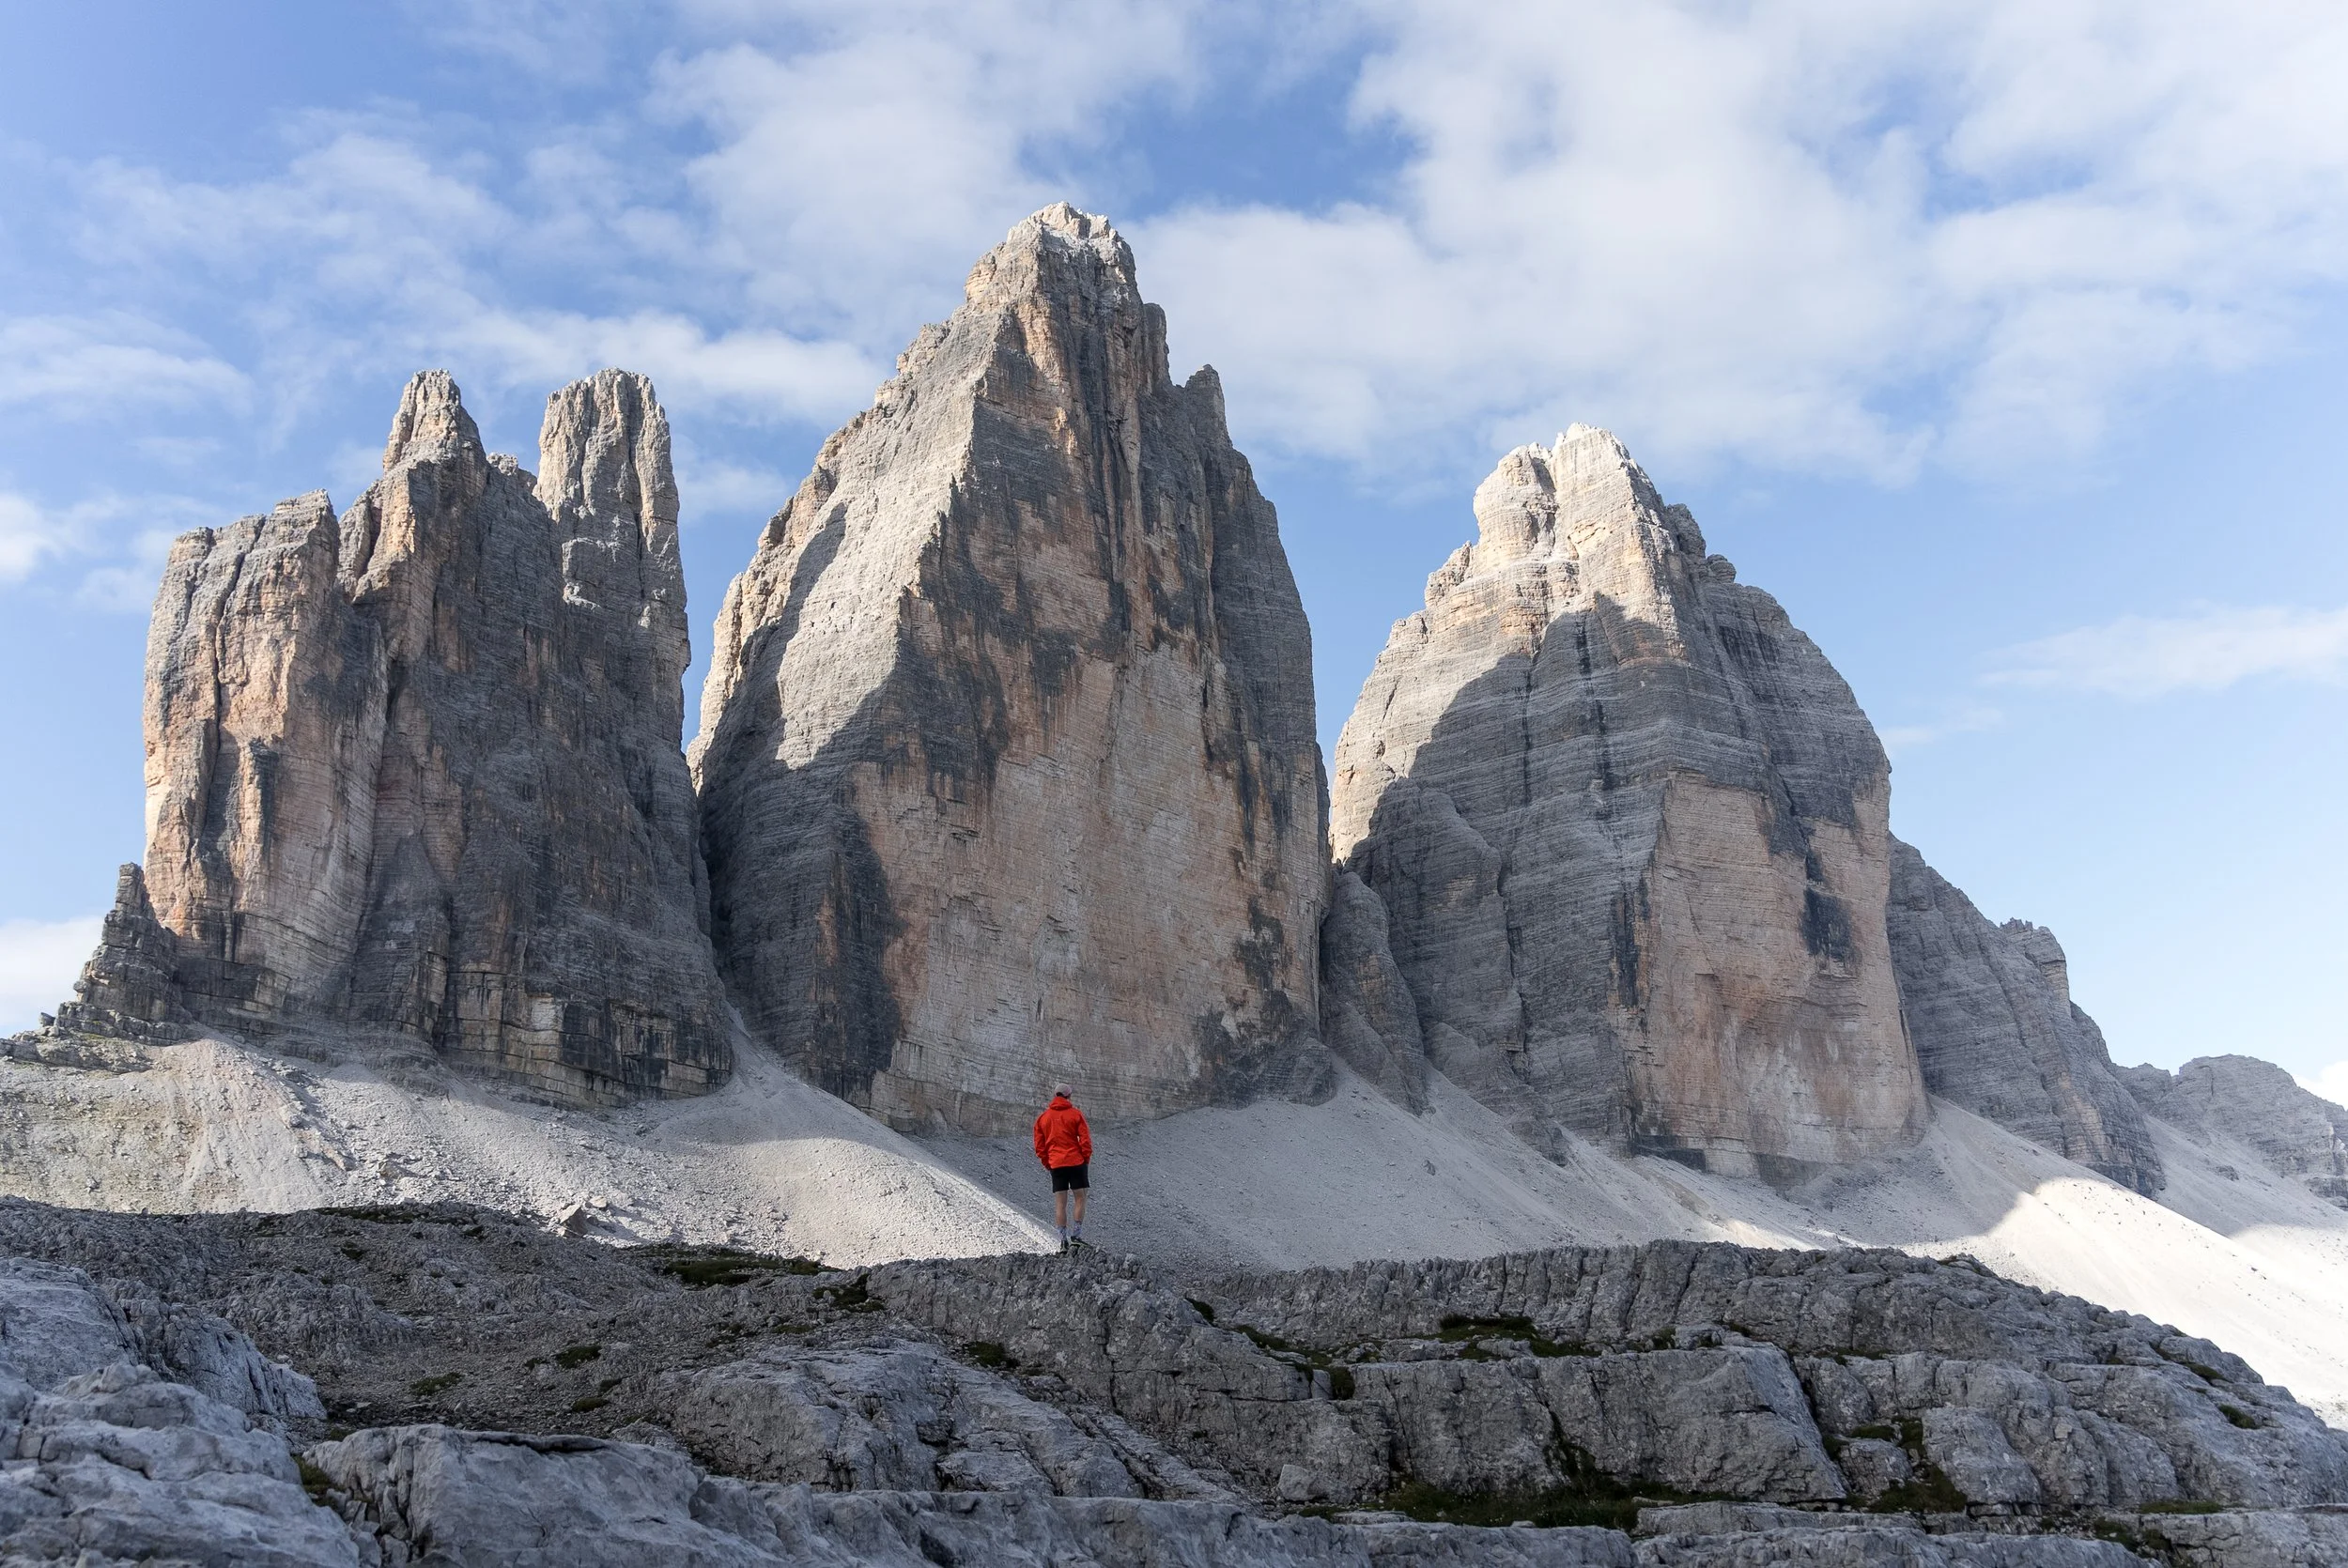
Tre Cime di Lavardo Circuit
The Tre Cime loop is a circular hike around the iconic three peaks.
While this trail is busy, the views more than make up for the crowds. You can choose to hike it in either direction:
Clockwise: Generally quieter
Anticlockwise: The more popular route and also the better option if you're planning to explore Via Ferrata Paterno
I’ve done this loop three times, always anticlockwise, so that’s the direction I’ll describe here.
From Rifugio Auronzo, a wide and well-maintained path leads towards Rifugio Lavaredo, followed by a short but steep climb to a panoramic saddle. This section can be quite busy, but it’s also where you’ll get your first proper view of the dramatic, flat-sided faces of Tre Cime.

From the saddle, you have two trail options to reach Rifugio Locatelli:
Lower path: Wider, safer, and more beginner-friendly
Upper path: Narrower and steeper but offers better views and more photo opportunities
Either way, you’ll be craning your neck to admire the jagged peaks towering above you. The upper path also passes by some World War I caves, which are easily accessible from the rifugio itself.


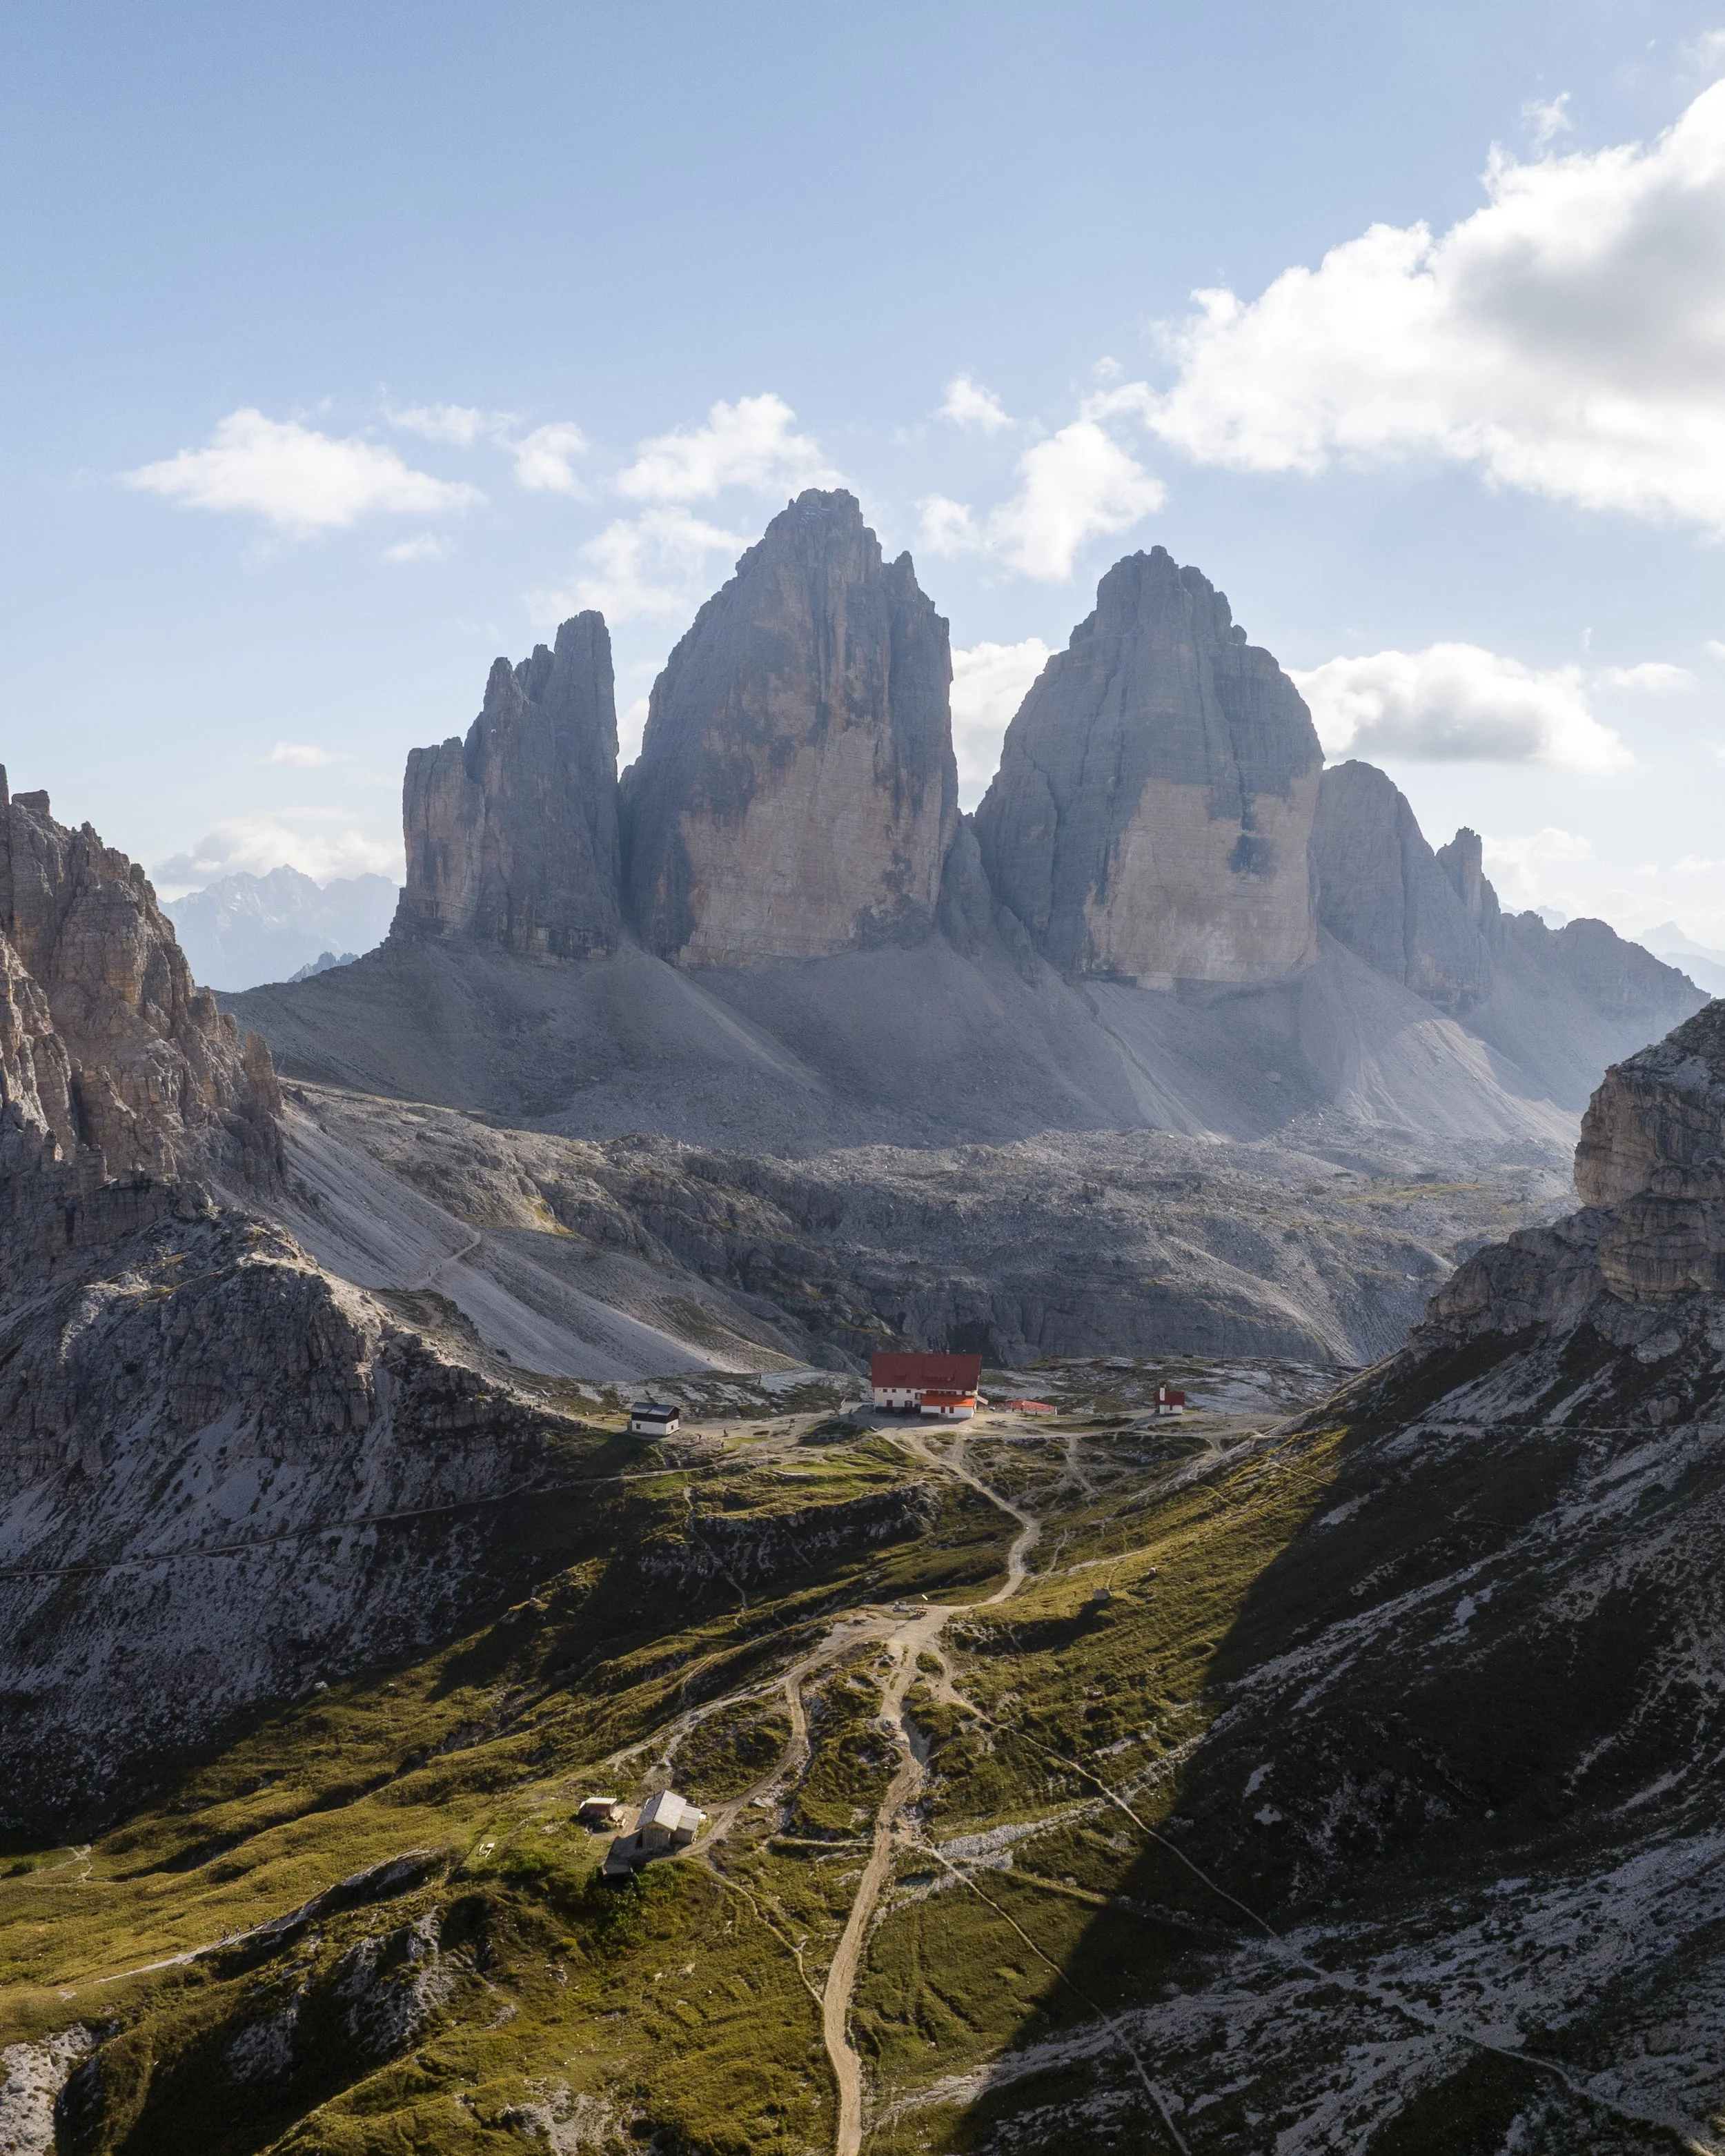
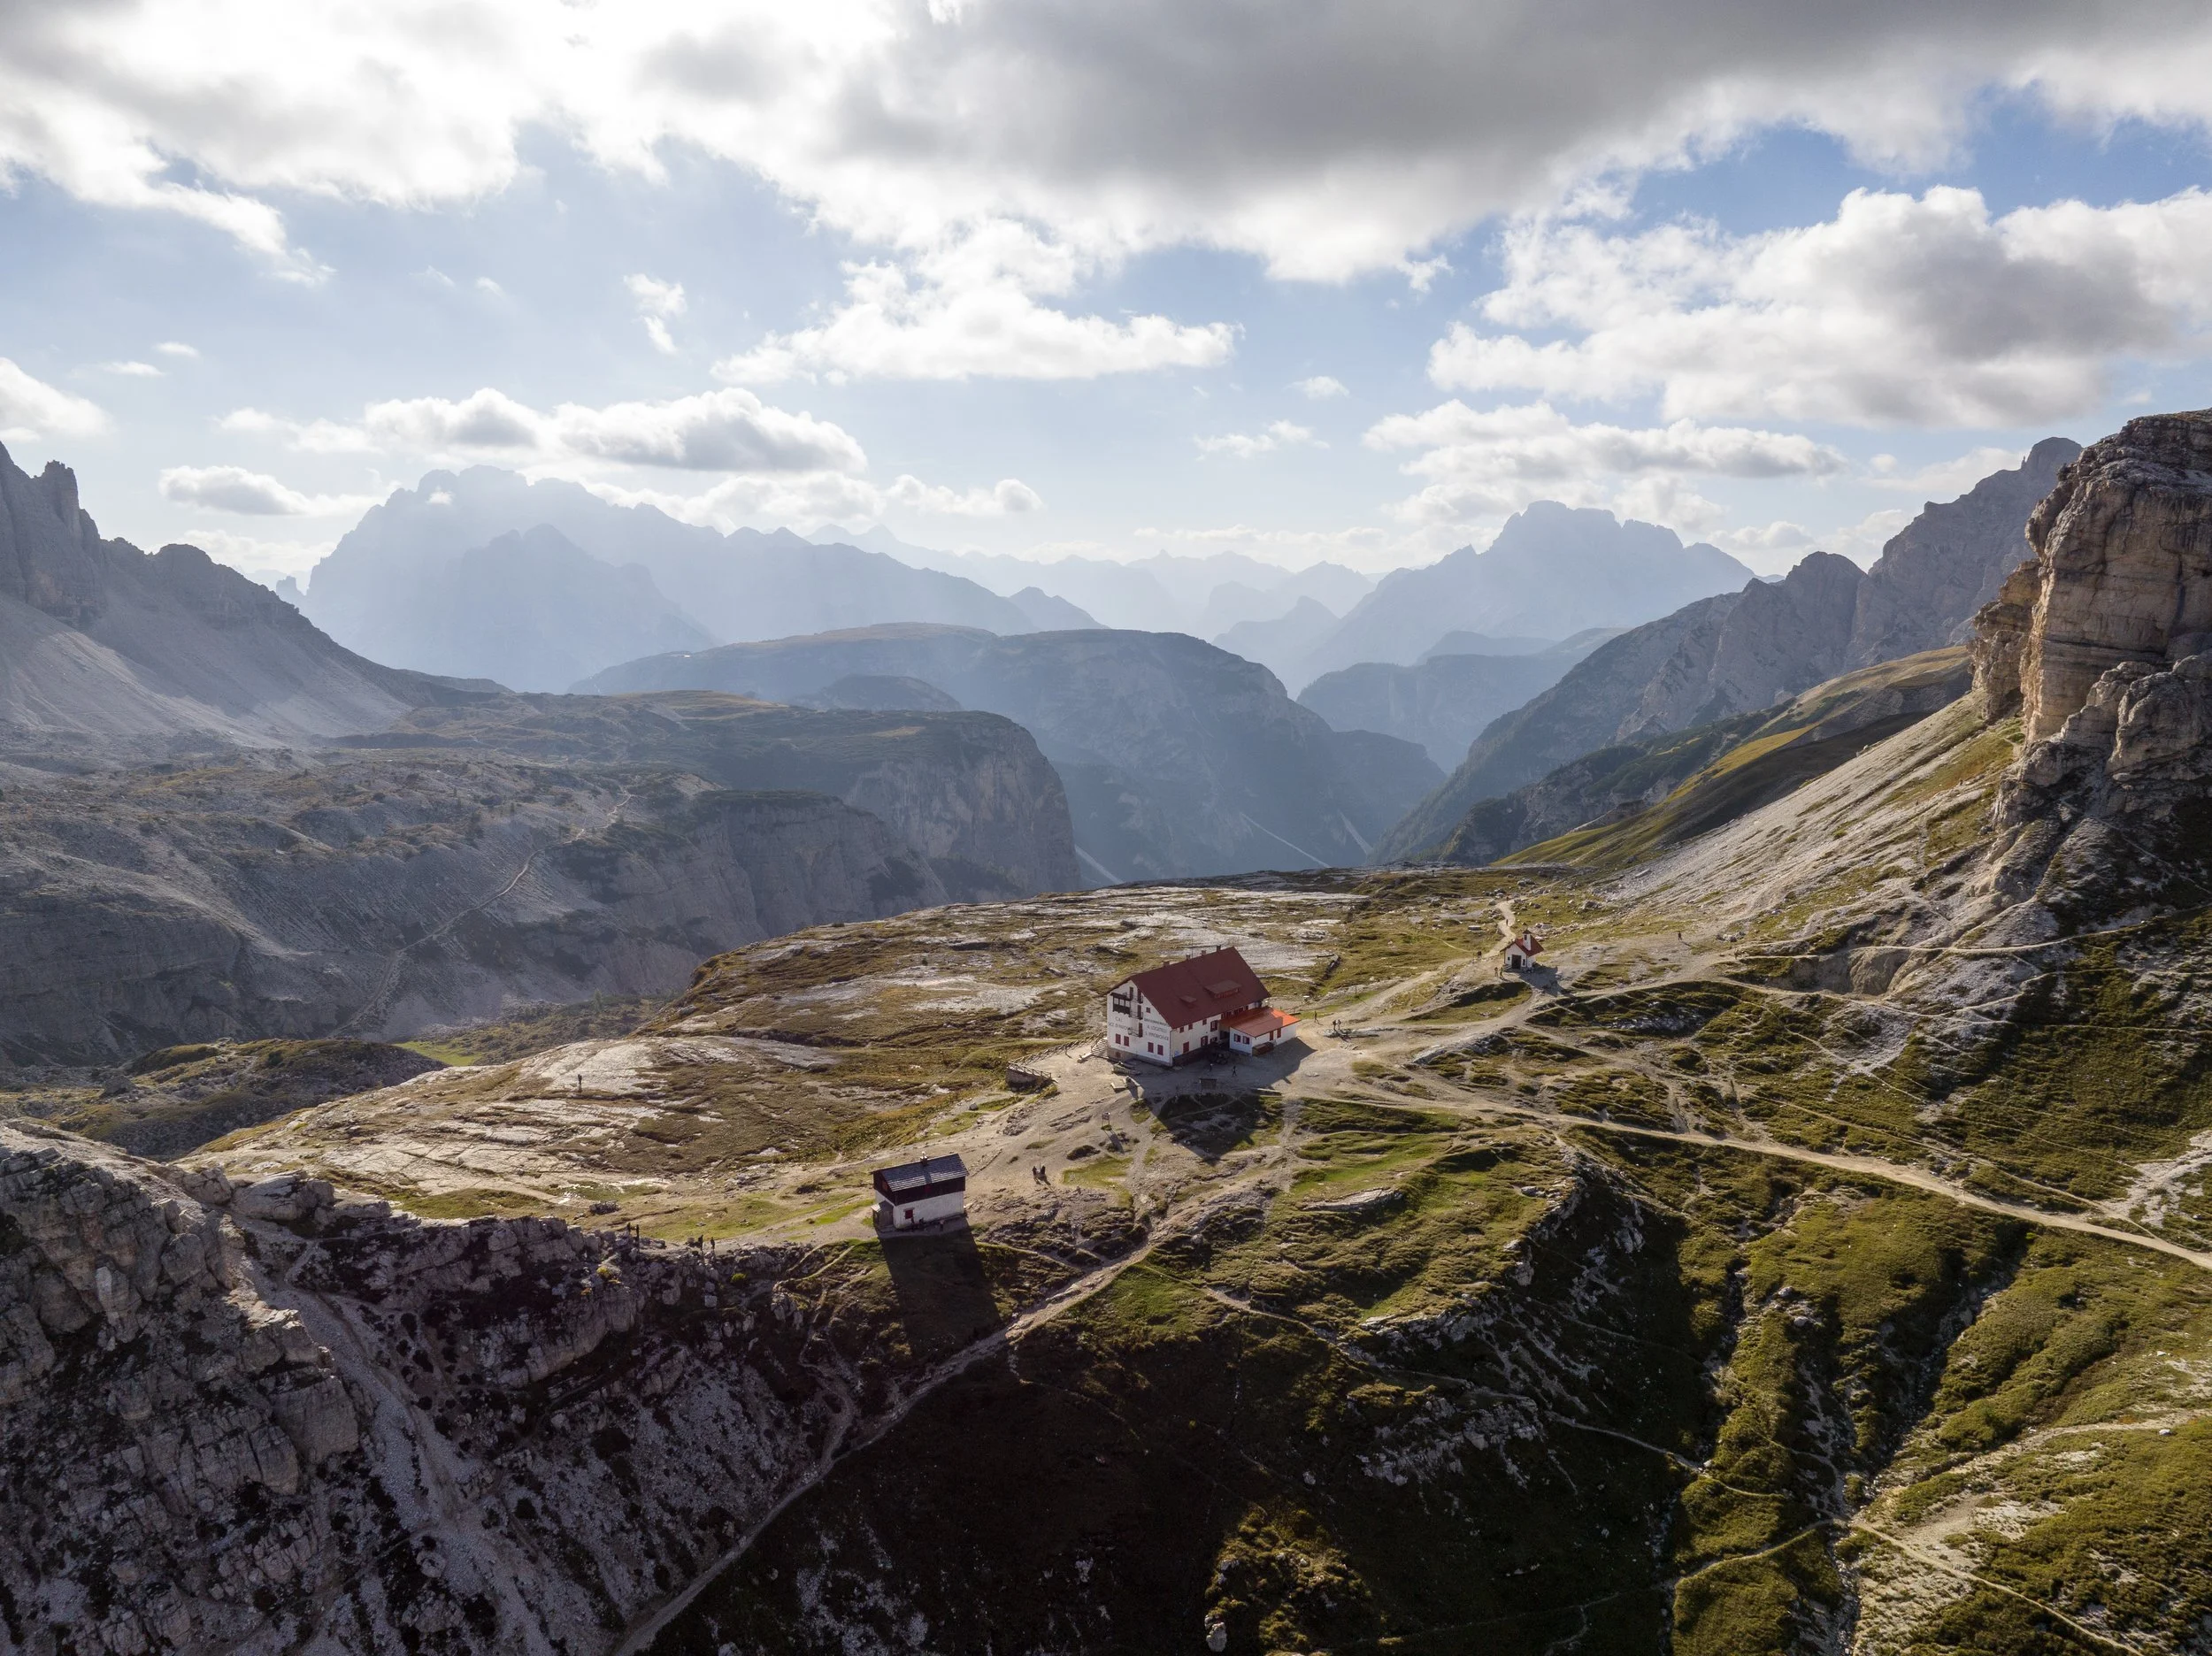
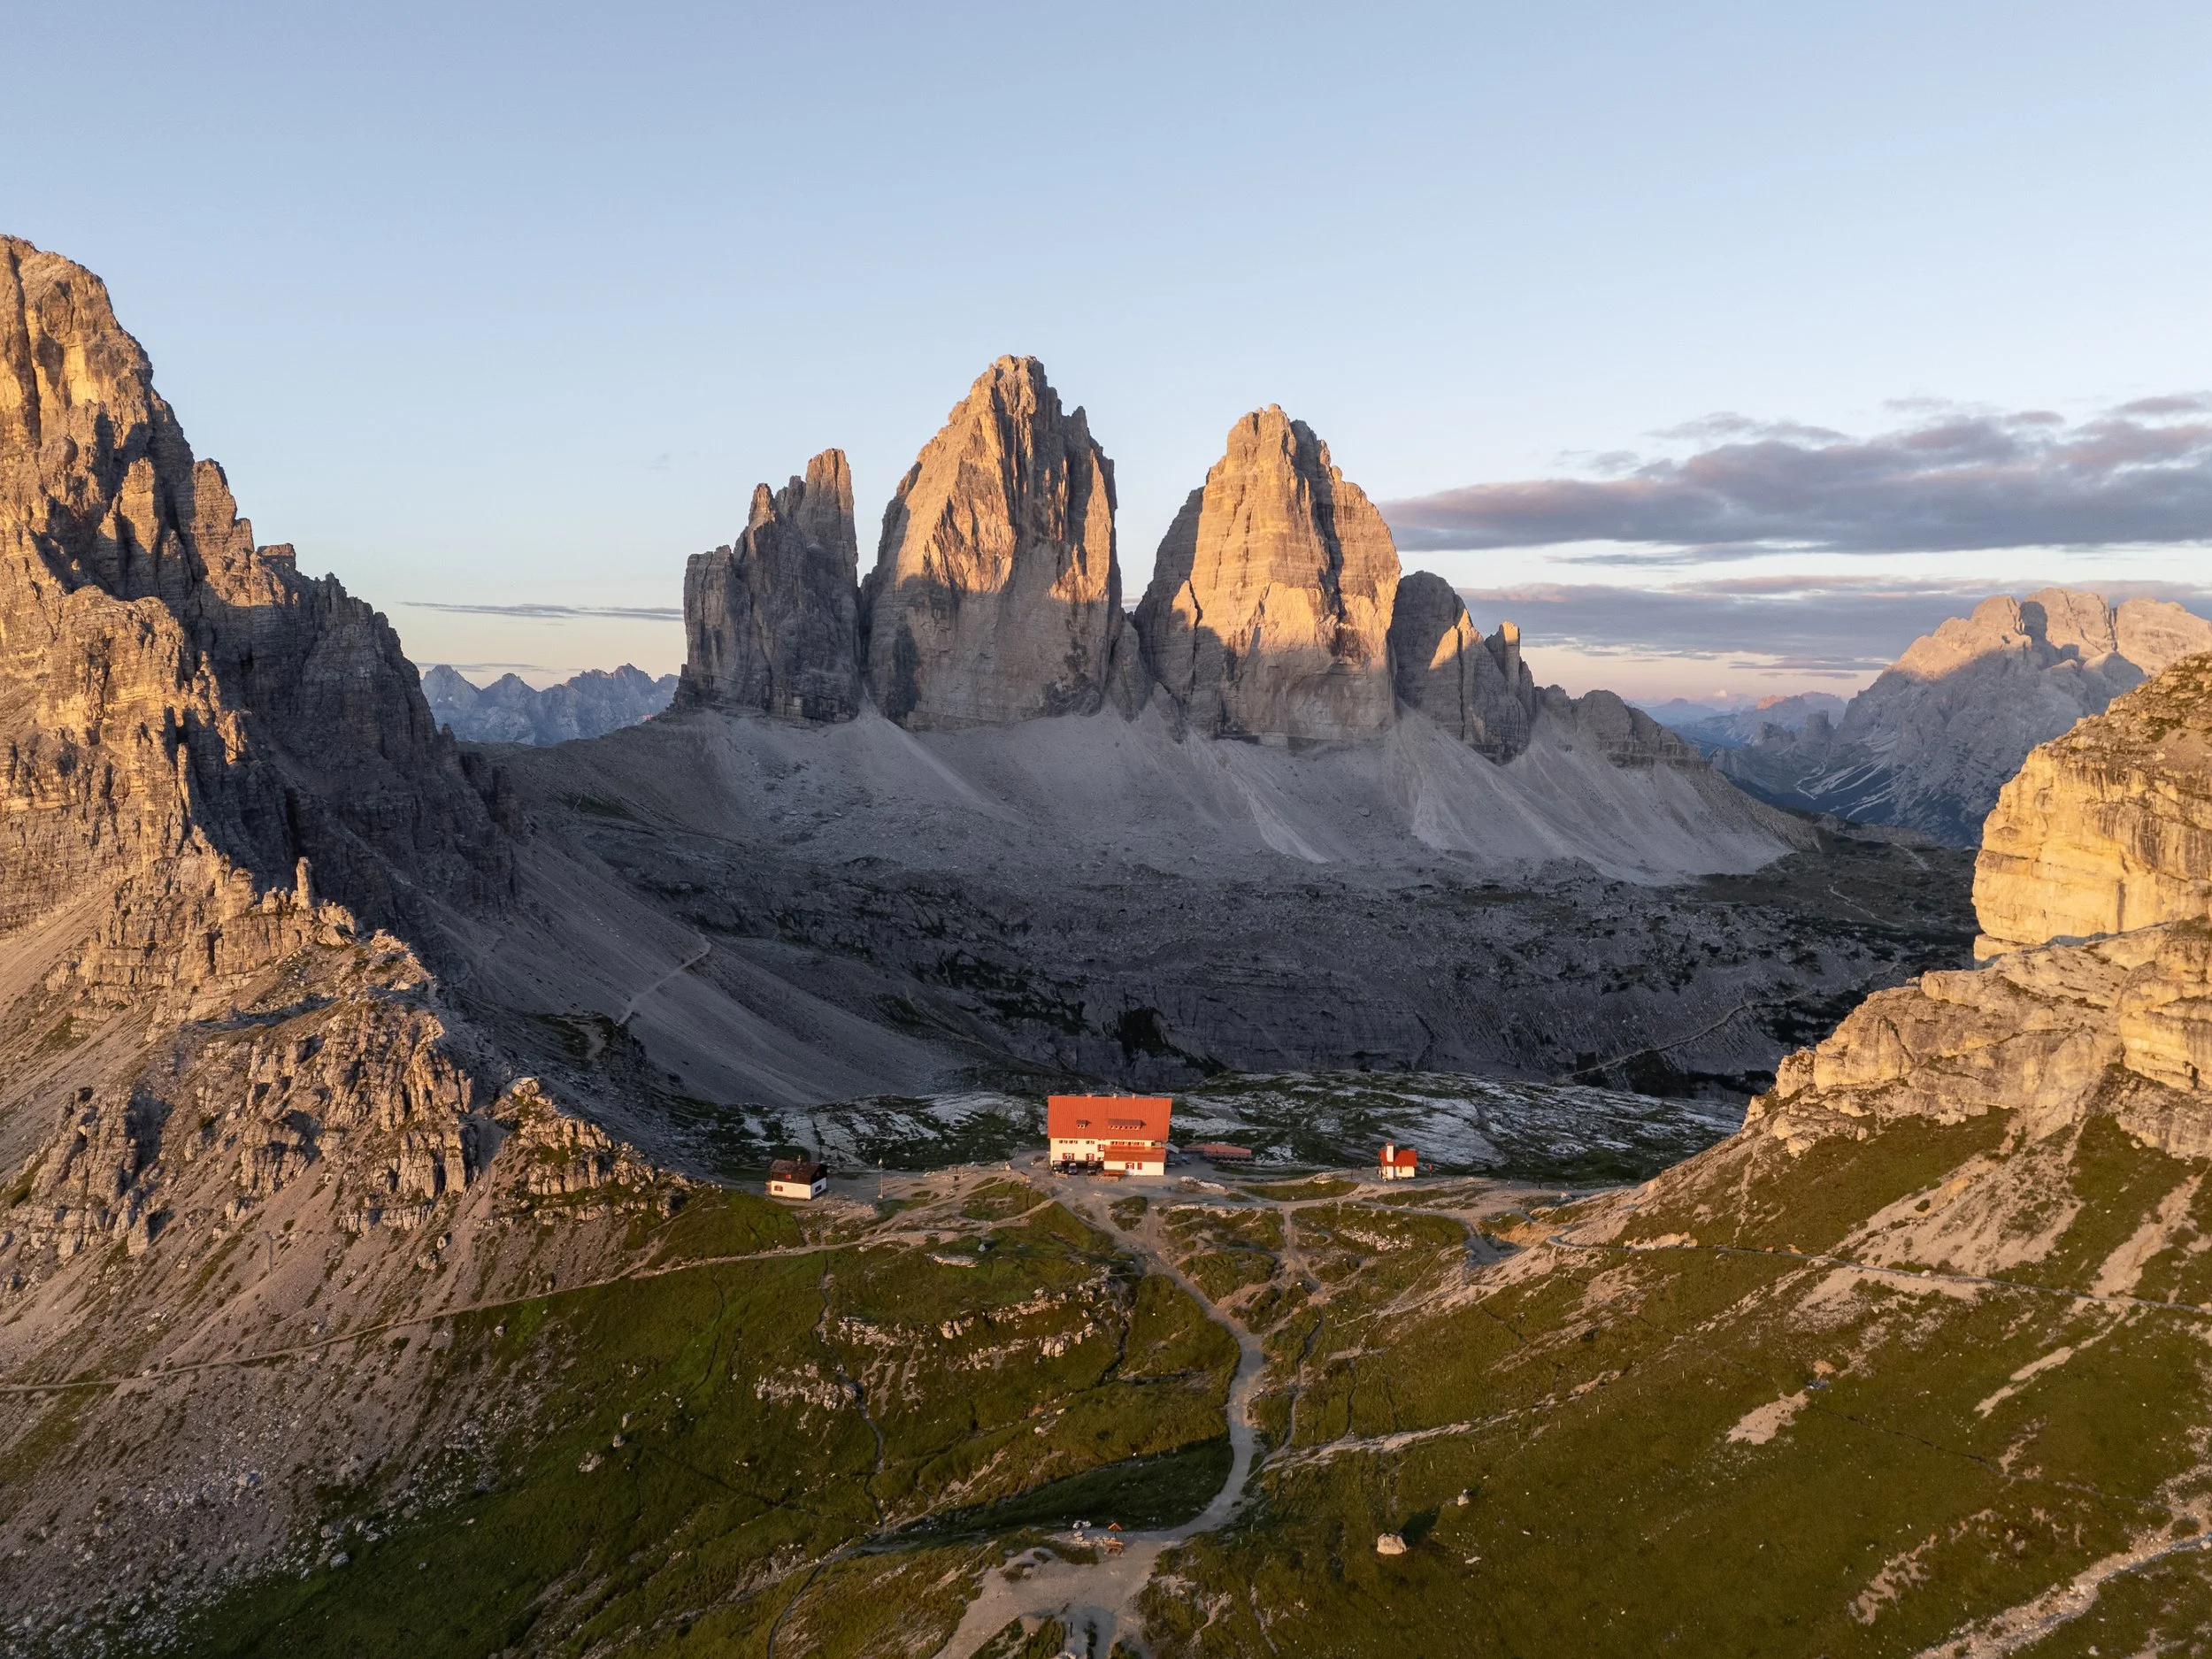
Rifugio Locatelli is a striking hut with a red roof that sits directly opposite the peaks. It’s the perfect spot to pause for lunch, either with food you’ve packed or a hot meal from the hut, and have a coffee or a mid hike pint.
The Rifugio is cash only, so make sure you come prepared.
If you’re keen to capture the iconic cave photo of Tre Cime, look for a path leading up to the left behind the rifugio. The viewpoint is perched within the cliffs and requires a short but steep climb on loose scree so take care ascending and descending.

To finish the loop, you have two options:
Steep path: Descend to a saddle and climb up to Langalm (steeper but shorter)
Gentler option (recommended): Retrace your steps a little, then follow a wider path that runs below the peaks (not the scree slope). Although a bit rocky underfoot, this path is more manageable and scenic.
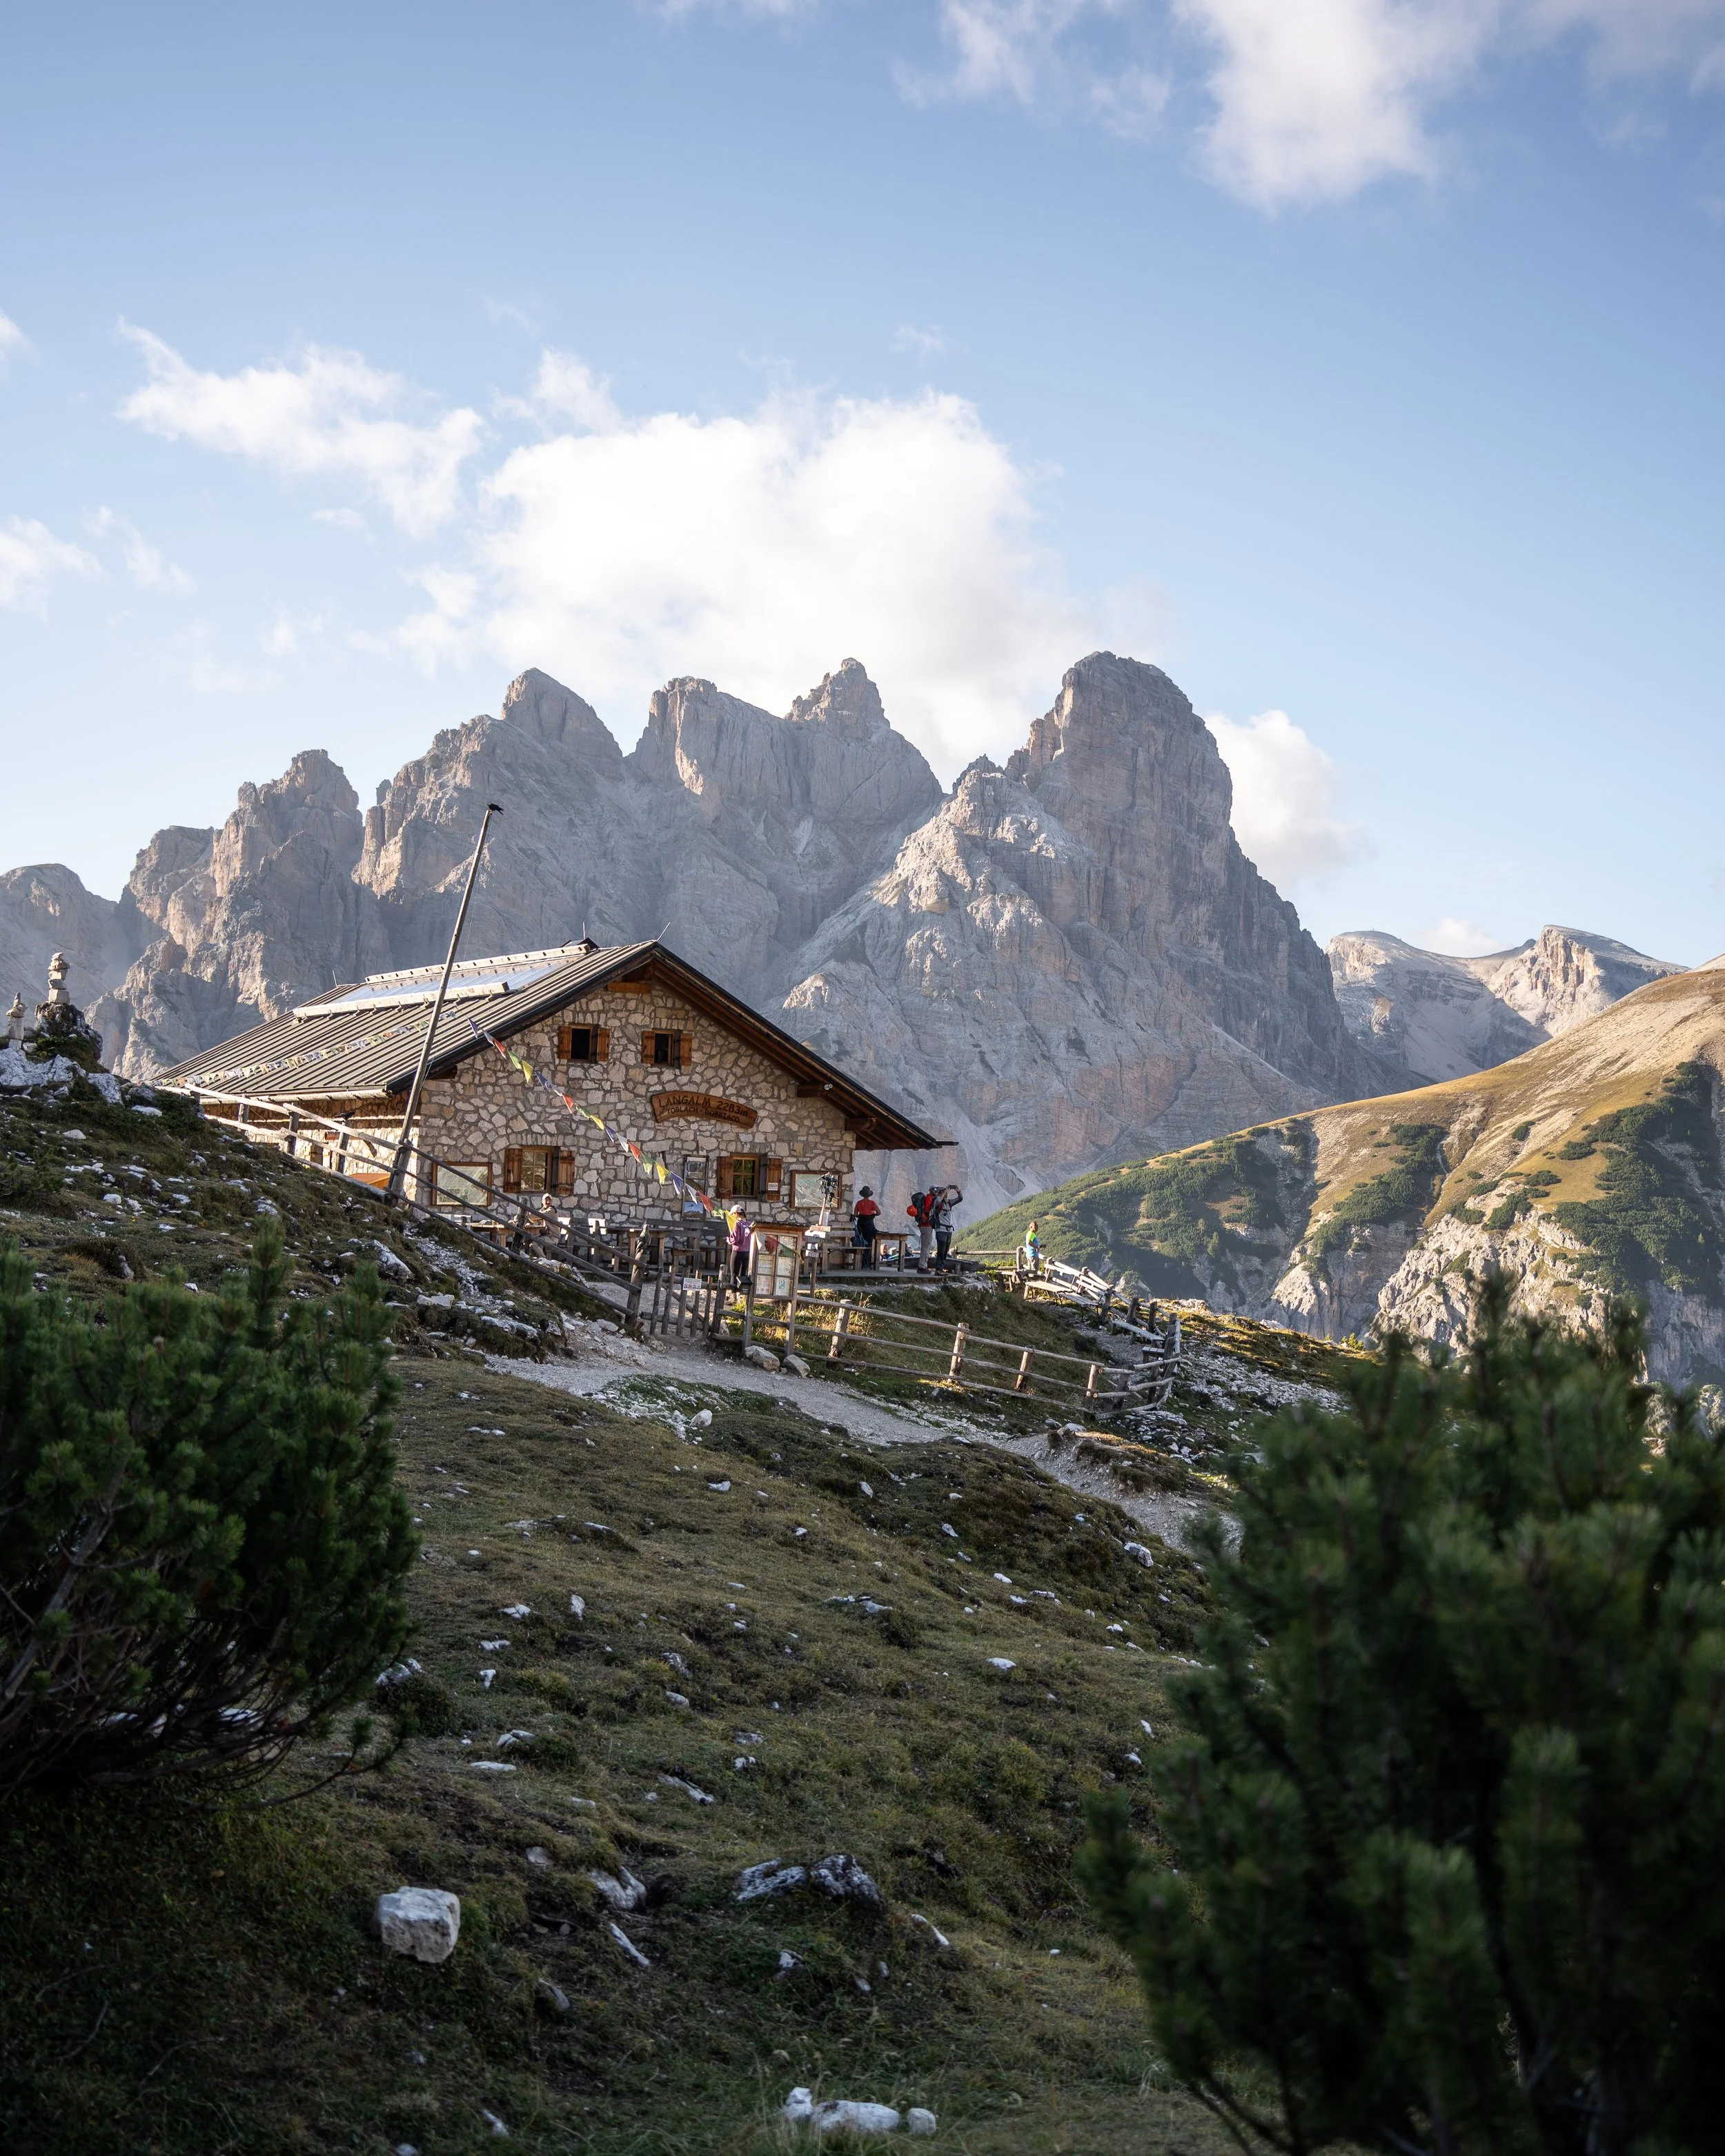
Both routes converge at Langalm, where you can stop for refreshments. Next to the mountain hut, you’ll find a series of beautifully clear lakes that reflect the peaks perfectly. These lakes also serve as the source of the Rienz River.
From here, there is one final short climb up and around the mountain to Forcella Col di Mezzo, which offers fantastic views back towards Misurina and Punta Sorapiss.

To end the hike you have two options
To get the bus: Continue around the mountain for 1km to return to the car park
Hike Back to Misurina: Descend via the valley trail (5 km, 580 m of descent)
Tre Cime loop hiking stats
Distance: 10 km
Duration: 3–6 hours
Elevation gain: 300-400m
Difficulty: Moderate
Ending the Dolomiti Trail in Style
Sadly, this hike marks the end of the Dolomiti Trail, and from here, you'll need to organise your own accommodation or transport.
If you can, I highly recommend spending the night at Rifugio Locatelli, if you do secure a booking it will elevate the final day into something truly unforgettable.
Advance booking is essential, as beds are often reserved weeks or even months in advance. While they do have an online system, it’s also worth emailing them directly. I contacted them at 5:30 pm the night before and got a reply within 30 minutes saying they had room to squeeze me in.
Spending the night allowed me to complete the loop more slowly, enjoy the landscape, and undertake two nearby via ferattas.
Via Ferrata Torre Di Toblin
Via Ferrata Monte Paterno


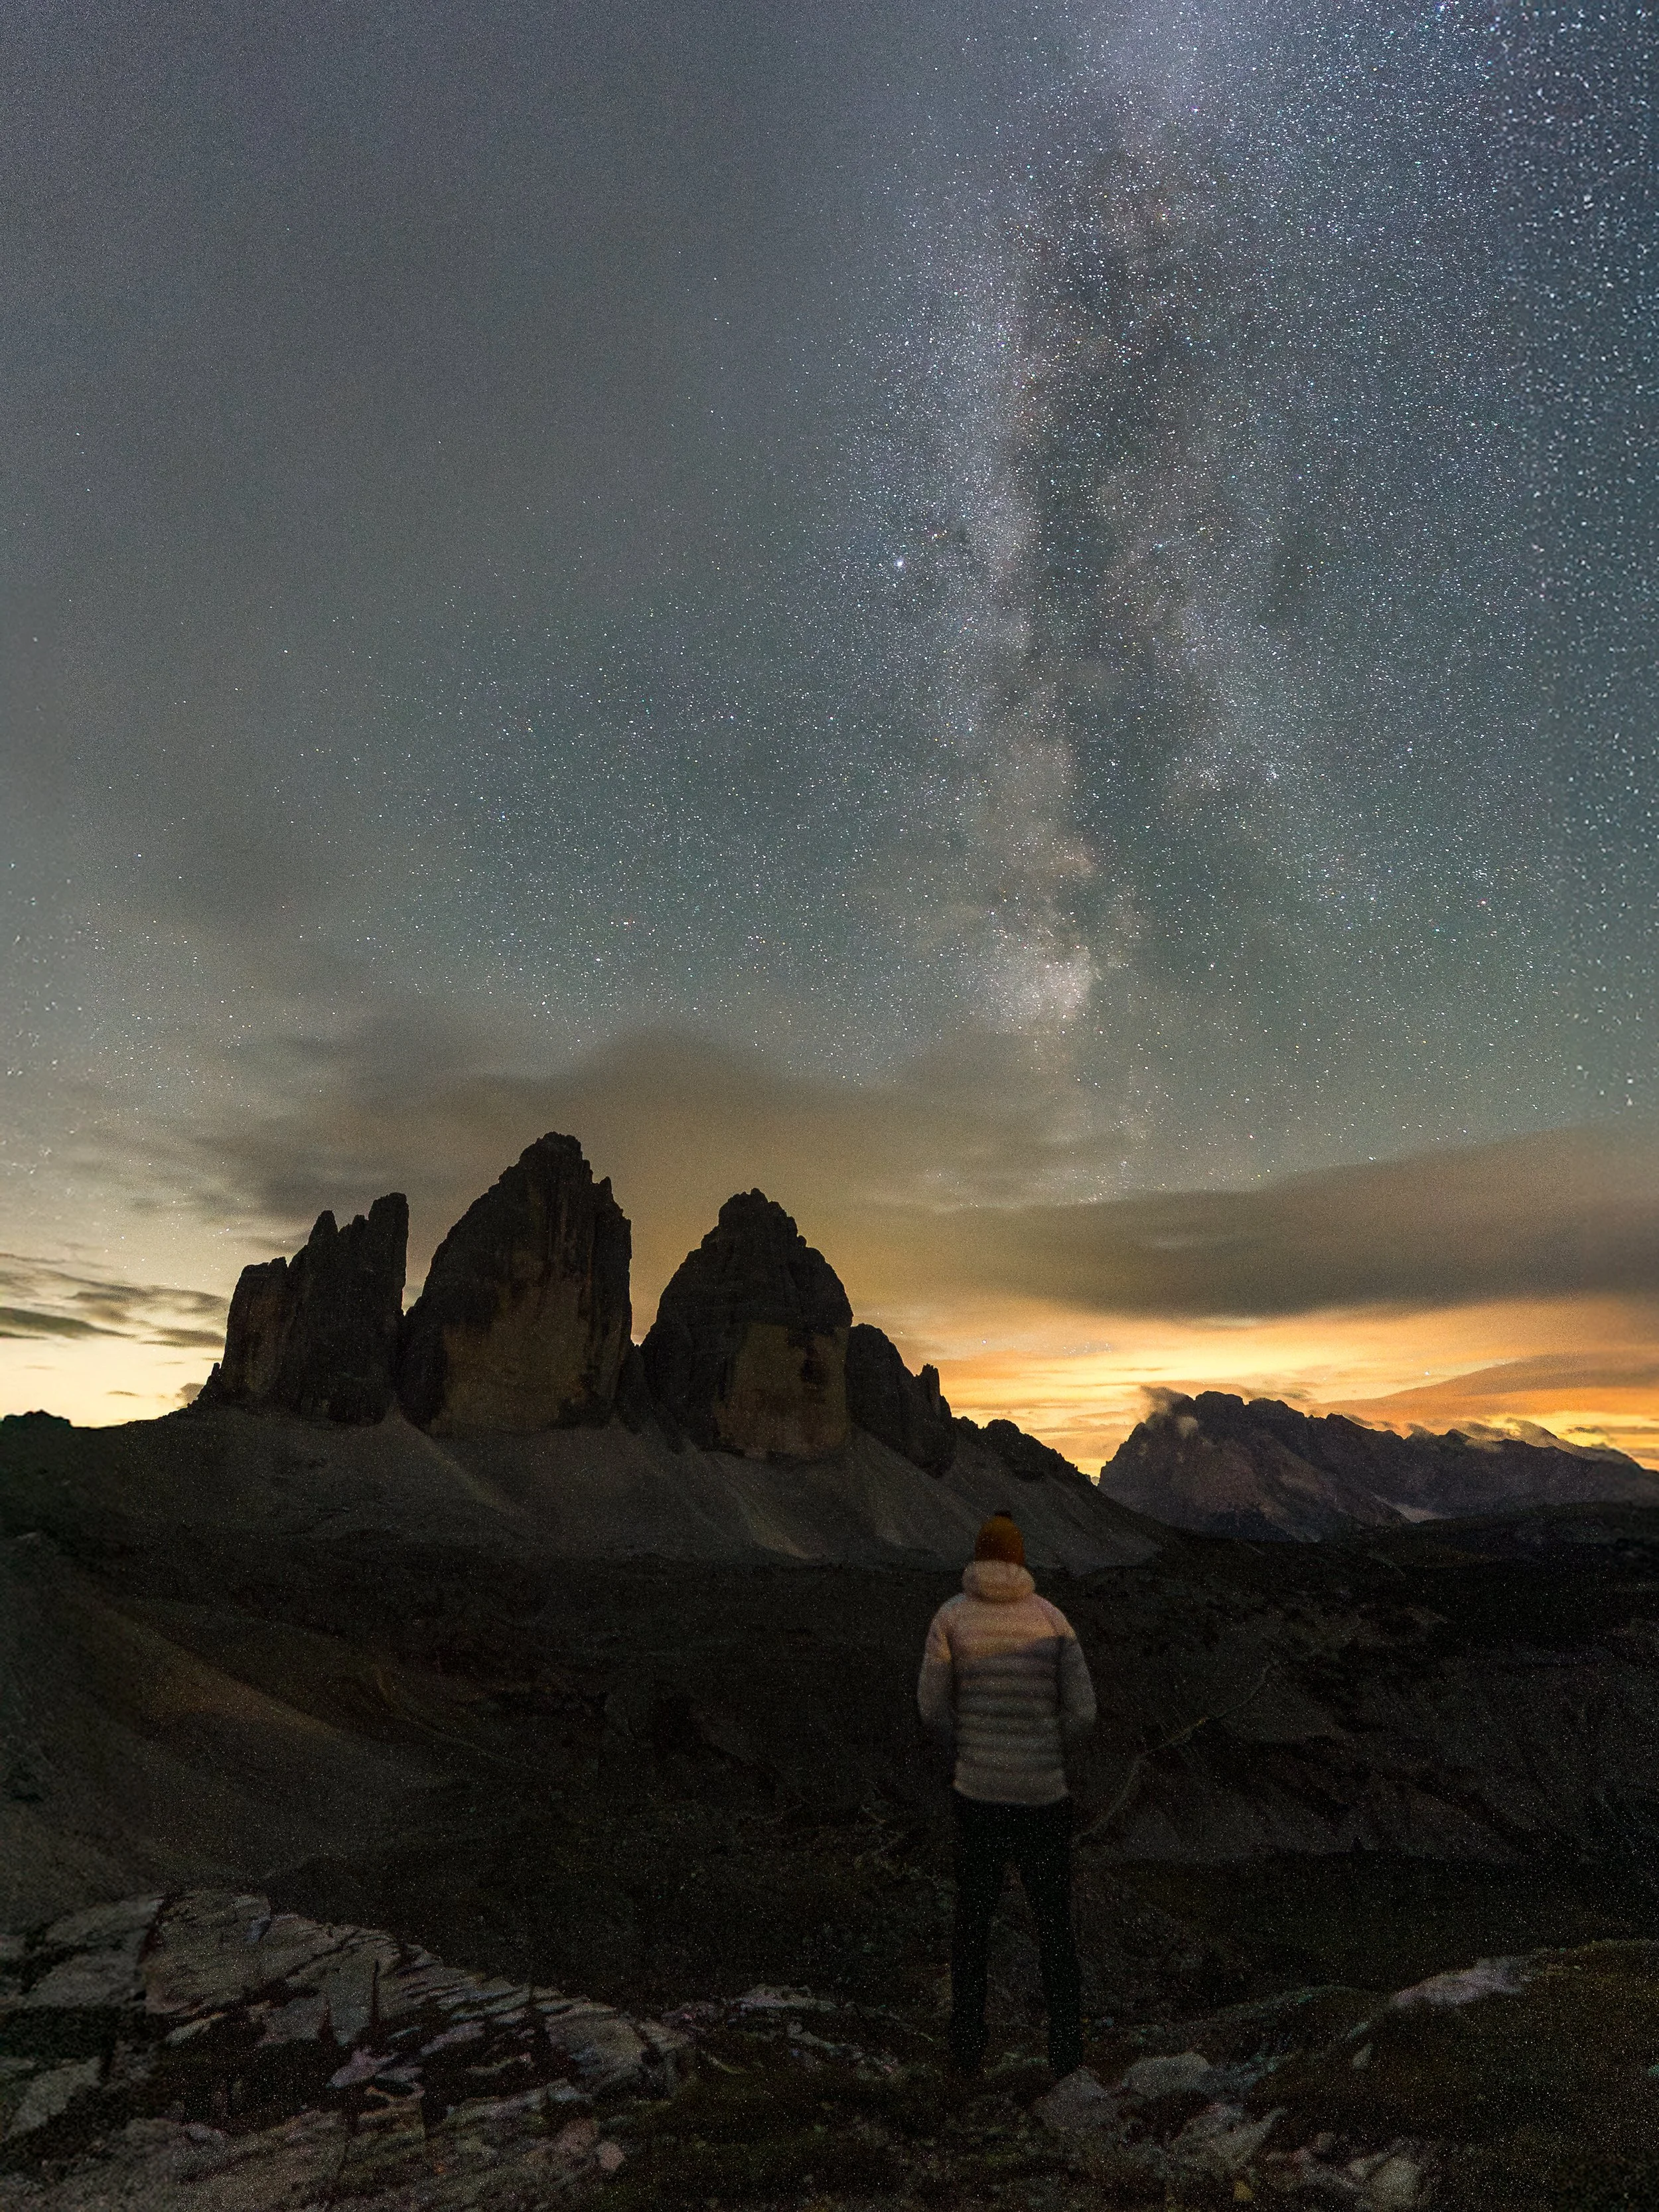
Once the day hikers left, the whole area felt transformed, becoming peaceful, quiet, and deeply atmospheric. Also watching Tre Cime at sunrise, sunset, and even under the Milky Way was an experience I’ll never forget.
The overnight stay cost me €80 for a bed in a dormitory. It included a delicious three-course dinner, a simple breakfast, and drinking water at the table. Again, it is cash only do don’t make the mistake of not carrying enough
Read more about that adventure [here].

Final Thoughts
This trip was truly unforgettable. Completing the Dolomiti Trail is just as much about the personal journey as it is the physical challenge. You’ll likely finish the week with a full camera roll, tired legs, a head full of memories, and if you're lucky, a few new friends too.
The landscape you pass through is simply different gravy. The scenery and scale of the mountains is both hard to comprehend and to explain.
It may sound cliché, but the dolomites are a place you have to experience to truly understand.
What made the experience so special wasn’t just the unwavering beauty of the Dolomites, but also the people I shared the trail with.
One of the things I loved most about the Dolomiti Trail format is the flexibility to hike alone or with others. I spent five out of six days walking solo, and one day hiking alongside someone else.
There’s something incredibly peaceful about hiking alone; the freedom, the space to think, the lack of pressure to match anyone’s pace but your own. But sharing the trail with others, even for just a day, added a different kind of enjoyment.
Evenings were a highlight in themselves; regrouping at the huts, catching up over a beer or dinner, and swapping stories from the day’s adventures was almost as rewarding as the hikes.
Getting to know the group and hearing where people came from, why they were doing the trail, alongside what moments had stood out to them, also made the whole experience richer. It allowed me to reflect on my own journey, and in a way, re-live parts of the trail through their eyes.
Whether it was sharing a hot dog on the side of a mist-covered scree slope, or laughing over dinner in a mountain hut, the camaraderie and sense of accomplishment felt every bit as powerful as the views themselves.
Despite our different ages, backgrounds, and hiking abilities (and the fact we’d never met before) we felt like a little trail family by the end of the week. A slightly dysfunctional one, sure. But a family nonetheless.
If you're considering the Dolomiti Trail, I can’t recommend it enough. It’s a thoughtfully crafted adventure that brings together all the highlights of the Dolomites without any of the logistical headaches. From the stunning landscapes to the unique accommodation, and from the quiet trails to the group connections, it’s a trip that will live long in your memory. You won’t regret it.
Book your Dolomiti Trip here
Check out the Travel Base website for more unique adventures
Help support my website
If you’ve made it this far, thank you for reading! I hope my experiences (and a few hard-earned tips) help you feel inspired, more prepared and excited for your own Dolomiti Trail adventure.
If you’d like to support this website, you can use the affiliate links below to book your accommodation or transport. These come at no extra cost to you but help keep this site running.
If you are feeling generous you can also buy me a coffee to say thank you, and give me a follow on social media. Ciao and Bella!
Book your car using Discover Cars
Book your hotel using Booking.com
Book your Dolomiti Trip here

-
Know and plan the route: Use proper hiking app ( i used Wikilock and Maps me in the Dolomites ) and have the route downloaded for offline use. I also had the routes saved to my Garmin so i could use my watch to navigate.
Check the Weather: Always check the weather forecast for the specific peaks and mountain ranges you are planning on hiking. I do this right up until the moment I set off. For the dolomites I used Windy, Meteo blue and Mountain forecast
Start Early: you will not only have the best experience, as you will miss most of the crowds. But it will give yourself plenty of daylight to complete the hike. Afternoon Thunderstorms are also common during summer, so its best to be down and off the mountains by then
Know Your Limits: If the hike is too hard, youre not feeling up to it or the weather changes, dont be afraid to turn around. The mountains will always be there and no hike is worth injuring or risking your life for.
Group Up: If possible, hike with others or consider hiring a local guide for extra safety
Wear and carry the correct kit: Don’t attempt Via Feratta with out the appropriate gear and carry the essentials. I have created a list below
-
The correct kit and equipment are essential when hiking in the Dolomites
Sturdy and comfortable hiking shoes with good grip
Waterproofs - I would recommend a jacket, over trousers and a bag cover
A layering system (wear/carry a minimum of 3 top half layers, with a 4th in winter)
GPS device with the route downloaded (or Map and compass)
Power bank and charging cable
Headtorch + First aid kit
Plenty of fluids and high-energy snacks
Gloves and a hat for cooler conditions
Hiking poles to help with both the ascents and descents
If it’s winter then micro spikes, extra clothing /layers and specific winter gear is essential.
-
Base layers
Smartwool Active hoodie- My go for spring, summer, and autumn hiking.
Smartwool Intraknit Thermal Merino Base Layer 1/4 Zip - My choice in winter and colder weather.
Mid LayersColumbia Triple Canyon Hooded Fleece Jacket- Lightweight, warm, comfy, and stretchy. Everything you need from a mid-layer. It also has elasticated thumb loops, a close-fitting hood, and three zip pockets.
Rab Men's Microlight Alpine Down Jacket - Essential for the colder months, wildcamping, and when you are soaking in the views up on the summit.
Outer shell
Columbia Ampli-Dry III Jacket - Waterproof, lightweight, functional, and packs down small. It also has breathable stretch shell fabric with underarm zipped ventilation.
Lower Half
Footwear
Columbia Montrail Trinity Ag II - The comfiest summer hiking and trail running shoes I have ever worn.
Adidas Terrex Free Hiker 2 GTX - My go to for the wetter months of the year
Columbia Men's Facet 75 Equinox – My go to in Winter, incredibly comfortable, waterproof and warm
Socks
Darn Tough Vermont Van Grizzle Boot socks – My winter sock of choice
Backpacks
-
My recommendation for getting around the Dolomites is to rent a car.
It gives you complete freedom to explore at your own pace, heading wherever and whenever you like. It’s also handy for storing extra gear while you’re off hiking, so you don’t have to lug everything around with you.
Compared to a campervan or motorhome, a car is far easier to drive and more fuel-efficient, especially when tackling the Dolomites’ many winding mountain passes.
If you’re booking a rental car online, I personally recommend Discover Cars.
I’ve used them multiple times because they search both local and international rental companies, helping you find the best value. Their platform makes it easy to compare prices and customer ratings, so you can choose not just the cheapest option, but one from a company with a solid reputation.
I booked through them for my most recent Dolomites trip, and the experience was faultless from start to finish.
IF you do end up booking with discover cars, then using my affiliate link will give something back without coming ta cost to yourself.
-
Another great option to explore the Dolomites is by campervan.
This stunning mountain region in northern Italy is perfect for van travel, offering total flexibility, panoramic pitches, and the freedom to stop wherever the scenery calls. Compared to booking hotels or mountain huts, a campervan is often more cost-effective and offers far more spontaneity.
If I was to recommend a company it would be Roadsurfer, although I haven’t used them in the Dolomites, I have used them in UK, North America and Other places in Europe
They have a depot in Venice and Milan, which are close to the airport and easily accessible by public transport. Their rentals come with unlimited mileage, and they offer a wide range of campervans to suit different needs.
I would recommend choosing the Couple Cottage model. It’s incredibly spacious and ideal for mountain driving and camping. Not only did it include everything I needed, but it was also a manageable size, easy to drive through mountain roads and park in normal-sized spaces.
If you're planning a road trip through the Dolomites, I highly recommend Roadsurfer. You can get 10% off your booking using the code: KNIGHT10. (I don’t earn any commission off this)

Find me on Instagram